
Over time, any facade of the building can lose their attractiveness. Wood facades are subject to particularly rapid aging. How to update the facade? How to protect it from external influences? How to give a house an attractive appearance on your own, fast and inexpensive?
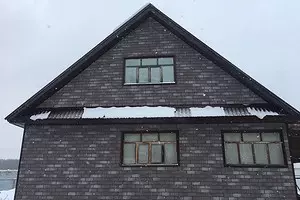
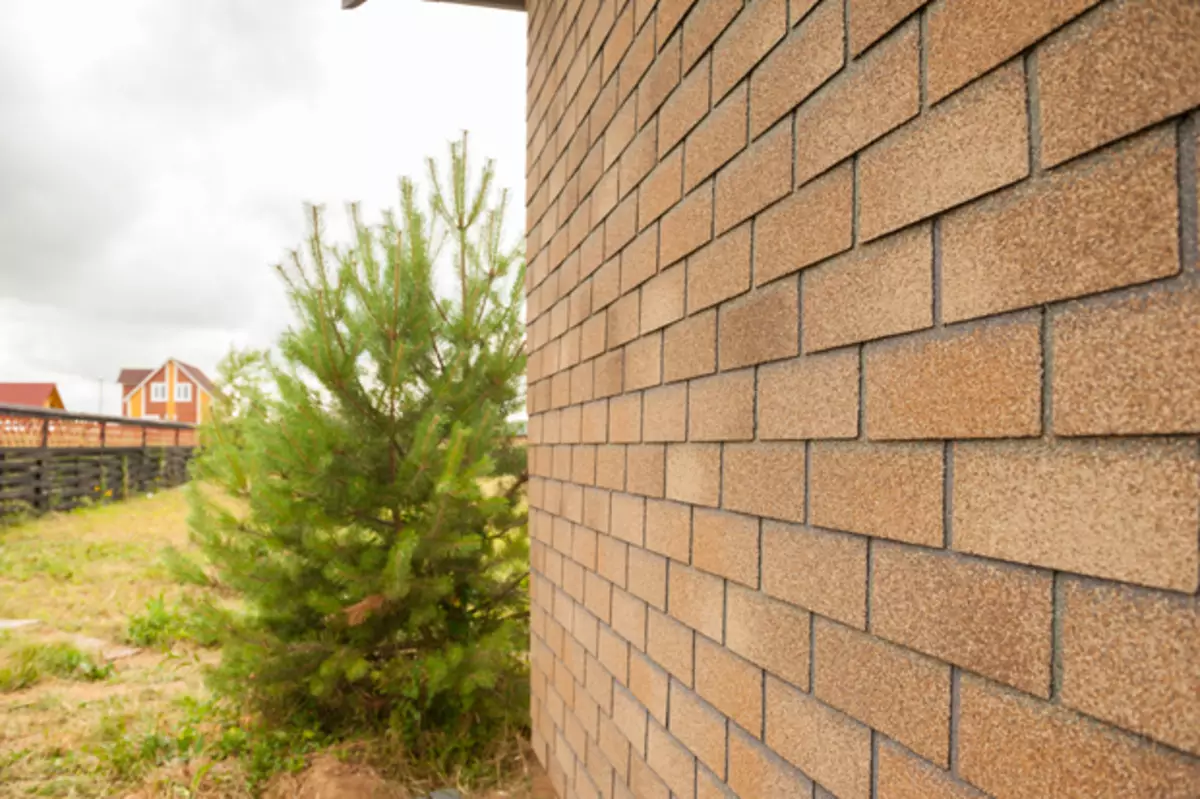
Photo: Tehtonol
Especially for the answer to these questions, Tekhnonikol has created an innovative material - the facade tile Tekhtonol Hauberk. The tile is made of glass cholester impregnated with bitumen with applying a sprinkling of natural stone. The material does not spread the burning, does not fade under the influence of sunlight, completely sealed, and also not subject to mechanical damage.
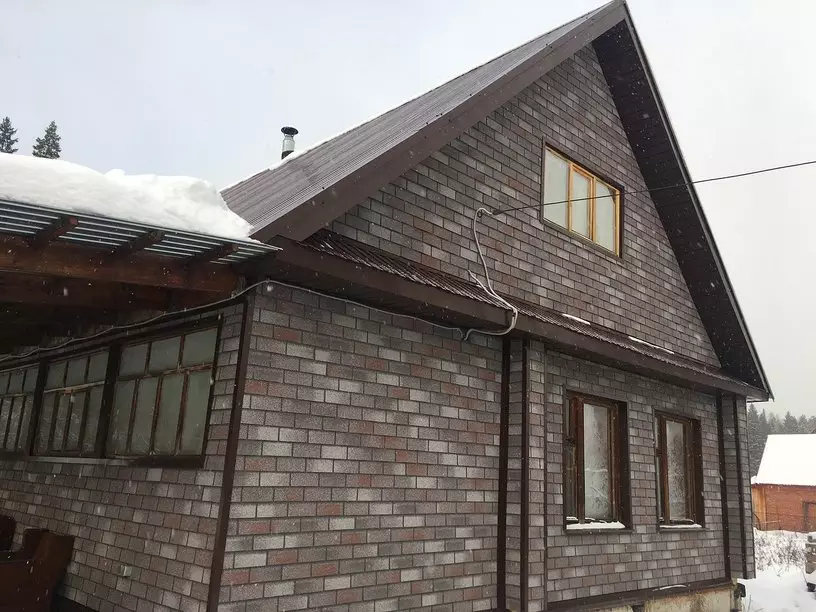
Photo: Tehtonol
And the possibility of mixing and combining basalt granules of various colors to mix and combine basalt granules allows you to create shades resembling popular brickwork options. The palette includes 7 shades - antique, marble, terracotta, burned, beige, sandy, as well as new 2018 - red brick.
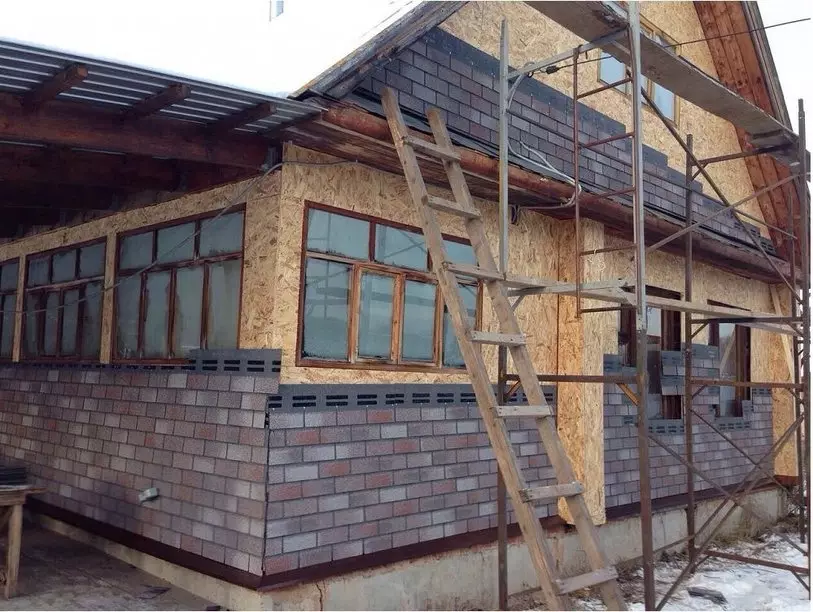
Photo: Tehtonol
The weight of the facade tile does not exceed 12.5 kg per sq.m., which means that the facade of the house will not be subject to excess load.
Working with the material is very simple. We will tell, as in just a few stages, independently update the facade of the dilapidated wooden house quickly and inexpensively.
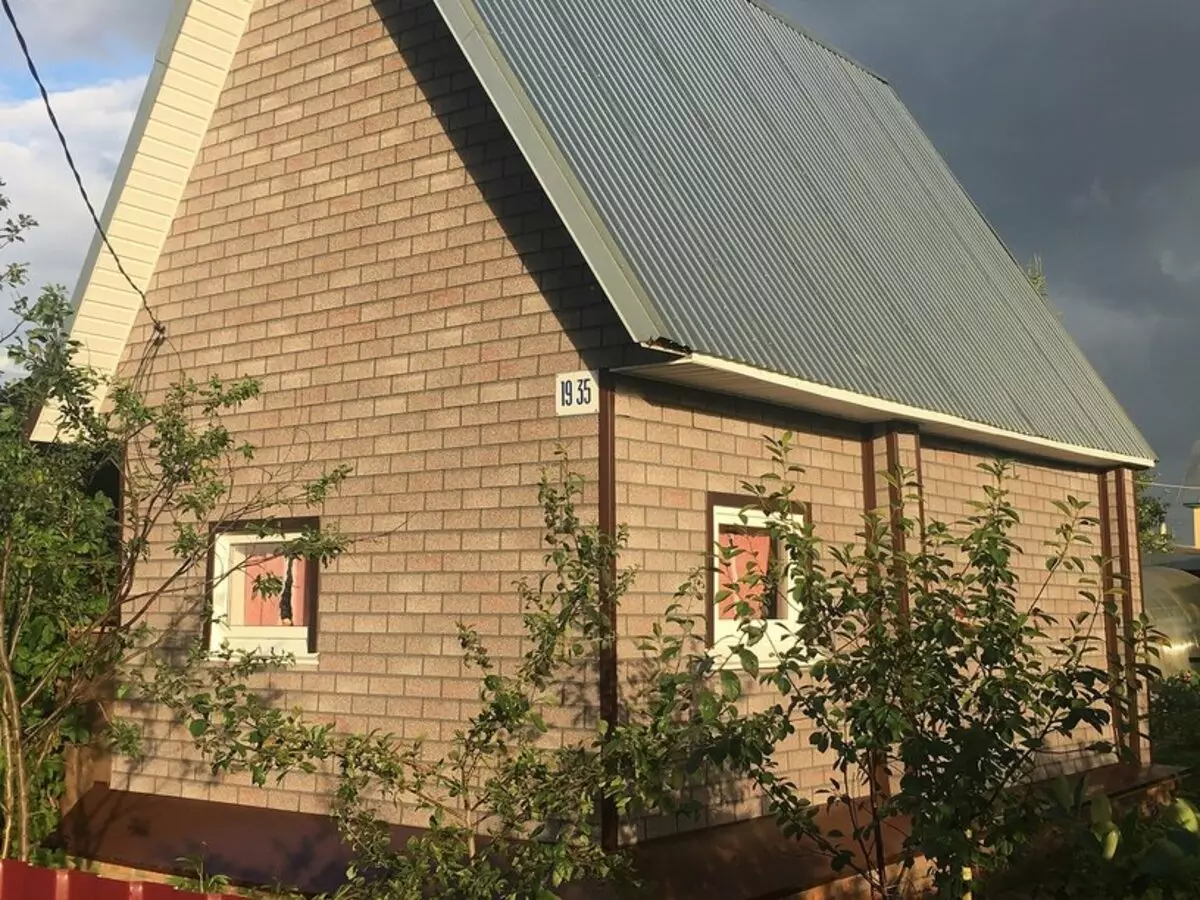
Photo: Tehtonol
1 Stage: Preparatory
To start updating the house, it is necessary to release the territory adjacent to the facade. Provide direct access to all wall walls. If necessary, free from decorative elements, window and door decks, external and internal angles.
The surface for mounting the tile must be solid and smooth. Therefore, it is necessary to prepare a durable, dry and moisture-resistant wooden flooring of the facade (FSF plywood, OSP-3 stove, tipped or edged boards). Then, thoroughly measure the facade and calculate the required amount of material.
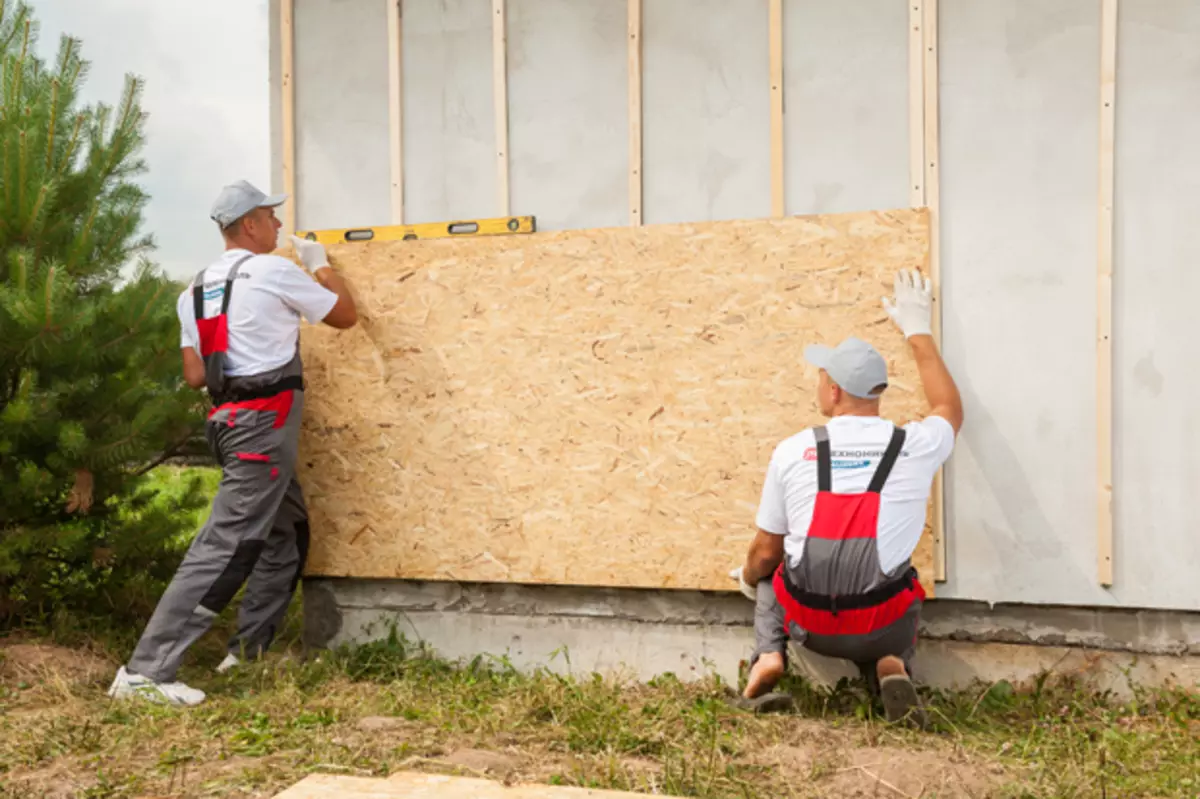
Photo: Tehtonol
With the help of a bend lace, apply vertical and horizontal lines to determine the level that serve as guides and help align the tile in the installation process. After that, you can move to the next step.
Stage 2: Installation
Installation of the facade tile TechnoNIKOL HAUBERK is underway. The lower row begins with the starting strip. Installation of the starting strip is taken from the angle of the house with an indent of 5-10 mm., Cut the lower "petals" of the facade tile and secure on galvanized nails.
Nails should be chopped in such a way that the hat is in the same plane with the surface of the front tile, and not crashed into it. Each tile is fastened with nails so that the nesting of the overlay tile overlap the nails of the underlying.
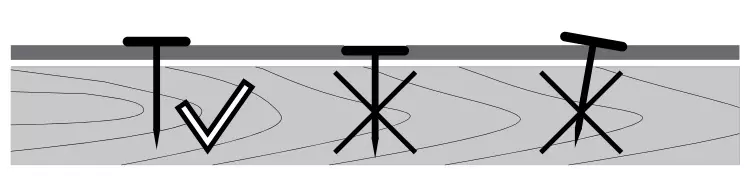
Photo: Tehtonol
Next, the first row is mounted on top of the starting strip and is attached to 11 galvanized nails according to the scheme.
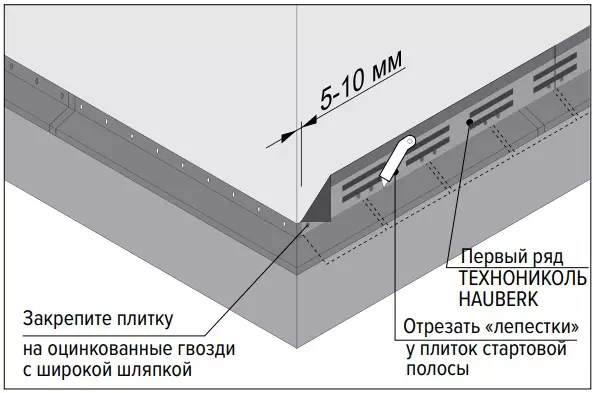
Photo: Tehtonol
The following rows of facade tiles are stacked with a displacement of half the "petal", which creates the effect of brick masonry.
To minimize the tonal imbalance, mix the contents of 5-6 packages in random order.
The facade tile is easily cut by the usual roofing knife with a hook blade.
If the installation is carried out at temperatures below +5 degrees, it is necessary to withstand the material at room temperature for at least a day, and make small batches. If necessary, gluing tiles to each other is allowed to provide a special construction hairdryer, heating sticky stripes on the front side of the material.
All color combinations of the facade tile Technonol Hauberk can be combined with each other, creating a unique facade: to highlight the external and internal angles, window openings, columns, and so on.
3 Stage: Finishing Finish
In order for the facade to look over, it is necessary to mount internal and external angles, window decks and lowers. For this stage, it is necessary to use metal elements with basalt sprinkle manufactured by Tekhnonikol.
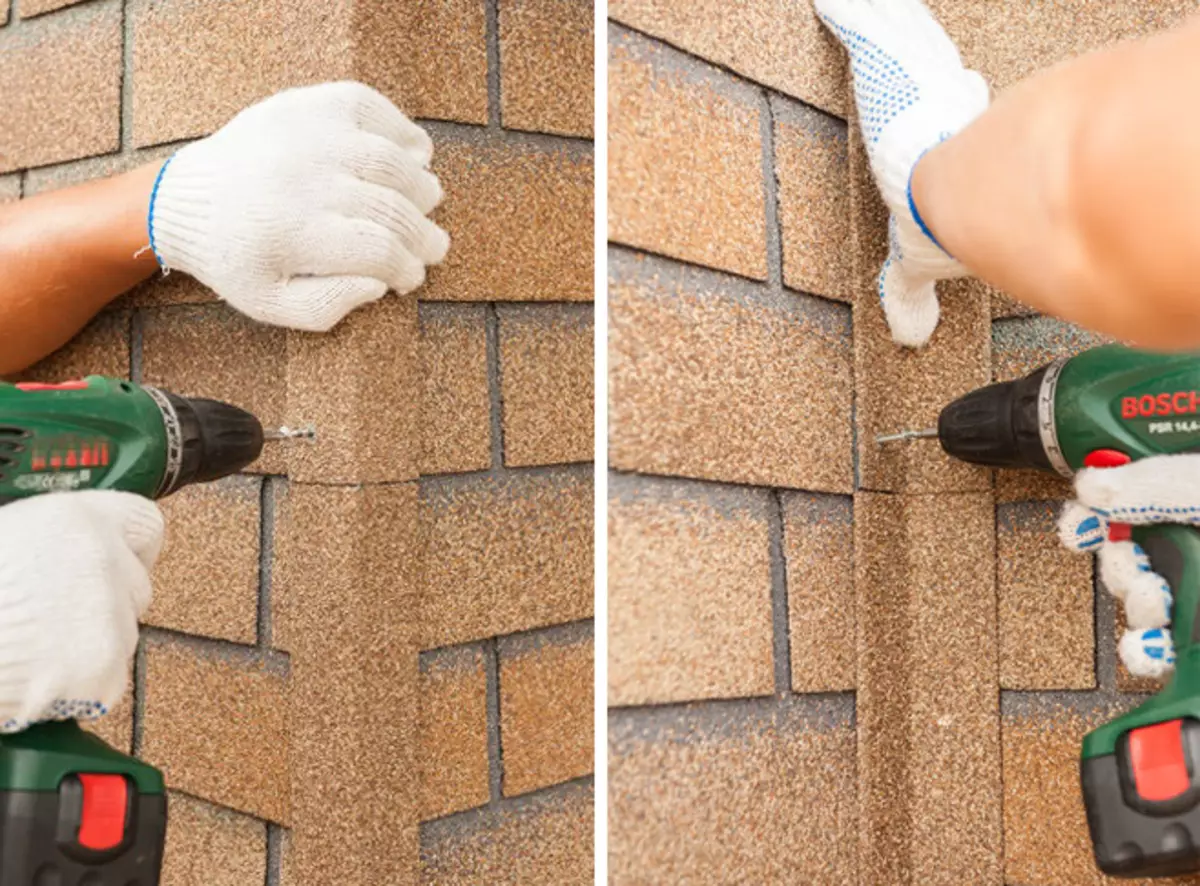
Photo: Tehtonol
The facade tile can be updated not only the whole facade, but also its individual elements - input groups, base, frontoths.
It is for this reason that more than 1,000 families have preferred the facade tiles of TechnoNIKOL HAUBERK. After all, possessing excellent performance, it can be decorated with houses built in absolutely different styles.