
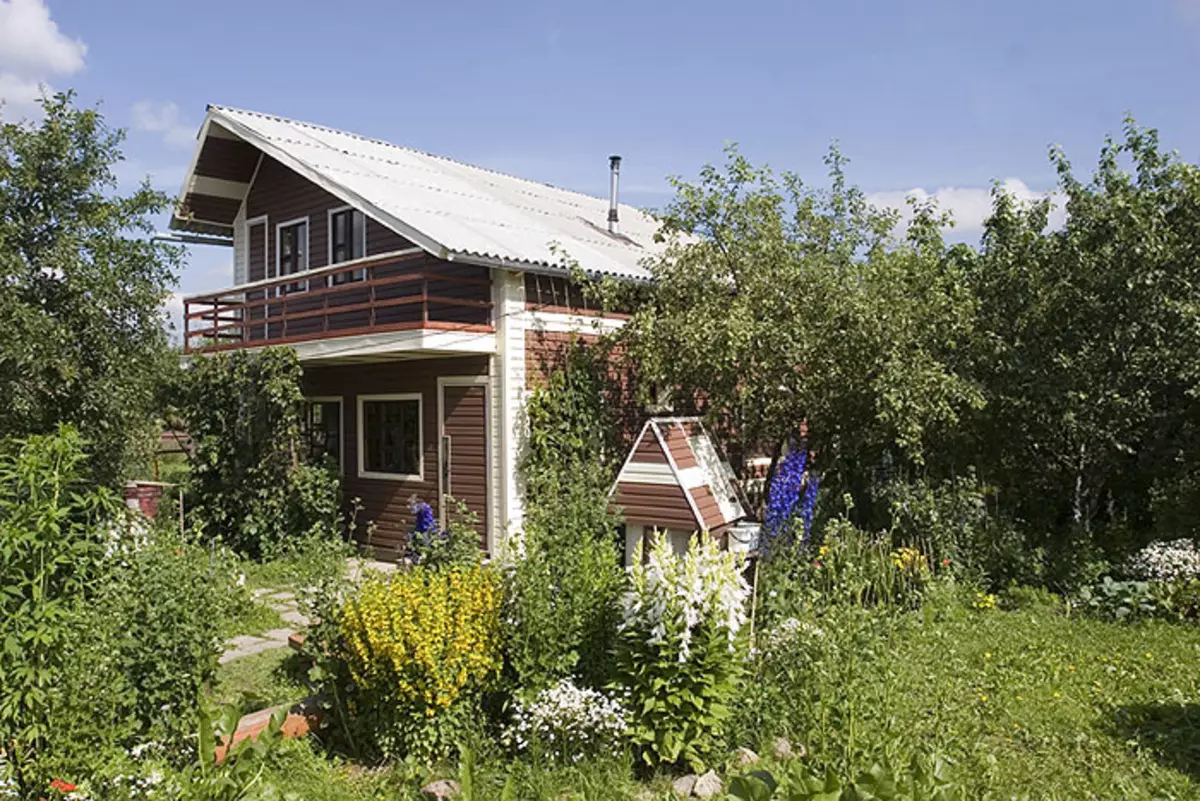
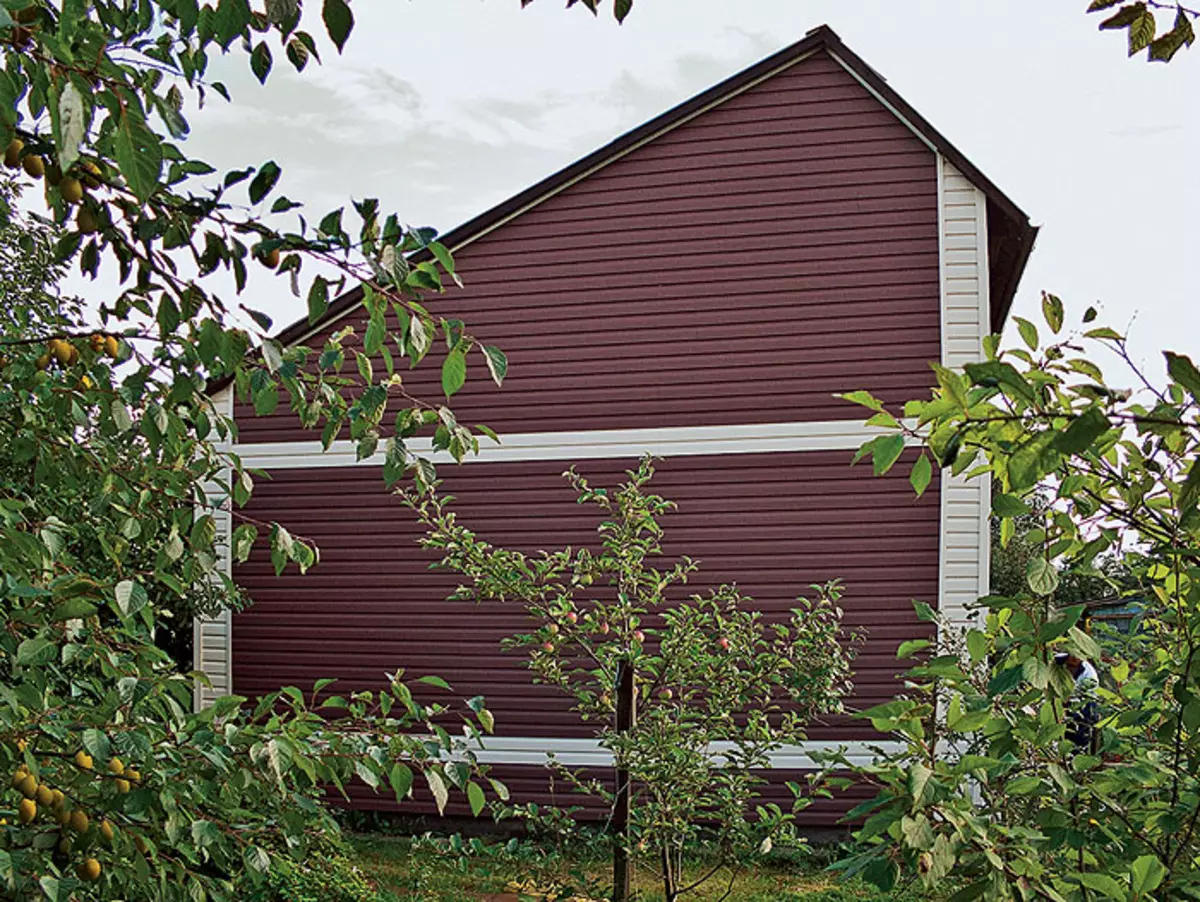
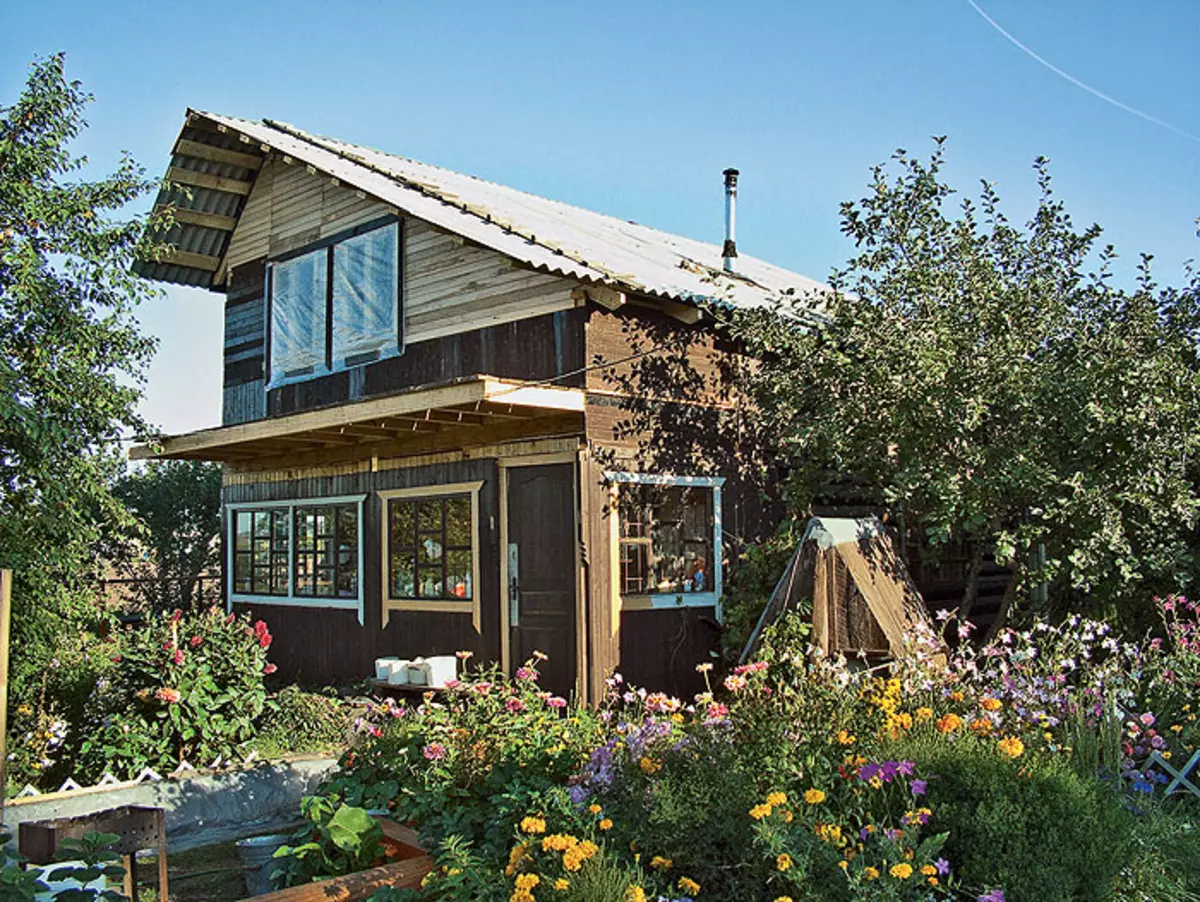
Technology of insulation of walls of complex geometry on the example of a country house consisting of a log cabin with a skeleton mansard

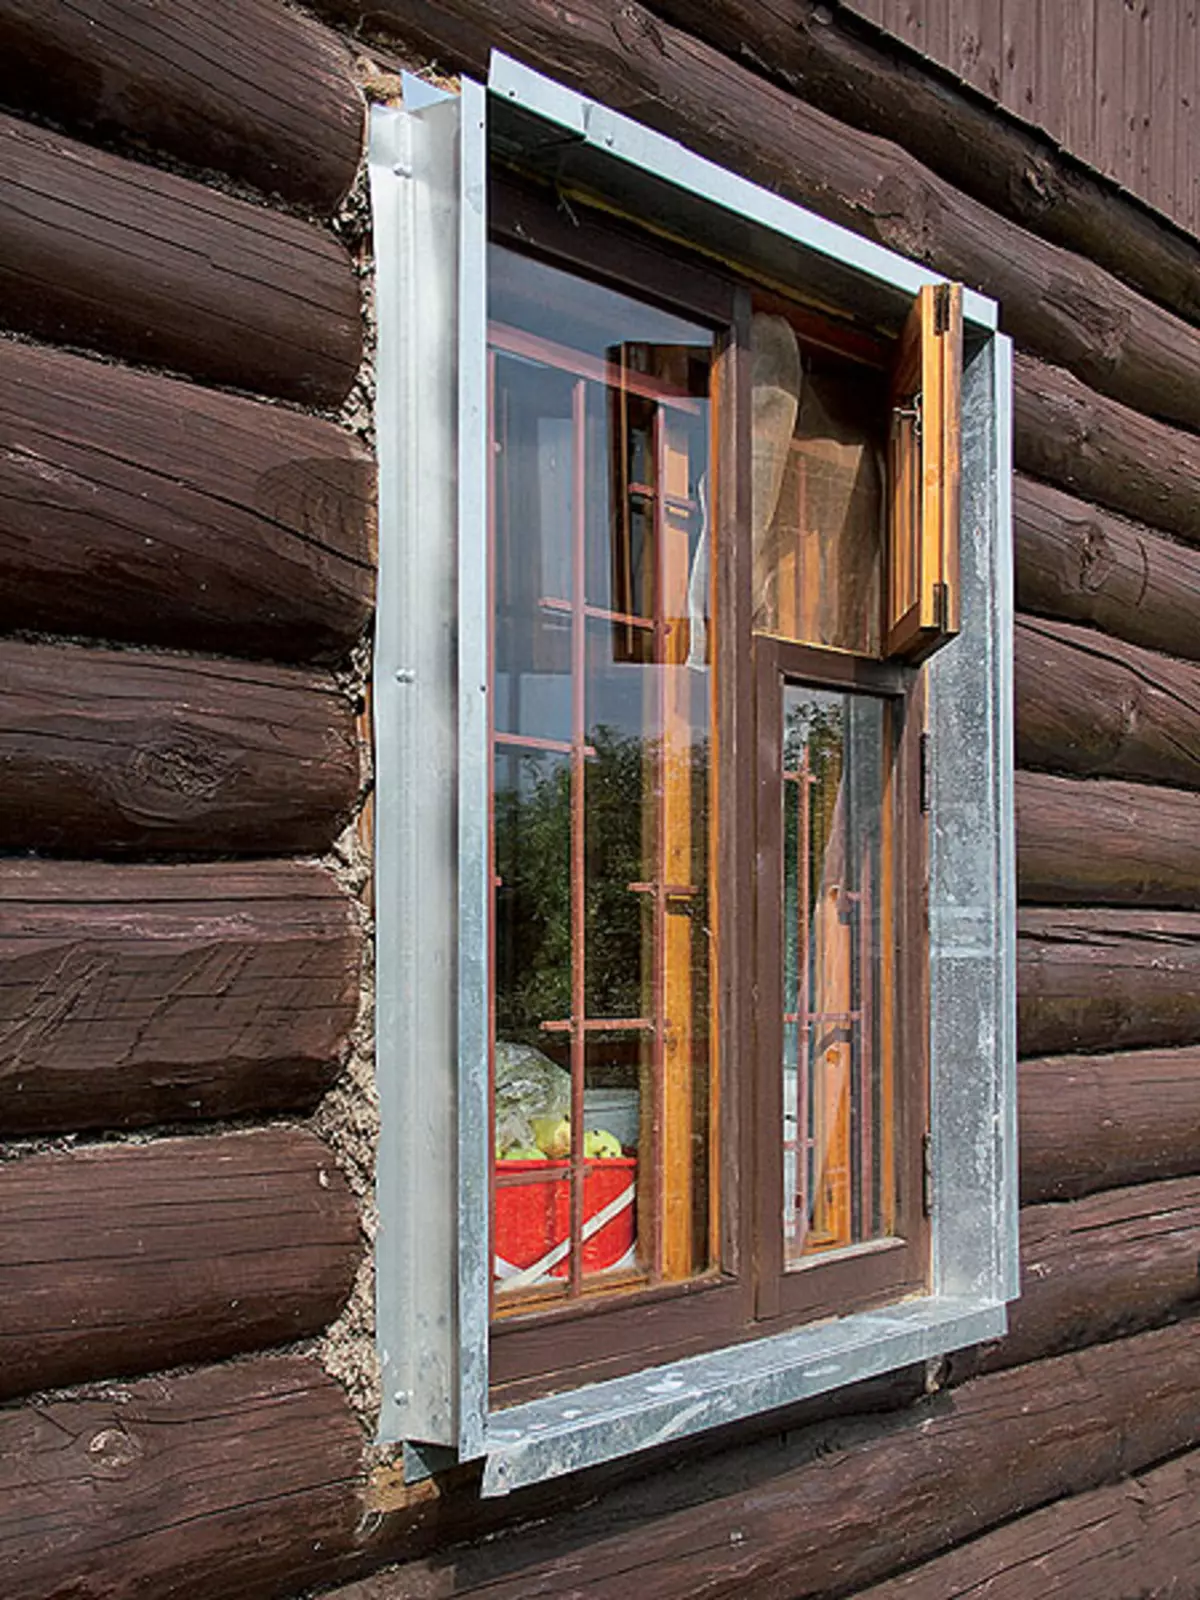

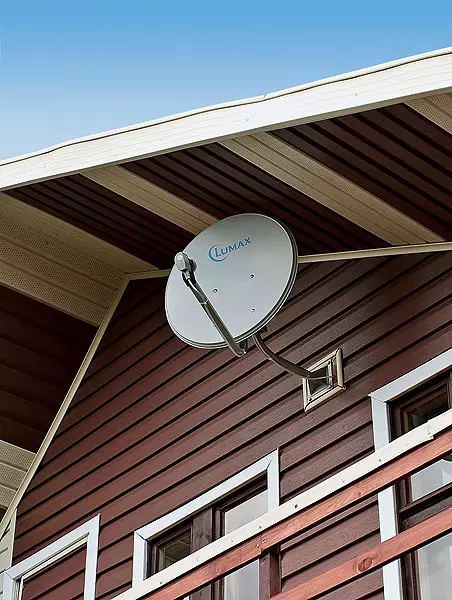
On a warmed facade to install it more difficult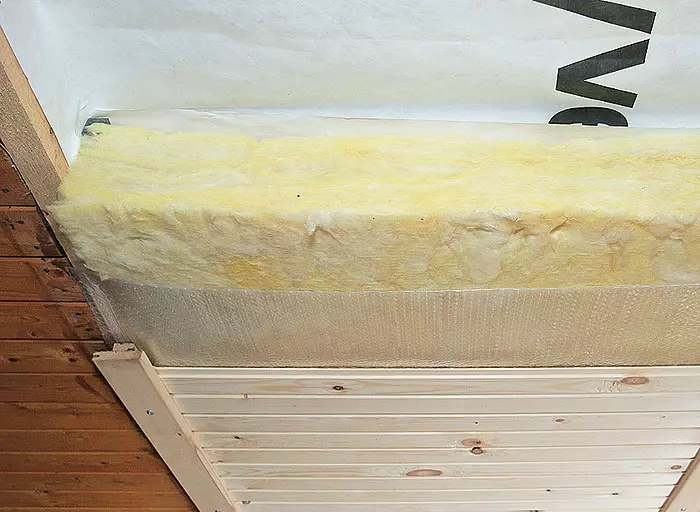
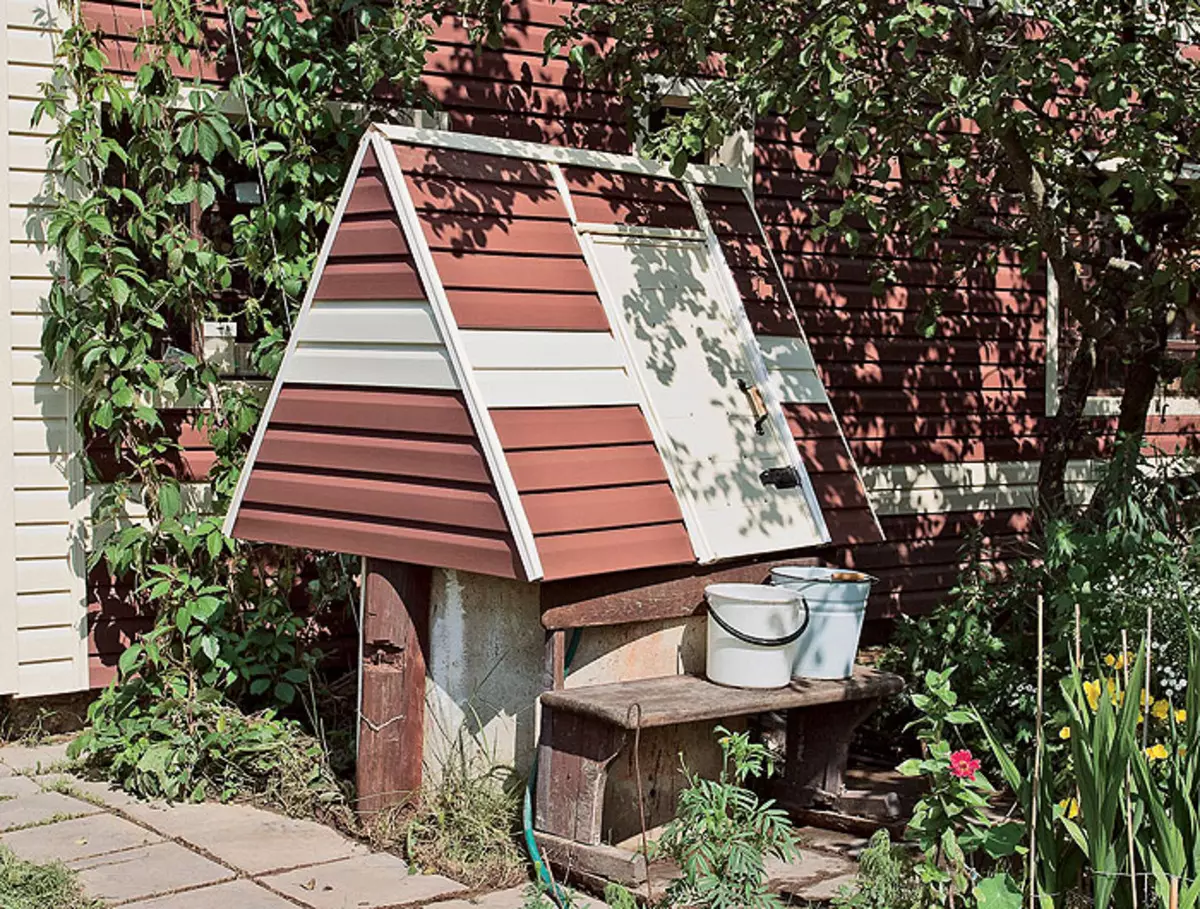
It would seem that with the outer insulation of the country house, there should be no difficulties that this process is repeatedly tested, and there is a description of the technology in special literature. However, as practice shows, ready-made recipes are not always suitable. For example, when warming up the cottage consisting of a log cabin with a skeleton mansard, the owners due to the complex geometry of the walls had to develop their original technology.
There was a common villa near Moscow. They built it shortly after the famous crisis on a miraculously survived money during him. They were hooked quickly, to meet the amount in their hands, until the producers were slightly "contused" economic collapse and did not begin to quickly raise the prices for building materials.
Apotoma turned out to be a cottage, in size typical rather for the period of stagnation than for post-pre-drawn times, - 66m, with an attached veranda 62m. Low-log, top-rack. Ito and the other is insulated with a layer of basalt wool with a thickness of 50mm and from the inside to save money is covered with gypsum fiber sheets. The roof is insulated with the same layer of basalt. People after all, the summer cottage was built, and not a house for permanent residence. And how many of those who survived the means? .. Now, except that there would be enough on the bathhouse.
What to warm?
But be that as it may, the house was built, and he really liked the owners. Still would! After all, the project was based on a sketch developed by themselves, - almost half of the church occupies a two-time lounge, in which the doors of the bedrooms are overlooking (two-on the second floor and one- on the first). It is authorized, it is possible to pump the entire house only installed directly on the floor with a living room with a metal oven for long burning. True, even in the summer, as soon as it grows it, it was necessary to drag this stove for the night, and by the morning it was warm all the heat. Only happy owners tried to pay attention to such little things, and in the winter it was not riding in the country. So lived as long as the children did not have grown and one of them did not acquire his own family. Then the grandson appeared. The ID has become both scolded at the same time, and cold. Then the family council accepted the decision to insulate and suck the veranda by making a room for a grandson.
| 
| 
|
| 
| 
|
| 
| 
|
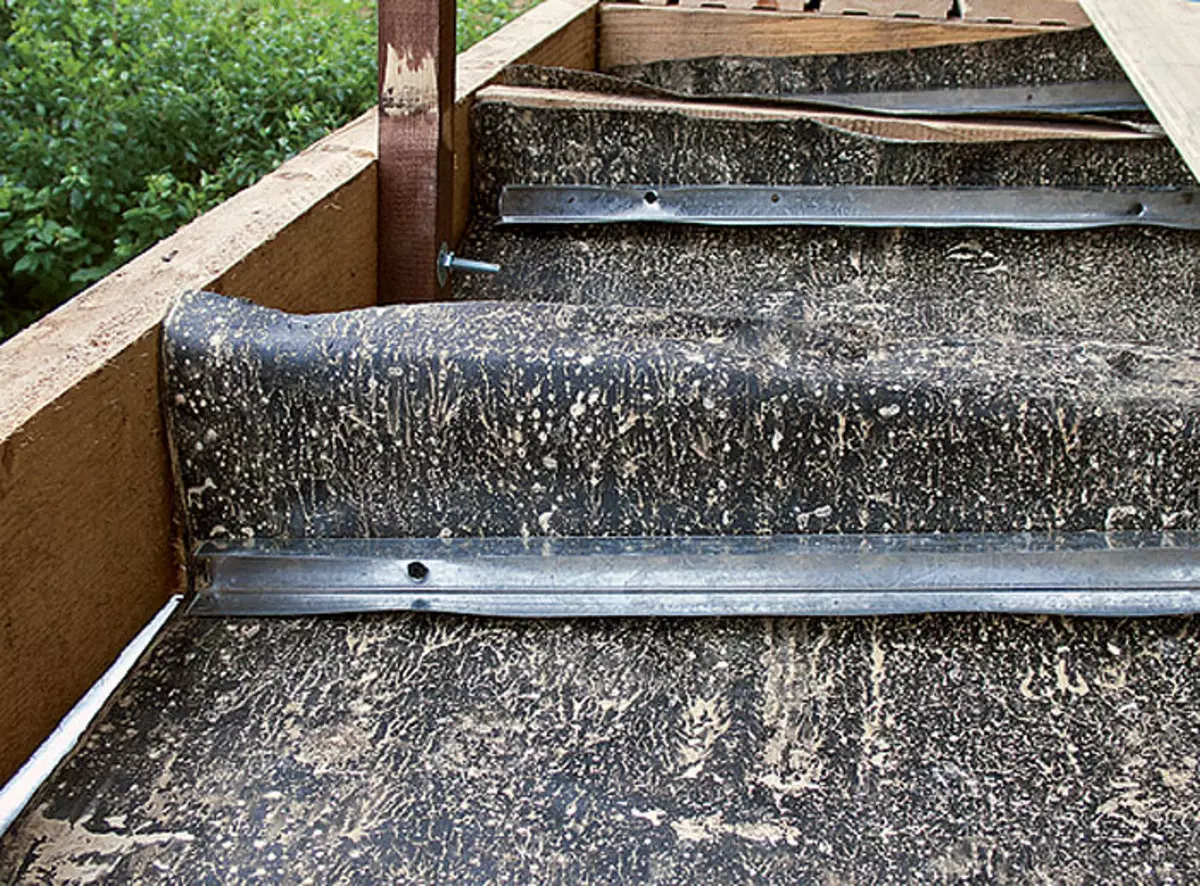
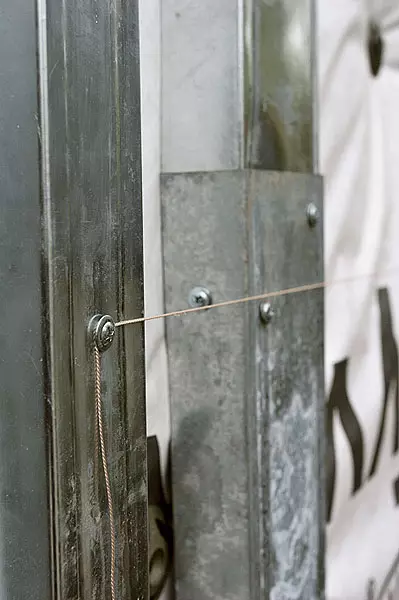
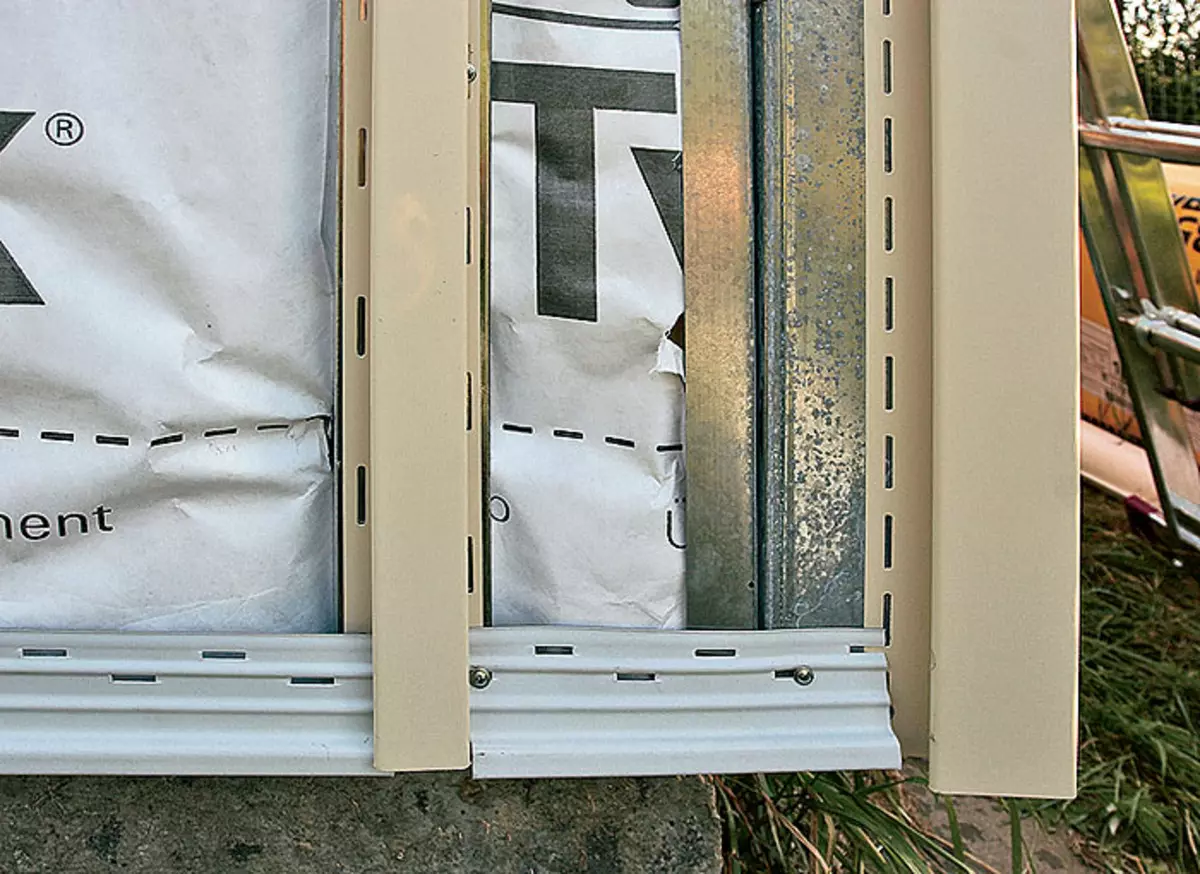
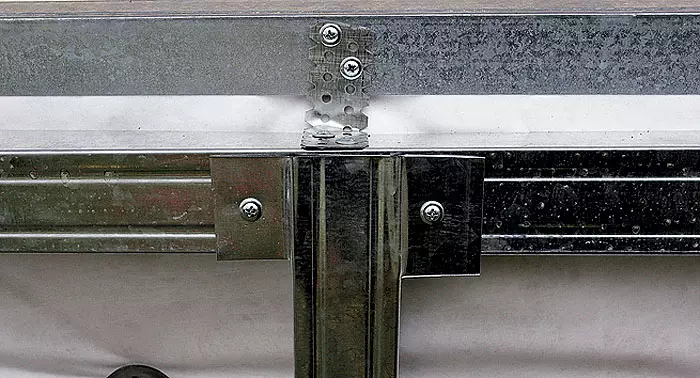
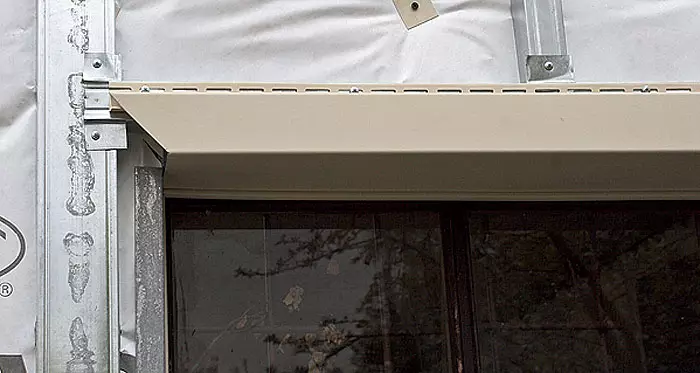
1. Corrected with the help of the level of corner profiles in the upper and lower zones, two lace were tied, on which the intermediate profiles racks were installed
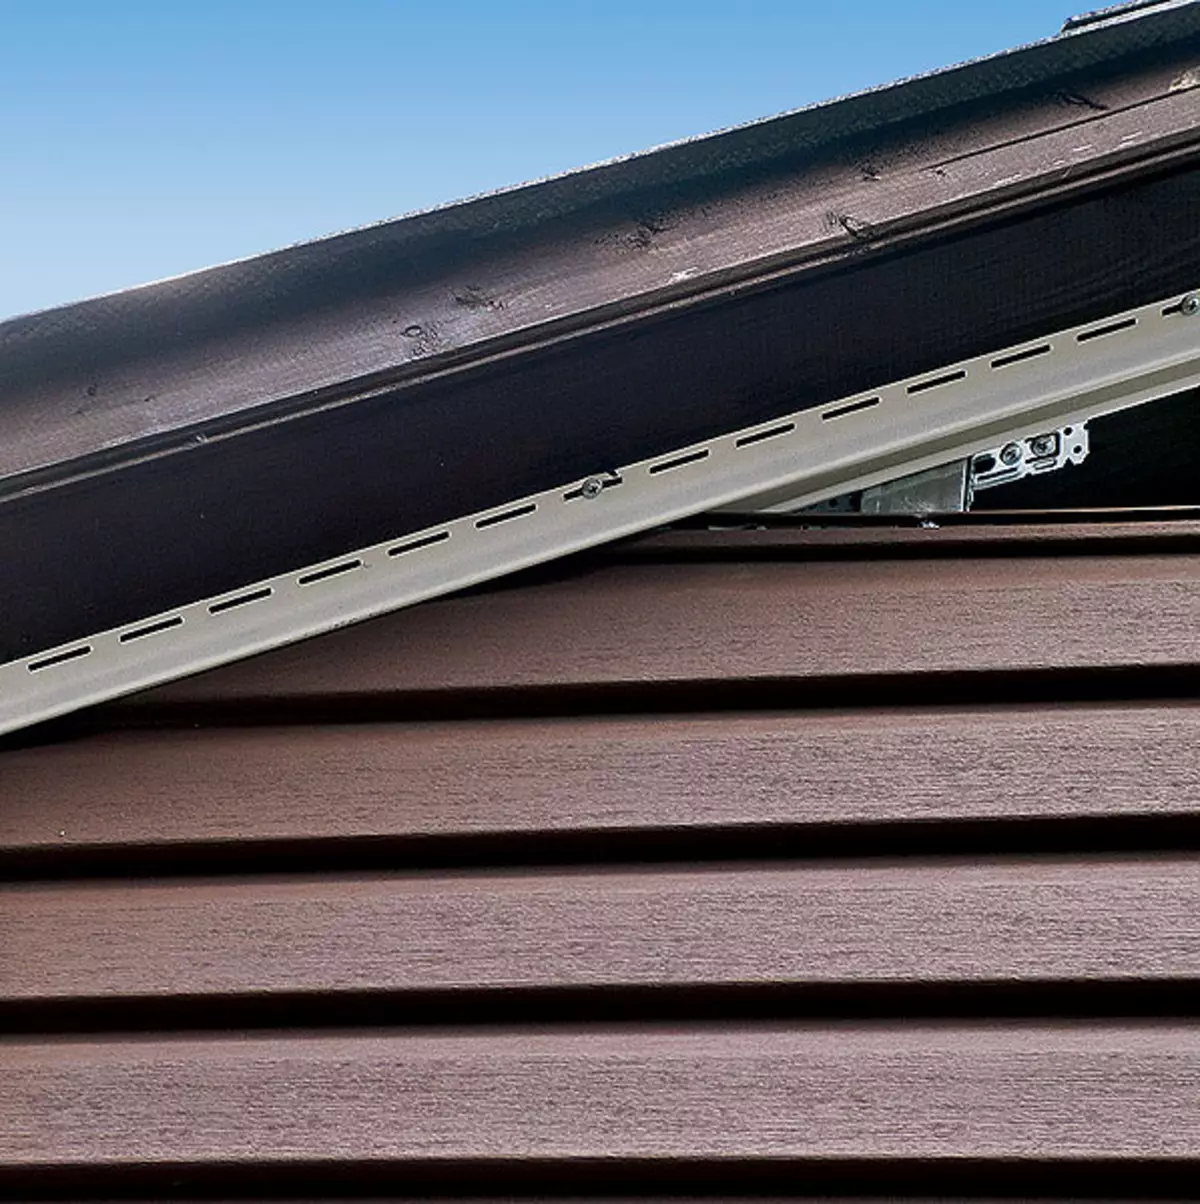
2. The top and below they were attached to the corner and over the entire lengths of the suspensions; to release them, in wind insulation cut holes
3. If necessary, the width of the profile can be increasing
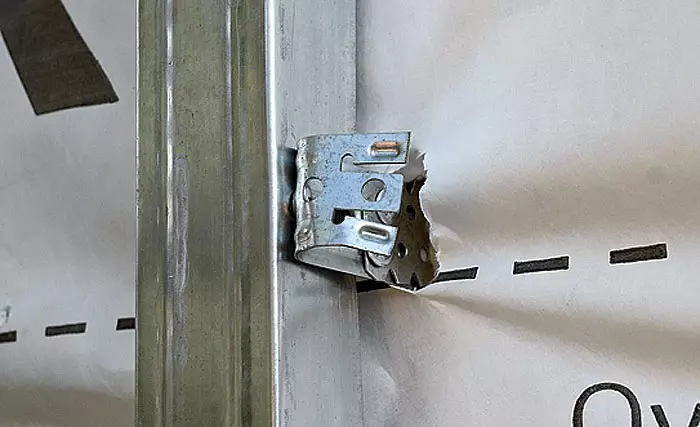
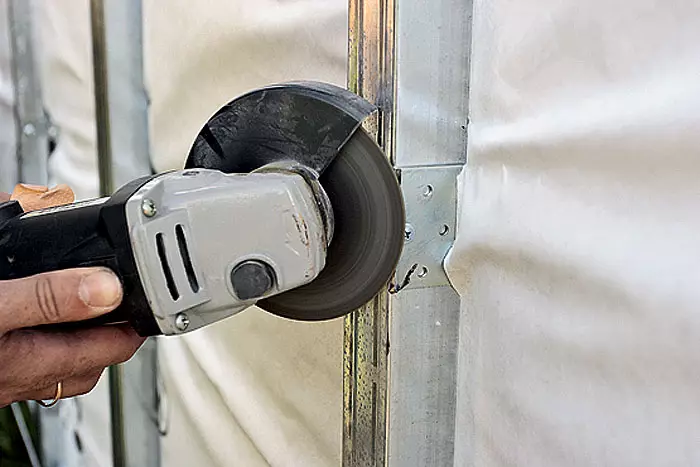
4-5. "Surveys" of the suspensions of flexion (4), the corners are cut off with a grinder (5)
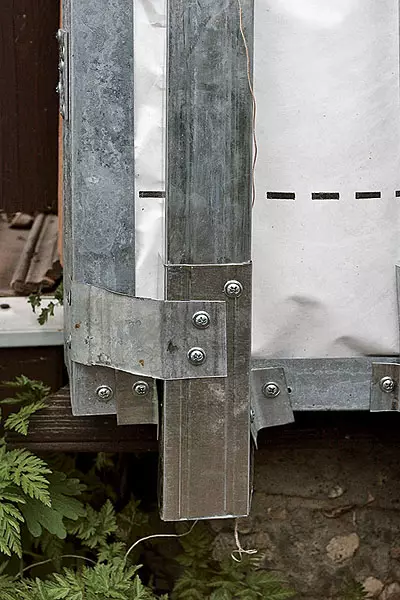
6.Siding began to mock the corners of the house. First, installed the angular profile, then at a distance of about 30 cm from it - n-shaped, after which the starting bar was attached to the lower strapping profile
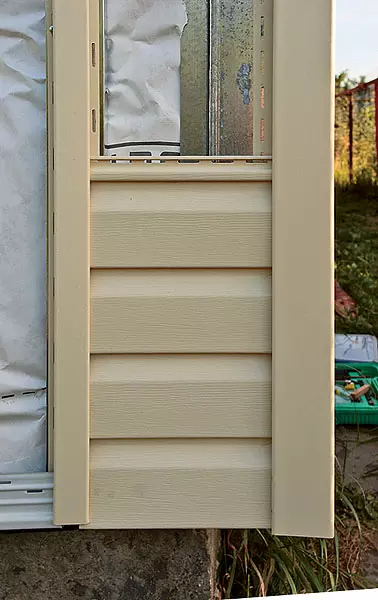
7-8. The space between the angular and n-shaped profiles was filled with sliced sliced panels of light siding
9. Before the angular design was ready, started the walls of the wall. It used the red-hot siding panels, and in the 3rd and 14th rows of height-light
Contrary to prescriptions
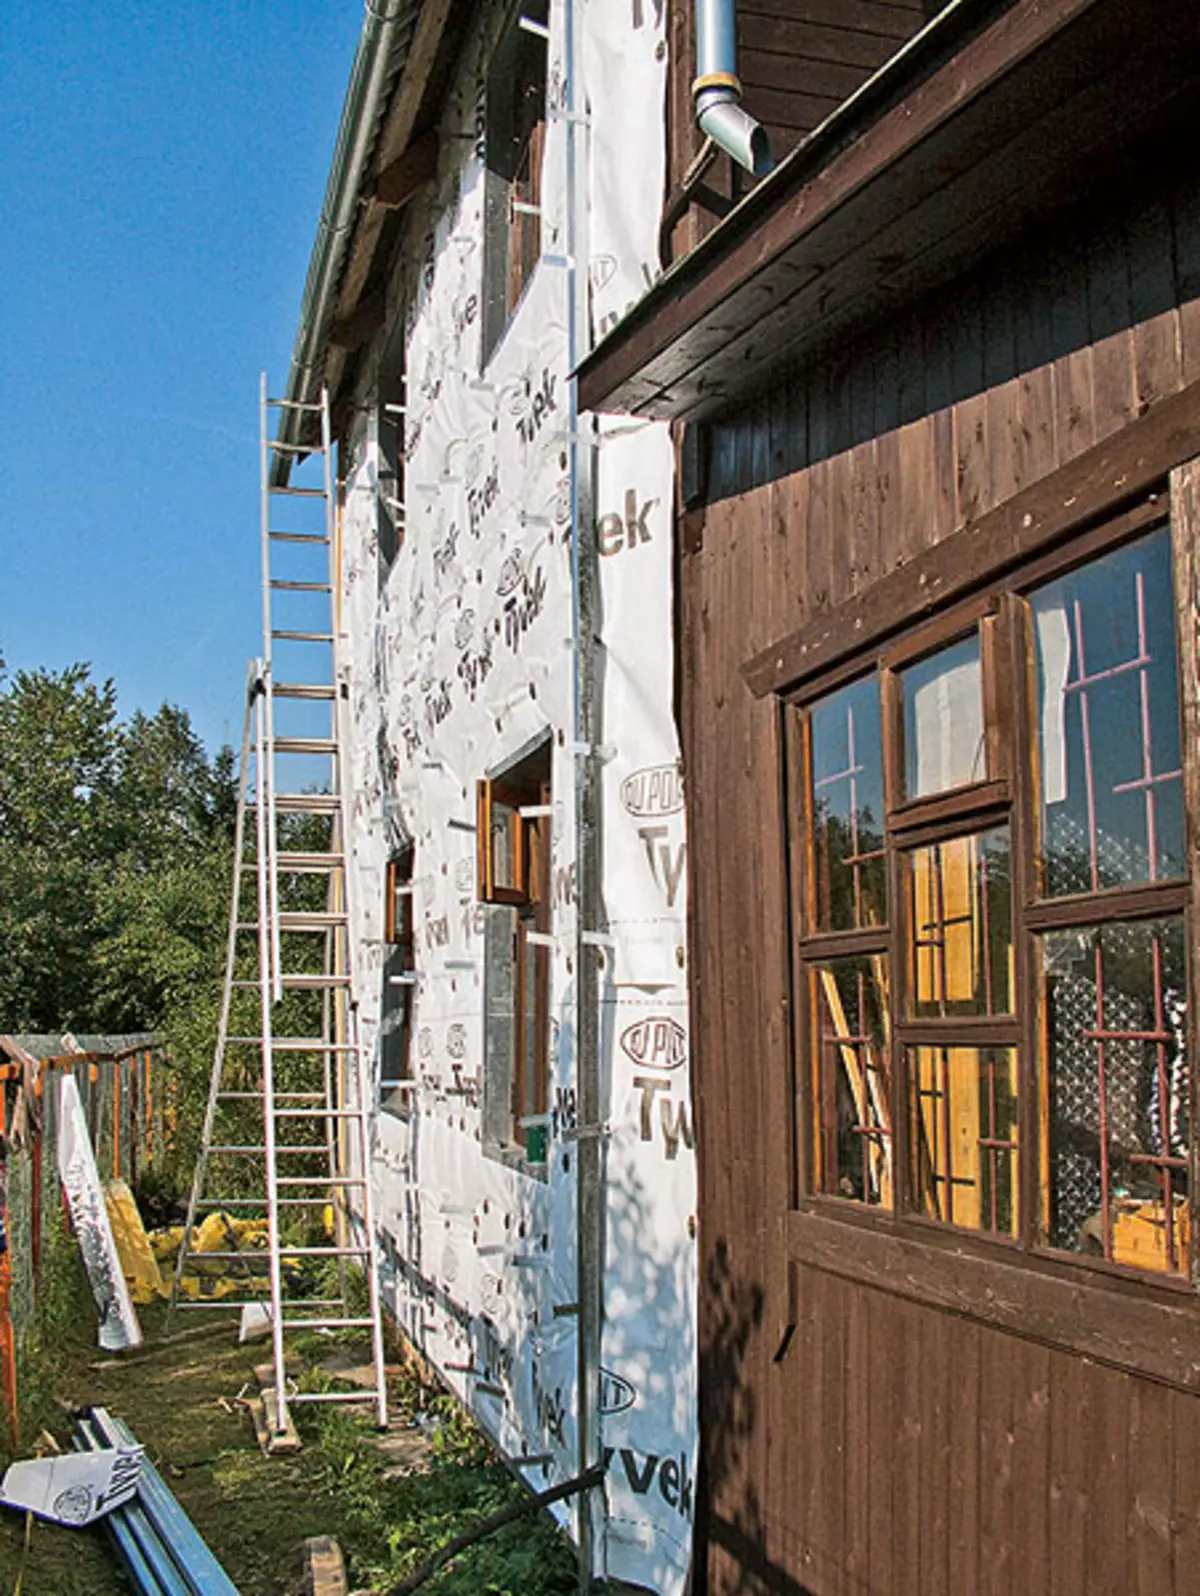
In order not to lose the useful area (house and so crazy), they decided to warm it outside. And so that the resistance of the heat transfer of the walls is no less than the most modern standards relies. Icultage Introduction Technology was at the level - with wind insulation, ventilated gap and siding facade.
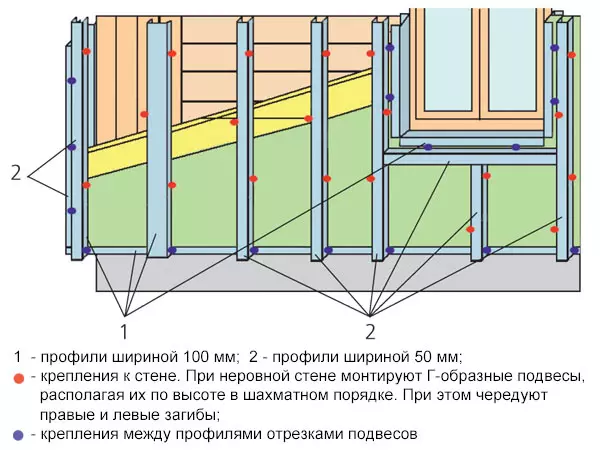
But not one of the insulation technologies found in the literature did not fit. Most recommendations read about the following. Interests with ventilated air gap The insulation slabs are mounted between wooden or metal frame racks. With two-layer insulation, the frame may consist of horizontal planks and vertical racks. The choice of location is determined by the type of protective-decorative coating used. If, for example, siding is installed horizontally, the outer frame is performed from horizontal racks, to which the vertical elements of the wind insulation are added after the wind insulation after mounting, and in turn, they are fastened. In this case, the inner layer of thermal insulation is placed between vertical bars (racks), externally extended between horizontal planks. Punching frame elements usually use brus with a cross section of 5050mm. The insulation plates are placed with seam overlap.
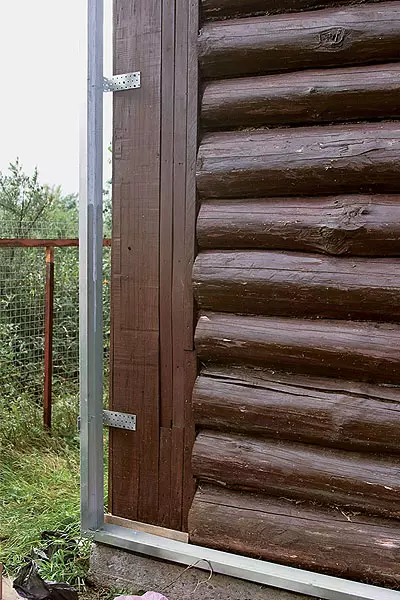
It seems to be everything correct, but applies only to the house with smooth walls. It was also understood by the owners, vertically putting a long rail to the wall of the house: she was in three places to the log cabins (they are all different diameters!), And it did not fit the wall of the skeleton monster. So all the rails will have to be attached to the corners? One rack will be needed at least five corners of about 40 rubles. For 1 pc. Racks are needed every 60cm. Total on the corners for one wall it is necessary to spend about 2.5 thousand rubles. The same 1m3 edged board - 7.5 thousand rubles. Plus insulation and good siding. No, so the family budget is not enough! Yes, and weigh all this wooden lamp will be so much that it will break the whole skin with the attic (after all, it will have to be attached to it), but it will completely ruin the design. The player-insulation at the proposed technology will not firmly fit into the wall, which means it will be useless. Need to look for some other solution!
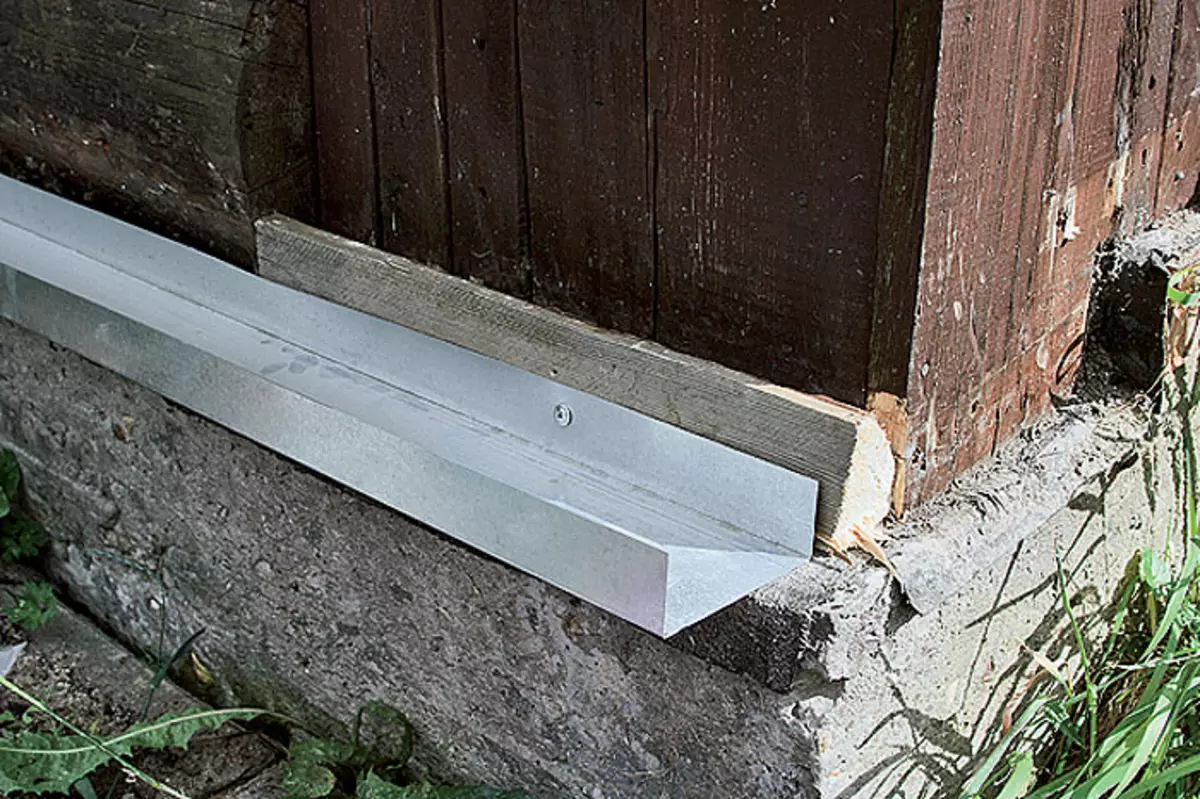
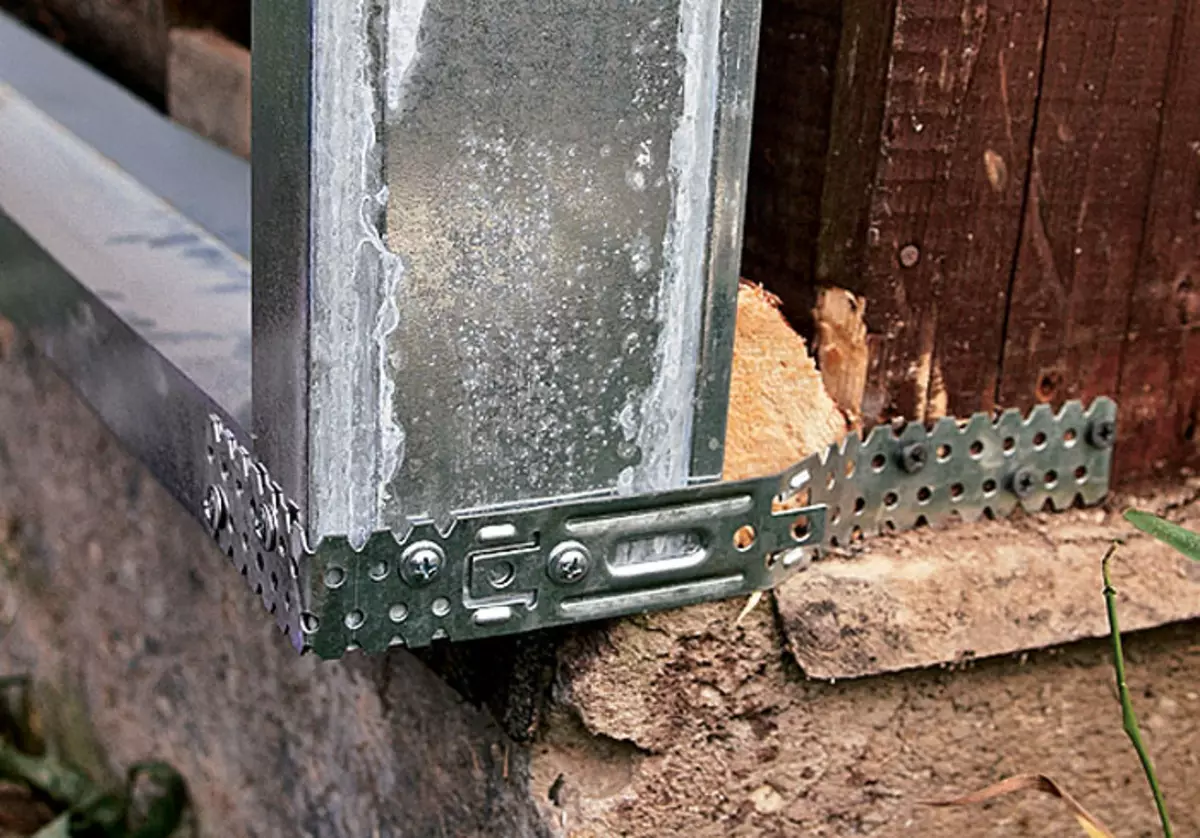
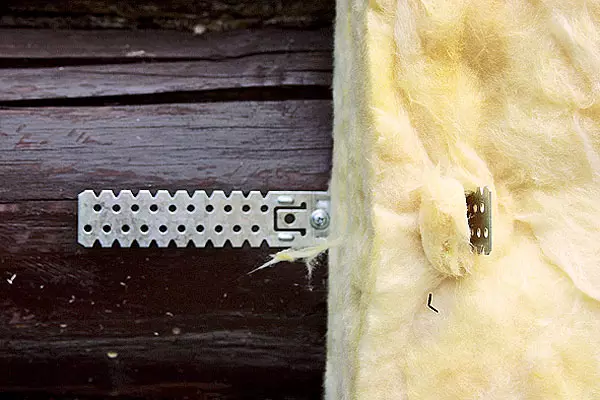
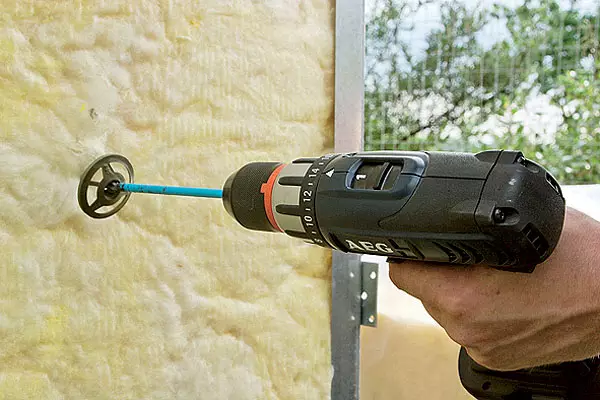
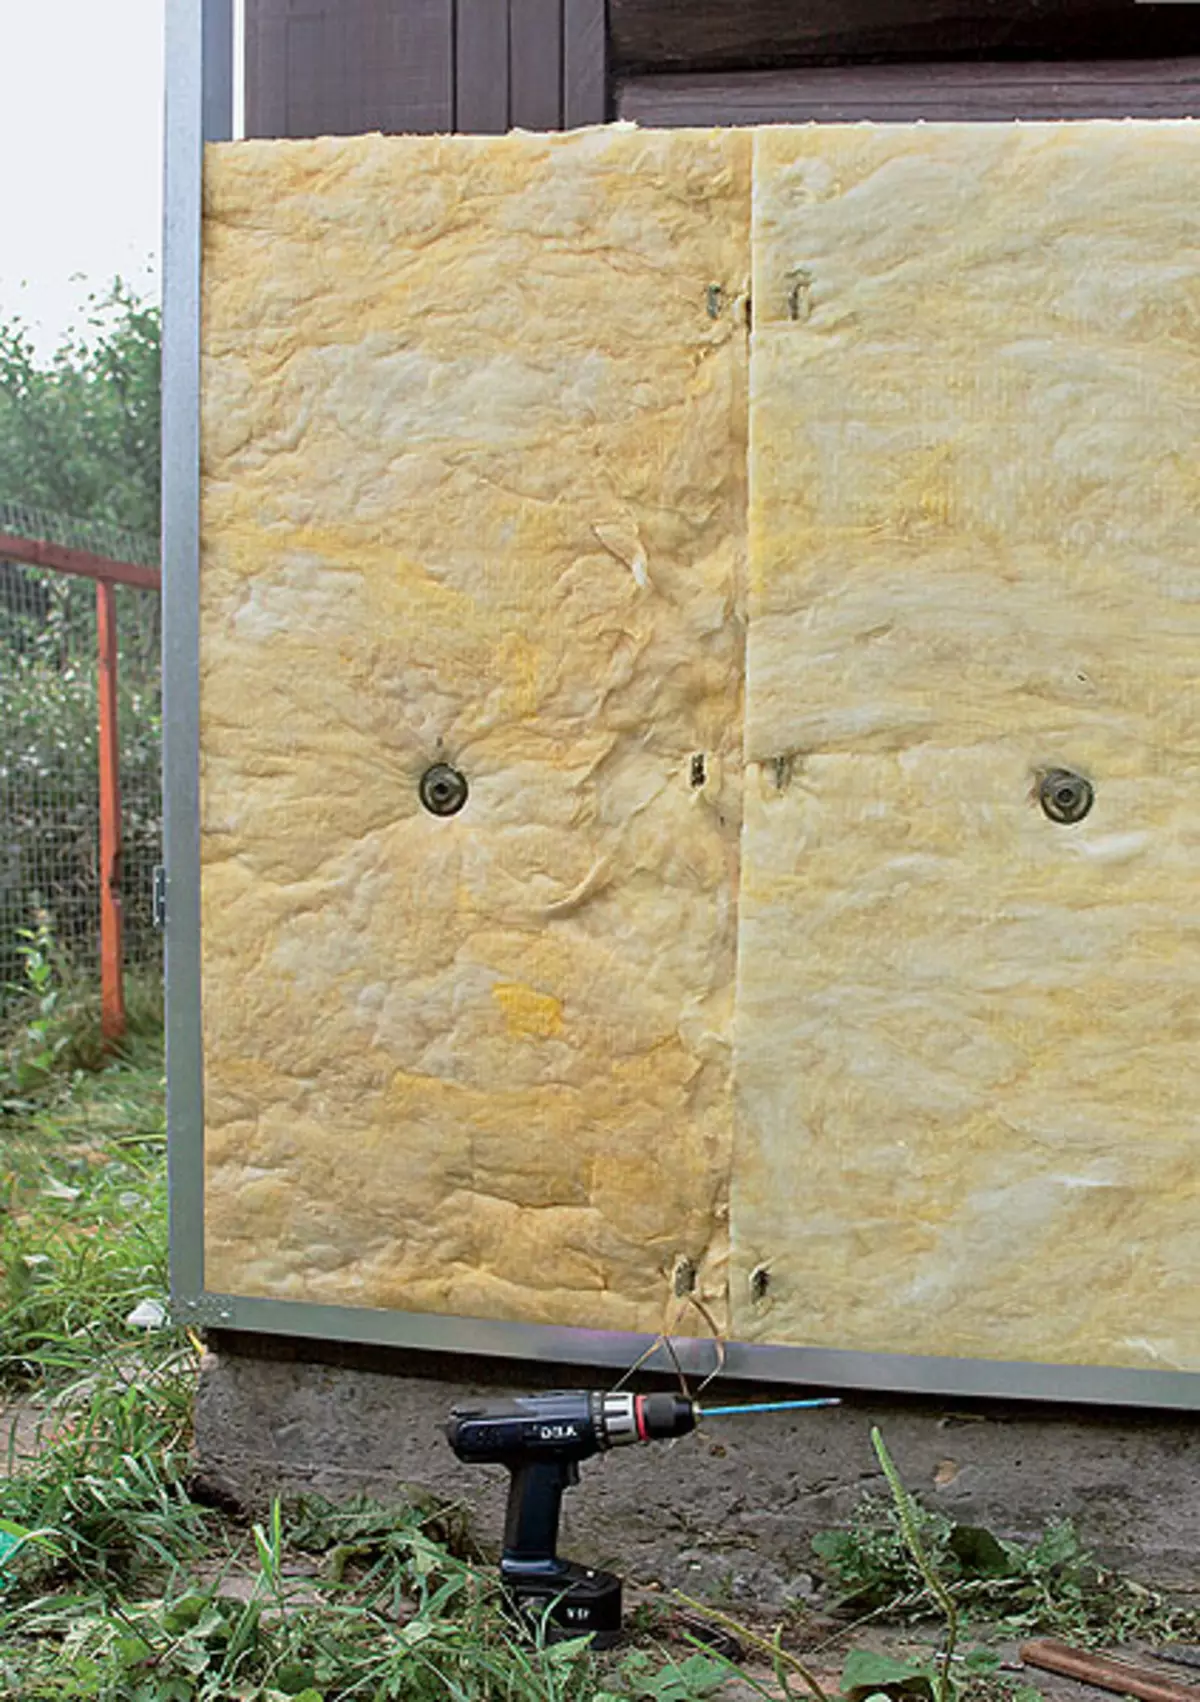
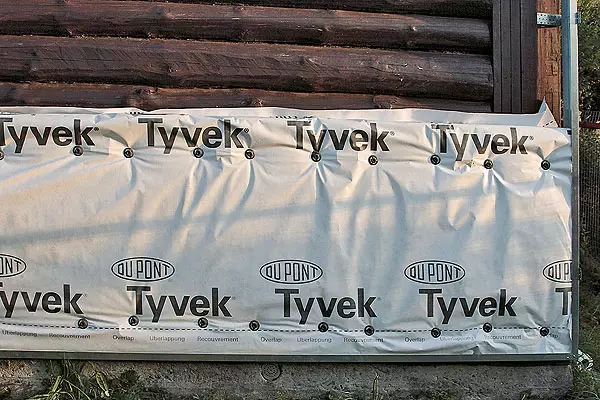
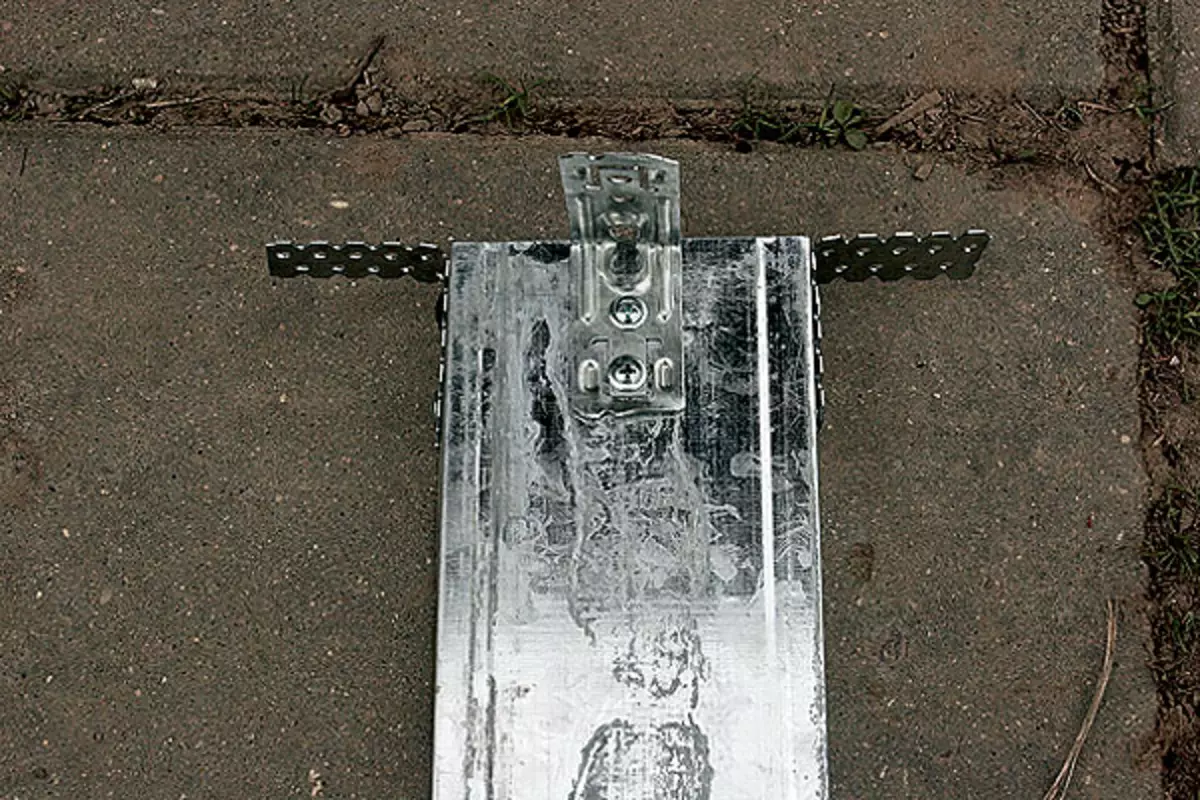
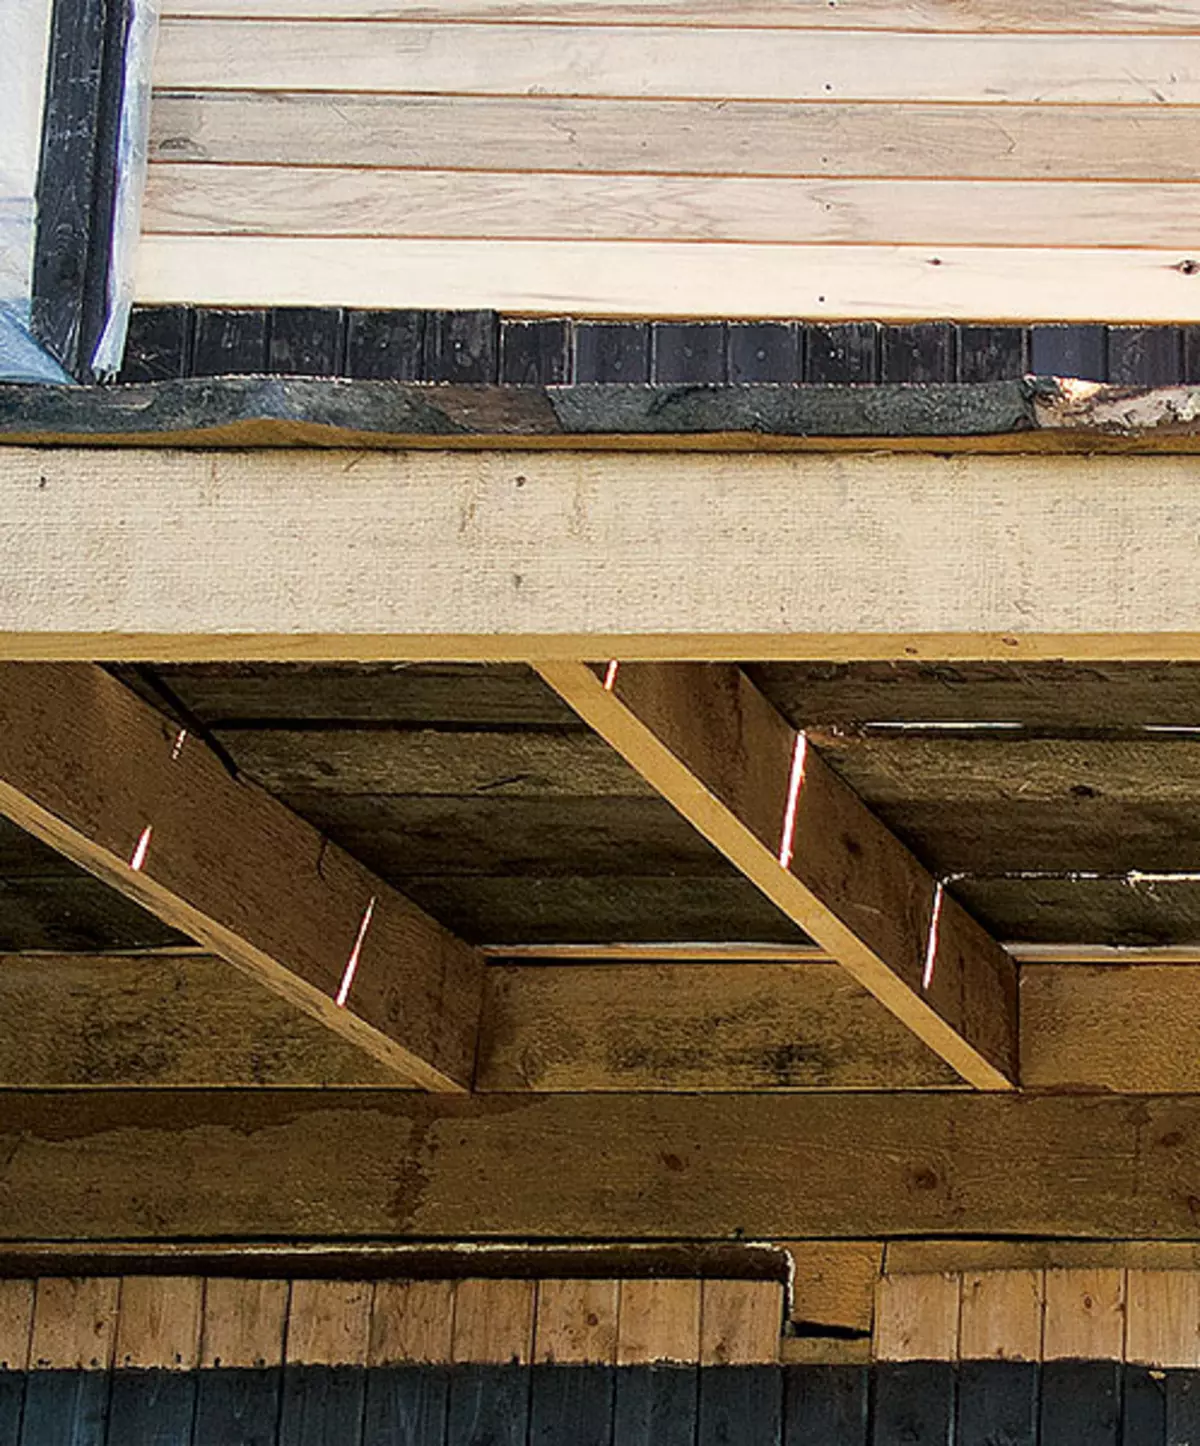
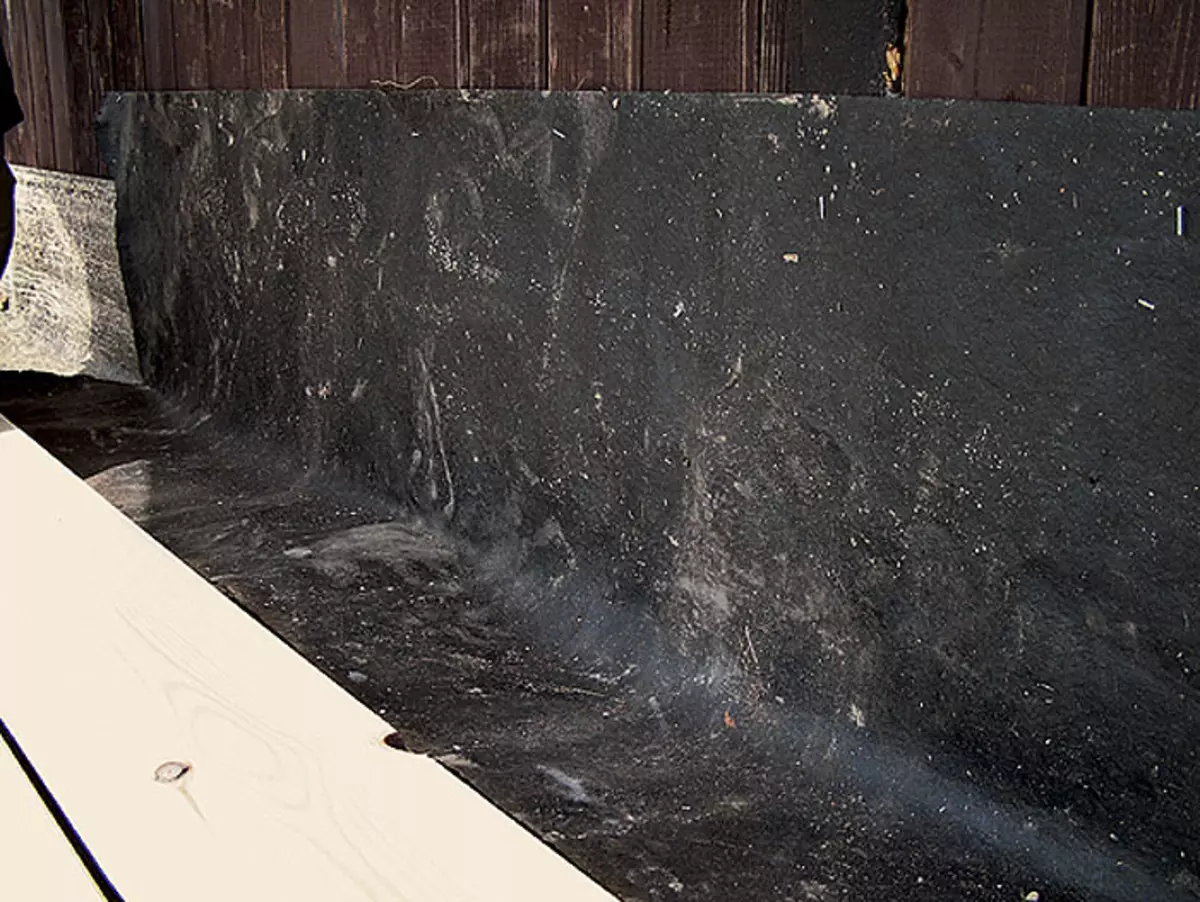
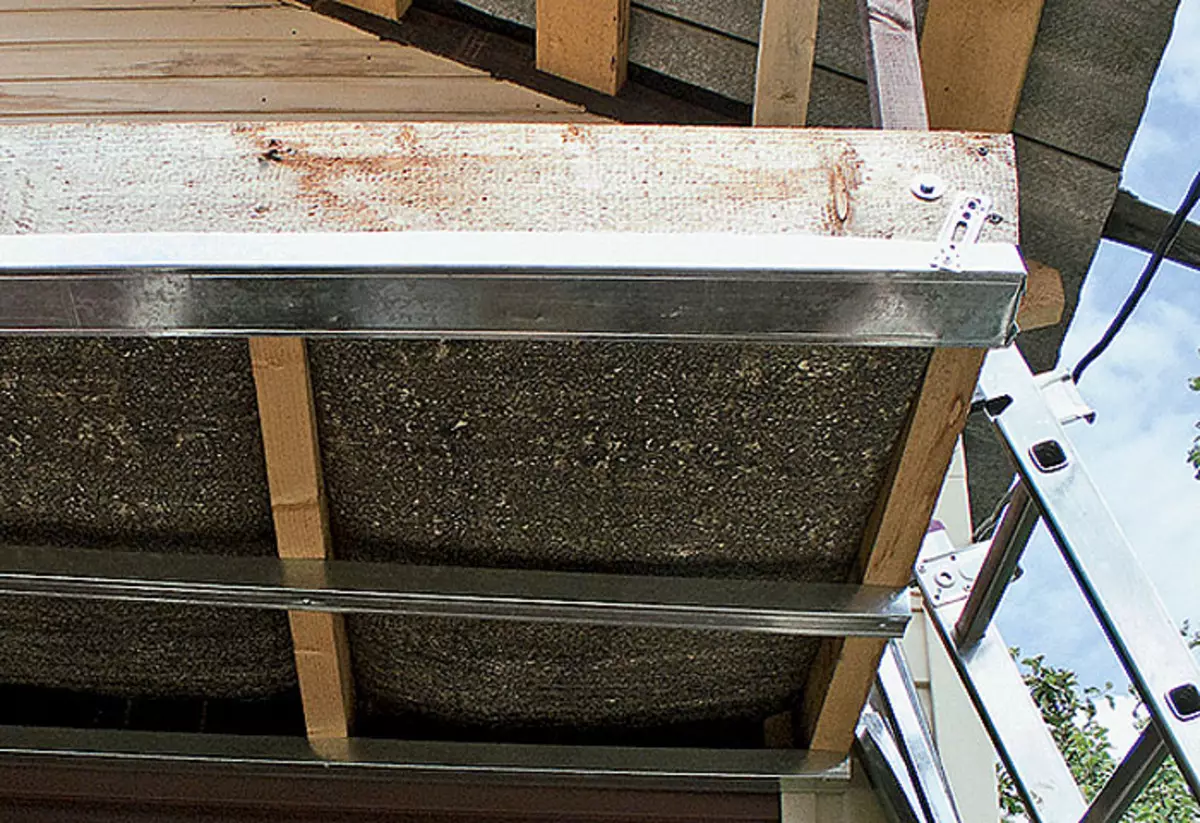
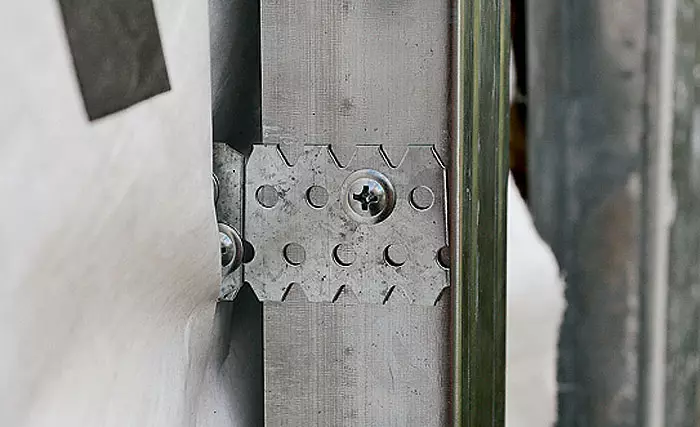
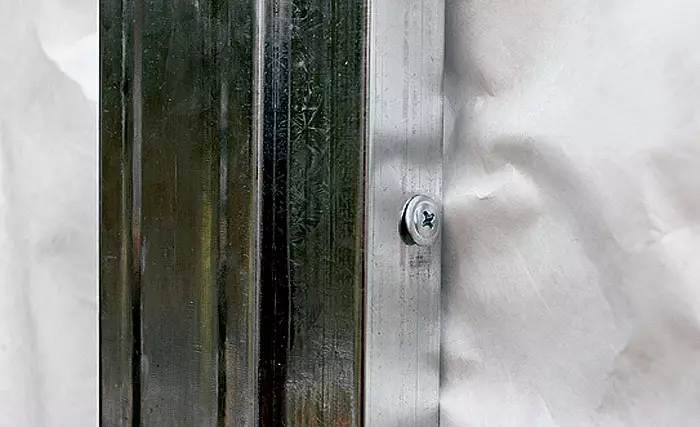
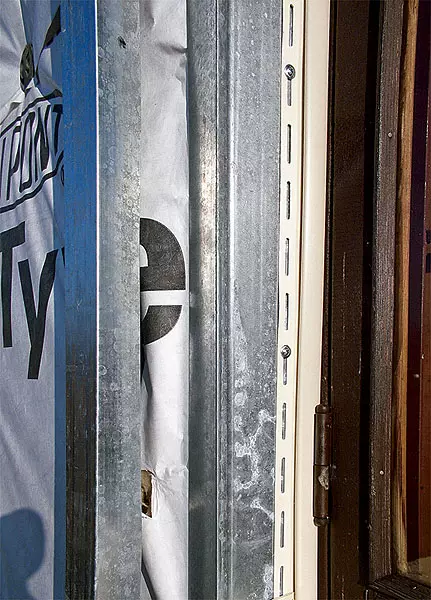
How long was the process of thinking and how many strength he costly know what the owners themselves. At the time they came up with the technology that was deprived of all the listed flaws. It was necessary to mount a solid layer of the insulation thickness of 100mm close to the wall, protecting its ends along the perimeter of the wall with a metal profile. Then close this "carpet" by windproofing film, attaching it together with the plates to the wooden wall with self-draws with plastic hats-"fungi". Jew on top of this "carpet", repeating the irregularities of the wall, mount the racks from a galvanized profile, thoroughly aligning them vertically and horizontally.
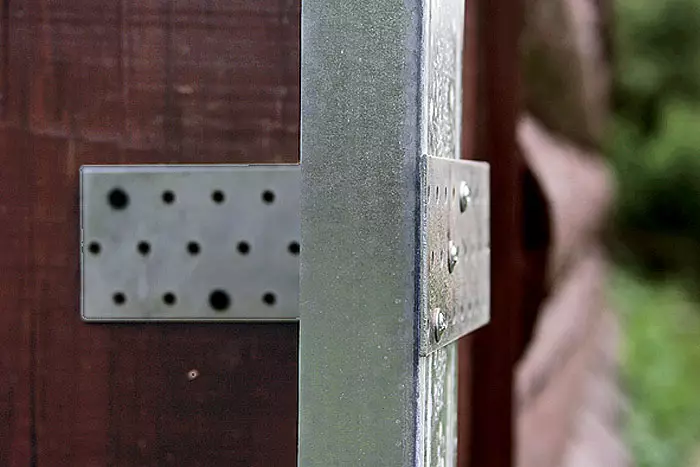
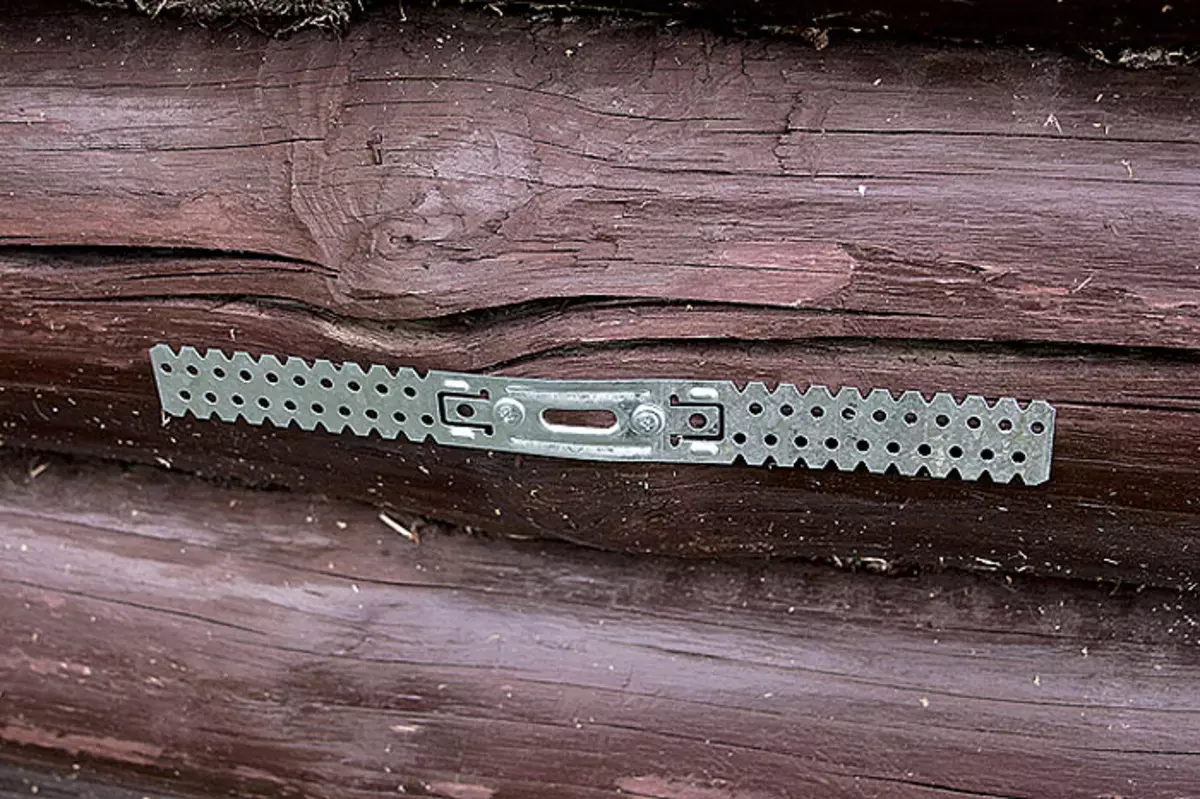
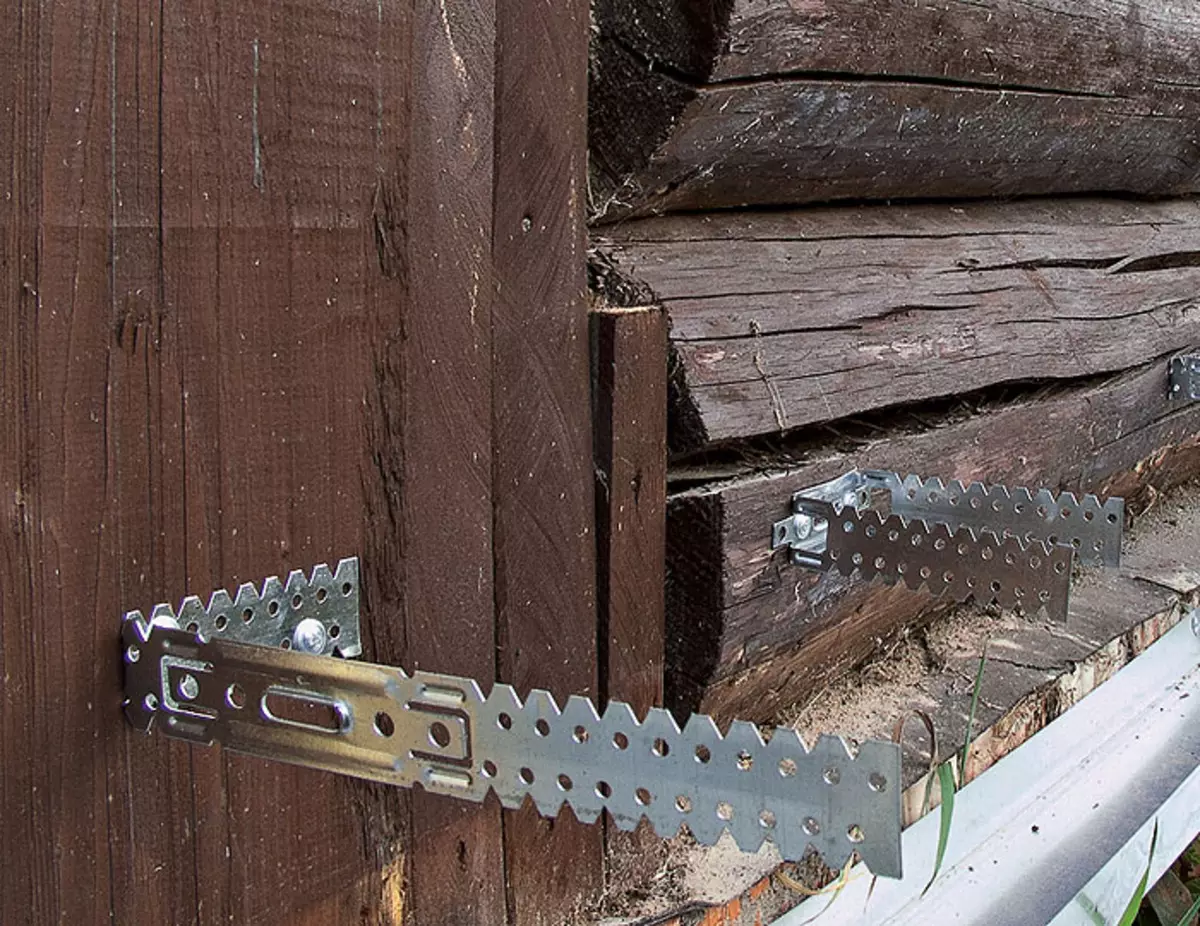
The profiles will be held mainly for the swiss switches, and they are protected from the entire length of the bend and twist them all over the entire length will be protected to the wall even before mounting the insulation of P- or M-shaped holders made of suspension for mounting the suspended ceiling. They can be done so that they will probably get to the racks from any "Wpadin" walls. If the element turns out to be too long, it is not terrible, then it is not even necessary to cut, just beaten enough. Thus, created from the "plane" profiles to which siding will be to be installed, it will not depend on the irregularities of the wall, they will define only the magnitude of the ventilated air gap. Ipownce this value will be non-permanent. Less than 50mm (this is the recommended size) the gap will not work, profiles will not be given. Abunday is bigger, not scary: it does not affect the heat saving.
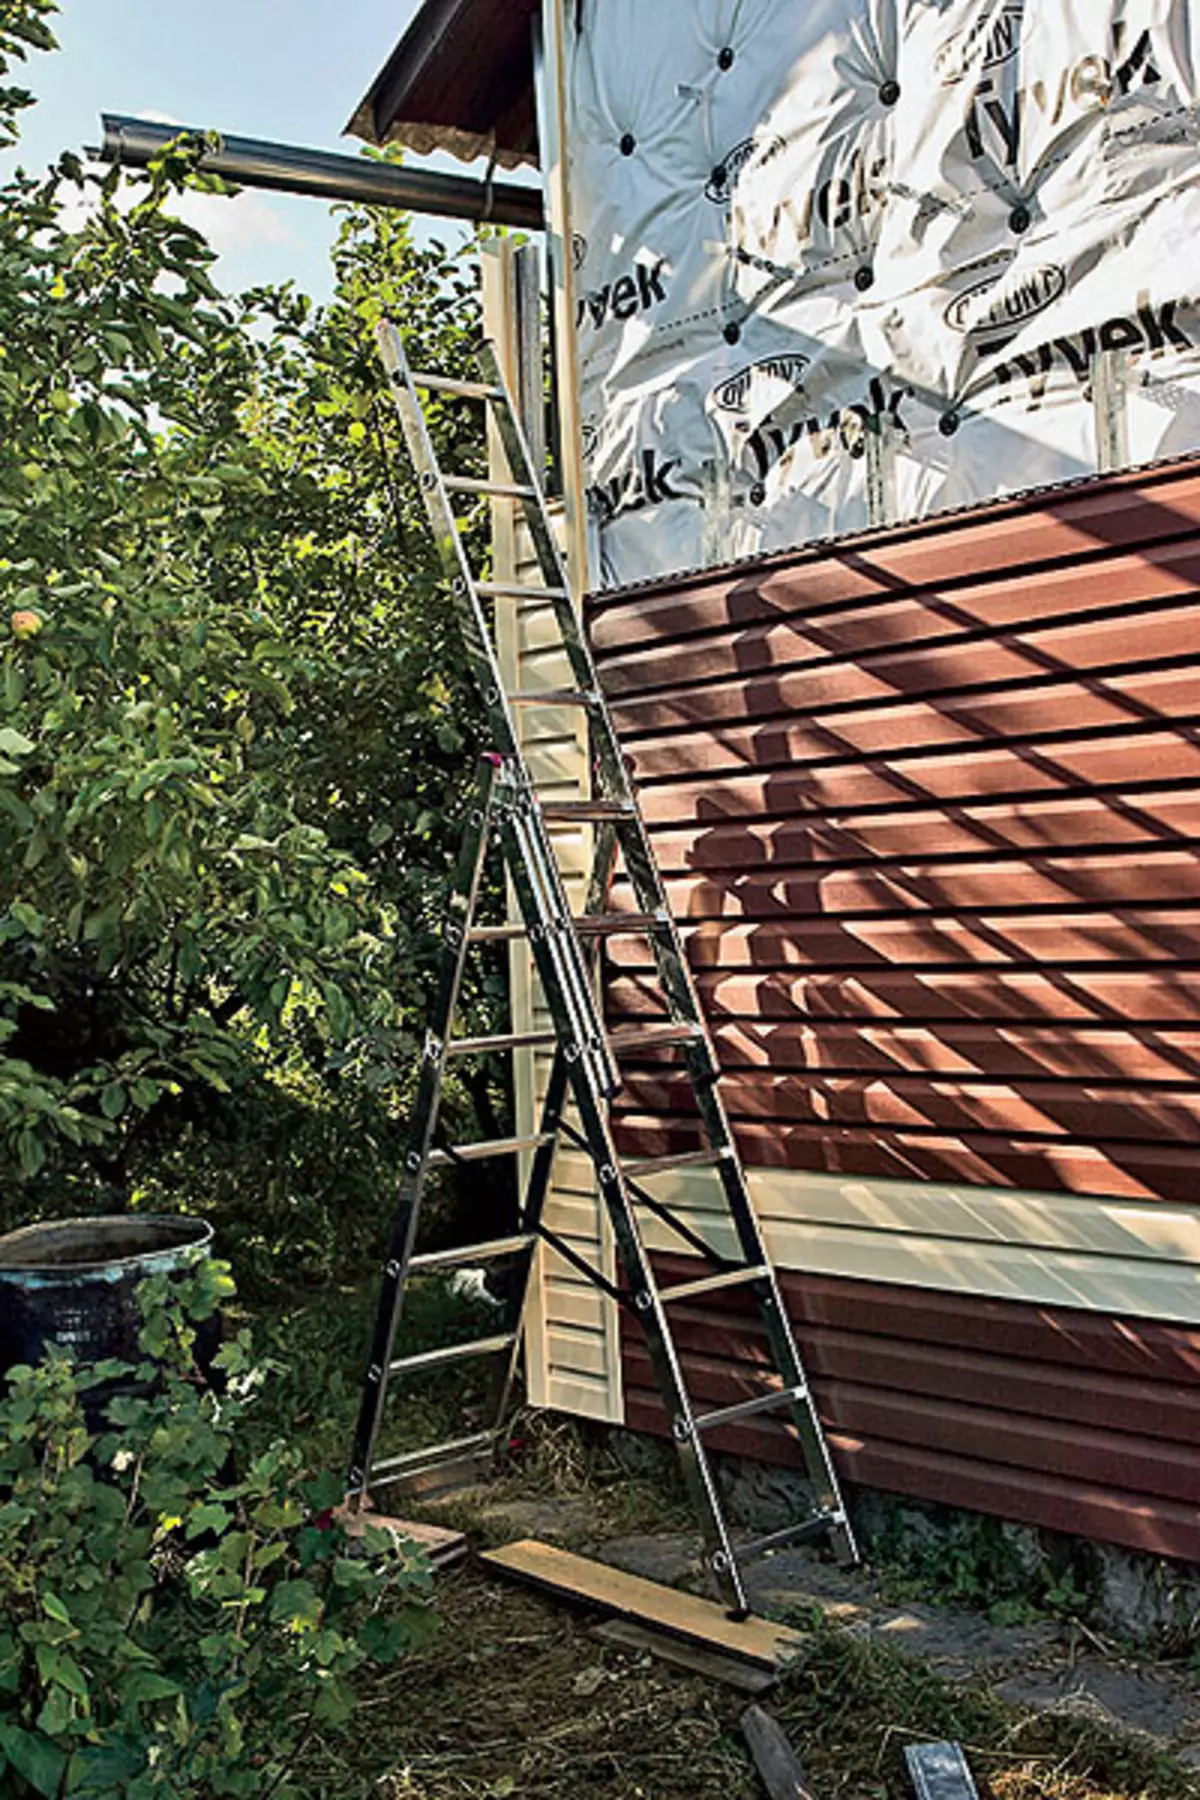
Works on insulation and installation of profiles and siding went quickly until the installers stood on Earth. Avot how to work on? After all, people are not a bird. Build forest for long
Obvious flaws in their own know-how the owners of the house saw two. First, a bent with an angle or letter "P" suspension is not a corner: the strength is not that. But after the installation of siding, when all the suspension profiles held will be interconnected, the design as a whole will become more durable. It is no longer impossible to displaced it. Secondly (and this is the main thing), on the developed technology, none of the construction firms work will not work with experiments? So, it is necessary to carry out the intended forces. Important family having a friendly sleeves.
| 
|
| 
|
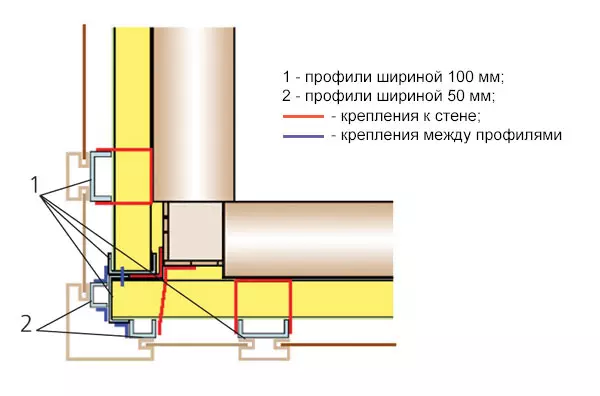
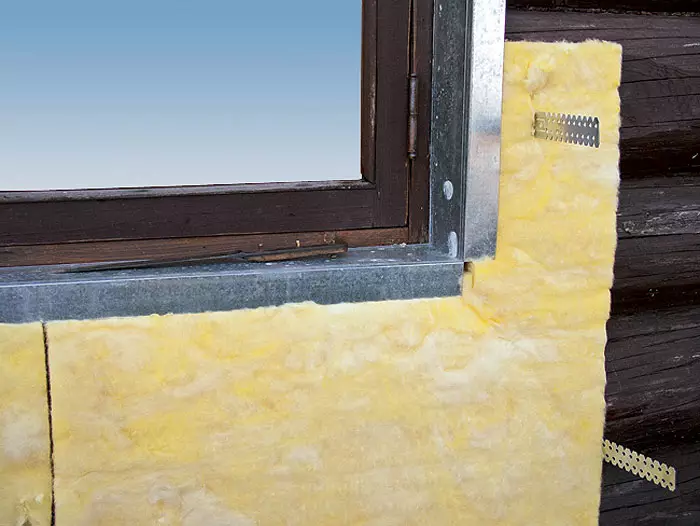
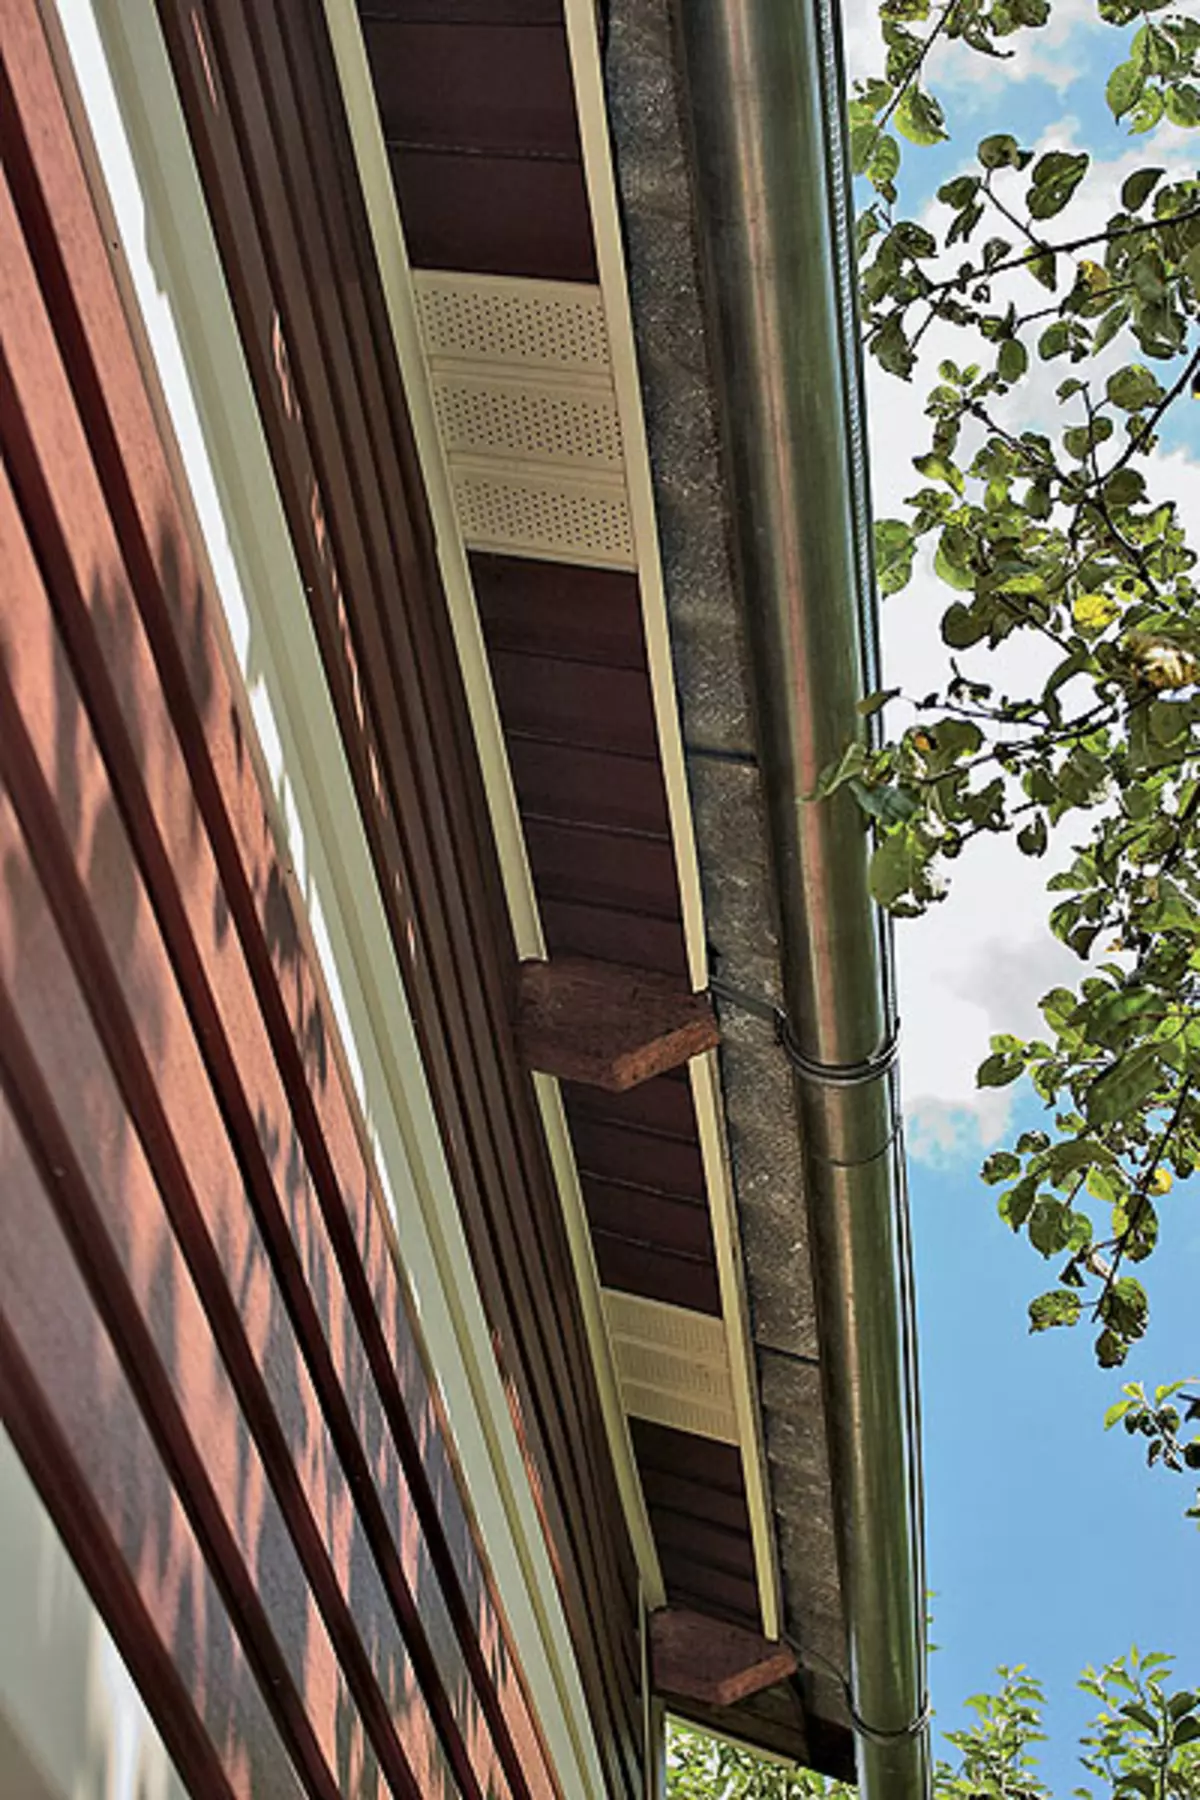
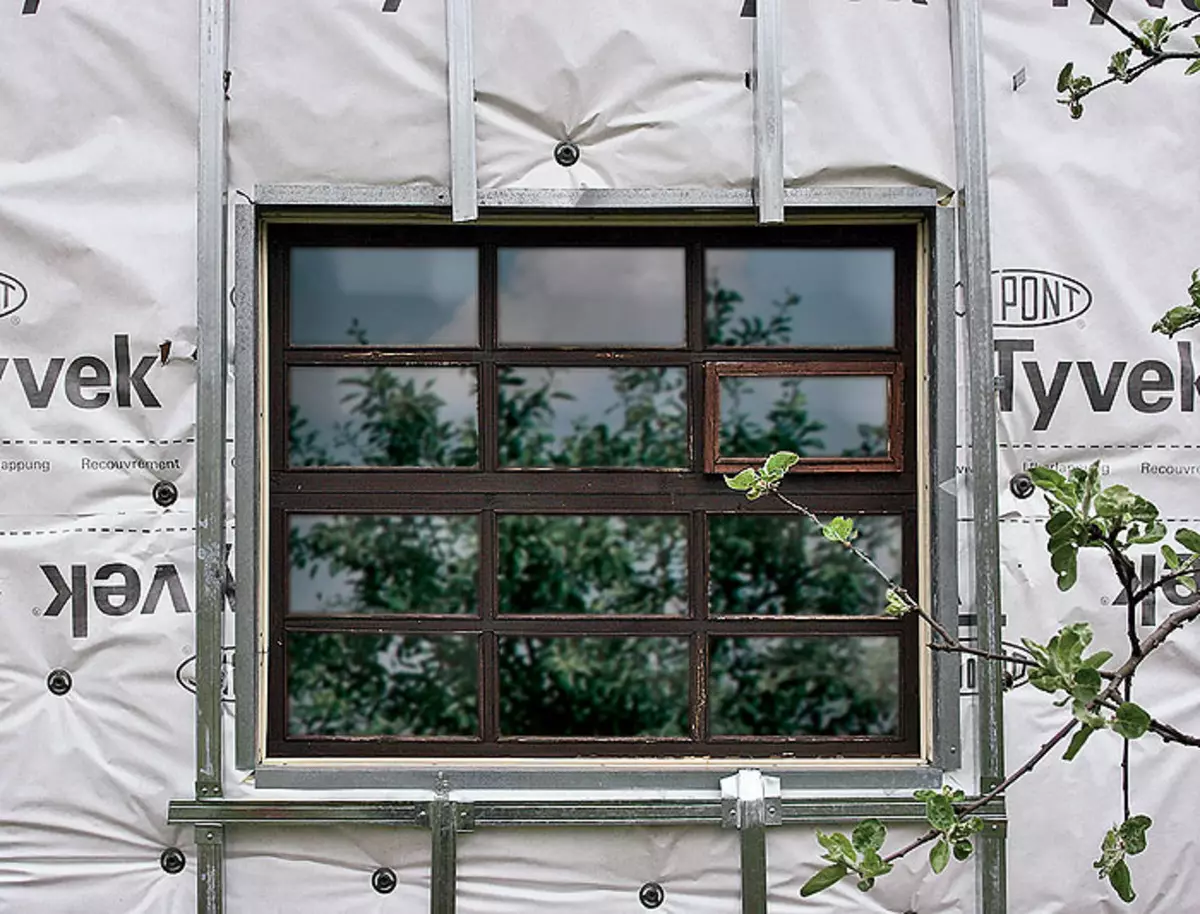
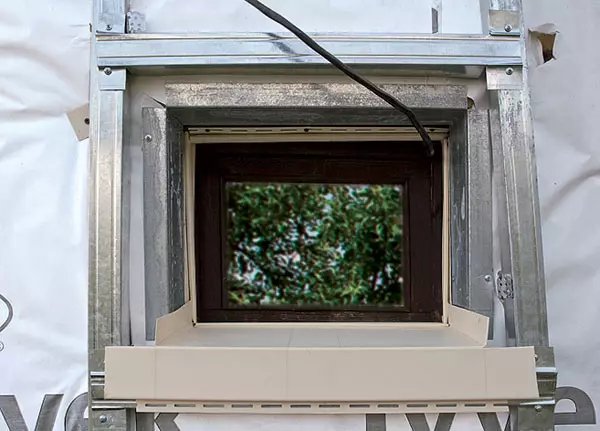
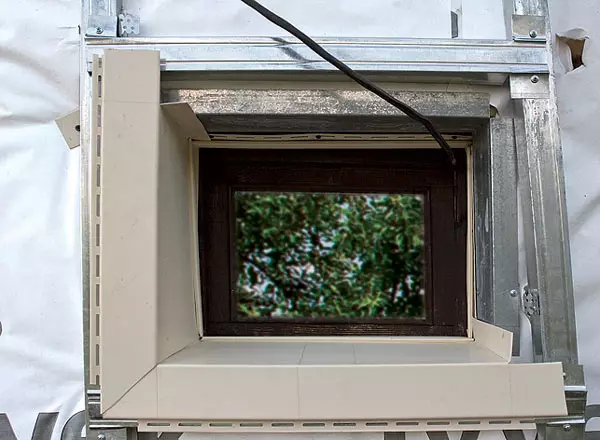
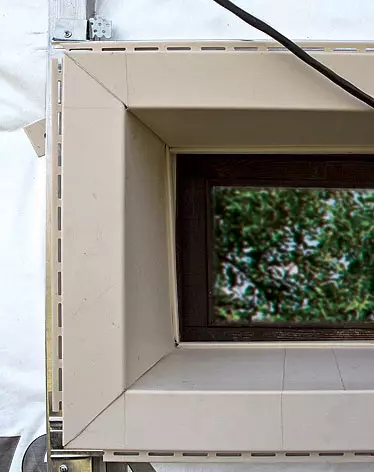
After mounting the wind insulation of the window, we framed 50mm width profiles (10), tied them between themselves and with a 100-millimeter profile (11). On the perimeter of the window, the final profile (12) was recorded - plastic platbands inserted with a long side in it, and the ends attached to the external frame (13).
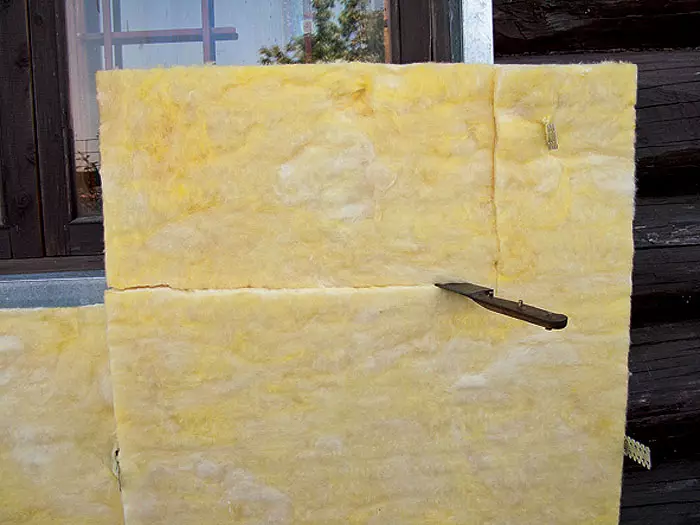
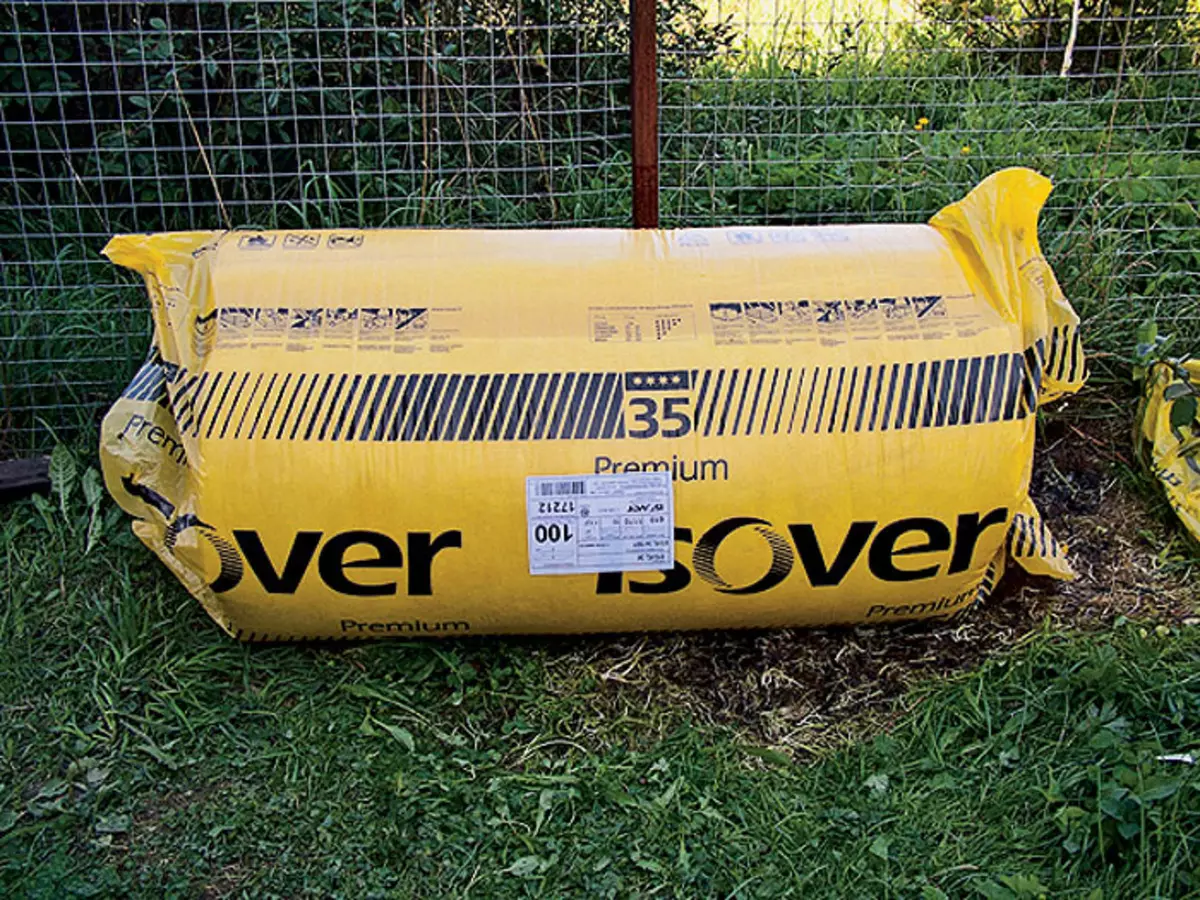
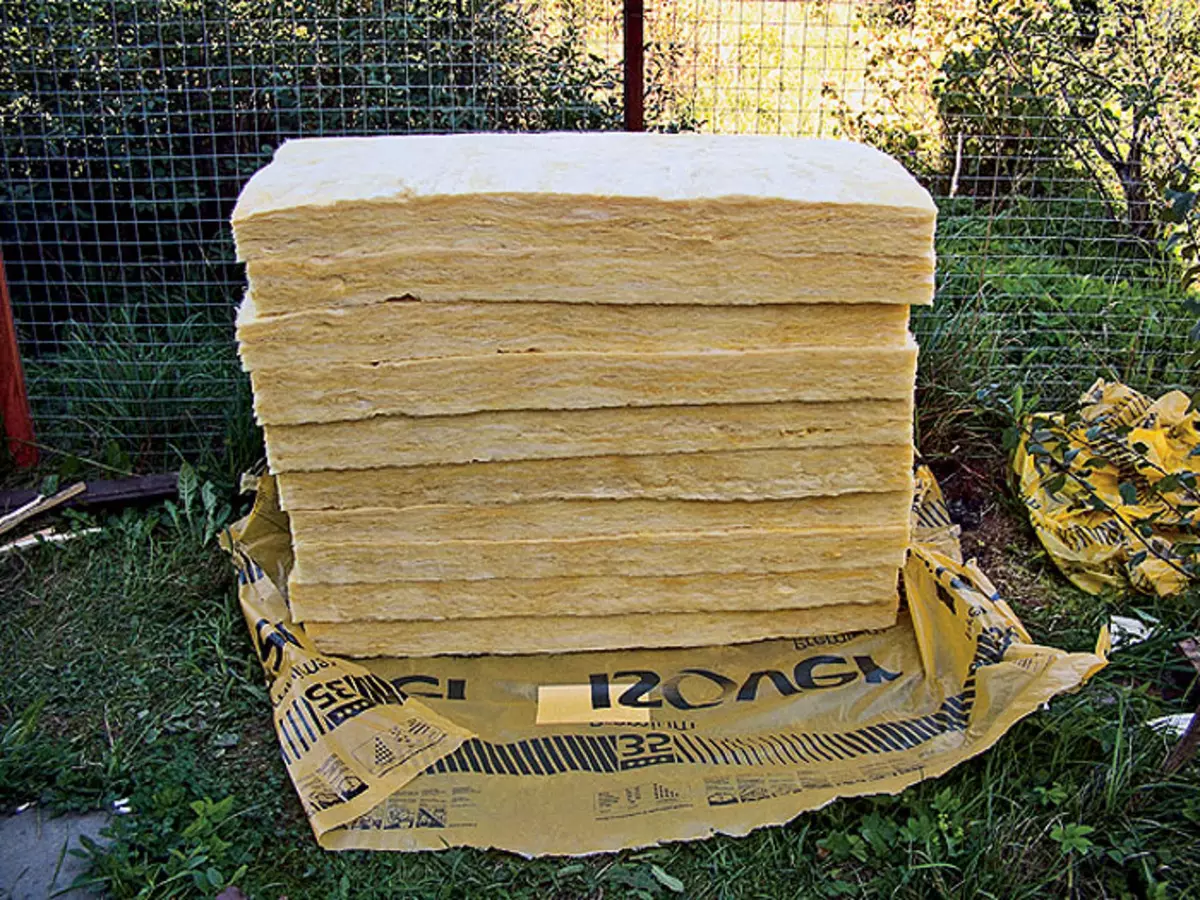
How to choose insulation
Over the fact that the insulation choose, we thought for a short time. From the use of foamed plates, they refused immediately, all of them are sufficiently solid, and they are not adjustable to the irregularities of the walls. Mineral complimentary insulation remains basalt, or fiberglass. Preference decided to give the latter. The choice influenced ... mice. The house is rustic, and therefore there is a possibility of rodent raids. If these gray pests settle in the house itself - more Polbie: to fight homemade mice there are tested ways. But if they are justified in the outer insulation? Not to smoke, except to dismantle the design.
Let it work with fiberglass less pleasant, or modern technologies are perfect, it is necessary to recognize: glass gamble is still ok. But after all, the mouse is living creatures. It is authorized, the glass gamble is also less comfortable than basalt.
Well, considerations, generally correct. This is what is said in the conclusion of the FGN "Research Institute of Disinfectology" according to the results of biological testing of the damage to rodents of thermal insulation materials from glass staple and basalt fibers conducted on gray rats, house mice and voles:
"Products made of fiberglass and basalt fiber consists of an inorganic material that does not attract rodents as food.
Conditions of free choice (in the presence of another nest material: burlap, paper IT.P.) Insulation of glass and basalt fiber attract rodents last.
Extrigative experimental conditions These materials were influenced by rodents only if they were a barrier on their way to food and water. "
A specific choice after consulting with specialists fell on insulating plates IsOver KL37 ("Saint-Goben Construction products", Russia) thickness 100mm. The thermal conductivity coefficient of the material is 0.035W / (MK), which allows after performing the insulation of the house of this design to obtain the above resistance to the heat transfer of external walls at the level of 3-3,2m2c / W (it almost fully complies with the regions for the Moscow region). Slabs of non-flags (belong to the NG group) and convenient for installation: width - 600mm, length- 1170mm. They purchased them with some margin of 20 packs collected in the overall packaging, which perfectly fit in the body of cargo "Gazelle".
Little secretage secretion
When designing windows, platbands with a wide shelf were used. The standard technology of their installation was solved somewhat to improve to increase the waterproof of the structure. On the lower part of the ends of the wide shelf on both sides, bent up (14). On lateral parts, such a bend was made at the upper part, and in the lower the narrow shelf were cut at an angle of 45 (15). The same angle was cut from both ends a narrow shelf of the upper part (16). After the installation of parts of their joints was treated with a sealant.
| 
| 
|
Be the house bright!
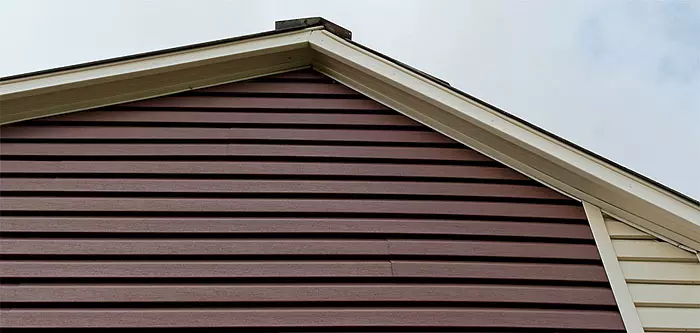
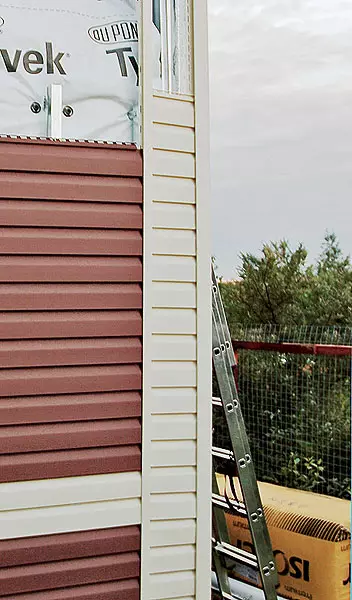
The first thing I had to do is to decide on colors of siding. The overwhelming majority of manufacturers offer products in pastel colors. Of course, the houses covered with such siding, of course, look carefully, but they turn out with some kind of neuropric, "translucent". That's what I wanted to avoid. There are among the manufacturers of the company from Canada and the United States, which produce siding juicy tones. True, it costs a brightly painted material by 8-10% more expensive, but what is divided-building once.
According to the catalog, the red-brown siding panels of Mitten (Canada) were chosen - it is present on the Russian market for quite a long time, and its products are tested for compliance with rigid world quality standards. Doborny elements (J-, F- and H-profiles, wind boards, external angles, platbands IT.) We decided to get a light beige tone, they will cost cheaper, and they will effectively contrast with rather dark main panels. As a result, the house will not seem solid block. By the way, it was the combination of bright and dark tones that was some kind of classic for most country houses: covered with oil paint blue or green walls and painted in white color corners and platbands.
Luza formed the decision of the hosts made adjustments to the specialists from the company "Jetta Stroy" (Russia), in which Siding acquired. "Why are you only enough of the good elements to make bright?" They asked. - I just need to return to the classics, so you need to perform a set of light siding corners. It's beautiful, and the rise will be quite insignificant, instead of a part of dark panels, buy blonde. Add only ten n-profiles to the kit. " I have pictured photos with such angles. Convinced! The owners agreed.
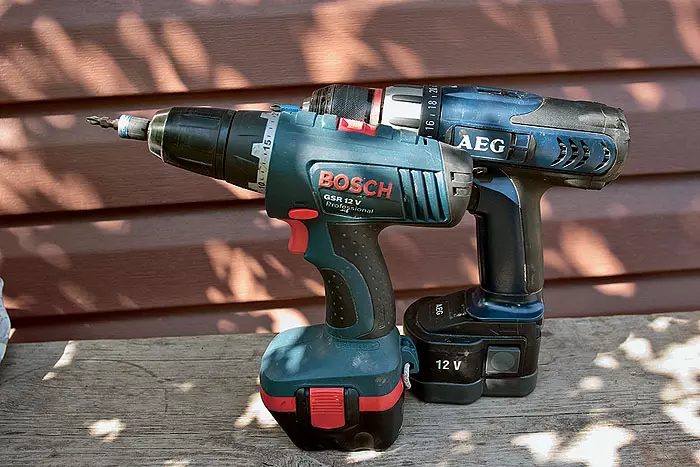
Serious work- good tool
From the idea of incarnation
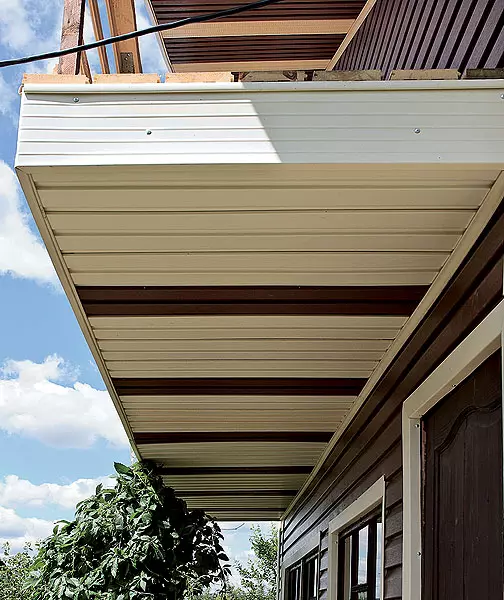
In general, the developed technology was implemented without any difficulty: put the wall around the perimeter with a galvanized profile; In a step corresponding to the width of the insulation slabs, vertical and horizontal rows were screwed to the wall of the P-shaped brackets from the suspensions; "Look" on them insulation slabs; Making slosses for the release of the mustache brackets, covered the plates with windproof film; mounted rack profiles; Installed siding. Of course, it was not without the improvements directly on the move. For example, the mustache of P-shaped brackets turned out to be short - had to be increased, and in the future it was mostly Mr.-shaped fasteners, alternating along the rates of right and left corners.Shading Omontal, perhaps we will not tell in detail. The manufacturer provided its products with detailed instructions for the installation - it was given not only all the necessary recommendations and work techniques, but also typical solutions of structural nodes in different versions. They act mainly on it, without thinking and not invented. Is that the smallest, for example, made small changes to the installation technology of platbands.
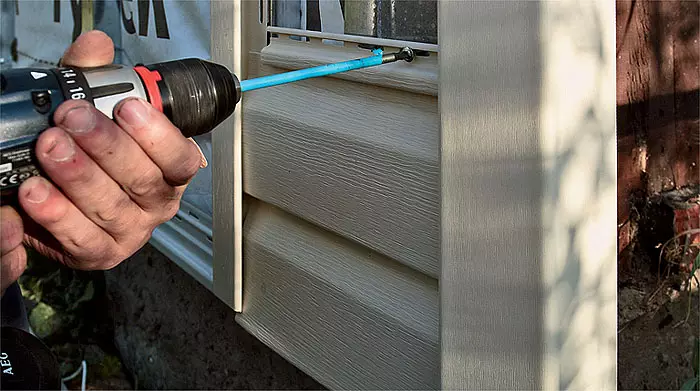
Siding was fucked not with nails, but galvanized self-drawers with a wide hat and a "drill" at the end. When the vertical elements are fixed, only the upper screws, the rest, with the gap between the cap and the 1-1,5mm panel, are twisted: now the panel can move with thermal expansion. Fixing horizontal elements, all the screws set with a gap.
In order for docking the panels along the length of the neck of the seams, they rushed into the eyes, they were placed in a checker. At the same time, the adhesives tried to position in the direction opposite to the one where you most often look at the wall. For example, from the porch to the tile facade: in this case, the joints can be seen only if you go for the house. But you go there not often, and from the porch the owners admire the same wall for many times on the day.
How did you decide with the room for the grandson? Disassembled a one-piece roof of the veranda and was littered over it a skeleton attic, firmly touching her design with the main house. The new room was insulated from the inside. The walls were truncated.
Let's summarize
Well, the idea is really original, although, as it turned out (perhaps, we will have to upset the owners somewhat), not quite new. Something similar is used when warming up with a brick wall with metal siding. True, it takes rather powerful corners of galvanized steel for attaching profiles. For the insulation of the wooden structure, such technology is used, possibly for the first time. Aidea to take up instead of expensive corners of the suspension, is definitely attractive.
And it should be recognized that there are many important issues related to the installation of siding outside our narration. For example, what and how can you cut it? We will definitely discuss this important and interesting topic in the nearest room.
Explanation of the first floor 1.Rerand ............... 11m2 2. Eye ............. 4m2 3. Guest ........... 11,6m2 4.Quchny .................. 7,5m2 5. Plive .............. 7,5m2 | 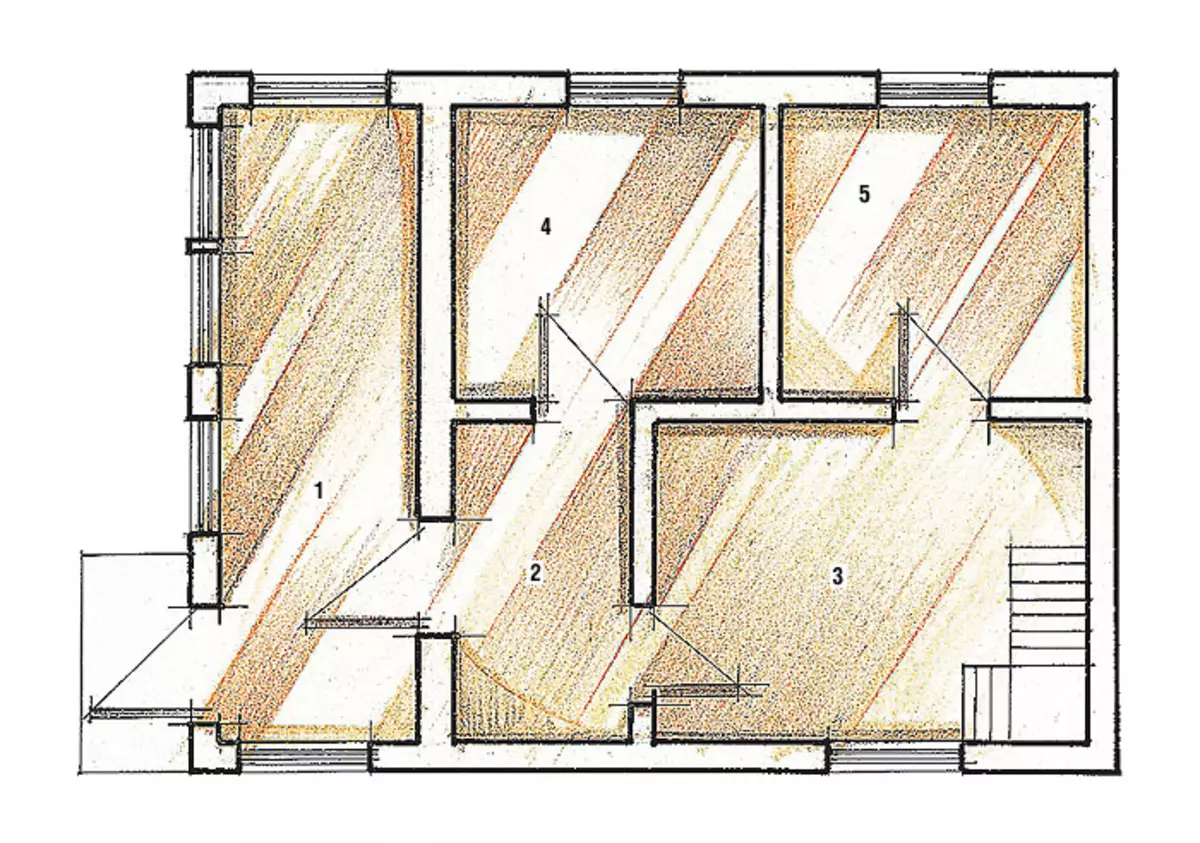
|
Explanation of the second floor 1.Nontracted balcony ..... 4,3m2 2. Split .............. 7.7 m2 3.Baby ................ 15m2. 4. Balcon .................. 6m2 5.Teter light | 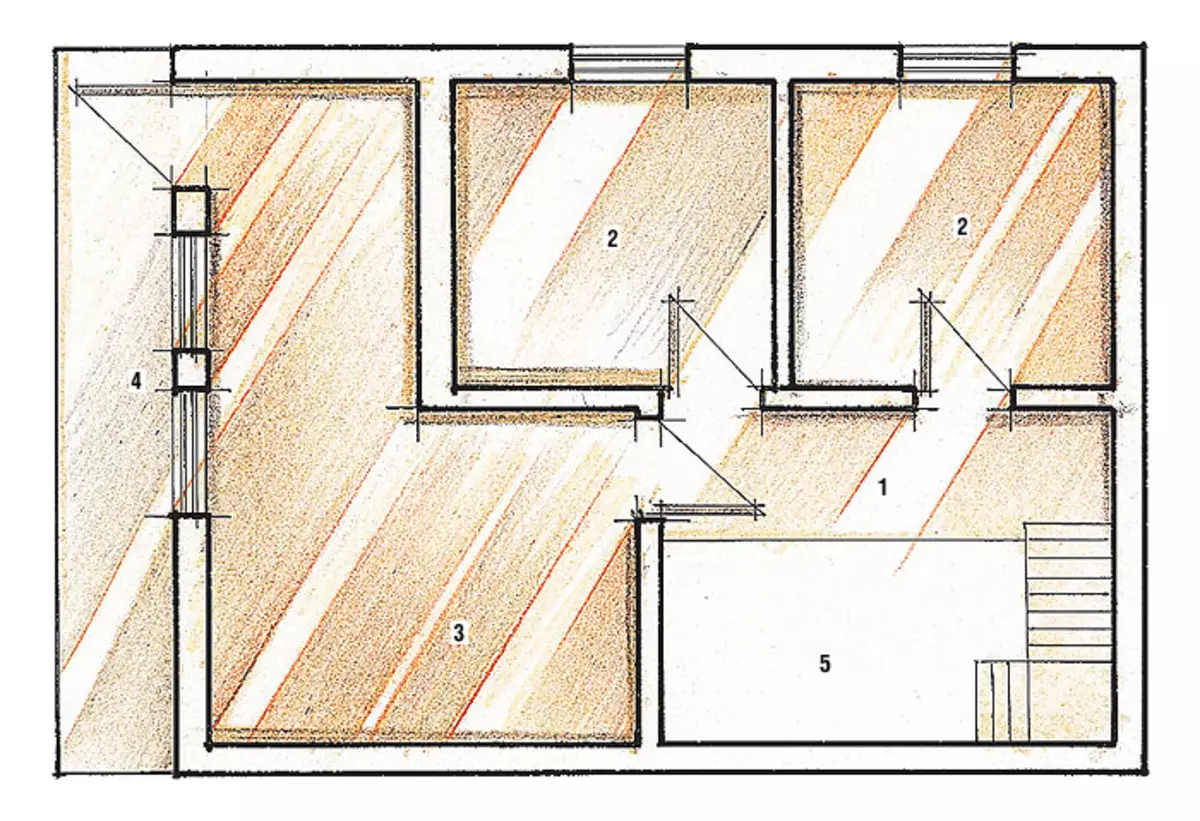
|
Calculation of the cost * Garden insulation area of 76m2, similar to the presented
| Name of works | Number of | price, rub. | Cost, rub. |
|---|---|---|---|
| Mansard Cork, Balcony | set | - | 33 700. |
| Device hydro and vaporizolation of walls, attic, balcony | 130m2 | fifty | 6500. |
| Isolation of walls, attic, balcony insulation | 130m2 | 90. | 11 700. |
| Device of the subsection design | 90m2. | 240. | 21 600. |
| Wall facing by siding panels | 90m2. | 470. | 42 300. |
| Installation of plastic slopes | set | - | 5300. |
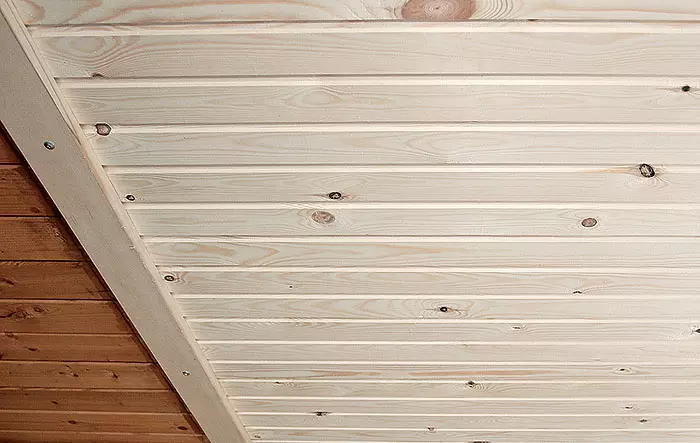
| Ceiling liner lining | 12m2. | 490. | 5880. |
| Device board floors | 20m2. | 340. | 6800. |
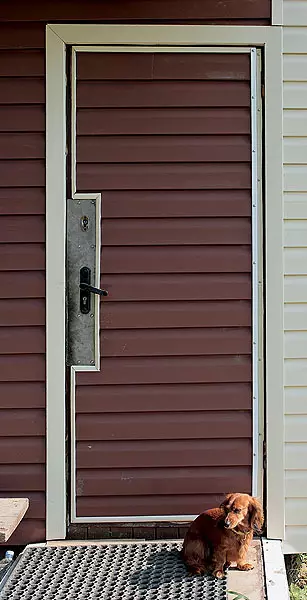
| Repair and facing the door siding | set | - | 1200. |
| Facing the base of decorative stone | 10m2 | 940. | 9400. |
| Total | 144 380. | ||
| Applied materials on the section | |||
| Siding panels and challenges | set | one | 77,000 |
| Profile galvanized 5040mm | 144 Pog. M. | 37. | 5328. |
| Profile galvanized 10040mm | 24 pog. M. | 43. | 1032. |
| Suspension direct | 300 pcs. | five | 1500. |
| Bar 150100mm | 5 pieces. | - | 3700. |
| Edged board 15050mm | 12 pcs. | - | 4000. |
| Lining | 50m2. | 280. | 14,000 |
| Bounded floor board | 20m2. | 1100. | 22 000 |
| Metal corner | 60 pcs. | - | 1800. |
| Self-tapping screw | 7kg | - | 1120. |
| Slate | 18m2 | 120. | 2160. |
| Wind insulation membrane | 3 rolls | 1500. | 4500. |
| Insulation isover kl 37 | 20 pack. | 1084. | 21 680. |
| Decorative rock | 10m2 | - | 6300. |
| Tile glue | 2 bags | 190. | 380. |
| Total | 166 500. | ||
| * - the calculation is made without taking into account the overhead, transport and other expenses, as well as the profit of the company |
The editors thanks the company "Saint-Goben Construction Products" and "Jetta Stroy" for help in preparing the material.