
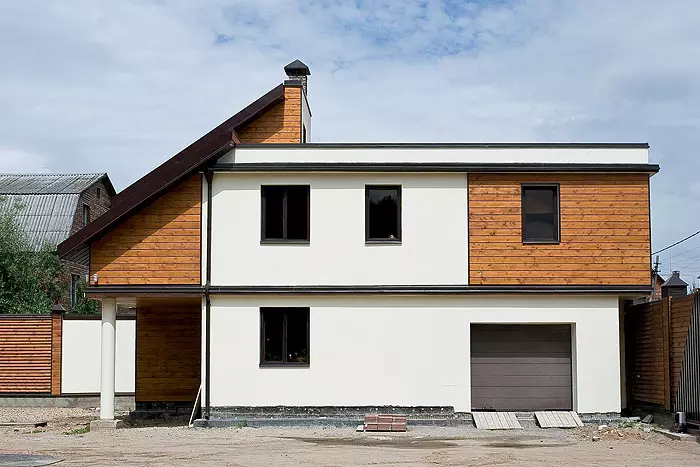
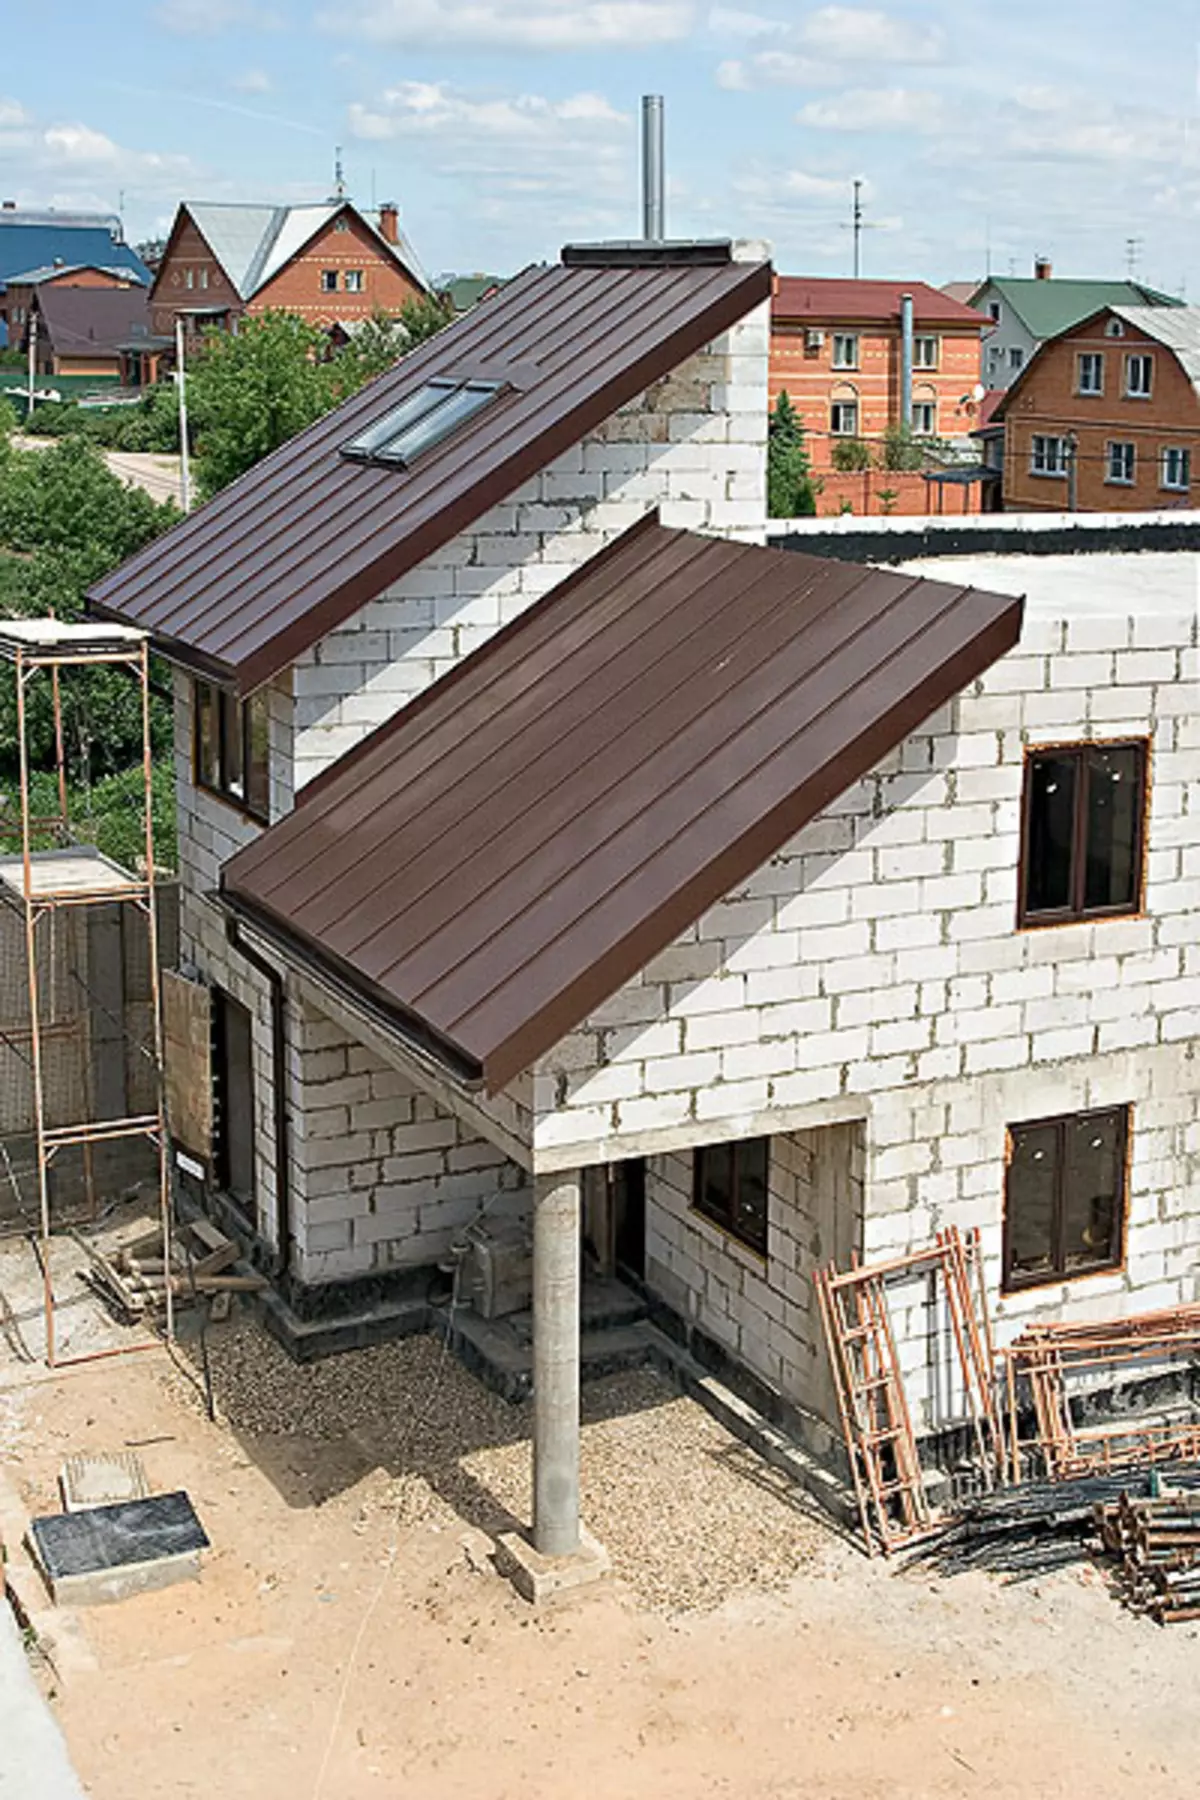
Erecting a two-story country house with an area of 125.4 m2 for "urban" technology for the construction of multi-storey frame-monolithic buildings

Blocks made of cellular concrete are widely used in the construction of external and internal walls of multi-storey frame-monolithic buildings. However, for private low-rise construction, such technology has so far been considered a unrevitable. We will try to disprove this opinion on the example of the construction of a small multipurpose home.
| 
| 
| 
|
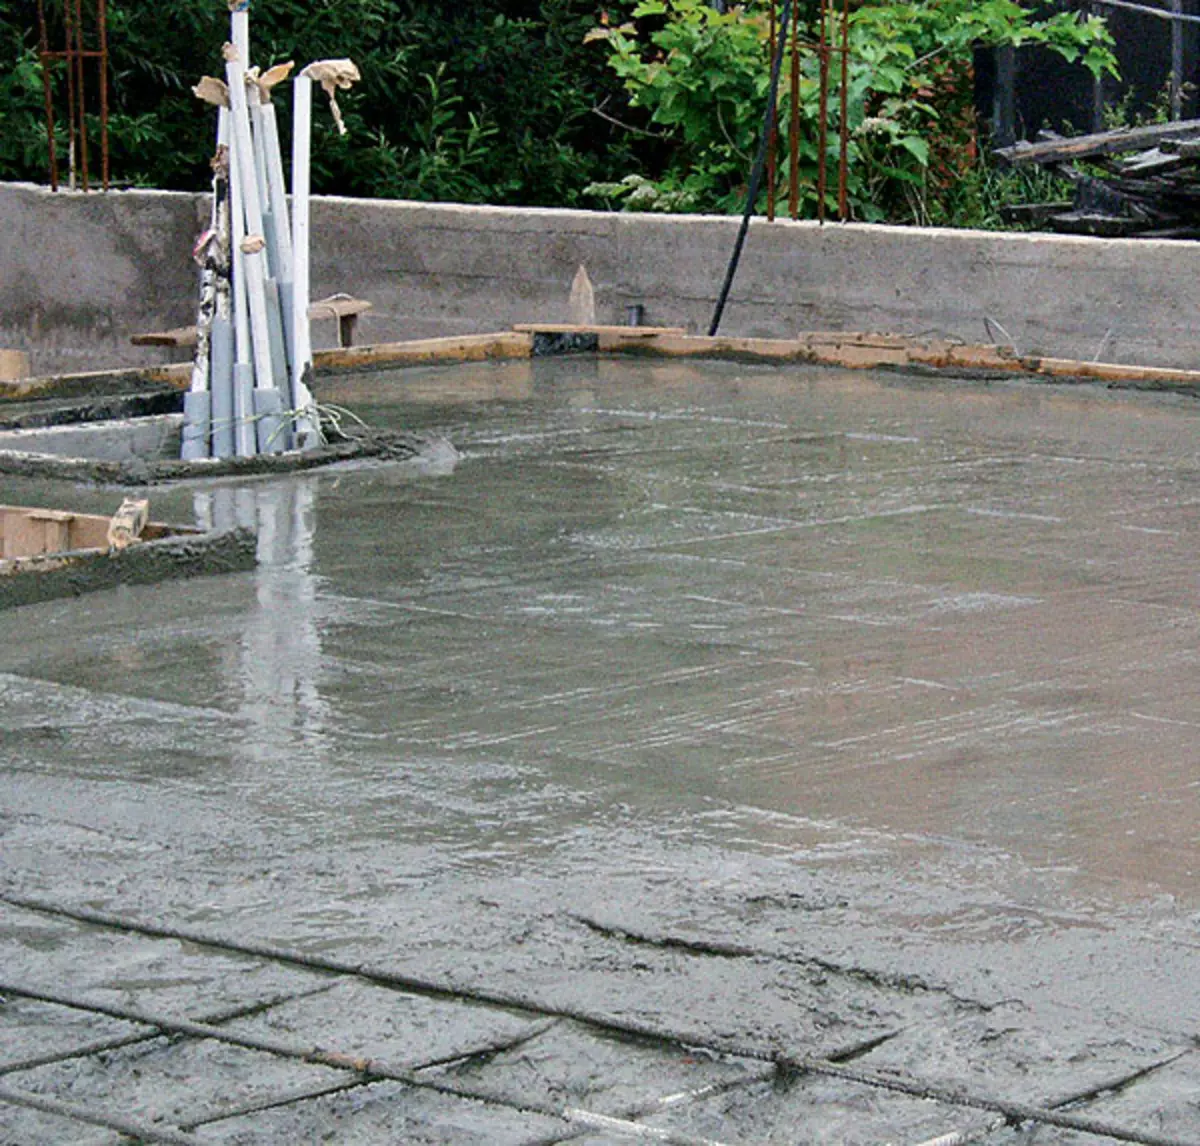
1. The base plate was cast from concrete M300, which was delivered by mixers
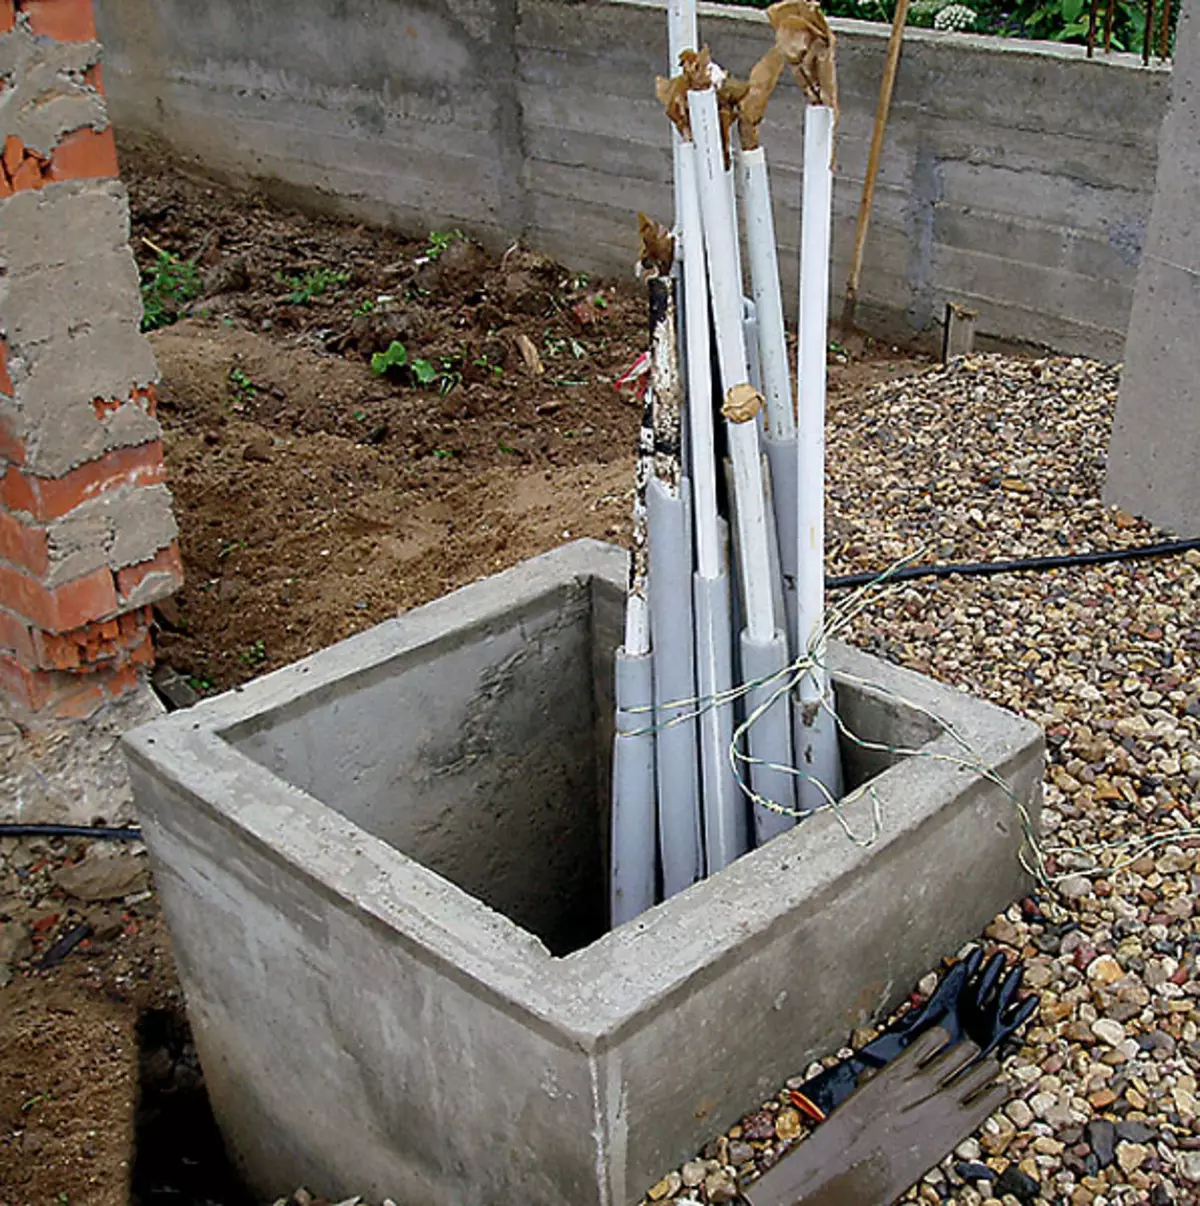
2. Conclusions extended from the main house of communications were placed in the "box"
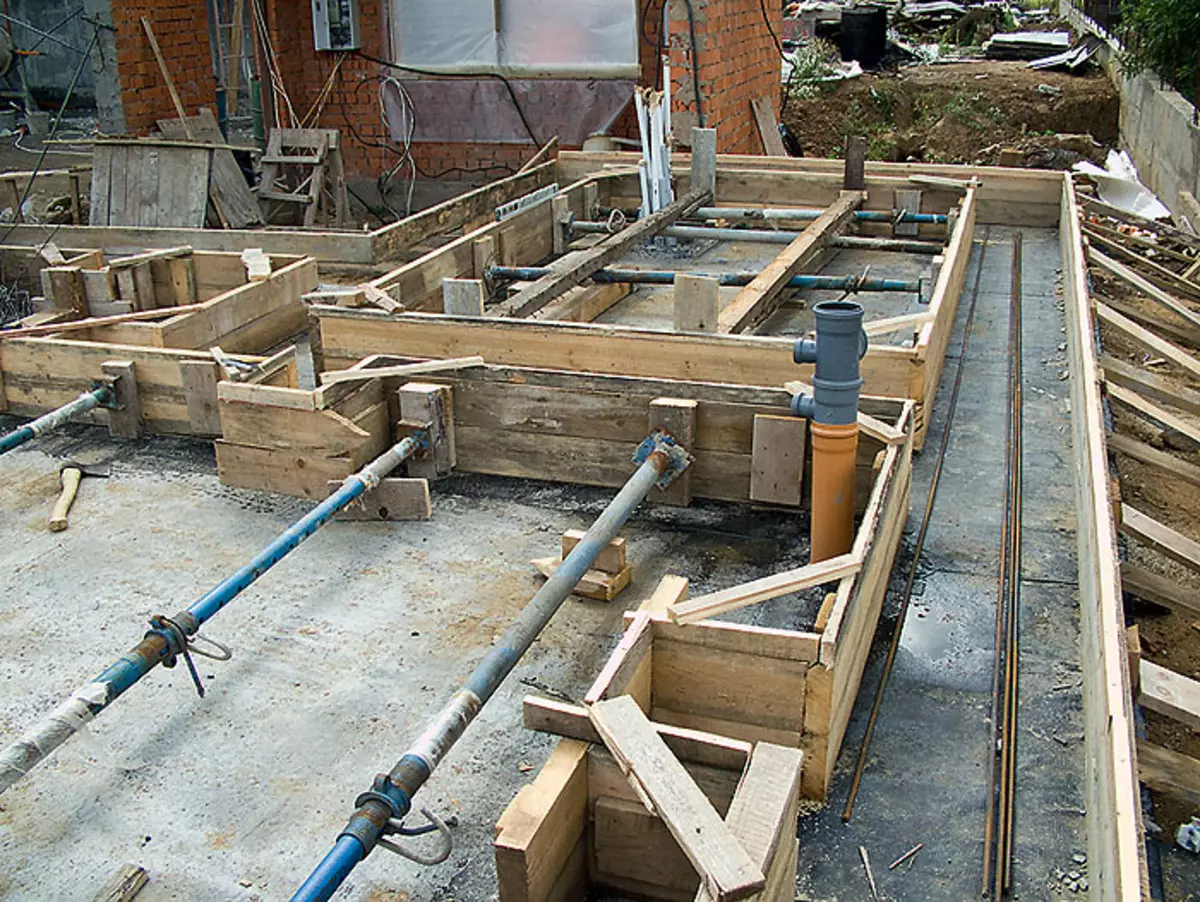
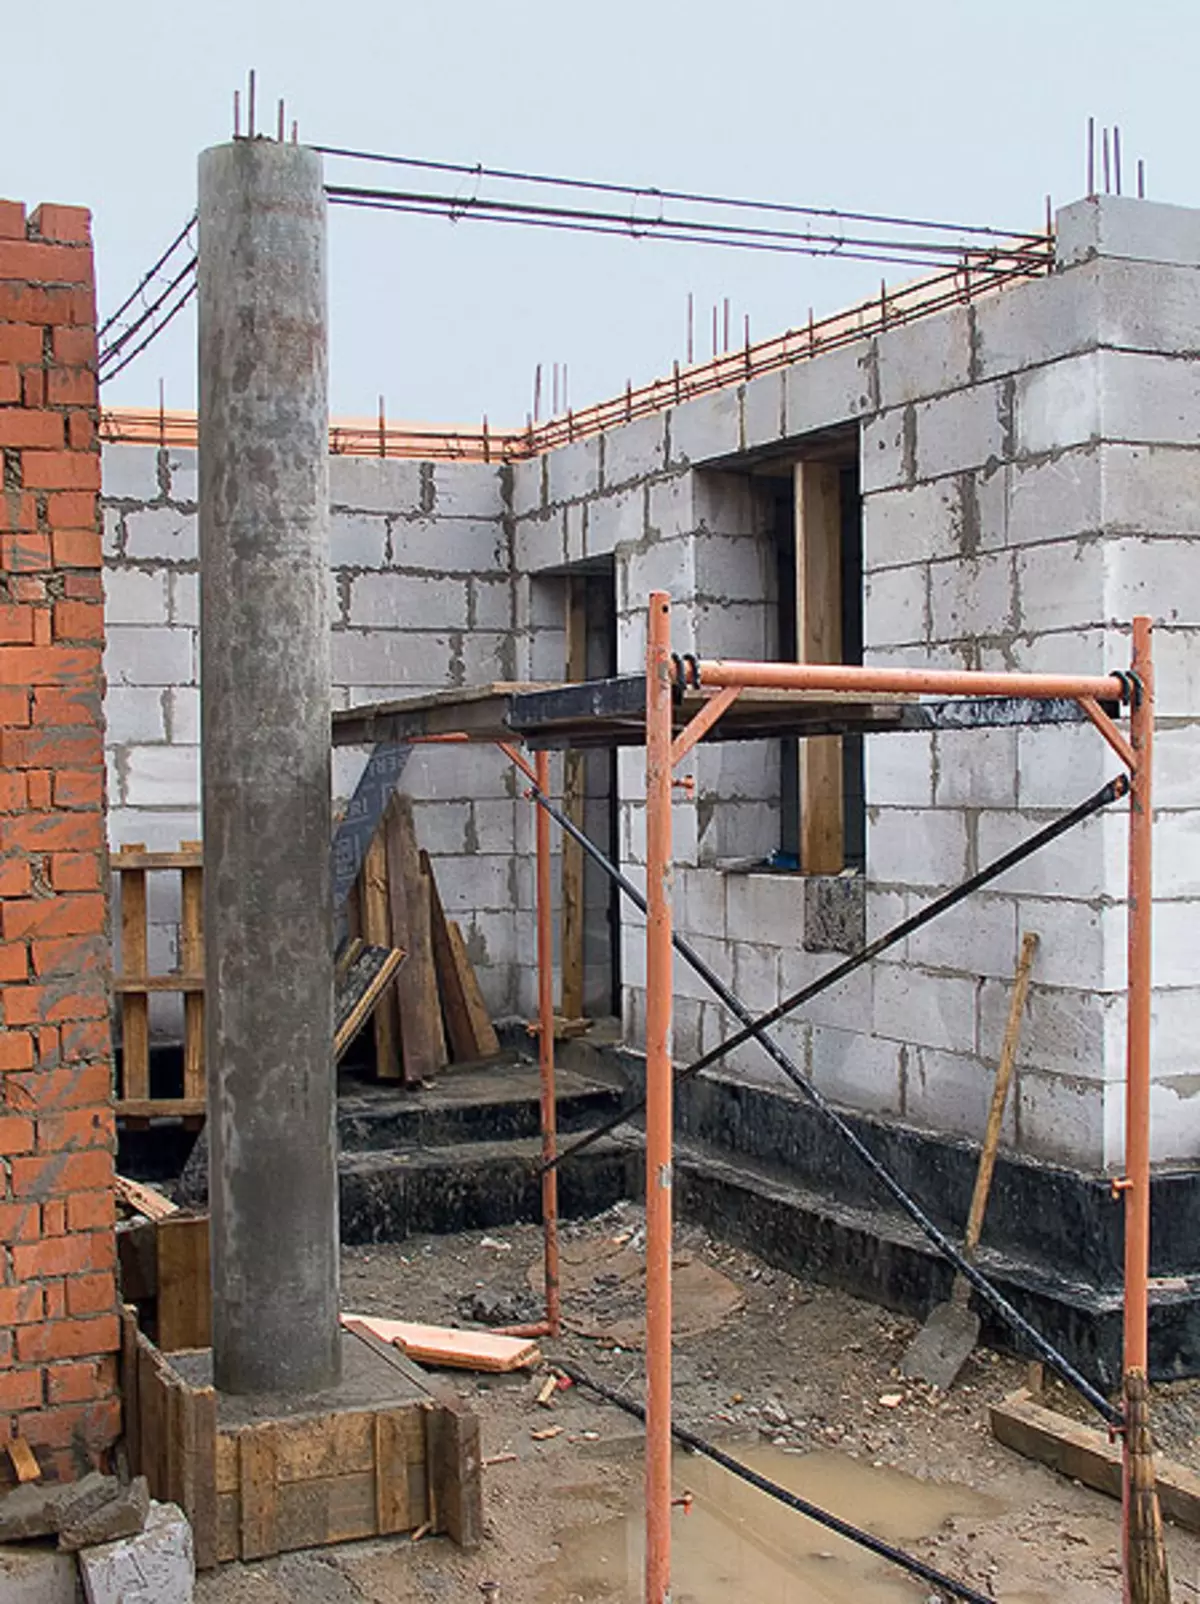
3. In preparation for casting the tapes of the base as the struts, metallic adjustable racks were used as the struts wall struts. This simple technique saved about 40 thousand rubles. (5m3 Wooden Bruce)
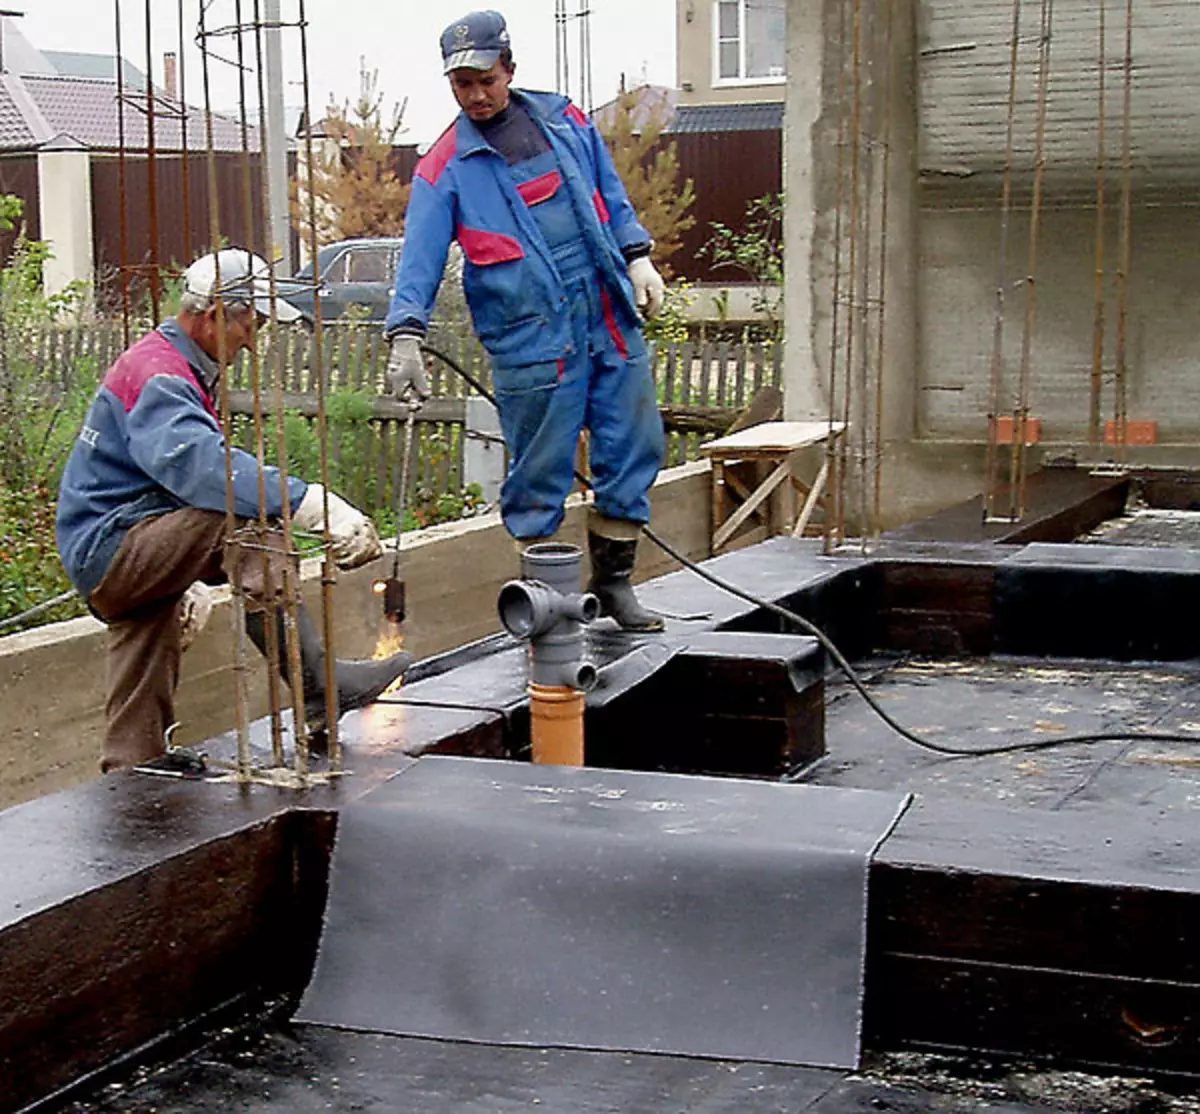
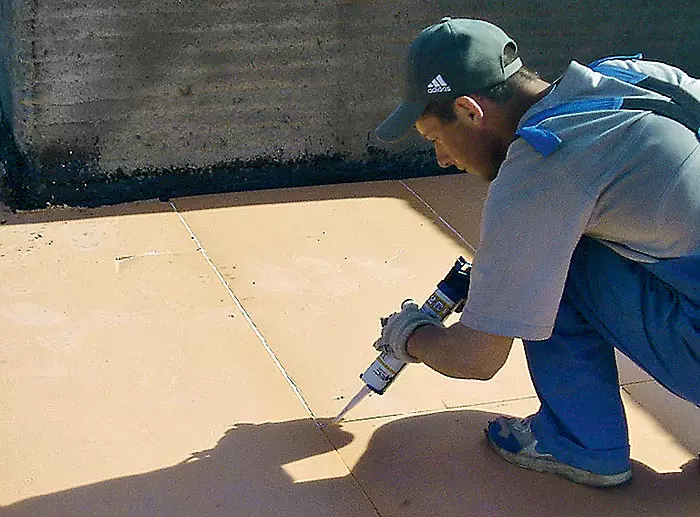
4. The tapes of the base and the entire surface of the foundation plate were covered with a bitumen primer, and then the sheets of the weld rolled waterproofing were laid. Pricewer Dusts concrete and improves its adhesion with waterproofing
In the idea of the customer, this house was supposed to solve a number of problems. First, fully isolate the noise made by the boiler and serving it equipment (clicks, sounds of working pumps and current water IT.D.). Secondly, create a "housing" and a small repair zone for a beloved car. Yves-third, delimit the living space of the owners and for a long time came to guests to quickly do not bother each other. Yes, and the fire safety of the main house, the removal of the boiler room in a separate building will clearly benefit.
| 
| 
| 
|
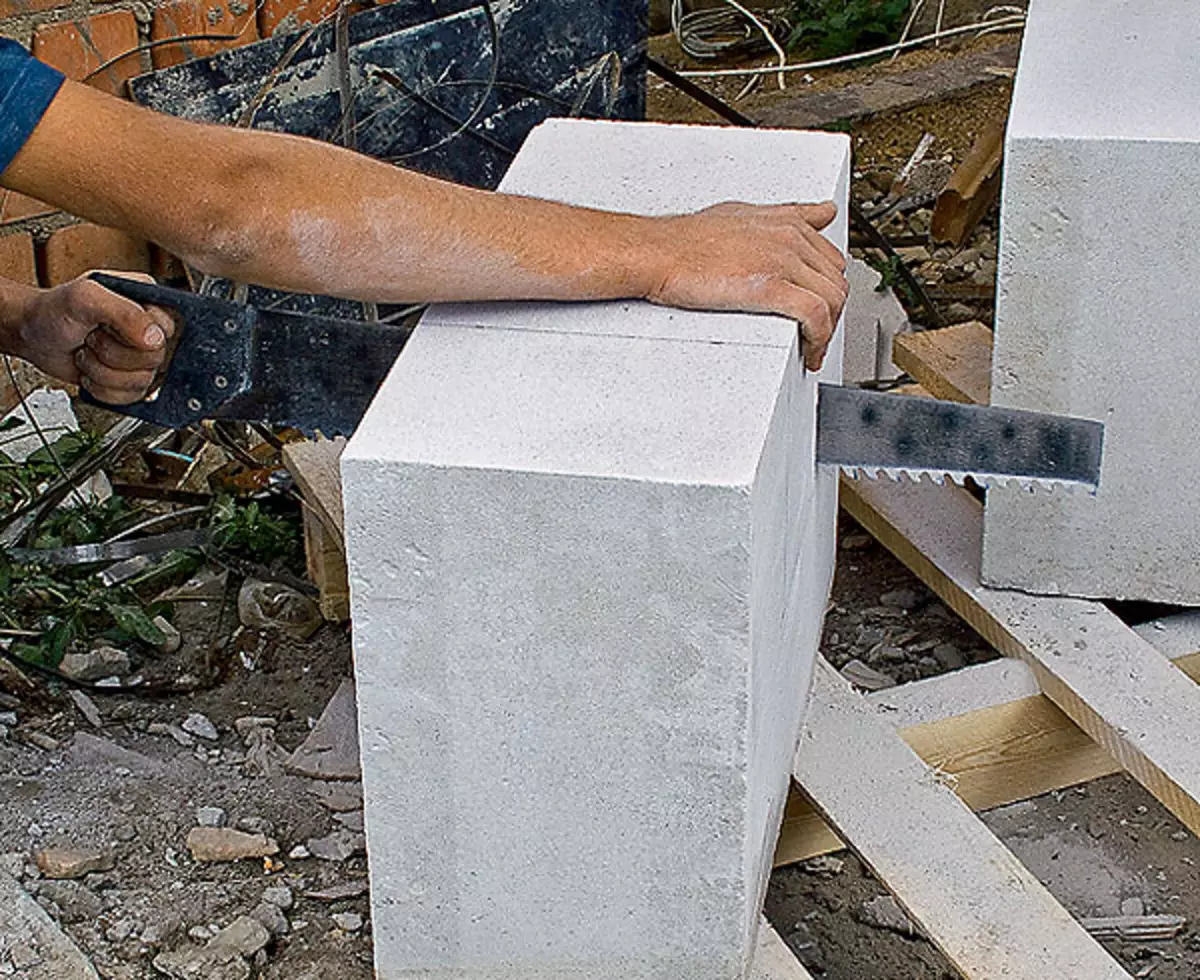
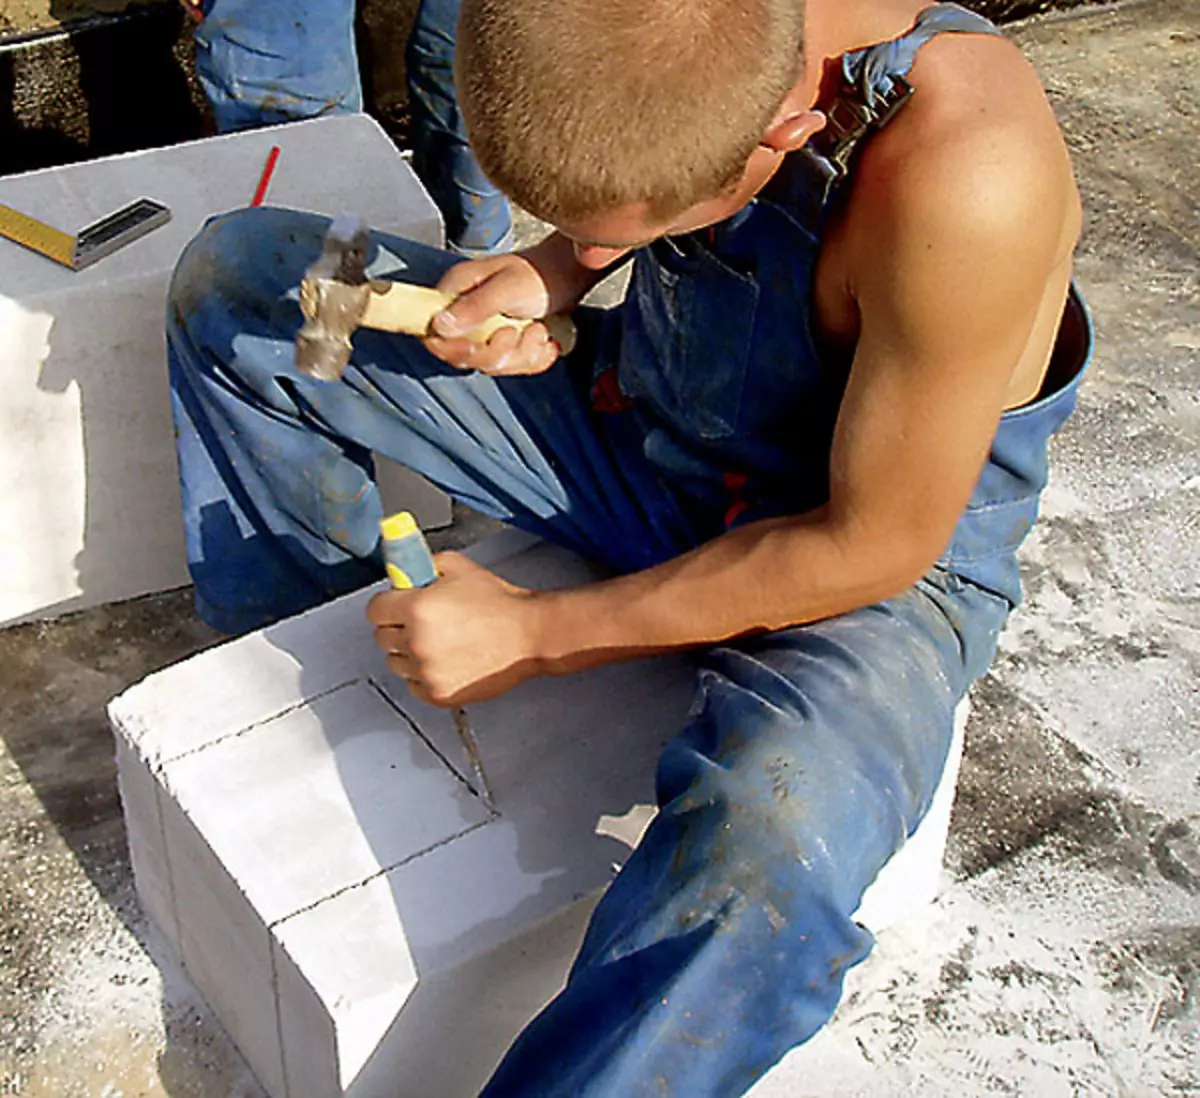
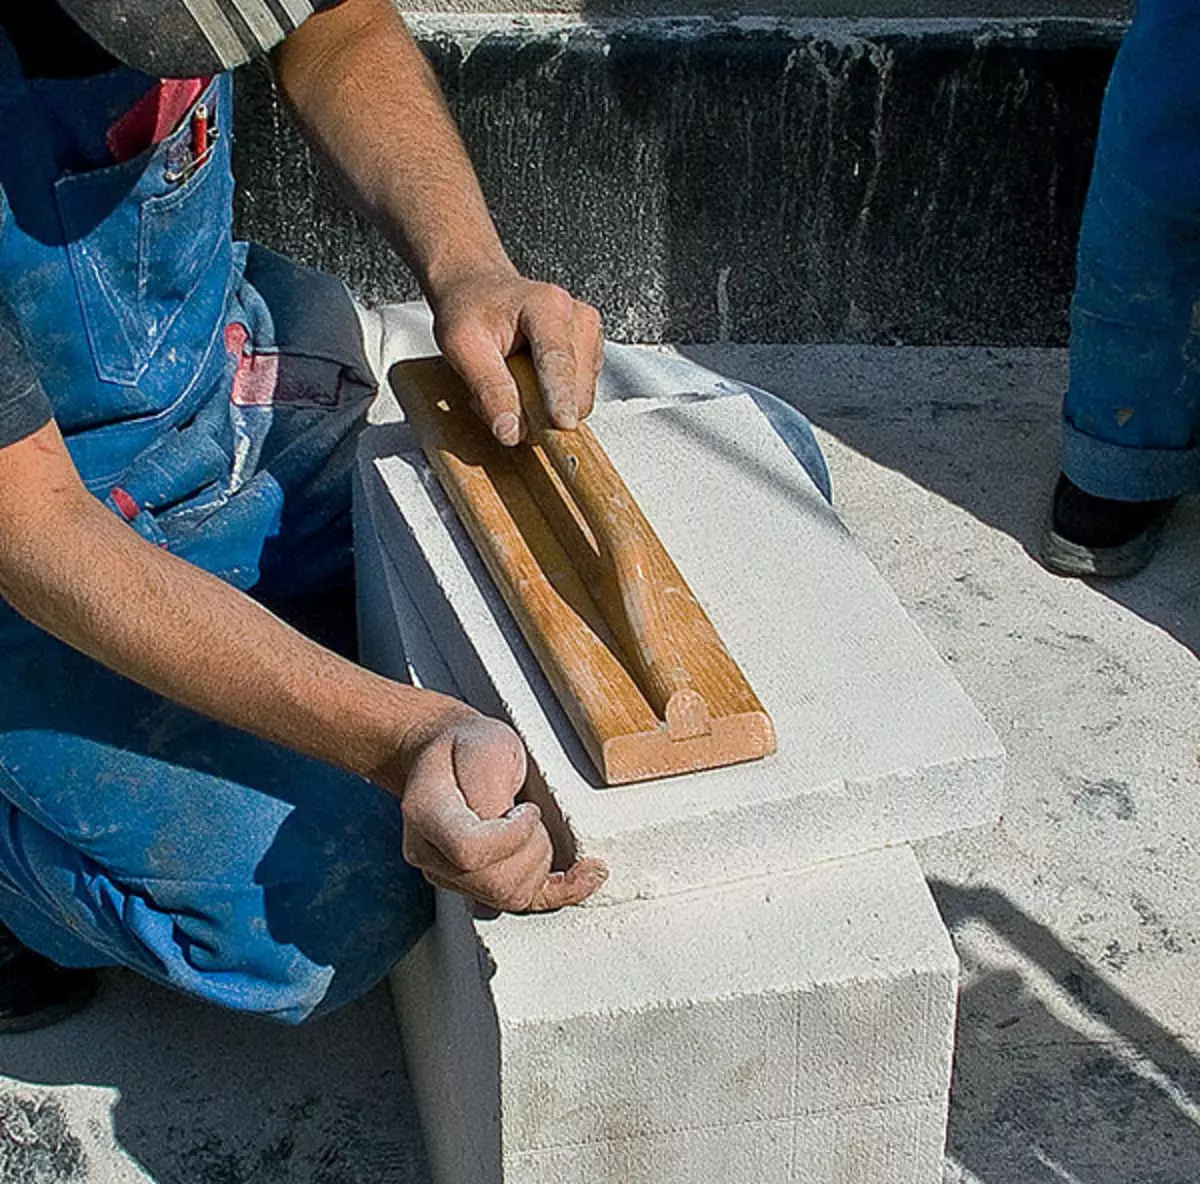
5-8. Products from all types of cellular concrete can be handled almost the same as a tree. For promotional parts, the grooves of any size are used both manual and electropolis (photo 5) or chisel (photo 6). Holes for outlets and switches and stages are made under the wiring manually either using a tubular cutter and even the first drill. The irregularities of the blanks and finished walls are smoothed by a special grater (photo 7, 8)
Foundation of the house
The design of this most important element is determined by the properties of a cellular concrete, in particular its relatively low crack resistance (that is, the ability to resist in a resistance). What does this mean to us with you? If a wooden wall is able to withstand some of the basement, then cracks may appear in the wall of cellular concrete. That is why the foundation for the building, built from this material, should be built from reinforced concrete and be very strong, and in some cases (depending on the design of the foundation and the degree of ground bunchiness) - just powerful. Naturally, such an approach entails considerable expenses, and to build an expensive foundation for a small house becomes just unprofitable. Abse of a durable foundation to contact with cellular concrete there is no reason at all. So what about?
The designers found a simple and relatively economical solution: to pour the monolithic reinforced concrete plate on the surface of the earth, and then tape tapes of the base. The construction began with the fact that from the main house to the guest punctured the trench with a depth of 1.8m, the bottom was leveled with sand with sand, and then the heat-insulated pipes made of stitched polypropylene for hot and cold water and an electrocabyl should be laid into it. Of course, standard solutions exist for laying such trails. For example, from Wirsbo (Sweden), four insulated pipes are enclosed in a common shell. But, firstly, such a pipe costs quite expensive (from 2700rub. For 1Pog.m), and secondly, it was necessary to lay, not four pipes, and more. Imbroved had to do its "assembly."
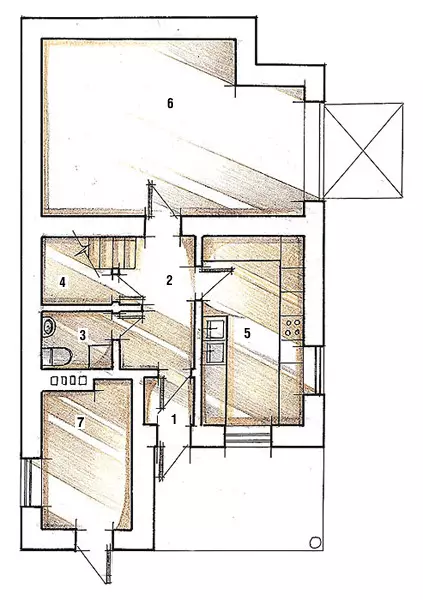
1. Hallway 1,6m2
2. Hall 6,3m2
3. Bathroom 2,6m2
4. Storeroom 3m2
5. Kitchen-dining room 13.1m2
6. Garage 39.7M2
7. Boiler room 8.2m2
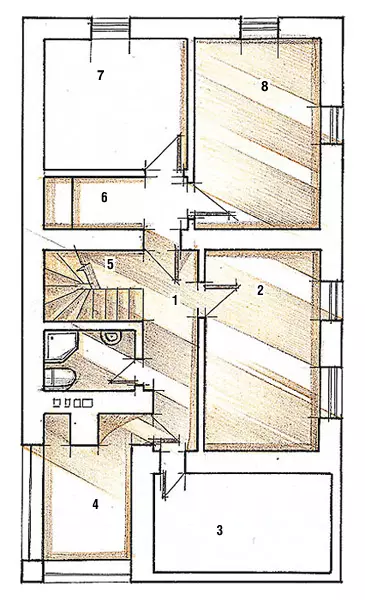
1. Hall 11,4m2
2. Bedroom 13,1m2
3. Hall 10m2
4. Living room 8.2m2
5. Bathroom 3,3m2
6. Storeroom 4,2m2
7. Bedroom 10,5m2
8. Bedroom 13,4m2
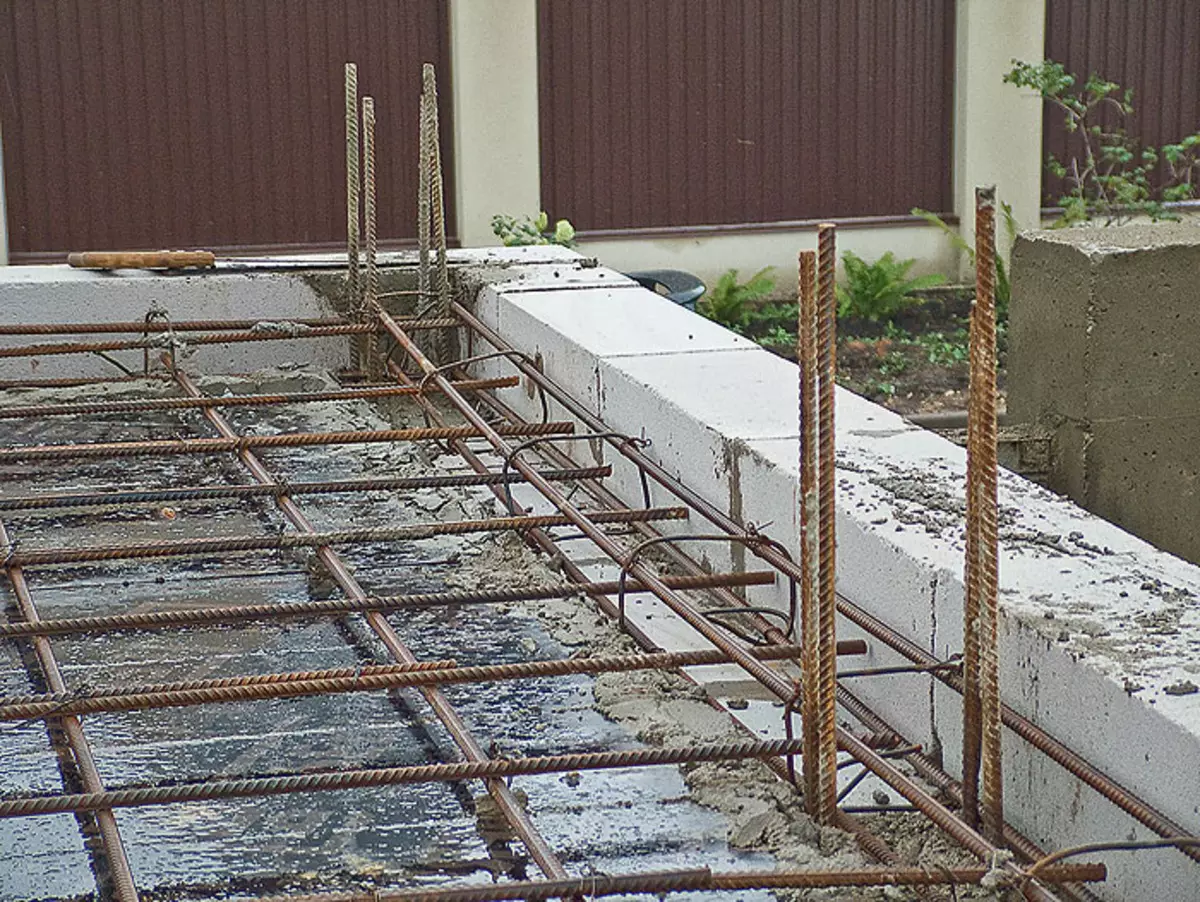
At the site, under the house, a fertile layer of soil was removed from the surface and the sand and gravel pillows were arranged (both of 200mm), which thoroughly tumbled. Next, around the perimeter of the future slab, a milking formwork was installed and a solid waterproofing membrane was created; The edges of it started on the walls of the formwork. Then the reinforcement two-layer frame was built (while the lower layer of fittings with the help of polymer "struts" was lifted over waterproofing by 50mm) and the concrete mixture was filled with a plate with a thickness of 220mm. After solidification, this concrete corresponded to the M250 brand.
| 
| 
|
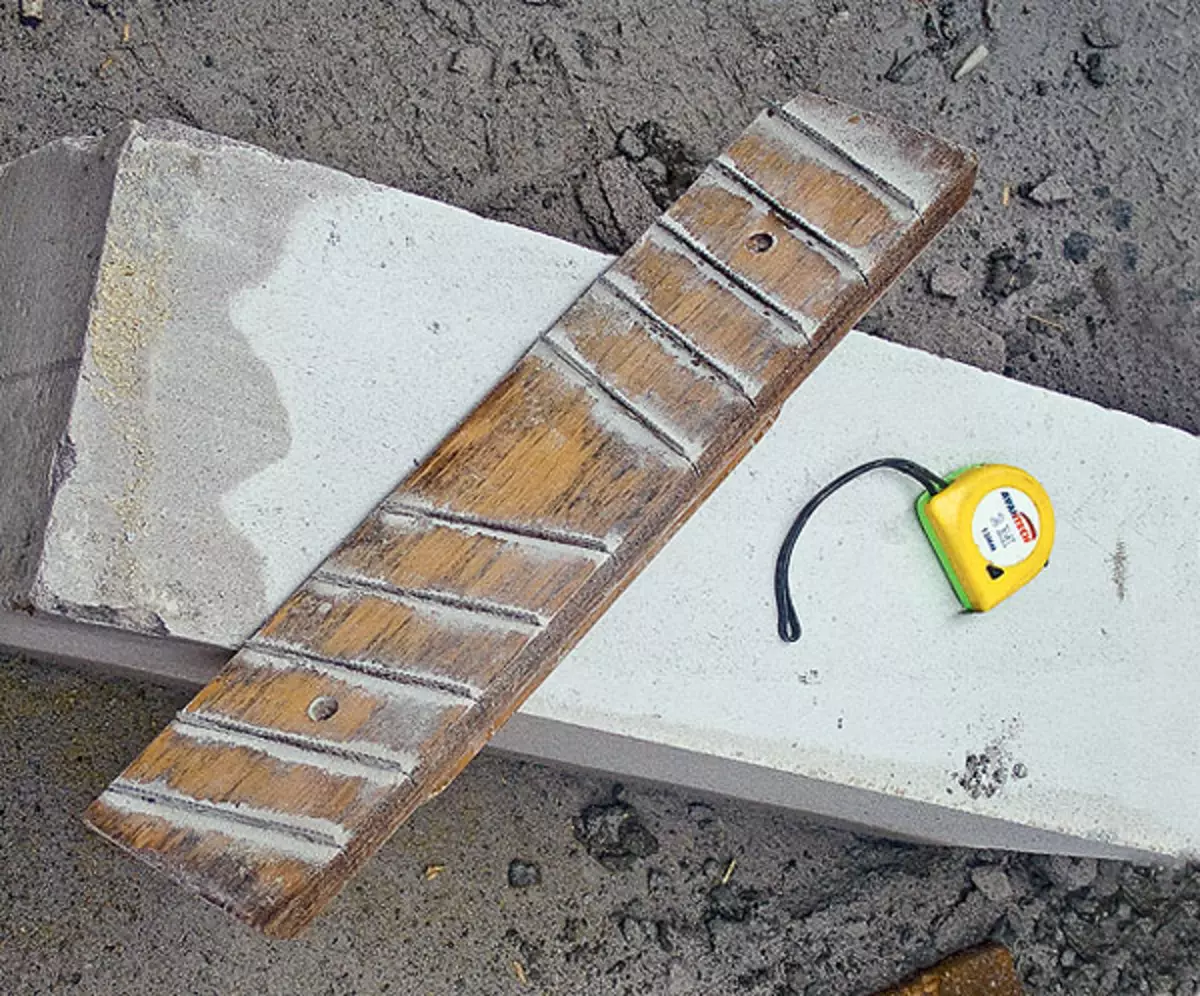
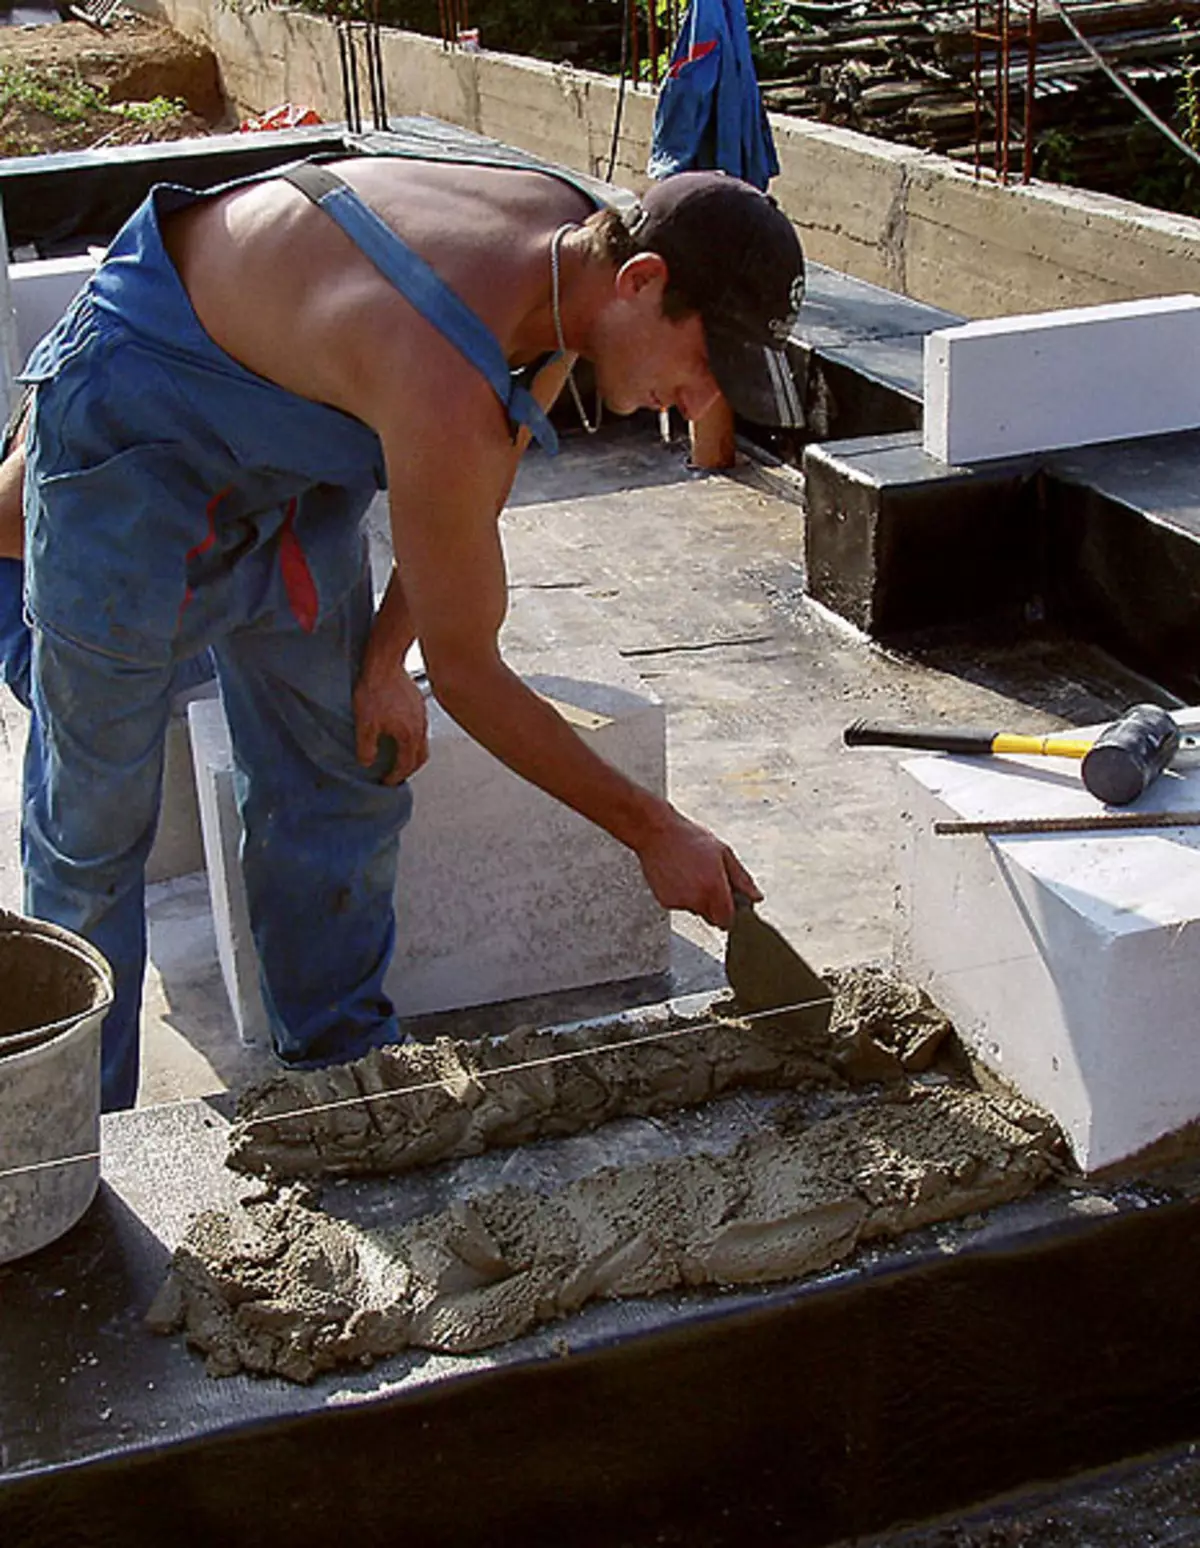
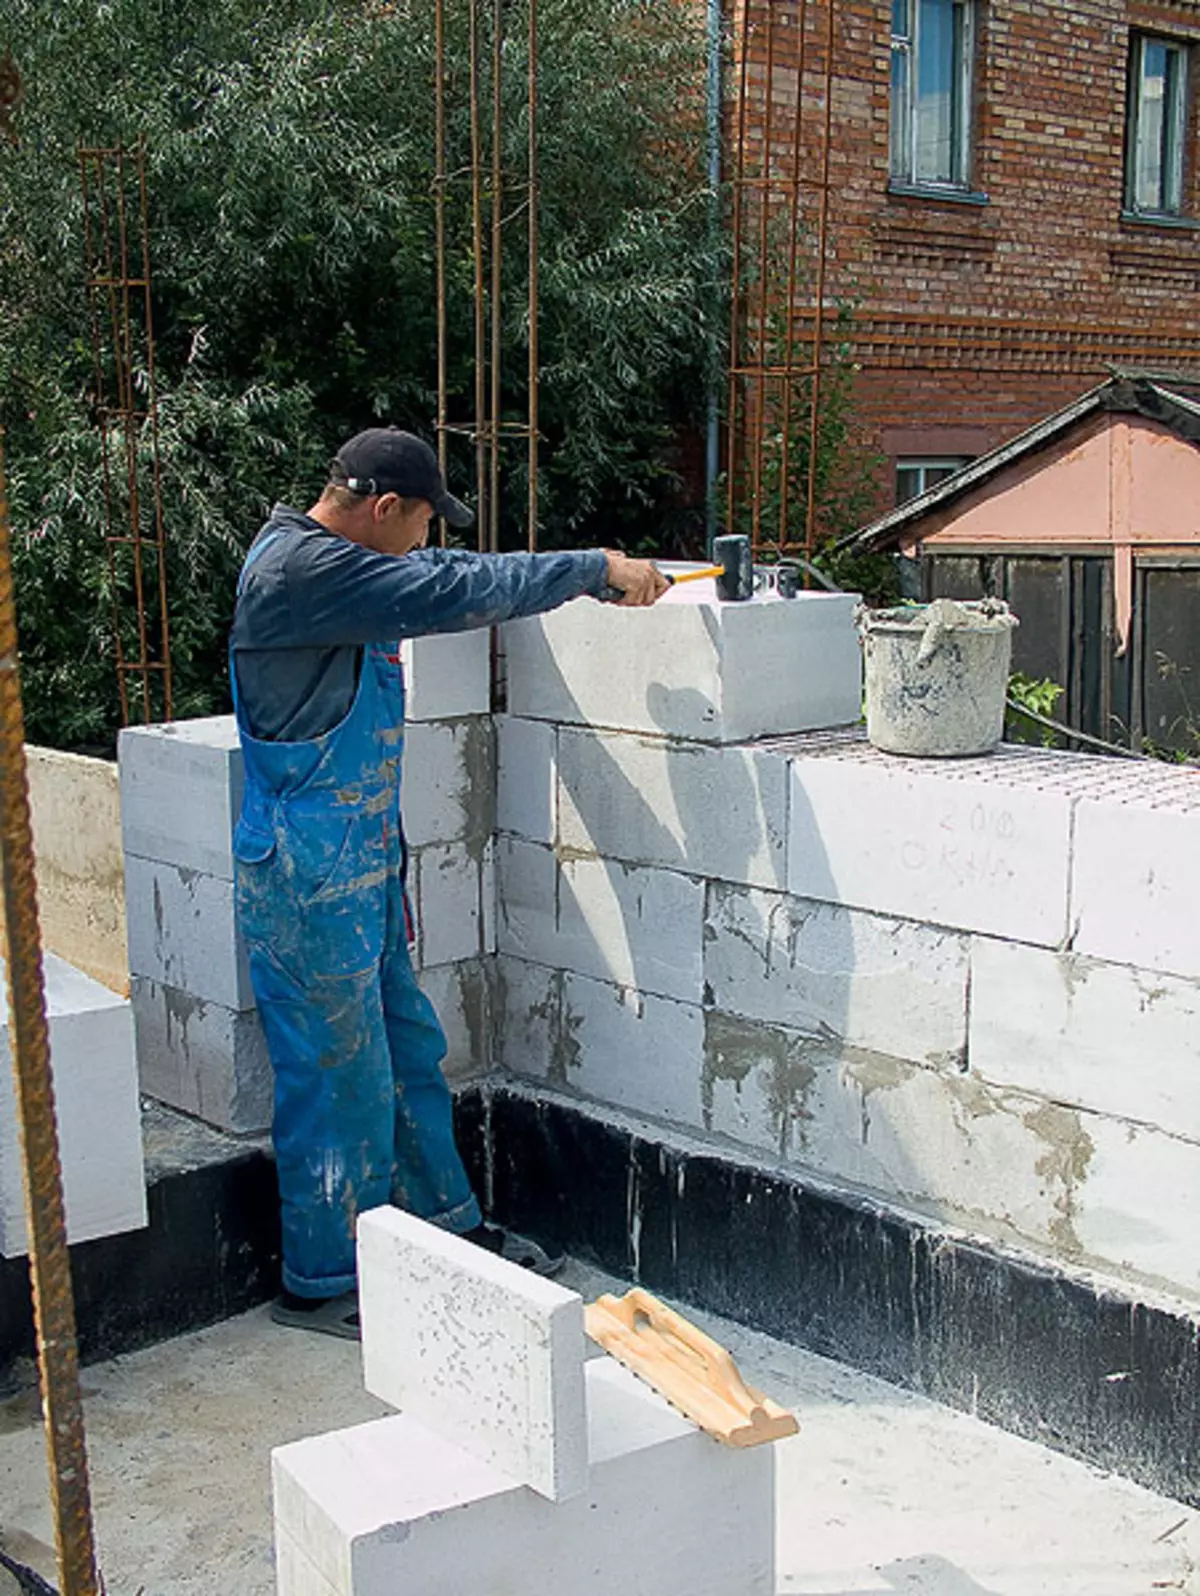
9-10. The first row of gas-silicate blocks was laid on cement-sandy solution (photo 9) than leveled irregularities of the base. All subsequent rows were laid on glue (photo 10) - at the same time the thickness of the seams did not exceed 2-3mm
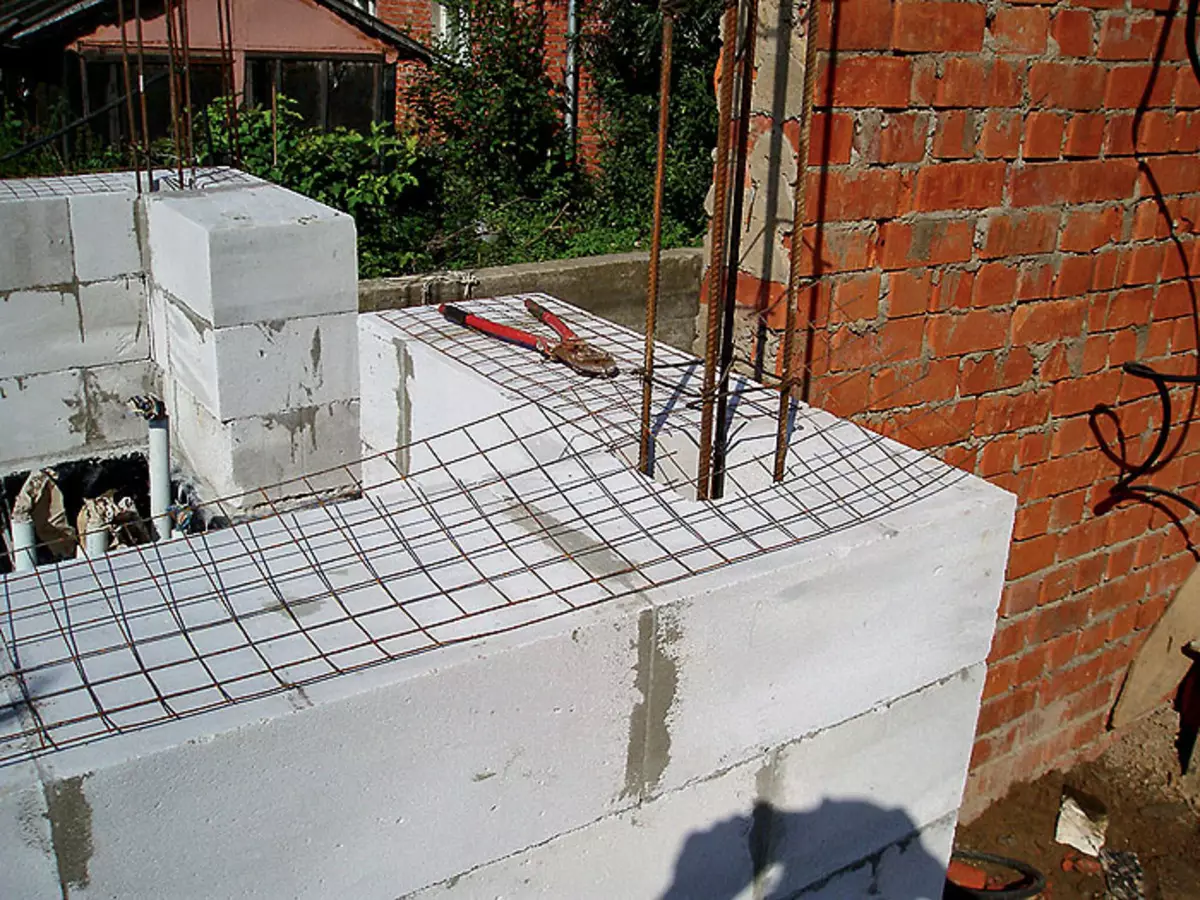
11. Every three rows in the seam put the reinforcement grid, which significantly strengthens the design.
When the formwork was removed, along the perimeter of the plate, and also under the future inner walls, the "tracks" of the waterproofing waterproofing material were pasted. Above them staged a militant formwork, in which the armature frame was laid tapes. Then in places defined by the project, the fittings of the future columns of the concrete frame vertically, tied it with a ribbon frame, and, using the same concrete mix, as for the stove, the ribbons themselves were cast.
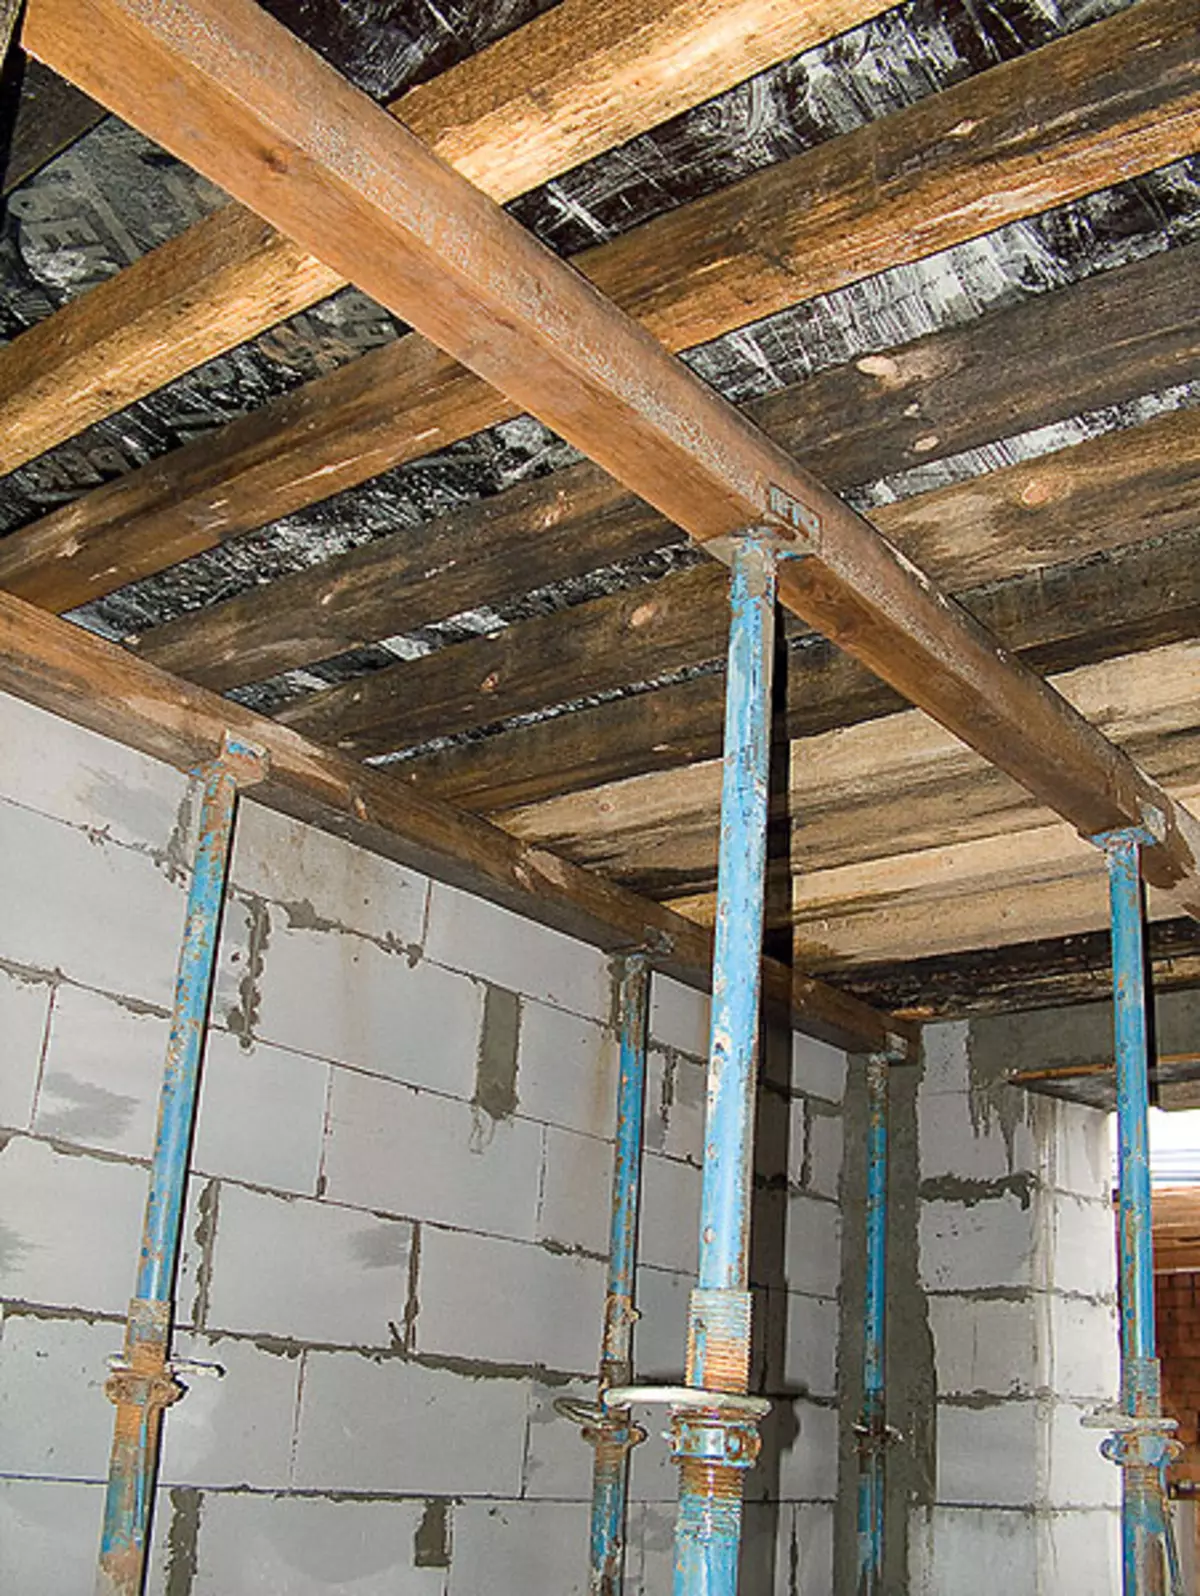
It is worth talking about one small tricks by construction - a wide use of regulated metal struts, and not always directly intended. When installing the formwork for tapes, the base is needed wooden struts, and when pouring the monolithic overlap. If you take a wooden bar to take a wooden bar, after the construction of the hosts will receive 5-6m3 with a concrete of wood, which and when cooking a kebab is not always possible to put into business. That's what they decided to avoid, taking the adjustable metal racks for rent (the cost of "rolled" of one stand-50 rubles. / Month plus returnable pledge 1 thousand rubles. Zad.). They were used both when installing formwork for tapes and when pouring overlaps and jumpers.
| 
| 
| 
|
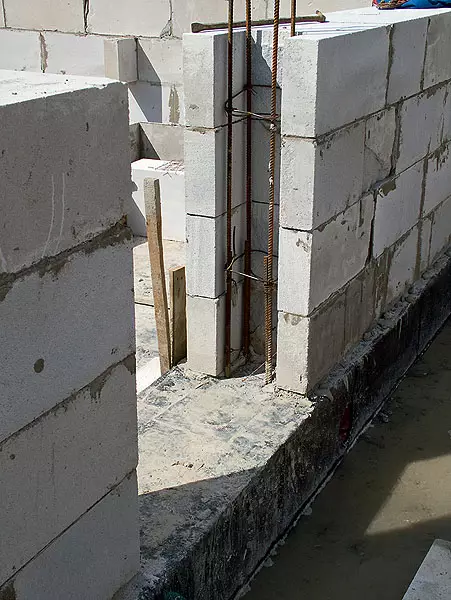
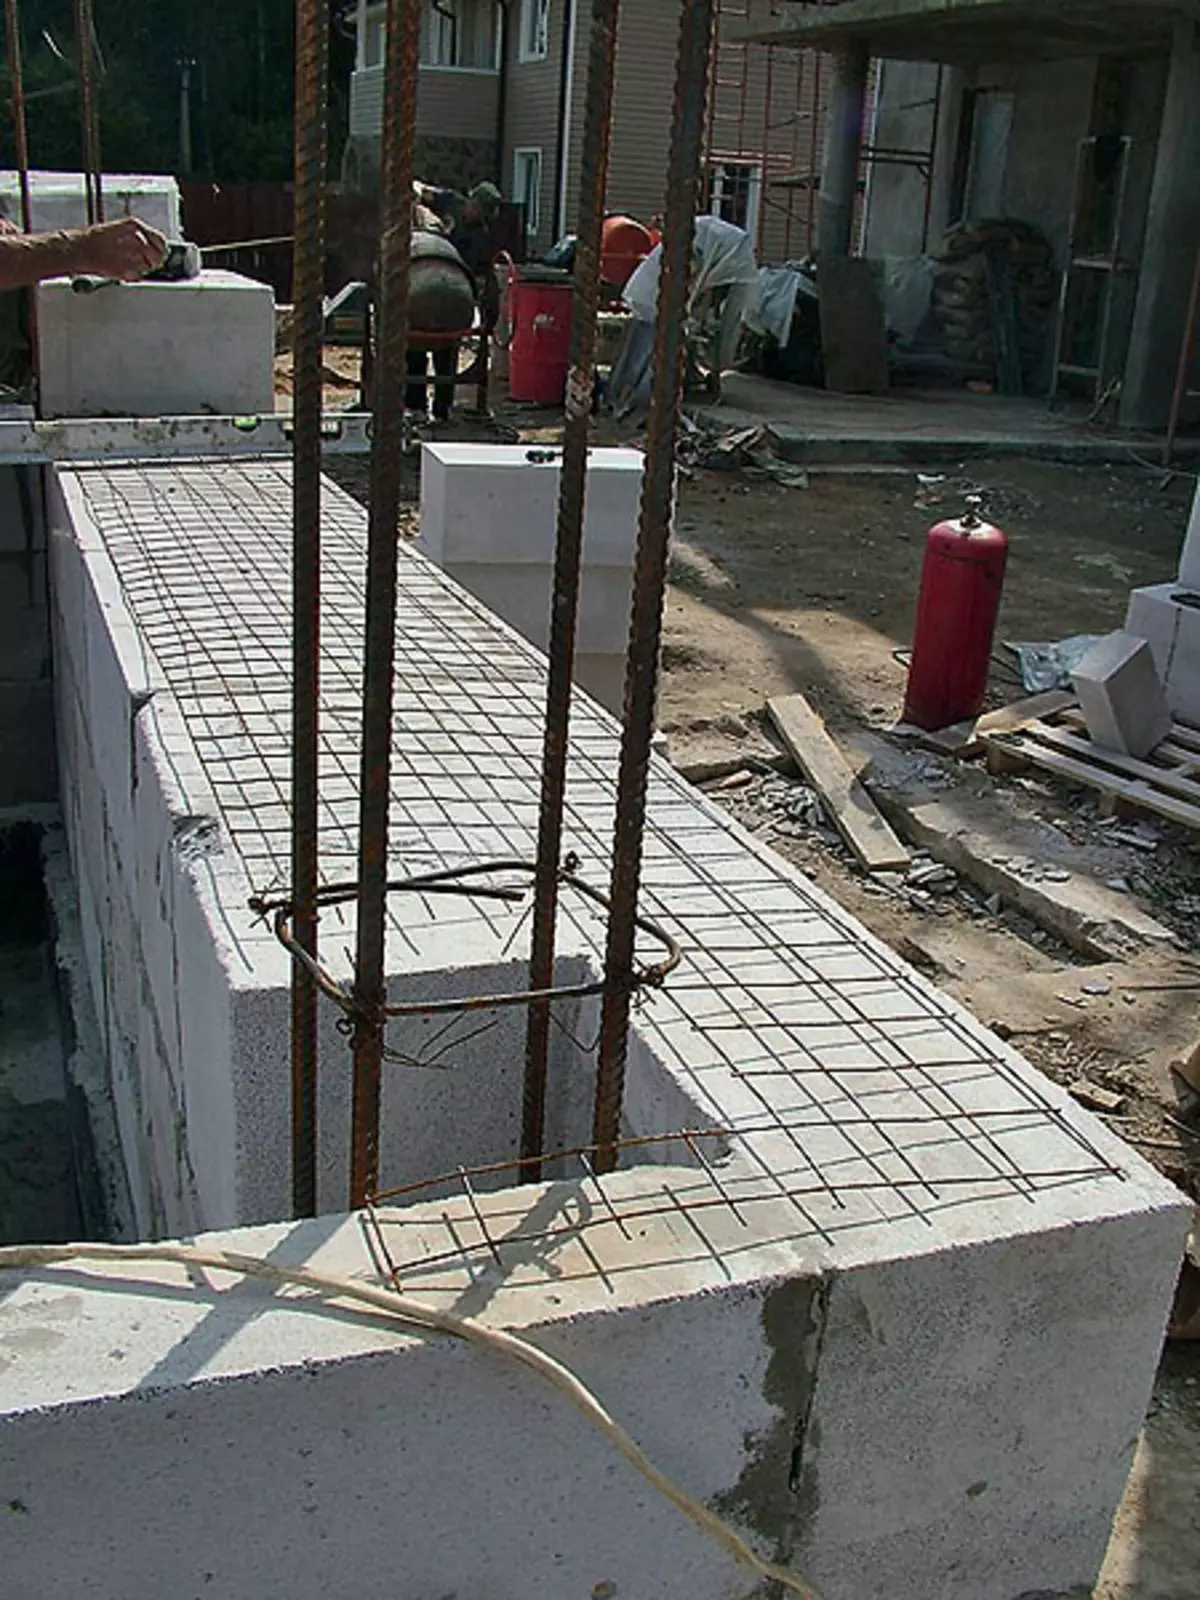
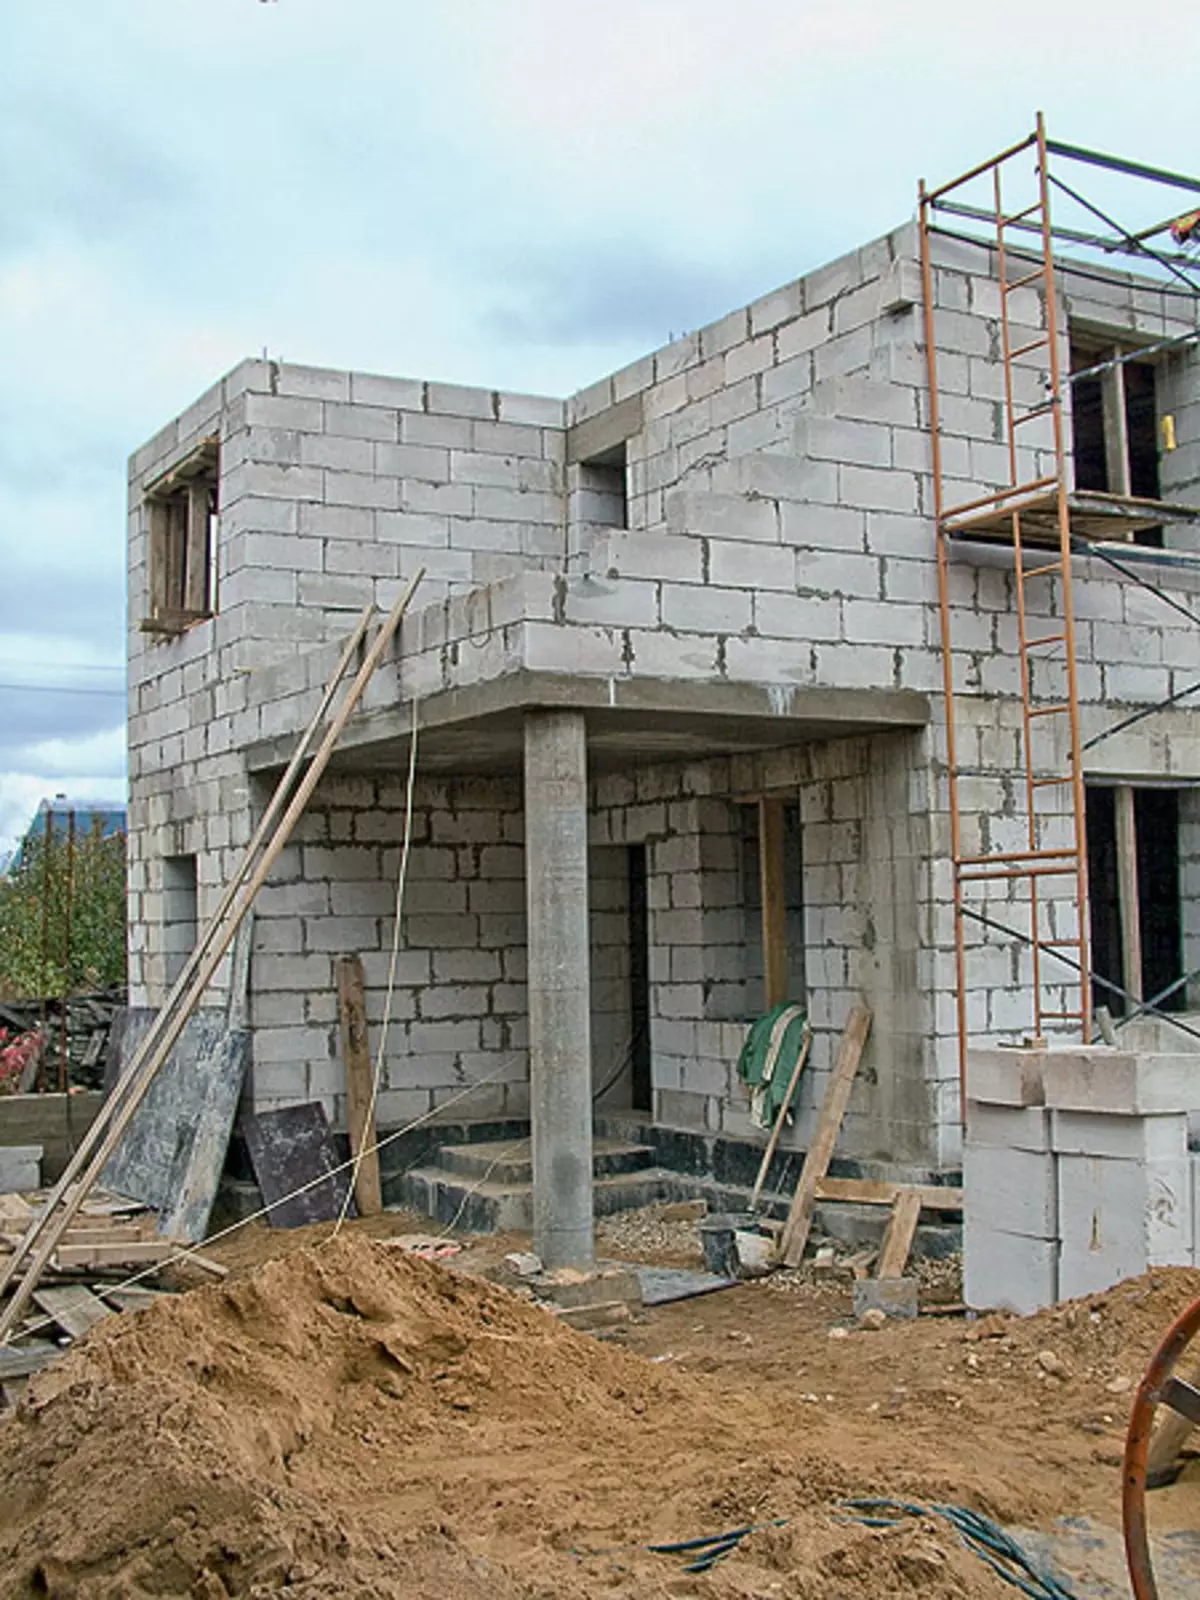
12-13. Niche under supporting monolithic columns had a cross section of 200200mm. They were located in a variety of doorways (photo 12), in the corners of the house (photo 13) IT.D
14. Under the corner of the house, hanging over the main entrance, created using asbetic tube as a non-removable formwork
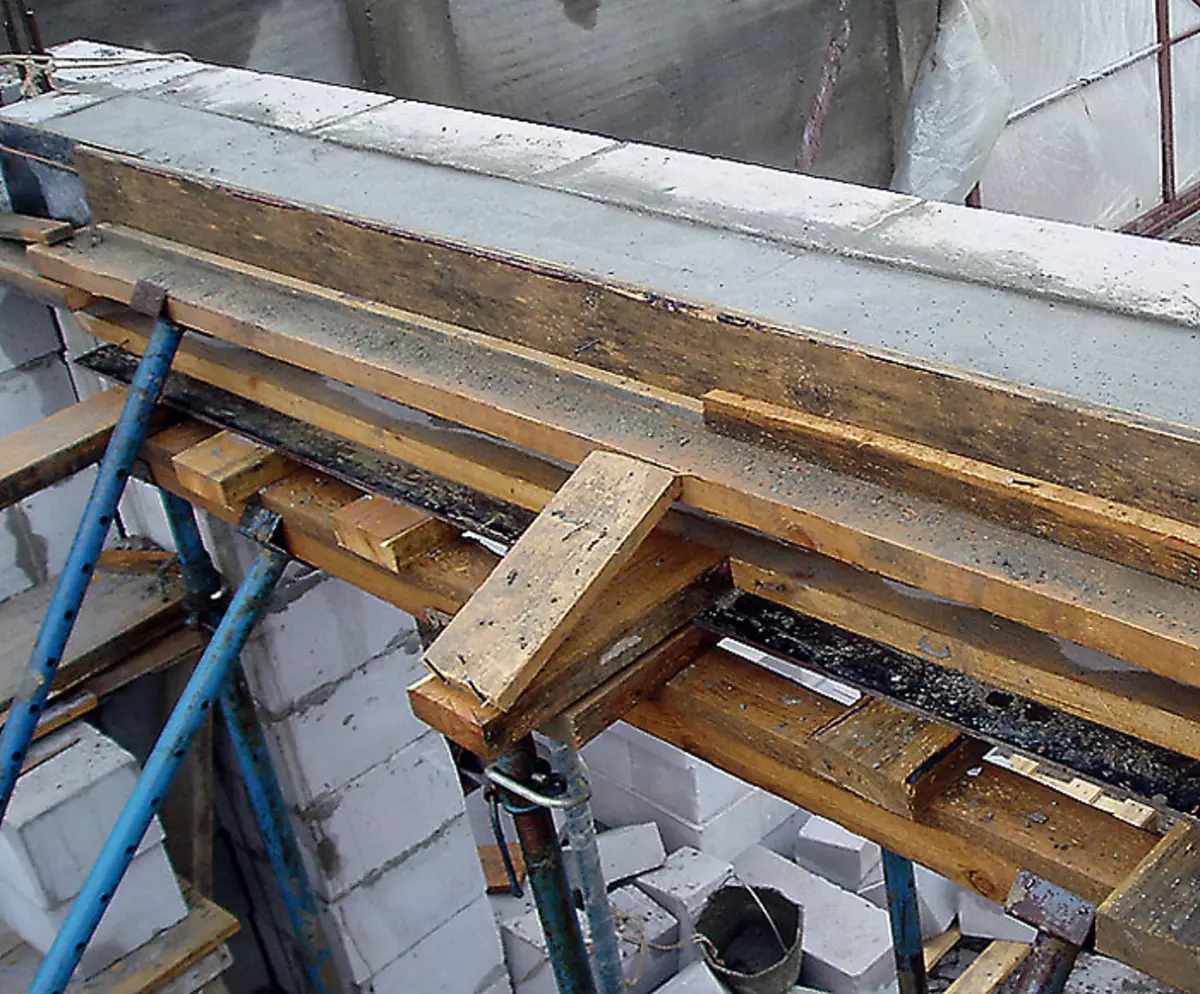
15. Movements above the windows, doors and garage gates were cast on the spot
Walls and support columns
Talk about masonry We will start with the original solution found by the designers. The owner of the house decided that the roof should be exploited, that is, flat. To be where to rest and sunbathe. At the same time, it must withstand large snow loads (according to the calculations, up to 1T to 1M2), and therefore, without a powerful carrier monolithic frame, the "sheins" does not do the structure. Only to construct it differently: by an indispensable way to pour reinforced concrete pillars inside vertical square niche wells (cross section of 200200mm), arranged during masonry in the walls of foam blocks. The walls of the floors were elevated, and then the monolithic overlap. Then the second floor was built in the same way. As a result, the carrier monolithic reinforced concrete structure - "shelf" will still arise, but it will be much easier to create it. The playful, make a mistake almost no place. And it will cost approximately 1.5-2rd cheaper.
| 
| 
| 
|
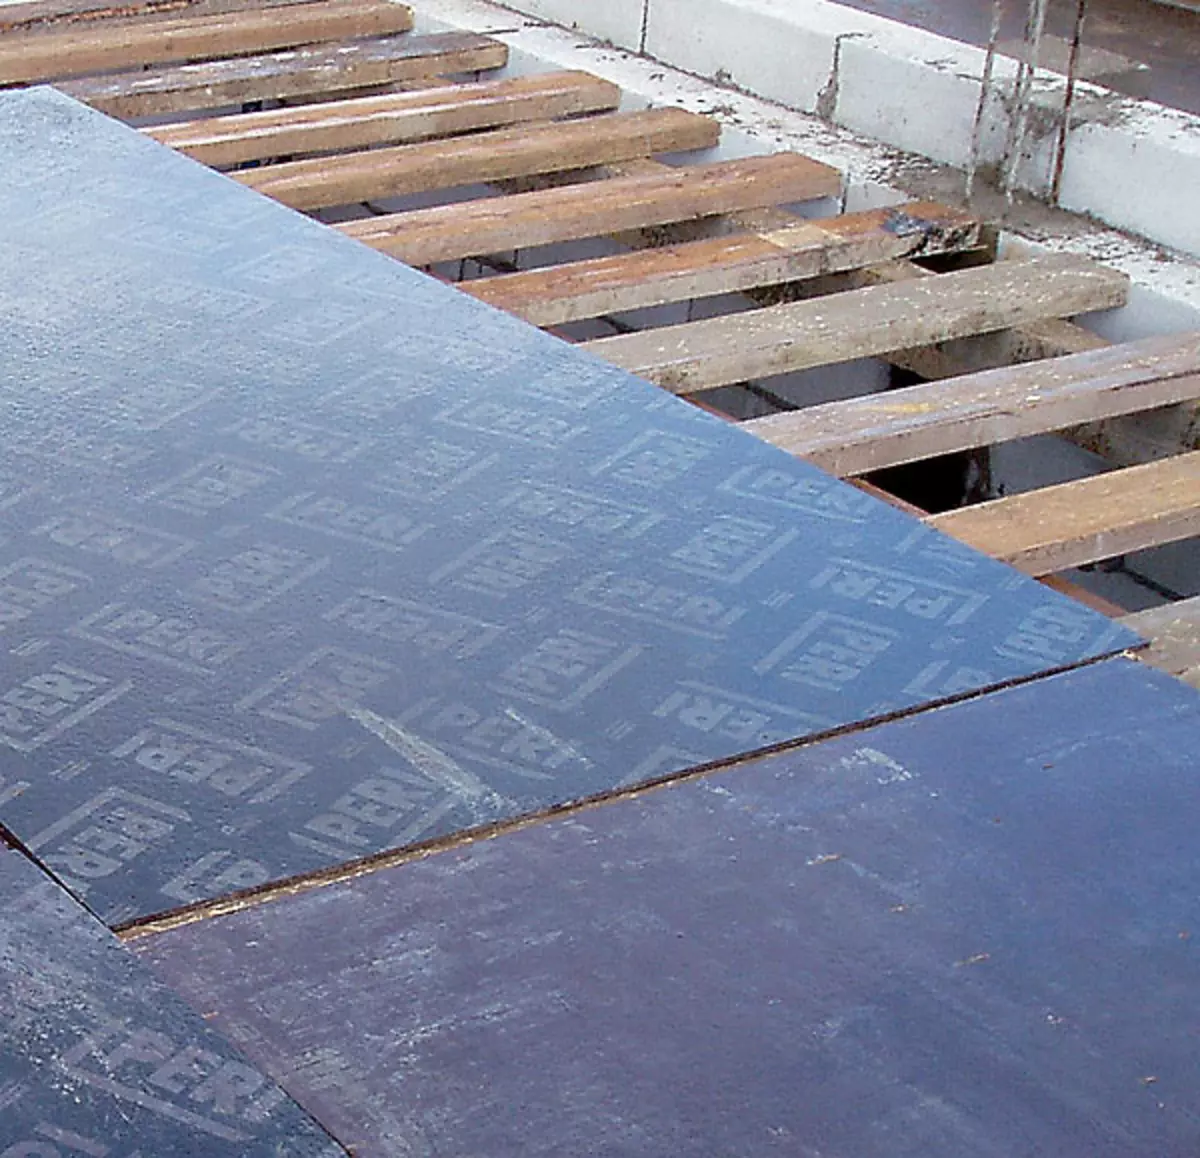
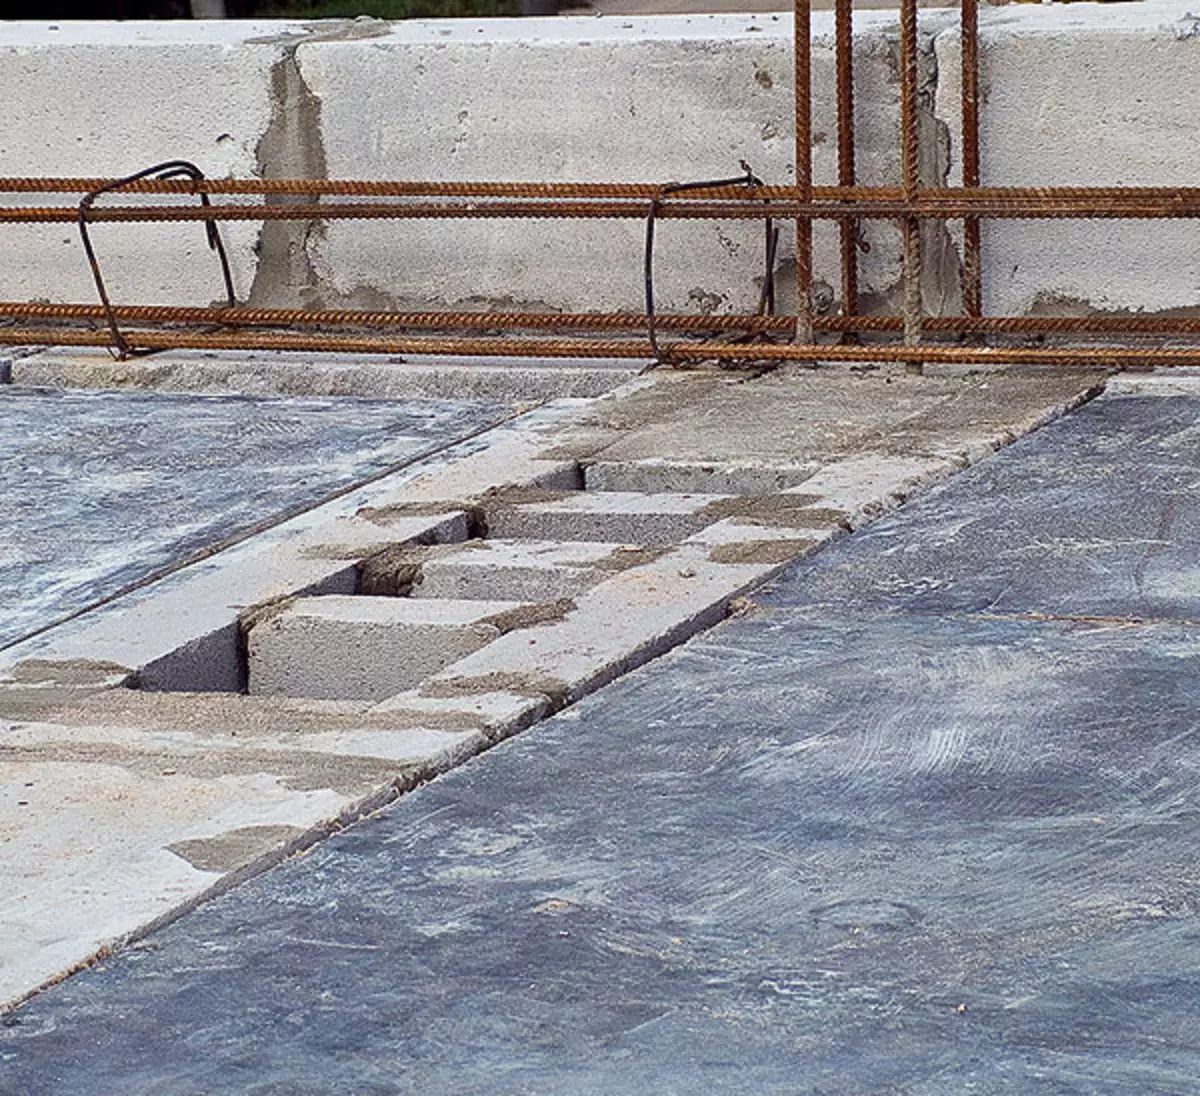
16-18. To create a seating overlapping on adjustable racks, laid bars with a cross section of 100100mm (photo 16), perpendicular to the boards of 50150mm, and over them with a solid flooring from laminated plywood (photo 17). After that, a reinforcing frame was created, linking it with the framework of the support columns (photo 18). As soon as the bombed concrete hardened, the builders began to lay the walls of the second floor (photo 19)
No sooner said than done. The first number of blocks in which the necessary grooves saw for the columns were laid on cement-sandy solution. This series must be aligned especially carefully, it is the "foundation" for all subsequent. Starting from the second row, the masonry was produced on the so-called adhesive solution, which was prepared on the spot from a dry mixture. If we continue the masonry on the cement-sandy solution, the thickness of the seams (10-15mm) will entail a decrease in the resistance of the wall heat transfer.
What made it possible to apply glue instead of a conventional solution? For the construction of walls, gas-silicate blocks of the Novolipetsky Metallurgical Combine (Russia), manufactured by Hebel (Germany) technology, were chosen. Their dimensions are 600300200mm, and the deviation of linear dimensions does not exceed 2mm. Buildings are faster and cheaper than bricks, and the walls are obtained significantly thinner and warmer (thermal conductivity coefficient - 0.16-0.23W / (MS).
| 
| 
|
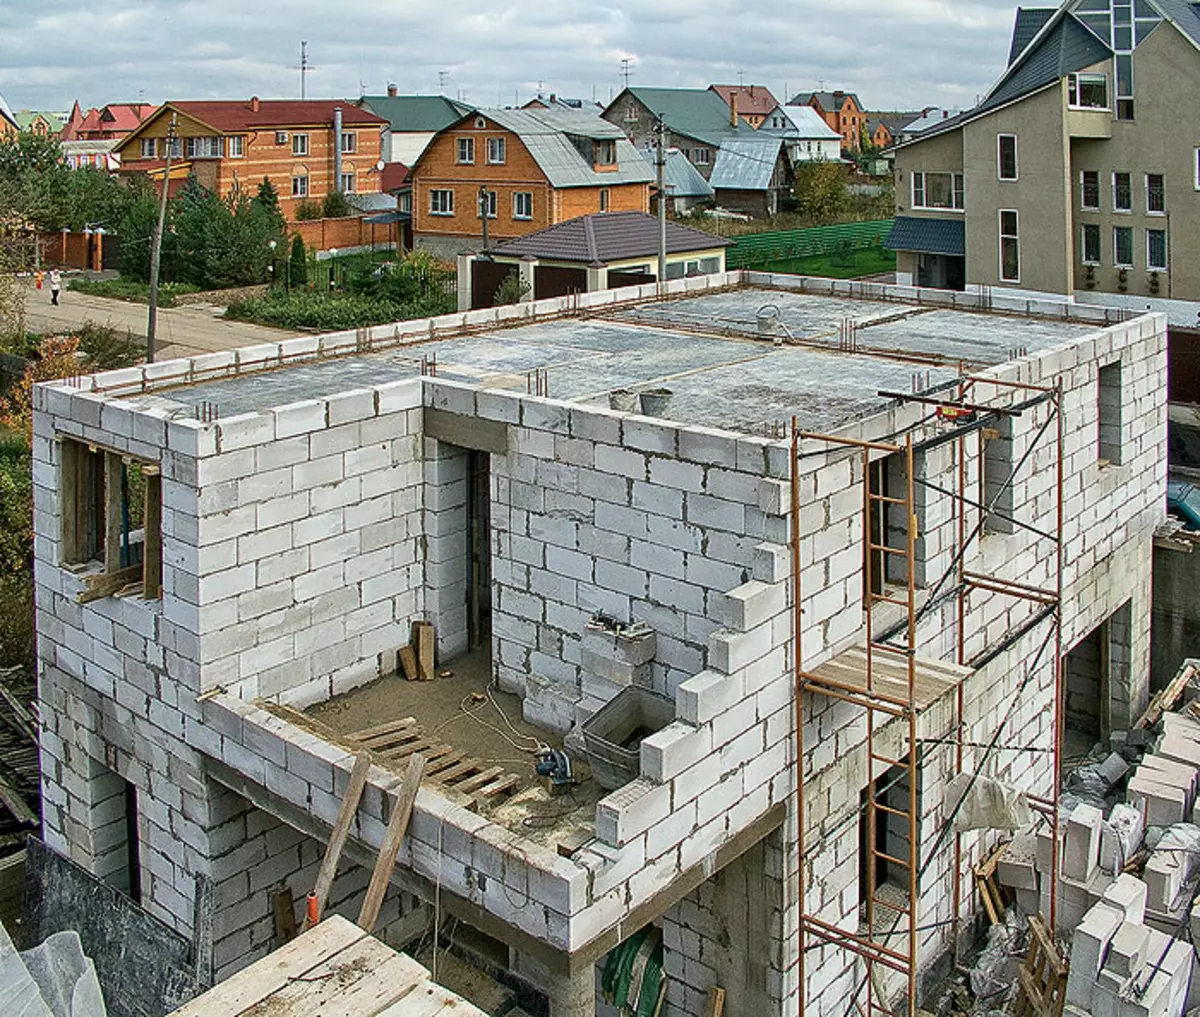
20. The fence of the operated roof was created from blocks, and then reinforced the belt from the monolithic reinforced concrete
21. Outputs of ventilation channels in roofing
22. The plates between the plates of extruded polystyrene foam on the operated roof were processed by sealant
Jumpers above windows, doors and garage gates made right on the spot. To do this, first built the lower part of the formwork, then on it from the cells of a cellular concrete, a thickness of 150mm laid out an outer wall, the purpose of which is double: first, not to give the jumper to turn into a "cold bridge", secondly, become an outer formwork. After that, the inner side of the formwork was mounted from the boards and plywood, the reinforcement frame was put on the resulting cavity and concrete flooded. When the walls were ready, open samples under the columns were covered with boards (they were secured using all the same struts) and poured concrete.
The builders did not forget when laying the walls and the sewage and ventilation, the corresponding holes were also chopped in blocks, and in the interior walls made through vertical cavities.
Bison flooring
The technology of its creation was also quite original. First, around the perimeter of the walls of each room, a reinforced concrete belt was arranged (on the external walls, the method of its execution was similar to the previously stated jumpers manufacturing). Then, using all the same adjustable racks, built from laminated plywood (seams between sheets were filled with sealant). Next, they laid a two-layer frame of fittings and with a concrete pump made a filling of the plate. This technique allowed us to obtain a solid overlap with rigidity ribs, which significantly increased its carrying ability.
As soon as the overlap concrete scored 50% of the design strength (this happens during 1 week), the builders have begun laying the walls of the second floor. When the walls were ready, they created roofing. Since both stages are similar to those already described, we will not stop on them, and we will immediately move on to the finishing processes.
| 
| 
| 
|
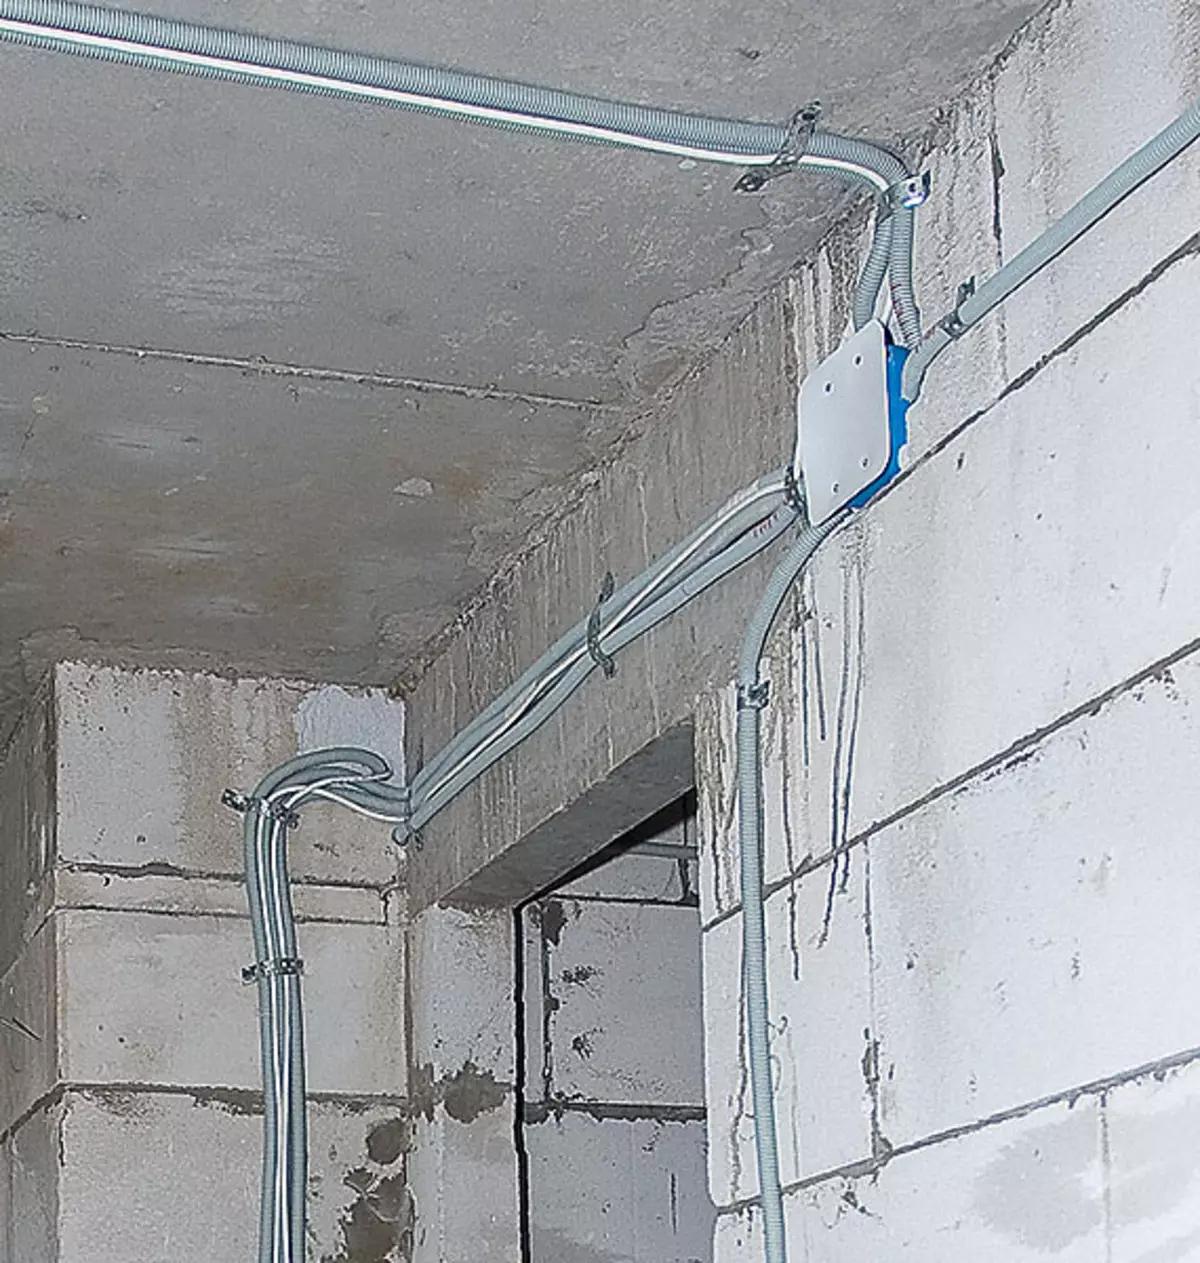
23-24. When laying the electrocabilities, first completed pre-laying, after which they removed them, cut out the stages, cables were fixed in them (photo 23). Pipes of heating, water supply and sewage laid straight through concrete overlap (photo 24)
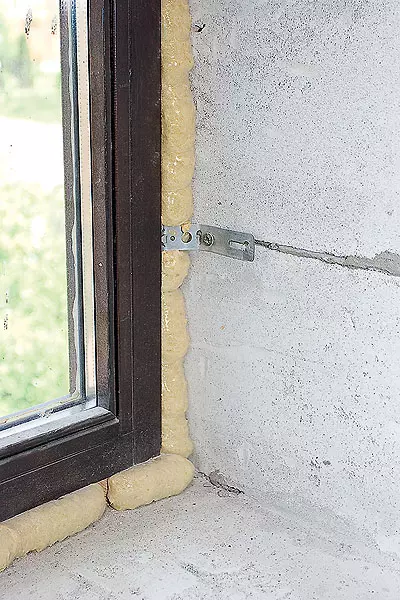
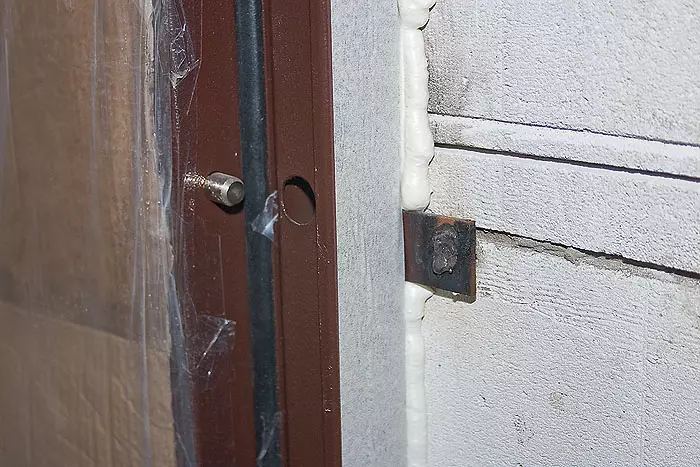
25-26. Fastening the window and door frames to the walls of cellular concrete were carried out with the help of anchor plates and frame dowels (photo 25). For steel doors, a thick steel plate and a rod (photo 26) took. The only nuance plate must be long, otherwise there is a chance to split the edge of the cellular block
Operated roof
Its device began with the fact that the concrete overlap was insulated with extruded polystyrene foam 50mm thick. Then the concrete screed was made over it, its thickness was at least 40mm. When she was filled with slopes of 2-3 (when walking, such a slope is practically implanted), aimed in the direction of the drain holes left in the roofs of the roof, through which the drain pipes will be entered into the facade.
Further, the tiery was treated with waterproofing composition TERRACO (Sweden) based on polyurethane (it was prepared on a place of two components, and then applied with a brush or roller). After the formation of the water-insulating layer, the porcelain tile was laid on it, using the glue for the Dolphin pools (Socrates, Russia).
| 
| 
| 
|
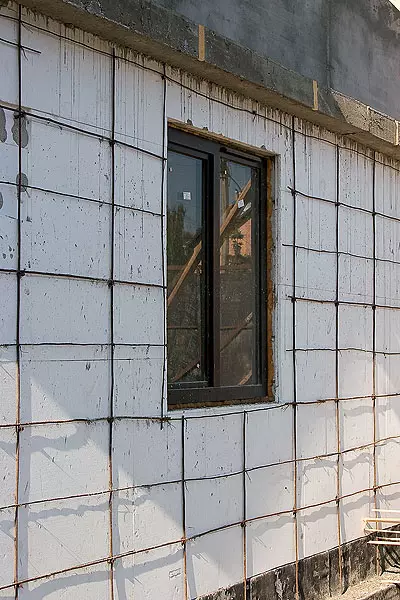
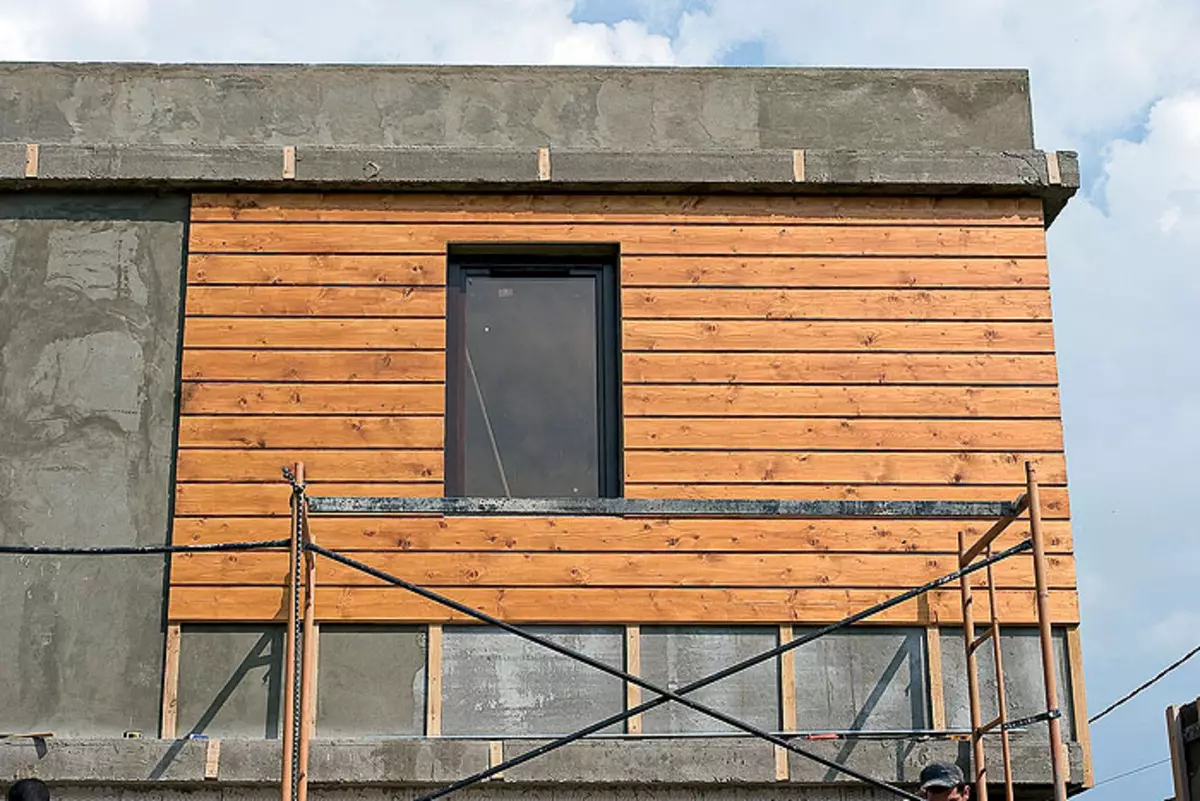
27-29. The walls outside were insulated with expanded polystyrene foam (photo 27) and pasted on the grid (photo 29), and then partially abandoned the clapboard on the crate (photo 28)
30. Exit to the flat roof covers the scope roof
Exterior finish
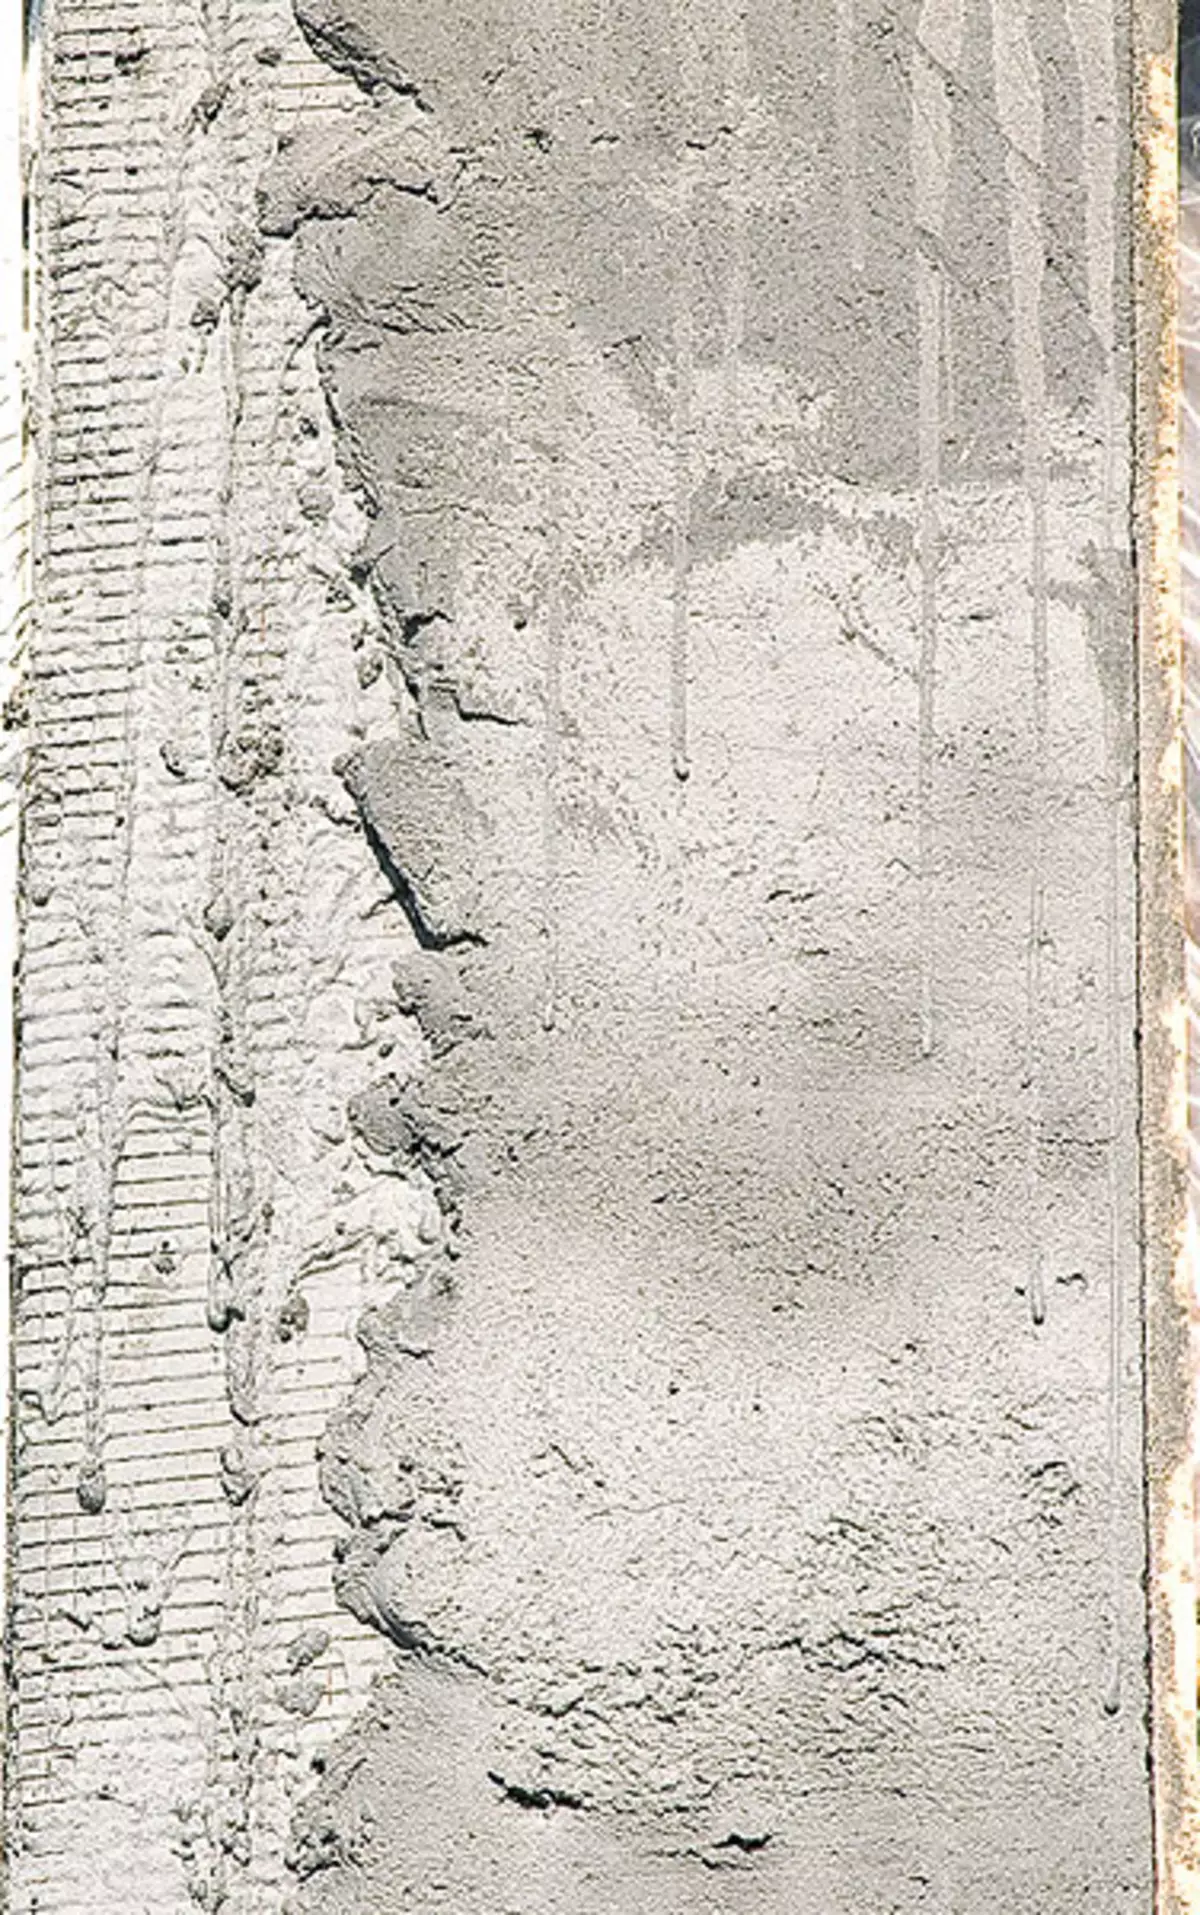
Of course, a 300mm thick gas-laced walls are rather warm, but at the same time, it does not quite slightly reach the requirements of modern heat resistant standards (we recall that the resistance of heat transfer - R0- for the Moscow region should be 3.16m2c / W ). Therefore, from the outside, it was decided to additionally insulate the walls of the styrene polypleth layer with a thickness of 30mm. Its plates were stuck on the walls and secured with dowels, and then reinforced with metal rods with a diameter of 5mm, which hold the reinforcement grid with 200200mm cells. Next, it was attached a plaster grid with small cells, after which the walls were plastered by the usual composition (from the "breathable" the plaes were refused when working with gas-silicate blocks of "breathable", since the polystyrene foaming practically does not let the water pairs).
To give the guest house with a stylistic unity with the main building already standing on the site, in certain projects on the walls on the walls of universal dowels, a wooden crate, which was blocked by the lining, in advance covered with decorative protective composition. Not closed wall walls were covered and covered with light front facade.
| 
| 
| 
|
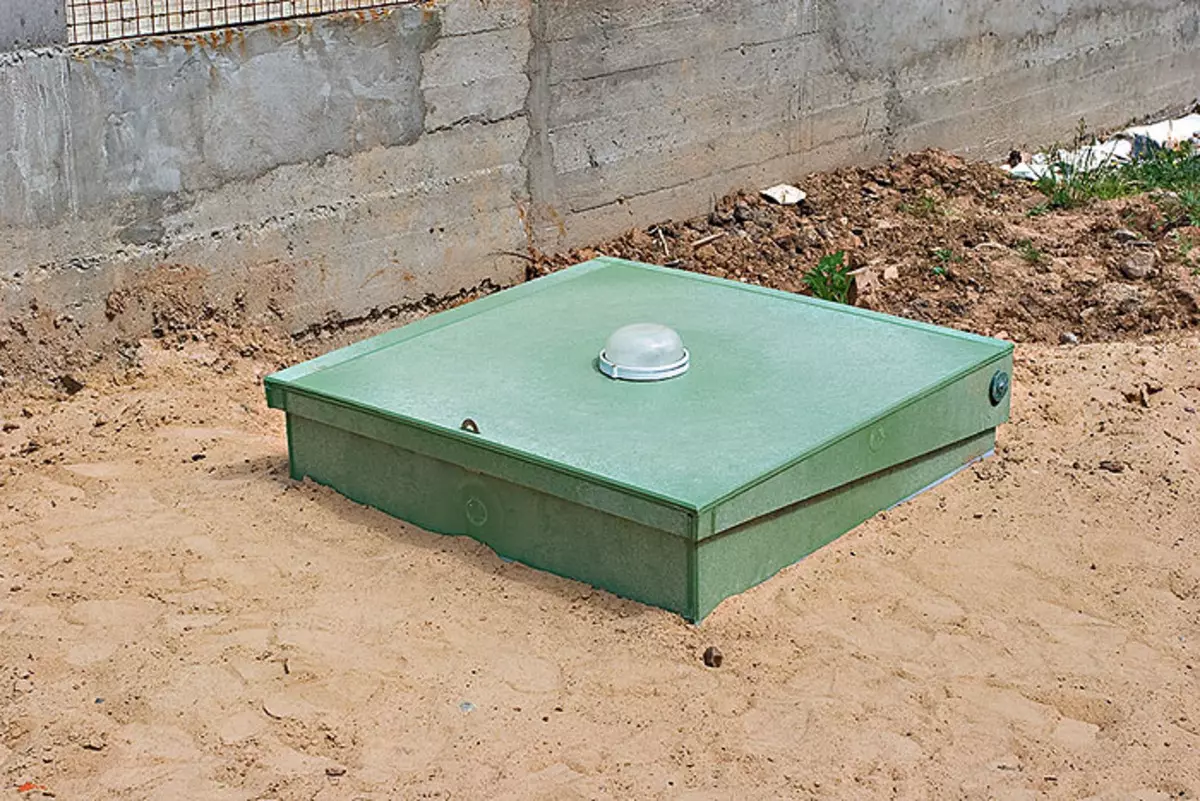
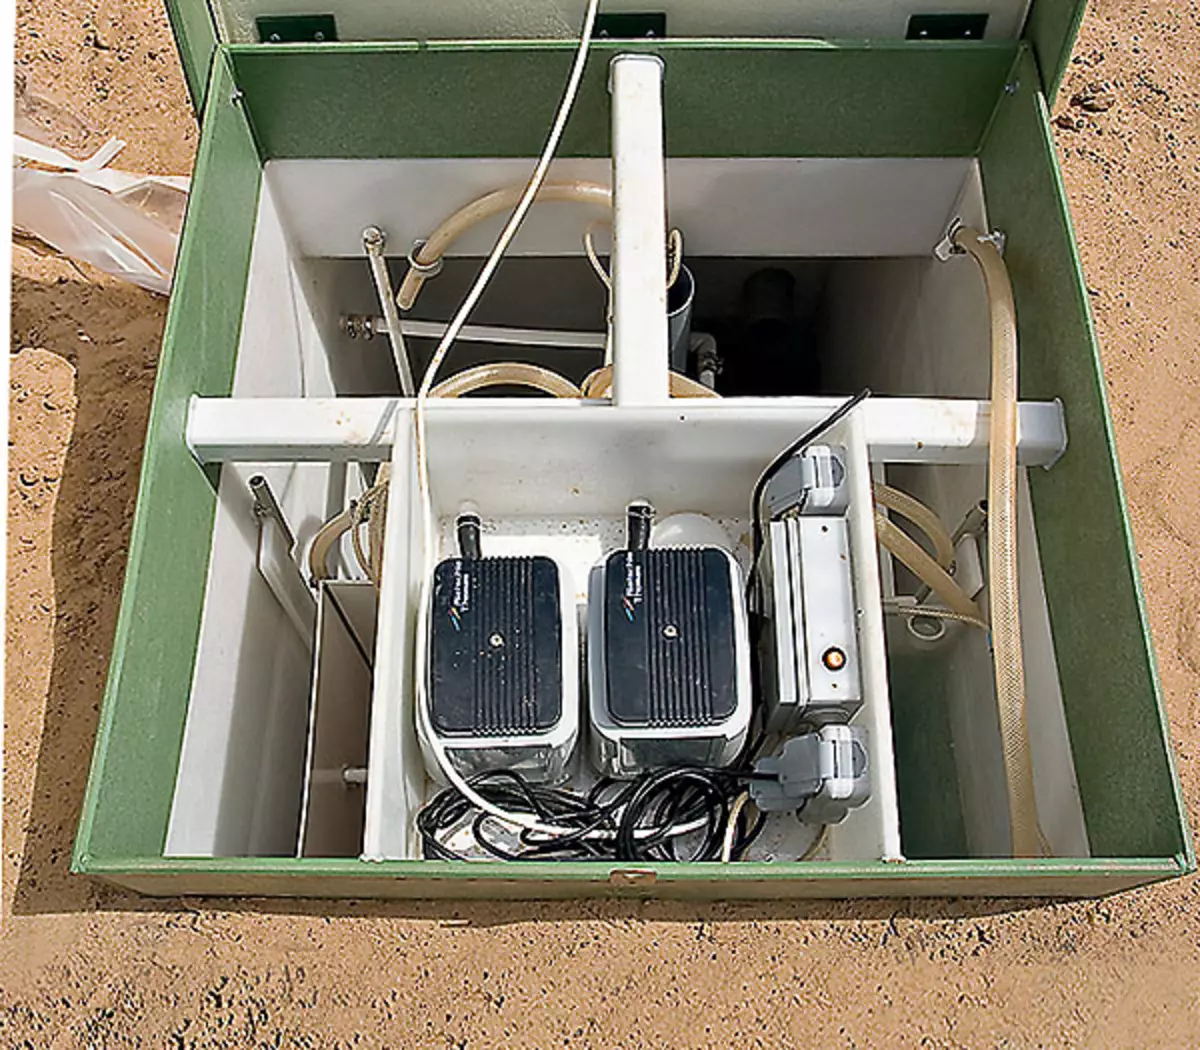
31-32. Since the village sewage is missing, the unprecedented housewater cleaning system "Topaz", which serves both buildings has been established from the built house. Purified water merges into a drainage pipe laid along the fence
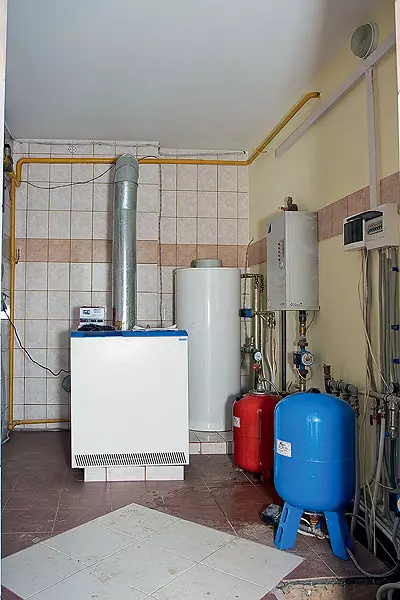
33. In the boiler room with a separate entrance, compactly placed the main (powerful) gas boiler, a boiler and a backup wall electrocotel
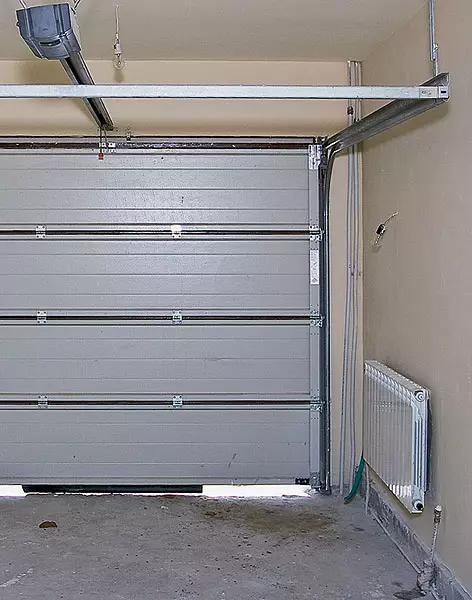
34. Garage automatic gate - they are "leaving" under the ceiling, saving space
Interior decoration
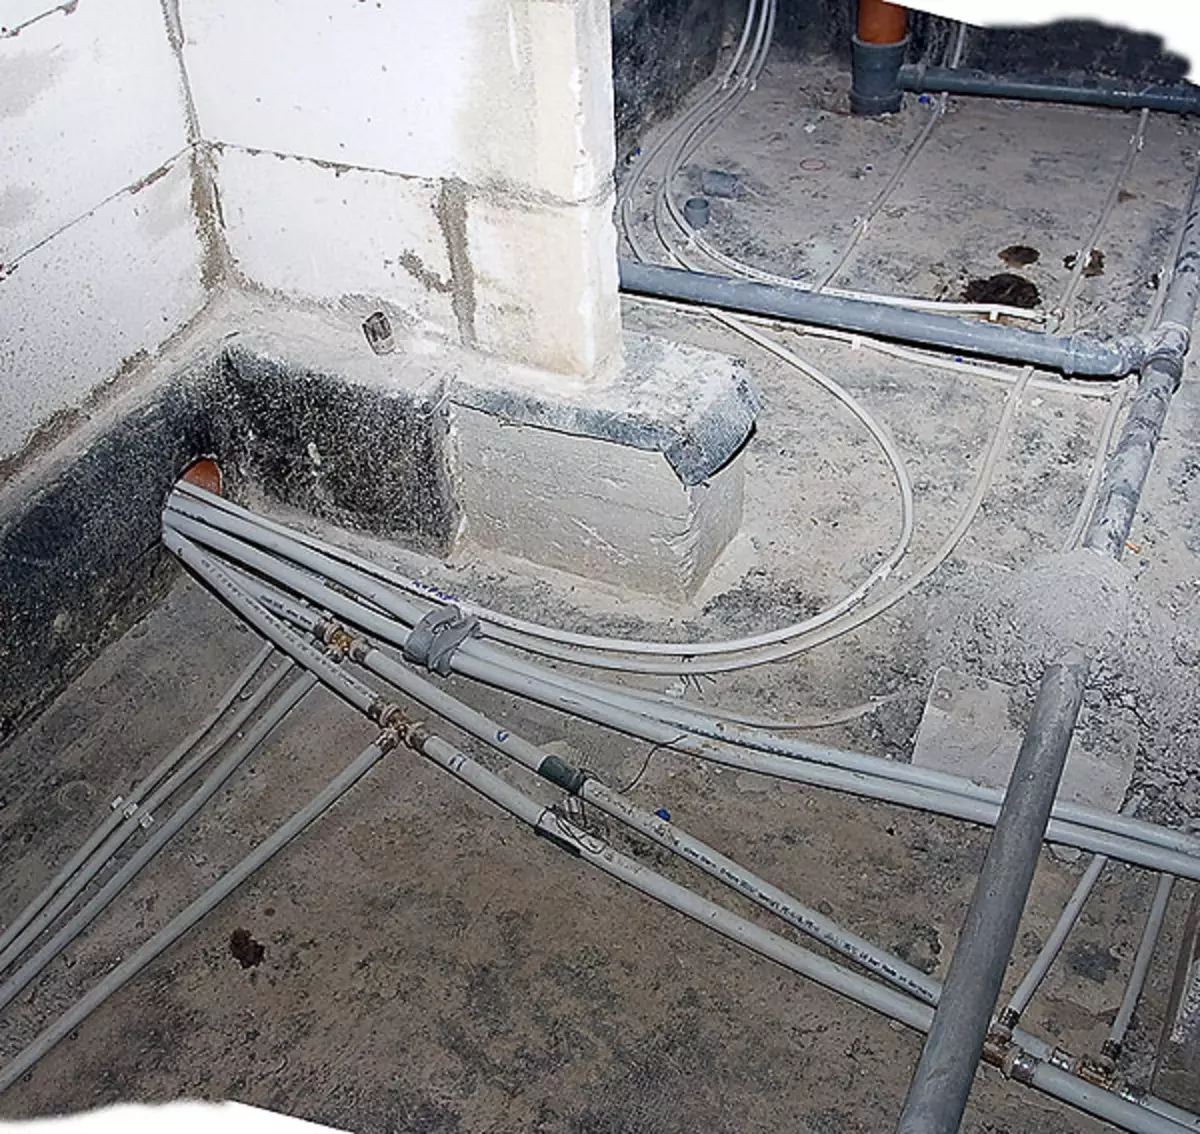
Before proceeding with this process, the builders spent the necessary communications in the house, and the boiler room was equipped with a separate entrance. The pipes of heating and water supply (polypropylene), as well as sewage (PVC), were laid on a concrete base, after which they were covered with a clay, on top of which was poured with a concrete tie.The interior finish itself is simple and laconic. The walls were plastered and ošpackled, then in accordance with the wishes of the owners were covered with wallpaper under painting and vinyl wallpaper, and in the bathrooms and the kitchen were tiled by ceramic tiles. The flooring in rooms and corridors is laminate, laminated directly on concrete using gasket from foamed polyethylene. The floors in the bathrooms and the kitchen were first coated with waterproofing composition based on polyurethane, on top of which ceramic and porcelain tiles were stuck.
The enlarged calculation of the cost * construction of the house with a total area of 125.4m2, similar to the submitted
| Name of works | Number of | price, rub. | Cost, rub. |
|---|---|---|---|
| Layout, development and garment | 26m3 | 780. | 20 280. |
| Sand base device, rubble | 32m3. | 260. | 8320. |
| Device of reinforced concrete base plates | 20m3 | 4200. | 84,000 |
| Device of constructon bases | 19m3. | 4100. | 77 900. |
| Waterproofing horizontal and lateral | 180m2. | 450. | 81 000 |
| Other works | set | - | 23 100. |
| TOTAL | 294600. | ||
| Applied materials on the section | |||
| Concrete M250 | 39m3 | 3900. | 152 100. |
| Crushed stone granite, sand | 32m3. | - | 38 400. |
| Ceramzit | 26m3 | 1900. | 49 400. |
| Hydrosteclozol, Bituminous Mastic | 180m2. | - | 46 200. |
| Armature, wire, sawn timber | set | - | 38 800. |
| TOTAL | 324900. | ||
| Walls, partitions, overlap, roofing | |||
| Construction of walls, reinforced concrete columns, belts, jumpers | set | - | 376 500. |
| Device of reinforced concrete floors | 200m2 | - | 86 840. |
| Insulation of walls and overlaps insulation | 260m2. | 90. | 23 400. |
| Hydro and vaporizoation device | 260m2. | fifty | 13 000 |
| Roll flat roofing | 60m2. | 240. | 14 400. |
| Metal coating device | 30m2 | 360. | 10 800. |
| Installation of the drain system | set | - | 10 700. |
| Filling the openings by window blocks | set | - | 12,000 |
| Device of chimney and ventilation systems | set | - | 72,000 |
| TOTAL | 619640. | ||
| Applied materials on the section | |||
| A block concrete hebel | 107m3 | 3800. | 406 600. |
| Glue for foam blocks | 92 bags | 180. | 16 560. |
| Masonry masonry 50503mm | 227m2. | 135. | 30 645. |
| Concrete heavy | 38m3. | 3900. | 148 200. |
| Sawn timber | 1m3. | 5200. | 5200. |
| Cement | 12 bags | 270. | 3240. |
| Steam, wind and waterproof films | 260m2. | - | 8700. |
| Polystyrene foam | 20m3 | 7500. | 150,000 |
| Roofing roll | 60m2. | - | 14,900 |
| Drainage system (pipe, chutet.d.) | set | - | 15,000 |
| Window blocks VELUX GZL 1054 M10 (16078) | 2 sets. | 10,000 | 20 000 |
| Smart and ventilation systems | set | - | 119 900. |
| Other materials | set | - | 85 500. |
| TOTAL | 1024445. | ||
| * - the calculation is made without taking into account the overhead, transport and other expenses, as well as the profit of the company |
The editors thanks the ABS-Stroy firm for help in preparing the material