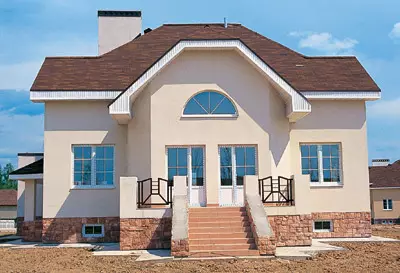
The technology of construction of the cottage with a total area of 384 m2 of bricks is one of the most affordable and universal building materials.
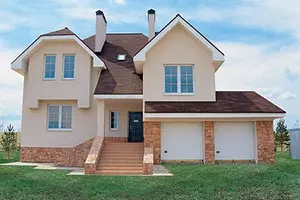

Despite the numerous novelties in the construction market, the brick remains one of the most affordable and universal building materials. The walls of it are durable, refractory and durable, and the technology of the construction of brick houses is also tested by time, and therefore it can be argued with complete confidence that by the number of adherents a brick cottage will lead to a long time among the "stone".
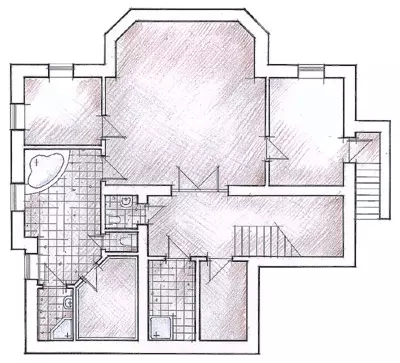
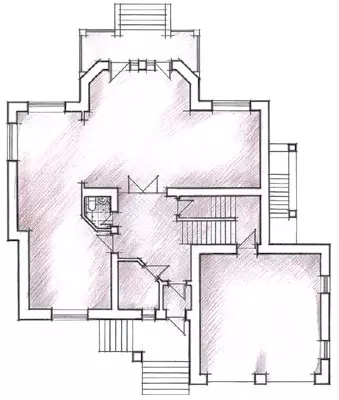
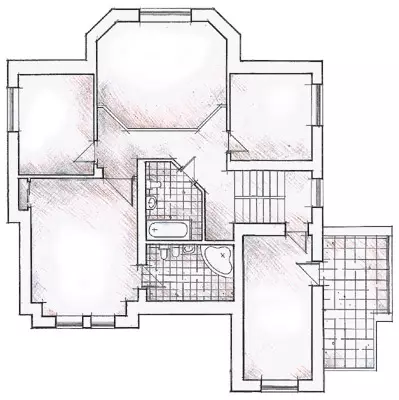
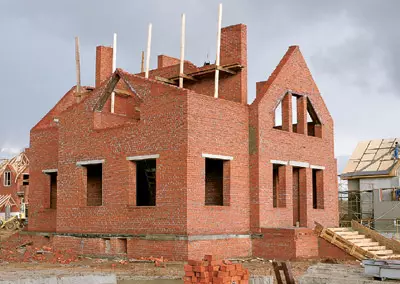
Classic cottage
The construction of brick cottages has long become the tradition of Russian individual developers. Those who plan to create a brick house in their area may be interested in the construction of a box of one of the similar buildings in the Cedar Cottage Cottage near Moscow. The work was performed by Taungeats (Russia) under the standard project ("Favorite").We start with foundation
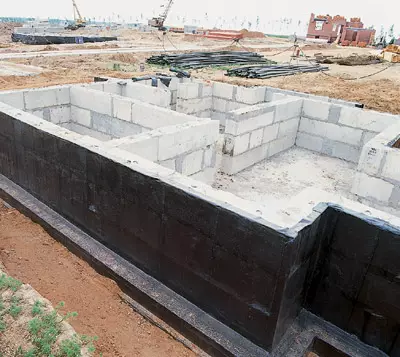
The type of foundation for this cottage was selected taking into account the conditions of the soil, as well as the project providing for the basement. Preferences were given to the collecting tape base from standard FBS concrete blocks on a monolithic plate. Its common design is as follows: base (monolithic stove), three rows of blocks, brickwork in two brick widths and a monolithic belt, which is stacked by plates overlapping the first floor.
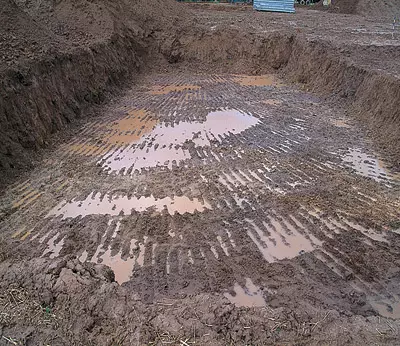
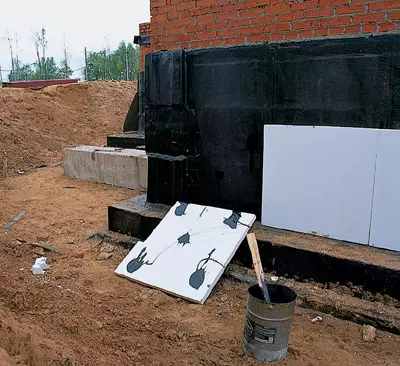
Before chopping, a vegetable layer of land was removed from the entire area of construction. With a depth of 1.7 m (below the level of freezing about 0.3 m), it was pulled out by an excavator. Running and alignment of the bottom and walls were carried out manually. Further, over the entire area, the bottom of the pit was covered and the sand was tumped to create a layer of a dense sand pillow with a thickness of 20 cm. After that, the so-called concrete preparation was made: the sand pillow was poured with a decade -antimetime layer of unarmed brand 100 concrete. After a day, a waterproofing layer of bitumen mastic was applied to it, and after its rejection, two more layers of the rolled waterproofing "Locurr" from Technonikol (Russia) were rejected. All this is to maximize the foundation from groundwater. It should be noted that for the sake of savings from the very beginning there was a small height difference (about 10 cm): where the bearing walls were assumed, the stove was thicker, in the region of emptiness and premises - thinner.
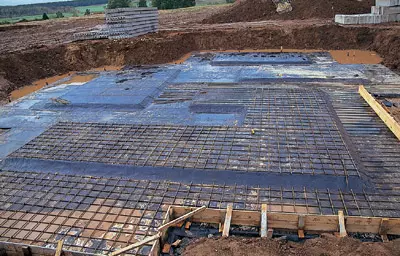
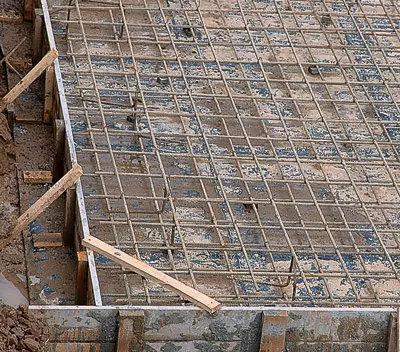
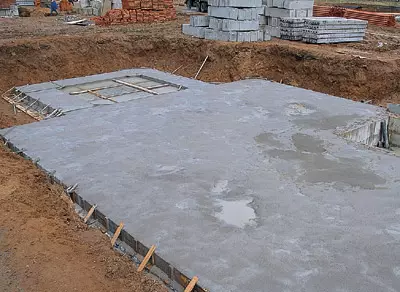
Next to the entire perimeter of this waterproof base, a milking formwork was elevated for a monolithic reinforced concrete plate. Having finished the formwork, they cut cubes from a pre-prepared solution of the brand 100. Cubes are needed to create the required gap (5cm) between the frame of the reinforcement and the bottom. The embointing was placed knitted frame from reinforcement with a cross section of 12mm, which was then poured with concrete grade 200 (B15). To avoid the formation of voids, a deep vibrator was used when pouring. After concrete solidification, the foundation is a monolithic reinforced concrete slab with a variable with a thickness of 30-40 cm. It is able to reliably withstand the seasonal movement of the soil.
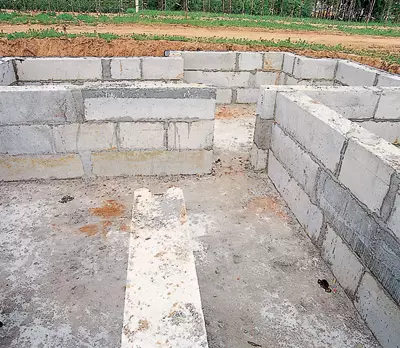
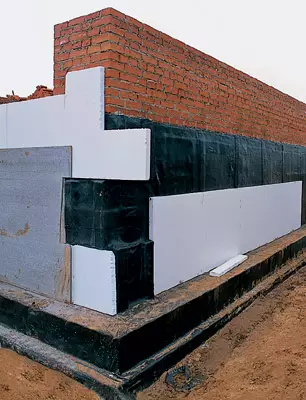
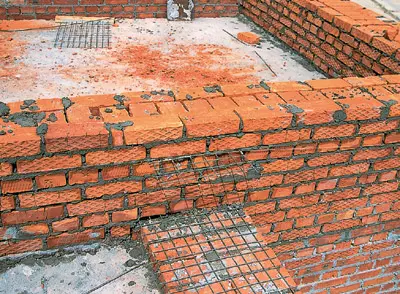
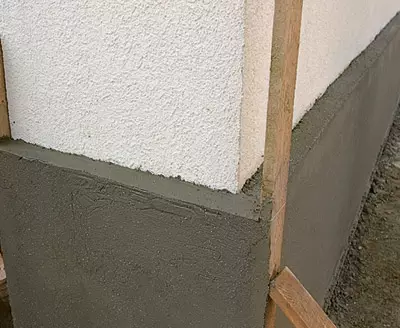
The next step is to install on the plate of foundation blocks (4058cm) FBS. They were attached to the cement-sandy solution in three rows, one above the other, with a dressing, thereby forming a part of the basement. For the supply of engineering communications between blocks of the lower tier in the right places, holes were made. After mounting the blocks from the outside, as well as along the upper plane were covered with rolled waterproofing. Then outside the basement was insulated with a thickness of 50mm thick, which was recorded on the bitumen.
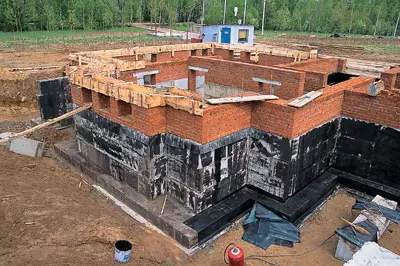
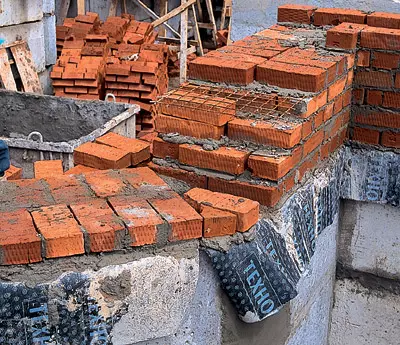
After hardening the waterproofing on the blocks around the perimeter of the house, laying a brickwork (width - two bricks, with reinforcement after four rows) with the device in it of the basement of the basement. Brick masonry height - 12 rows. On blocks forming the inner walls, lay the masonry into four rows above, taking into account the monolithic belt with a height of 30cm, which will be erected around the perimeter of the house.
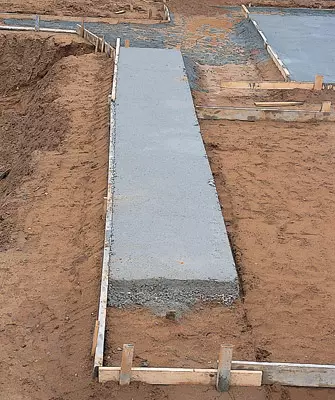
The project provides a garage. For it, at an altitude of 20cm from zero marks, a reinforced concrete plate was created with a thickness of 20 cm, for which the temporary rack under the formwork was built on the base.
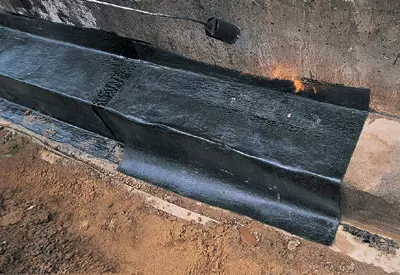
On the perimeter of the masonry, the formwork was installed under the monolithic belt section of 3830cm with a frame of 10mm rebar. Belt Belt concrete M200 brand.
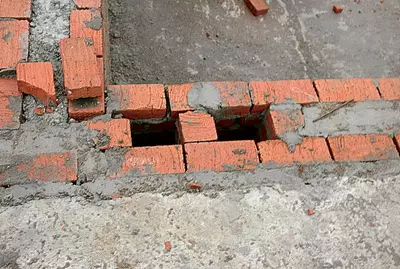
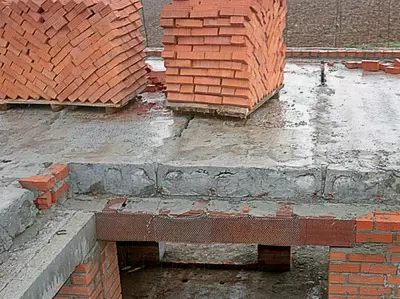
For overlapping, hollow reinforced concrete plates were used, which were fixed on the same solution as the masonry. Plates were installed with a crane. The seams between the panels were filled with cement mortar. To skip the risers of heating, water pipes and sewage, pierced with a hole of 150mm holes. For supplying from the main network of water supply and sewage, we dug a trench with a depth of 1.5m.
On the properties of bricks
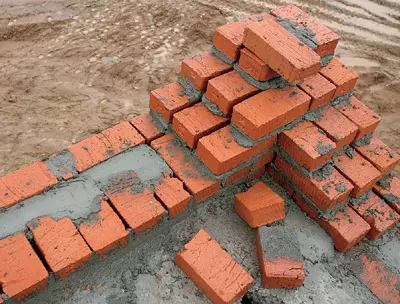
The main characteristic of brick-strength. Its indicator is the maximum permissible load (VKG) on 1CM2 surfaces, denoted by letters, indicating its numerical value. For the construction of houses up to three floors, the M100 brick, withsting the load 100kg / cm2, is best suited.
Another major technical characteristic of brick-frost resistance (the ability to withstand a certain number of freezing-thawing cycles). It determines the durability of the structure and is denoted by the letter F. As a rule, the frost resistance of the brick is at least 25-50, less often 75 cycles. For the climate near Moscow, it is necessary to use a brick with frost resistance of at least F35 (35 cycles). Complete designation of ceramic bricks consists of their name, type, strength grade, geometry code and frost resistance stamps, as well as guest numbers. Single full-length ceramic brick M100 brand and frost resistance F35 is as follows: Brick K-100/1/35 GOST 530-95.
The "classic" brick has the following dimensions: length ("spoons") - 250mm, width ("post") - 120mm, height- 65mm; Weight - 3.5-3.8kg, mass 1m3 masonry - about 1700kg. Such dimensions allow you to build walls of a complex configuration, lay out decorative elements. Fire resistance of brick walls allows them to be directly adjacent to the furnaces and cords.
Despite the fact that brick-durable and durable material, it has low heat saving characteristics: at the calculated outdoor air temperature -30s, the external walls of solid masonry from full-scale brick should have a thickness of 1.6 m (six bricks!). The solid laying of the walls of the residential house from a full-fledged brick with a thickness of more than 50 cm (two bricks) is economically inappropriate, so basically put the walls with a thickness of no more than two bricks, but with mandatory insulation (for example, there are facade insulation).
To improve heat protection characteristics use hollow bricks. We will have air layers that impede heat outlet beyond the building. But such material is less durable and when the bearing walls are erected, it requires a significant (1.5-2 times) increase in wall thickness, which increases the total cost of construction. Brick walls have a large thermal inertia: they slowly warm up and also slowly cooled. The temperature in brick houses undergoes minor daily oscillations, which is definitely good. But if in winter the house did not hear more than two weeks, began to warm it up to comfortable conditions for several days.
The approximate cost of one brick is 4-6 rubles.
Behind the stone wall
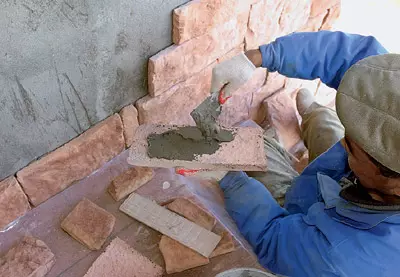
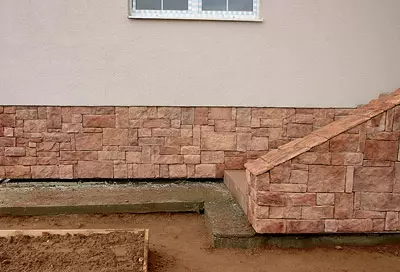
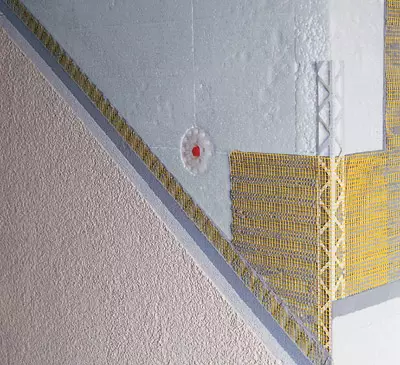
To increase the heat shield properties of the wall, a three-layer construction was chosen, consisting of a carrier brickwork (38cm), an outdoor cement-sand facing (50mm) and plate foam insulation (PSB-C) located between them. The foam layer with a thickness of 5cm is equivalent to the thermal printing properties of a brick wall with a thickness of about five bricks. Such a design simplifies the construction process of the house, since work on its insulation can be carried out in the second place, after the construction of a brick box.
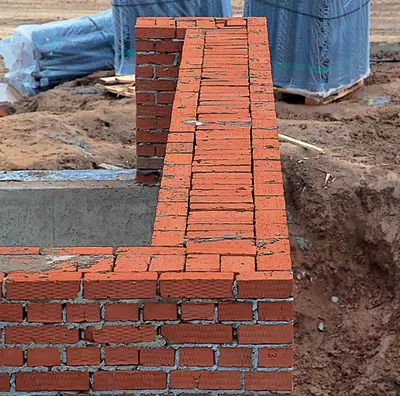
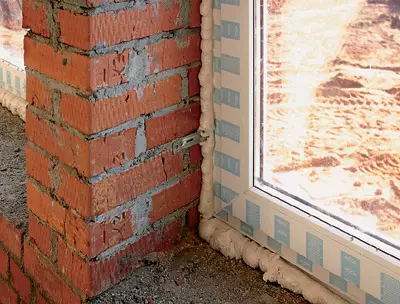
The walls were erected with solid masonry in a half brick. The thickness of horizontal seams was made on average equal to 12mm. The masonry has always started from the outside, from the corners of the building. At the same time, at every corner, lighthouses were made by a height of 6-8 rows of bricks, having a type of inclined stable. (Strains of the brick wall elements created in the temporary break places.) So ensured a reliable dressing of the new part of the masonry with the erected earlier. For the strength of the row of masonry led with the dressing of vertical, longitudinal and transverse seams, while using not only a whole brick, but also its half and three quarters.
Reinforced walls with a metal mesh from a wire 5mm every four row of masonry in height. Mesh rods joined each other knitted wire. Domestic bearing walls were also erected from full-scale brick. Their intersection with the outer was performed, passing alternately brick rows alone through another. The inner walls of the house reinforced just like external.
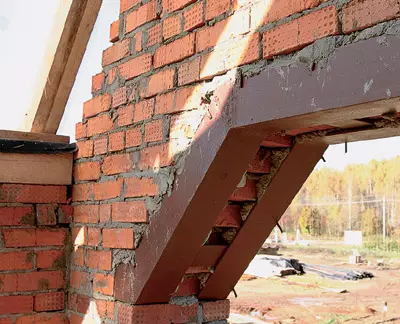
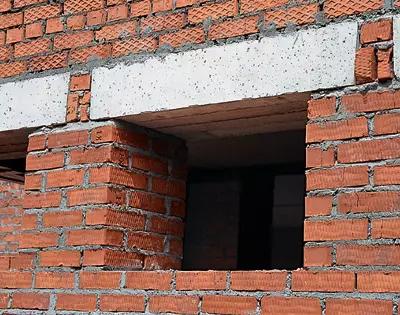
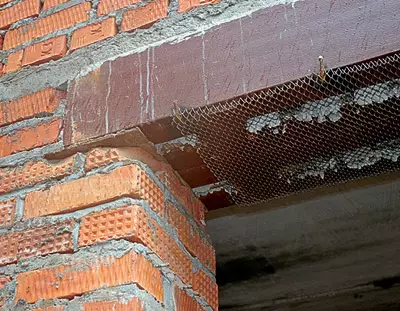
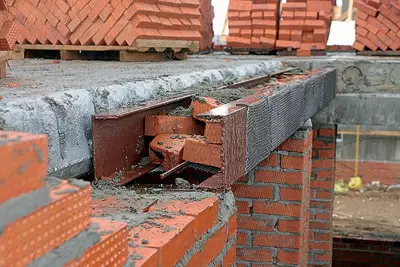
In addition, in the interior walls of the building was placed chimneys and ventilation channels. They were also laid out of a full-fledged brick with the appropriate dressing of the channel masonry with the wall masonry. The thickness of the walls of the channels and partitions between them is the minimum of the Pollipich. To build channels, the same solution was used as for the walls of the house. Partitions inside the building have a thickness of 12 cm (pollipich) and reinforced with wire 5mm through two rows of masonry in height. Door and window openings began to erect from the openings themselves so that the shares of bricks accounted for the middle of the wall. Jumpers over the openings were performed from reinforced concrete in the formwork. The height of the finished jumper and the support surface on each side is 150 mm. The lintels of the pitched type (above some windows) were made of a welded steel profile, which was done by the masonry.
Wooden antiseptic (bitumen covered and wrapped by rubberoid) plugs, multiple bricks - three on each side, at an equal distance from each other were installed for fastening the doors of the doors along the masonry.
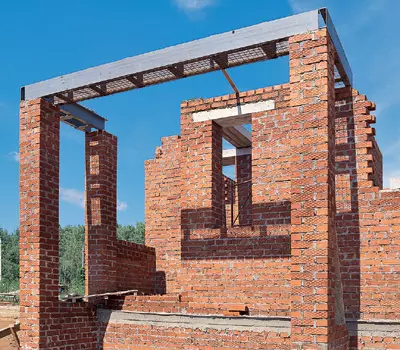
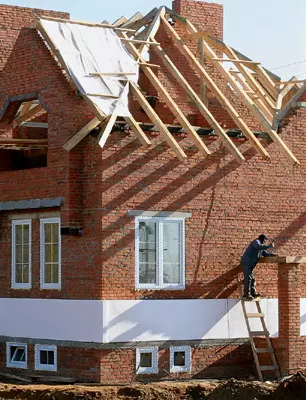
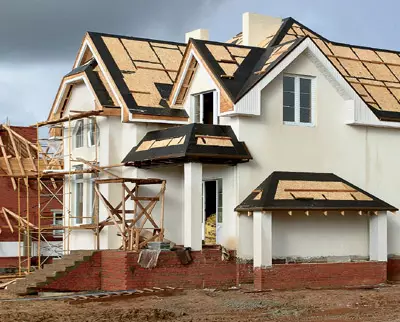
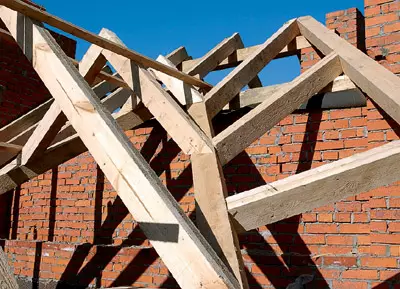
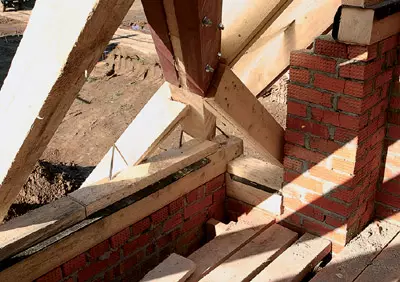
Mauerlat (Bar 150150mm) - Support for wooden rafters - was located on the upper internal circumstance of the walls of the second floor (the upper three rows) - in the so-called brick lock, and attached with wire to mortgage elements (rods) throughout the perimeter of the building. To protect against rotting, the bar before installation was wrapped in two layers of rubberoid. After that, they started setting the rafting roof design. The lining waterproofing layer was placed on the rafter, fixed by wooden bars, OSB-3 plates were laid on it, since the bituminous tile was chosen as a roof. The seams between the plates were embroidered with a bitumen composition. After graduating, the "roof" works were switched to facade insulation and plastering inland walls.
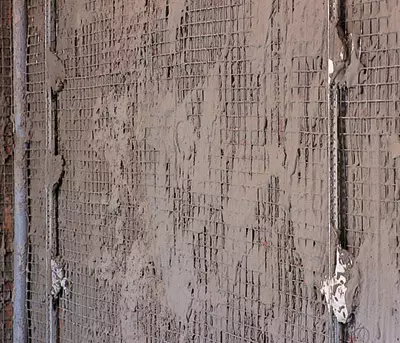
Marks installed special aluminum beacons, and for external angles, special corners with mesh edges. Arabote was used by a plaster mix of SCANMIX (Finland) and the aggregate for the preparation and applying of the solution, fed from the power supply. The solution was applied from the hose with a uniform layer throughout the workpiece. After that, it was aligned: the excessive mass was removed, in the place of the lack of- added. An aligned plastering solution was given a time to dry and start grabbing (1-1.5 hours). The surface was then treated with a special grater with a sponge for removing small tuberculos, filling fine scratches and pores, giving the surface to a very high degree of smoothness, after which four days were left for final drying.
The on-site insulation of the house of the insulation plate (PSB foam-with 50mm thick) was glued to the wall and fixed dowels around the place. Then they started outdoor plastering. The mixture for the facade was laid in two layers. For the first, the stronger jumped in the glass. The thickness of the plaster layer on the base is 5 cm, in the rest of the places 1cm. Upon completion of these works, laying and installation of engineering communications began.
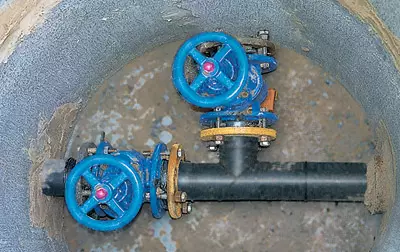
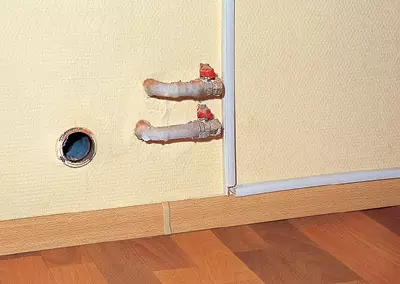
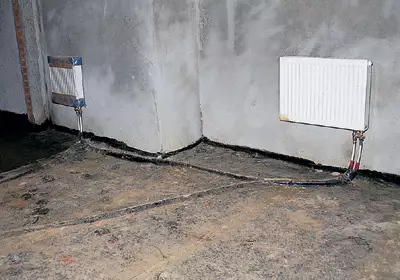
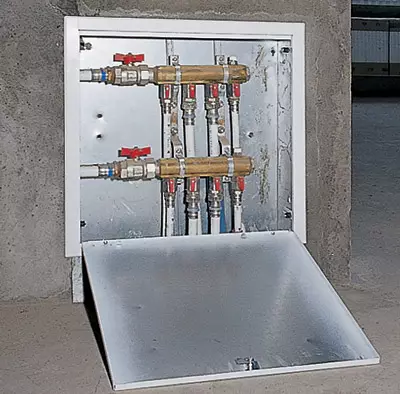
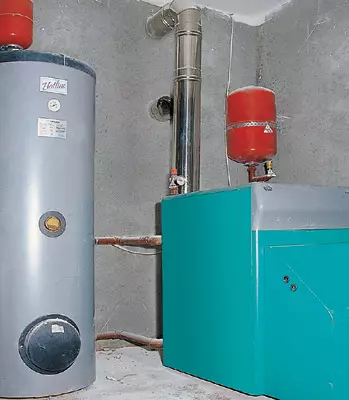
The heat source of the heating system is the CTC boiler (Sweden) with automatic regulation of the operation mode. This boiler, as well as Bosch boiler (Germany) for heating water installed in the boiler room. Punching devices used Corrado radiators (Czech Republic) with lower and side connections of pipes covered in the floor. The wiring of heating and hot water systems was carried out on plates of ceiling floors with metal-plastic pipes, which were then poured with a layer of screed. Connecting radiators was made after the end of plastering.
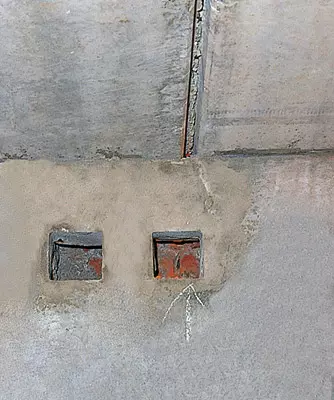
Power supply is supplied by cable with a transformer substation to the main distribution shield of the house. The shield is equipped with an electricity consumption counter and protective automatics, the wires are mounted in boxes. Wiring is made in a hidden way.
After completing the work on connecting and testing engineering systems, the house passed to the decoration of the inner walls and floors.