Facing the inner walls with artificial stone: the necessary materials, the choice of glue, the laying technology of the decorative tile.
Brick and processed stone are beautiful decorative elements. The technical characteristics of these materials meet the aesthetic criteria for diverse interiors and various conditions of their operation.

You have a choice of shades between white, beige, gray and black, depending on the interior decoration. Kitchens and bathrooms can gain a completely unexpected flavor. Every corner of the room can be changed. Decorate so dining table or any other interior element in your apartment.
Suites from the northern countries, these materials crossed the borders to become and in other climatic conditions by elements of the inner scenery and facade cladding, bringing joy and heat into the house, as well as the insulating function.
Modernization of production facilities brought technical excellence and allowed to create a large range of this products at affordable prices. Plants manufacturers offer bricks and decorative stones that find their place in the interior, and outside the building. This includes a large range of colors and a lightweight installation system.
Lightweight, light shade finishing stones are equally good for the facade and interior, and special finishing elements (corner, trapezoids, protruding panels) allow you to implement diverse architectural solutions: half airs, straight arches, edging doors and windows. Resistant to moisture, external influences and temperature overloads, such a decoration of the building is easy to execute.
Necessary materials
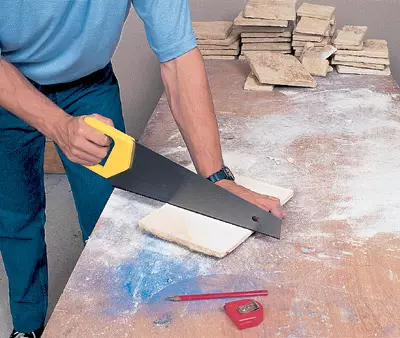
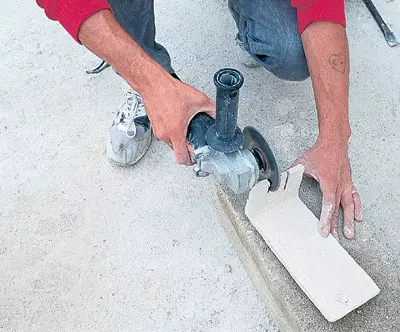
Laying of decorative stone tile does not require a particularly difficult tooling. Bought set includes: Construction tape measure, level, hand saw, pencil, metal line 2m long, brush and twine, if you want to cover a large surface with a tile, as well as a flexible spatula or brush for glue. If you planned the capital facing of the walls, stocking with a circular saw to cut the billets without unnecessary effort. Inaccination, pride the skin to handle just cut pieces.Glue
For external and internal works, one and the same glue cannot be used. The selection of glue depends on the humidity of the medium, as well as from the surface coated. Adhesive for external work, as a rule, comes in the form of a dry mix, packaged in bags. For internal works, it is used both dry mix and ready-to-use paste. However, some glue brands are suitable for both internal and outdoor work. Many can serve for the joints of the seams. Adhesion use information must be specified on the package.Sling and stripping
| The cutting of the stone tile is performed very easily. Still a pencil with a line, cut off the hand saw in case the tile is made of plaster, an electric circular saw if cement-based tile. Try to avoid great efforts to the tile, it can break. Ground file trees the edges. |
| Some of the elements may have a factory bummer on the reverse side. Here you will have to take advantage of a rough file to make it easier to facilitate tile laying. |
Laying
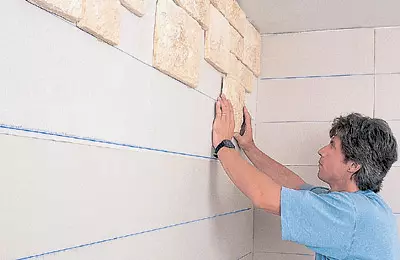
| This decorative tile is designed for cladding walls indoors. Before gluing a tile, make sure that the walls of the walls are dry and clean. Remove the paint and wallpaper, sand the surface, if there is a need. In the case, we use the largest element to carry out the first line of marking. |
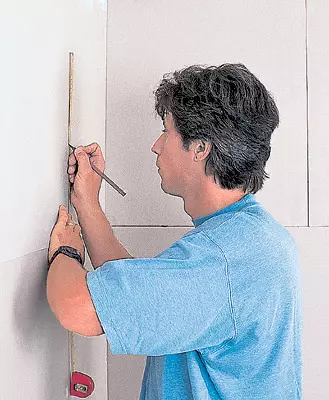
| Marking starts in the upper corner of the room. Seam the wall in two or three places, placing marks one to another. Perhaps the walls will not be able to accommodate the number of standard rows, so leave the place at the bottom of the wall for the criticism of the crop, where they will be less visible. |
| You will evaluate how the long aluminum ruler is easy when you spend the first line. Having attached to the label a ruler, set it down in the level so that the markup was horizontal. Transfer the height of the first tile. The visual perception of the glued tile depends largely from this first line. |
| You can mark the markup with the line or the bricklayer's twin, the last, undoubtedly much faster. Send a small nail in the corner for which the twine can be tied before tightening it. |
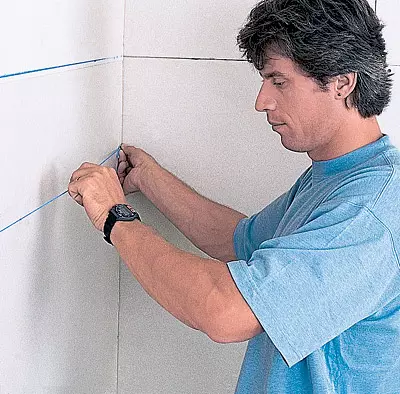
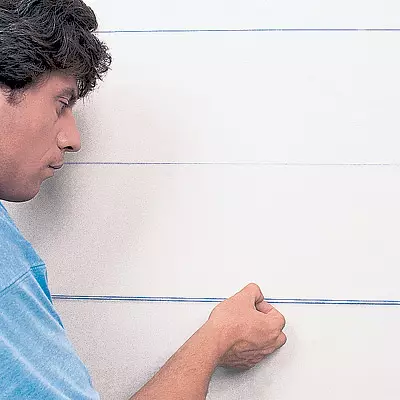
| Tension the twine strictly horizontally and, pulling it perpendicular to the wall, click on the wall. The twine is pre-soda in chalk so that the line is imprinted on the wall. Each time check the tension of the twine in the level. |
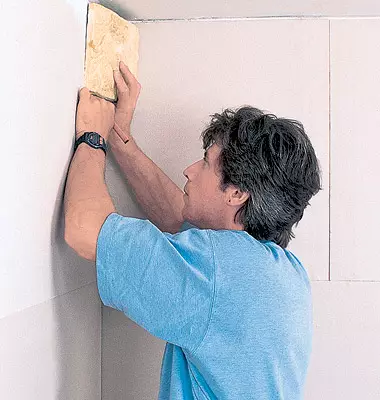
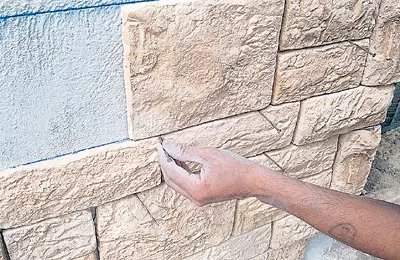
| Apply glue to the reverse side of the tile with a comb or spatula. Lump if the surface is uneven, you can apply up to 6mm glue. Place the elements closely, carefully controlling their adherence. |
| This method of laying the tile is more complicated, since only a good fit of the elements gives the impression of a wall folded from the real stone. |
| Try to avoid the deliberate regularity of the drawing, alternating large and small items. To during the installation, the tiles are not shifted, maintain them with the help of nails driven into the wall. |
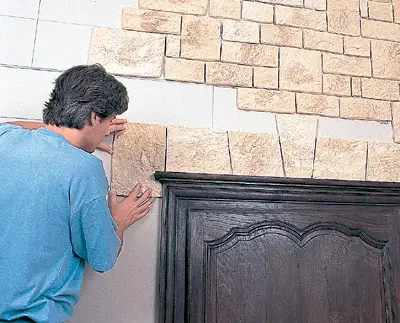
| When you come up to the frame of the door or window, stop in two rows to the platbands and make the frame by the frame. It is performed using whole pieces that sometimes need to be cut in those places where it is required. When the clearance around the perimeter of the doors is ready, you can fill out empty places. |
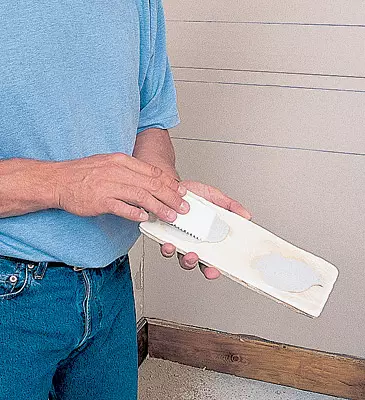
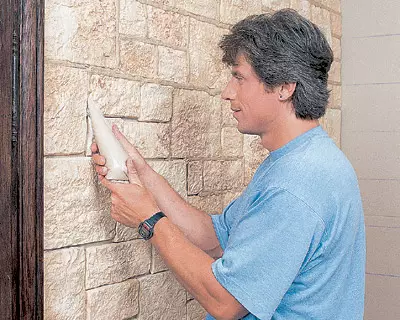
| The sealing of the seams should be made a few hours after laying, better the next day, on platforms of 2-3 m2. Filling the crox with a solution, squeeze it if possible into the depth of the joint. |
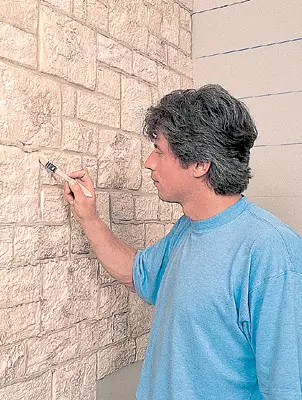
| Fill the seams to the edges. Before the solution is grabbed (after 10-30 minutes, depending on the source consistency), lay the seams with a spatula or brush. Do not press much to avoid scorches. After solidification of the solution with a spatula or handle of the brush, scrape the influx at the edges. The final processing of the seams produce a slightly moistened with a brush and light blows with a plastle-flotz brush. |
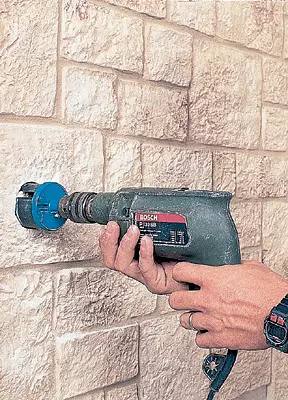
| In order to drill a hole for a socket or switch, you can use the drill-splitter. Do not attempt to drill a hole in the tile until it is installed: you risk breaking not one tile before you succeeds to achieve the desired result. Wire outputs are clogged in the socket of the socket or switch, after having undermined. Before laying a tile, mark the position of sockets and switches to facilitate their further search. |