Shirma can become the last stroke in the finishing of your interior. The material you choose yourself, and we will tell how to hammer a wooden frame with cloth.
More recently, Shirma as part of the interior was perceived by us as something long ago. But fashion is changing. Isaked things come back to us. Shirma can create a mood in any interior. Use, for example, the same tissue tissue and curtains. See how cool looks!
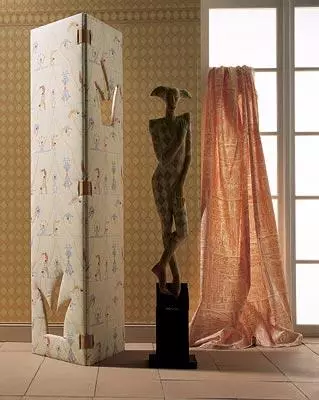
Mostly scores are made of fabric fixed on a wooden frame. As a rule, it is divided into three, four or five panels, otherwise called sheets.
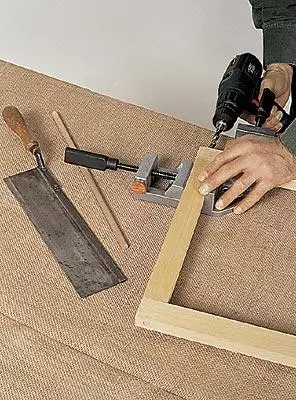
Describe a screen on ordinary loops possible at minimal costs and without much difficulty. But other bonding methods are used, such as hidden hidden or metal rods. But these types of installation require experience with textiles and wood. Shirma with metal joints is collected from maple or beech frames, for which foam rubber, fabric, finishing elements and hinges are fixed. These frames can be collected using the corners, but the spikes are most often used.
In addition to ordinary ways, there is another way of making a frame ...
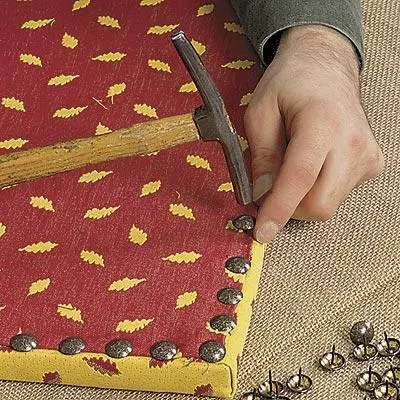
In order to make a screen, any fabrics are suitable. As a rule, the dimensions of the frame-width 40-50cm and height 150-180cm. Prepared surface allows you to attach fabric without any difficulties. The choice of finishing is also very wide: here is a flat tape, and twisted, cord, brushes, as well as gilded or copper nails of any shapes and sizes.
| You can make frames in a traditional way or, which is much easier, drumpped the hole and screwing the screw, pre-secure the bar with the corners. |
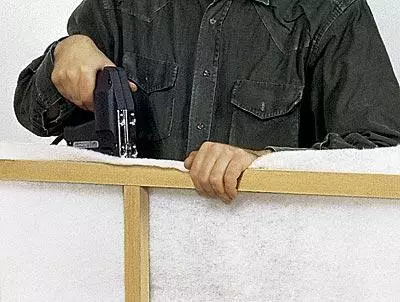
| Do not pull the material too much. To achieve uniform tension, start attaching from the center to finish to the edges. |
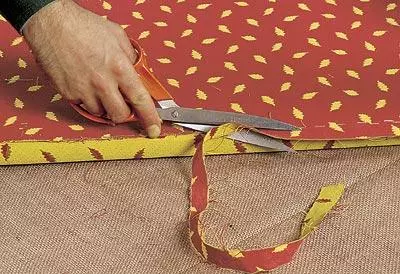
| When the first layer is laid, cut the remnants of the wool on the corners and along the entire frame. Use well-fulfilled tailoring scissors. |
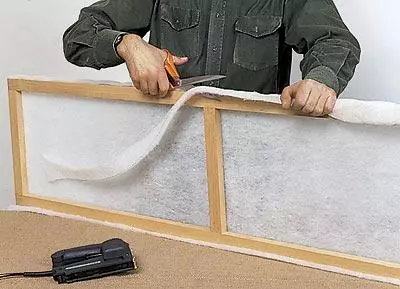
| The second side of the frame is also closed by cotton, which is attached not to the ends, but to the frame plane. Then do the same to cut the surplus wool. |
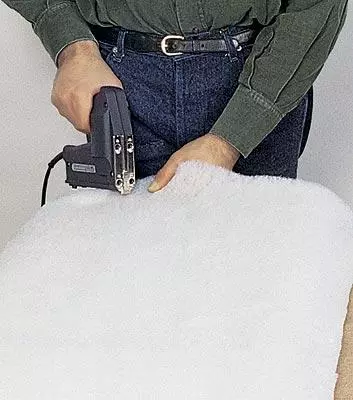
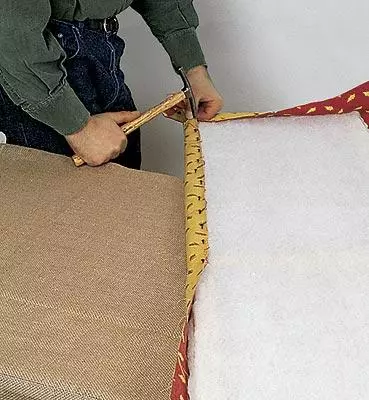
| The imposition of tissues requires the same tools as wool, only tissue is dragging on the opposite direction, and not attached to the ends. For this stage, it is better to use the stationery buttons first, and then a stapler. The fabric must be well stretched, and still fastening should be started from the center. |
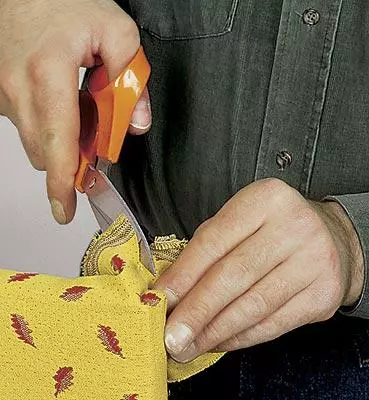
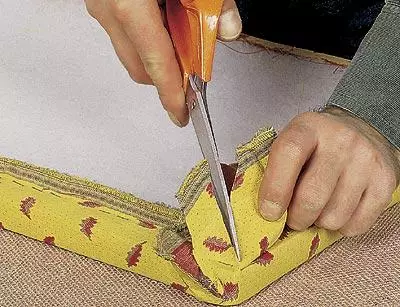
| At the corners, cut the surplus of the fabric, pre-fixing the closure fabric on the end. |
| On the opposite side, fold the fabric so that the tension does not change and the folds did not appear. Then fasten the clips and cut the surplus of the fabric. Put the frame vertically on the desktop. Tensioning the end fabric with one hand, and then scroll all the folds. |
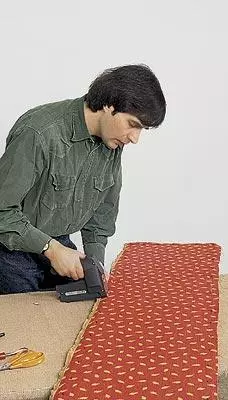
| On the second side, the fabric can simply apply, stretch and finally fix the bond. |
| If you close the fabric ribbon, you can simply cut off the excess fabric, but if you strengthen nails, it is better to turn it. |
| Various finish options are possible:
|
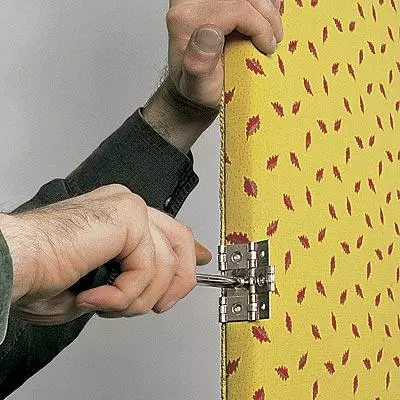
| Start setting the loops at the beginning to the center panel. There must be three hinge on the side. After all the loops on the central panel are screwed, fold the panel to face to face, align them and take the place for screws with a pencil or sewn, and then twist the screen. |