
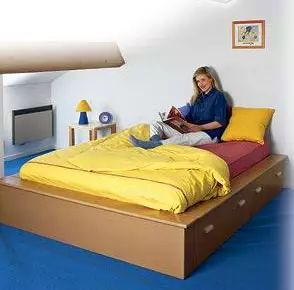
Instructions for assembling beds with descriptions of parts and their size. Follow the proposed scheme or make your changes to it.
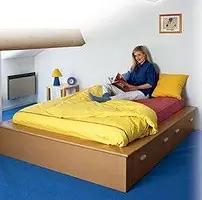
Do not envy the owners of this bed. The assembly will not be a lot of work for you. You can follow the proposed scheme or make your changes.
The headboard bed is a panel attached by one side to the end of the side block. It connects three transverse straps (central and two front) with a central block and a back of bed, which increases the rigidity of the structure. The mattress (140cm) is placed on the frame made of the bars in the form of a horizontal strapping based on short bars. From three sides, the base of the bed is closed with a wide edging thick 22mm.
So that the bed was collapsible, blocks and headboard are sealed with bolts and barish nuts. These connections are inside and are not visible outside. The transverse strips and three panels of the upper side can also be removed: the first are simply screwed up with screws, and the second are installed on plug-in flat spikes (without glue).
Two boxes are extended by guides with roller wheels with a diameter of 30mm. The orientation and depth of the boxes depends on the location of the bed and the availability of free space in the room. You can place the boxes on the other hand, "turning" the assembly scheme, if the space allows, the length of the boxes can be increased.
At a modest price
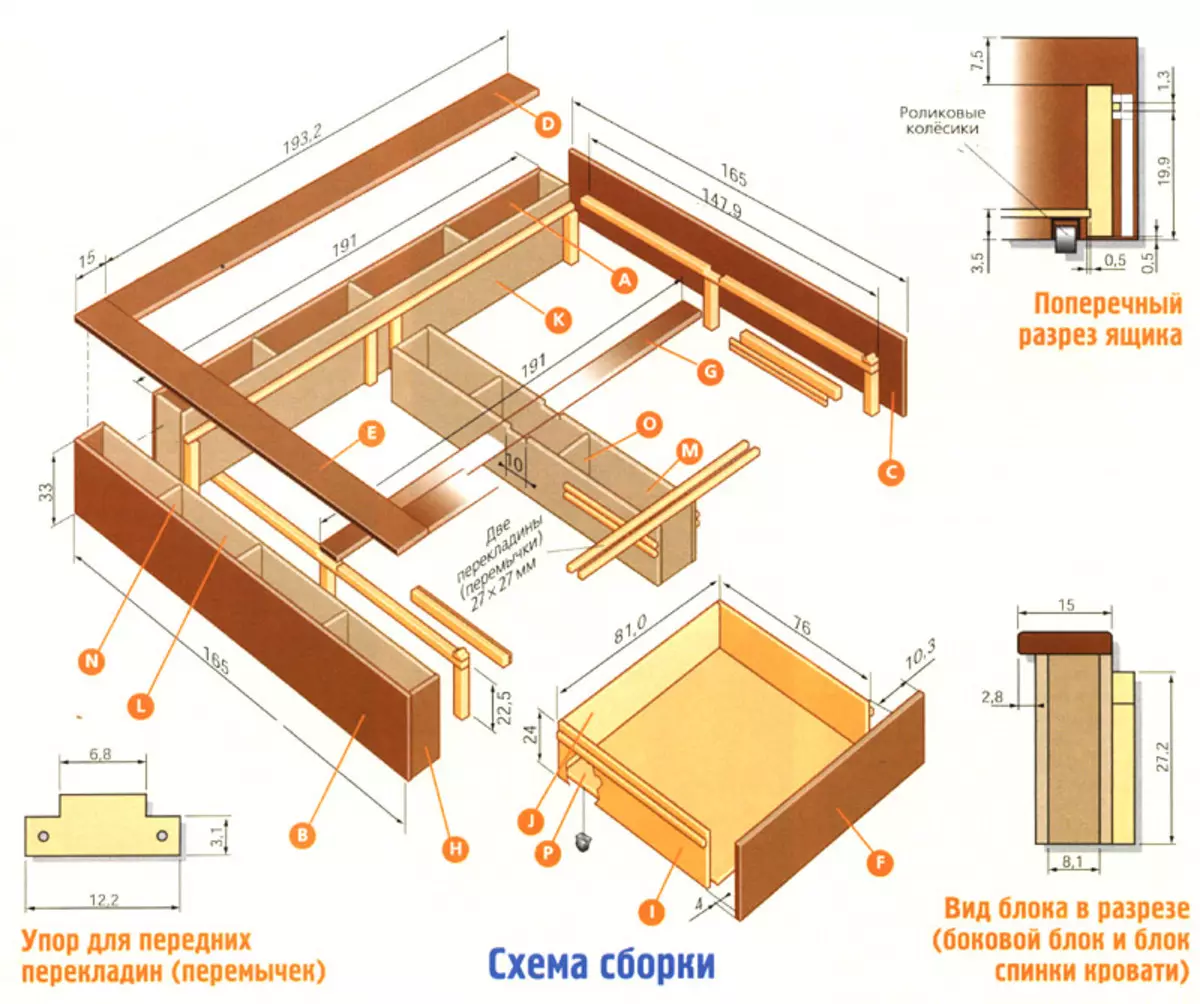
Dimensions of blanks
| N. | Name | Number of | Size, see |
| Board 22mm. | |||
|---|---|---|---|
| A. | Outdoor panel side block | one | 19133. |
| B. | Outdoor Block Block Panel | one | 16533. |
| C. | Headboard | one | 16533. |
| D. | Side straps of the top side | 2. | 193,215 |
| E. | Back boat | one | 17115. |
| F. | Outdoor panels of boxes | 2. | 95,332. |
| G. | Central transverse plank | one | 19110. |
| H. | Side Block Block Bed | 2. | 3310. |
| Board 16 mm | |||
| I. | Side walls of boxes | four | 7624. |
| J. | Rear walls of boxes | 2. | 77,824. |
| Wood-chip 19 mm | |||
| K. | The inner panel of the side block | one | 19133. |
| L. | Interior Bed Back Block Panel | one | 160,633 |
| M. | Panel of the central bloc | 2. | 147,927,2 |
| N. | Speakers (crossbar) side block and block backing bed | eight | 338,1 |
| O. | Speakers (crossbar) of the central block | four | 27,214,2 |
| Plywood 10 mm | |||
| P. | The bottom of the boxes | 2. | 78,874,8 |
Assembly
If you do not have the ability to make items in the workshop, it is best to ask to cut the panels in the store (see Heshesham assembly and a table with the size of the blanks).
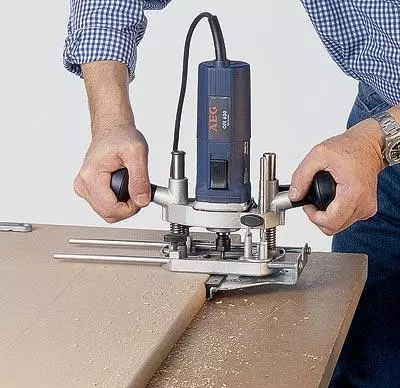
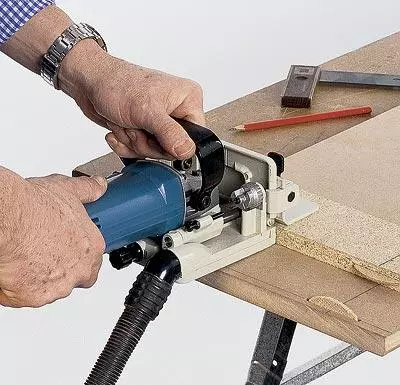
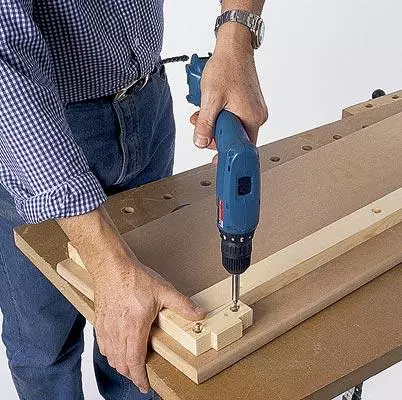
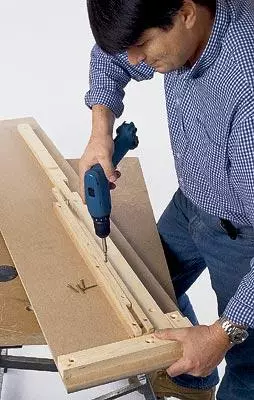
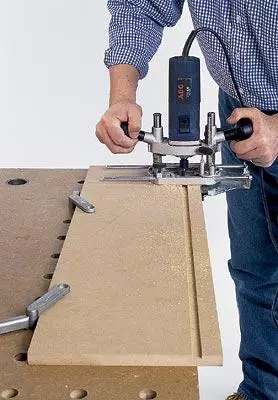
Blocks. Using a milling machine (milling) for cutting the grooves will significantly simplify the assembly of blocks. Flat spikes can be replaced with pins with a diameter of 8mm, after drilling the drill of the holes for them.
The facing panel of the side block is made of the board, and its inner panel and five spacer - from the chipboard, like the central unit. It is shorter and has only four spacers. On the two panels of this unit from above, the extensions of 10022mm are made through which the central transverse bar passes.
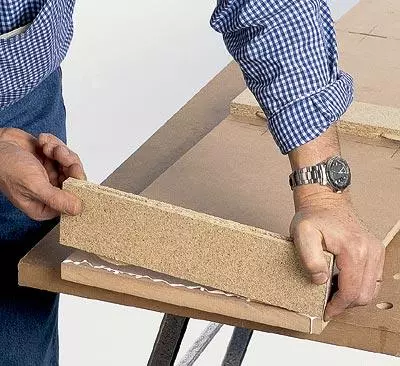
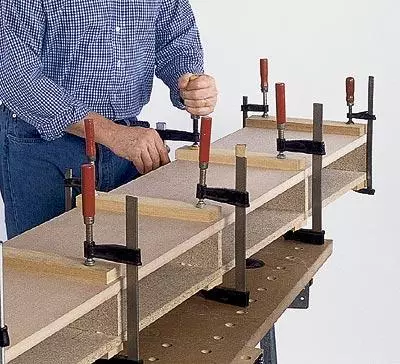
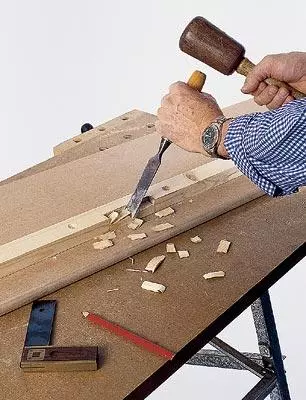
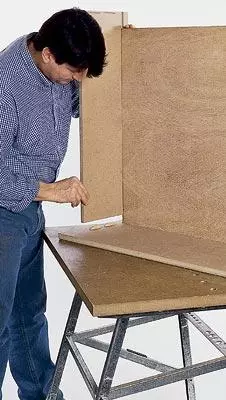
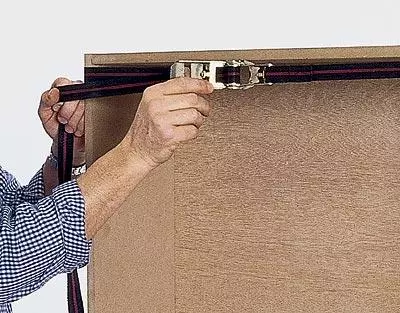
The back of the bed is going to a little differently. The sidewalls are cut from the board, like a facing panel. Attacks, how they close the ends of the panels, they make them a little wider than the other crossbars. After you accurately place and made the grooves under the spikes (or holes for the pins), from each pair of connected surfaces glue, only one is missing. Then the design is assembled and cleaned with clamps to dry.
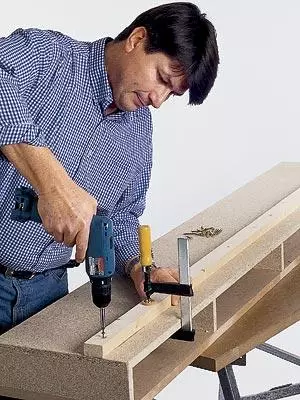
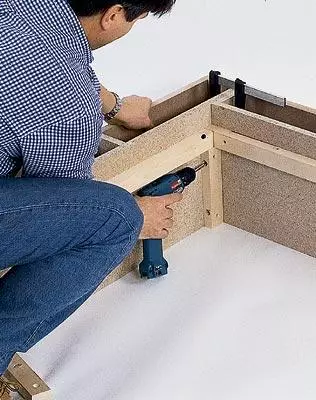
Mattress reference frame. It is made of horizontal, carrying the load of wooden bars with a cross section of 4727mm, which from the edges and in the middle are supported by vertical supports. They are mounted with glue and screws on the inner side of the side block, the backing unit and the headboard.
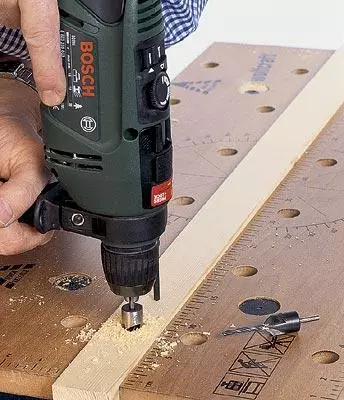
Three supporting bars are fixed on the headboard and back of the bed: along the edges and the center, on the lateral block they are only two, they are placed at some distance from each other, where the inner block is attached. After installing the carrier bars, the grooves are cut into them under the central transverse bar, the holes with a diameter of 4.5 mm under the screws are burned and cencing.
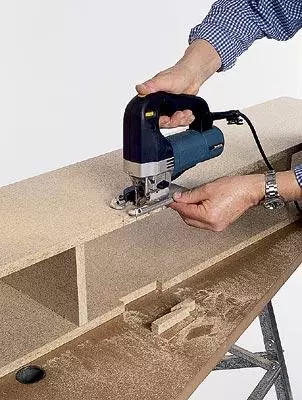
Boxes Collected with flat spikes and grooves. The front panel protrudes beyond the boundaries of the side walls. The bottom is included in the groove of 10mm width and a depth of 5mm. When the boxes are pulled, the front wall of the bed form the front panels, asymmetrically displaced. Closer to the center they protrude 10.3 cm, and at the edges of only 4 cm.
From the height of roller wheels depends on the location of the grooves in which the bottom is inserted. Between the floor and the box should remain a 10-millimeter gap. The counter side of the front panels accurately places the location of the grooves that should not go beyond the borders of the side walls of the boxes.
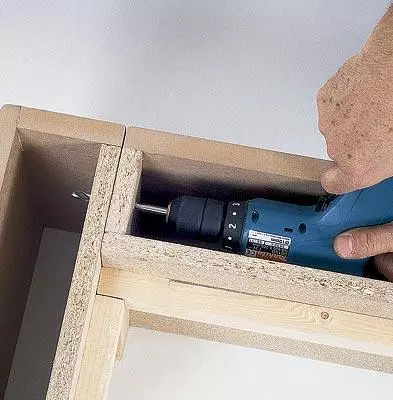
On the side walls of the boxes are attached to the cross section of 1313mm. They easily slide between two guides of the same thickness installed at the corresponding height on the panels of both blocks. Guides, located on the head of the bed and the back, are screwed first to the lining bars with a cross section of 4727mm, and then as one unit, this node is screwed into screws to the head of the head of the head and the back. As a result, the guide groove does not overlap with supporting bars.
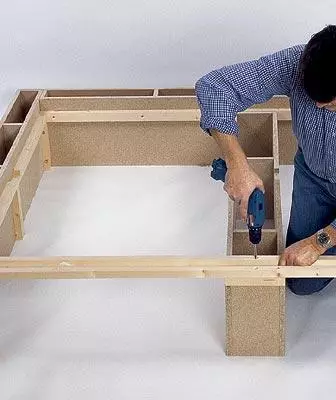
Front crossbars (jumpers). Along, they are relying on two short 30mm thick bar, screwed to the central block, and along the edges of the two stops of the T-shaped configuration fixed on the back and headboard. The decorative edging panel is installed on these jumpers.
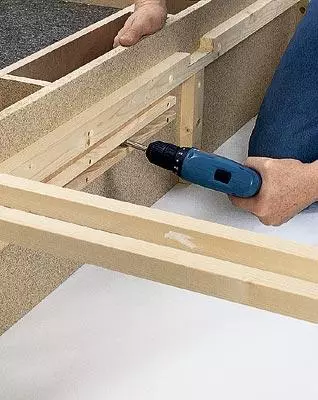
Decorative edging. Three decorative edging panels have a bottom of the grooves placed on one or two buttons. There are flat spikes installed on the bed base and on the front crossbars. When assembling, each spike is lubricated with glue only on the one hand, with the other, it is simply inserted into the grooves, which allows you to disassemble the bed if necessary. It should be remembered that the edging panel on the side of the drawers has only one end groove beds. After the central transverse bar is fixed in the cutouts intended for it, it remains to install the top edging. At the beginning at the edges and on the top panels of the top edging from the bottom side, mark the places where the grooves for connecting to a spike with front transverse layers and the base of the bed will be peaked. By making feedback, install edging on spikes.
Final finish
On the boards with a wide brush, apply two layers of acrylic primer, after which the surface of each layer is seized, then cover with two layers of the half-one polyurethane log with intermediate polishing.