
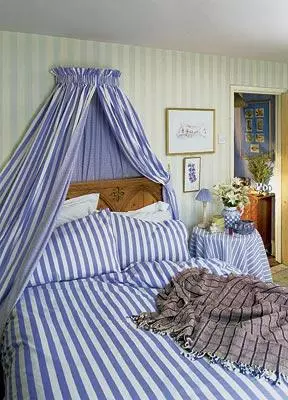
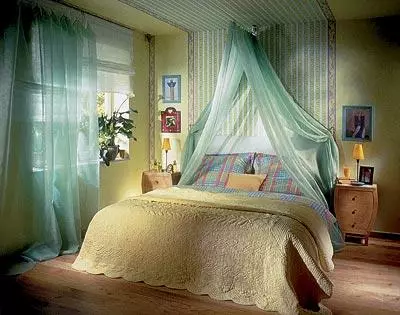
The bedroom can be decorated with a romantic canopy of spectacular fabric. Patterns and sequential description of work are attached.

If you are an adherent of a classic style and also in the soul of a romantic, you will fit the cozy headboard. Below we will tell you how with the help of spectacular fabric you can transform your bedroom
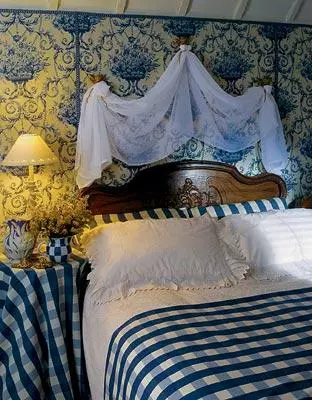
Funny stripes
| You will need:
|
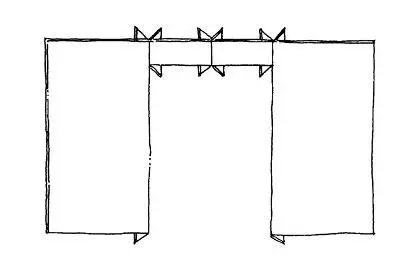
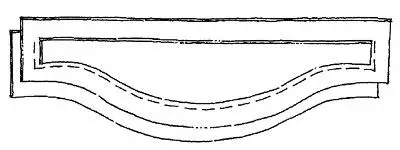
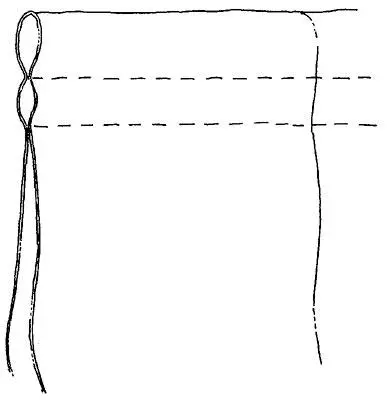
| Cut two pieces of fabric in a flower for the inside of the canopy. Each piece should be 75cm wide and 200cm long. Connect them together with long facial sides. Cut more two pieces, each 200cm long and 122cm wide. Connect these pieces with long free edges of the fabric in the flower, each from different sides. |
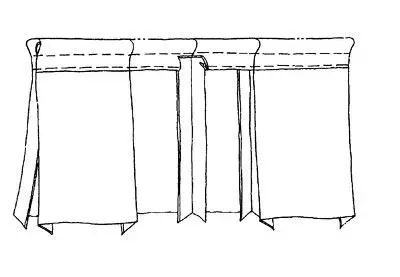
| From the striped fabric, cut two pieces of 225.5 cm with a length and 122cm wide and two-27cm long and 75 cm width. Connect these pieces as shown in the drawing, face side to each other and small parts in the center. |
| Connect the blanks into the flower and strip the front sides together so that the top edges coincide. Scaliate them and notify along the top edge, then lay. Turn down along each of the sides and also lay. |
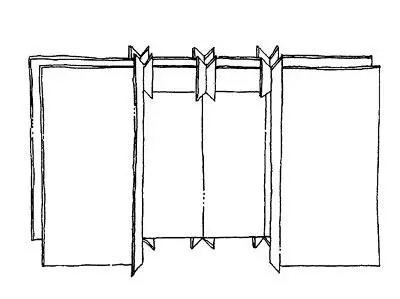
| Fold the canopy with the invented sides inside and so that the lower edges coincide in order to form a strip 12 cm wide along the top edge of the canopy. Scaliate and sweep together all layers of fabric close to the top folded edge. |
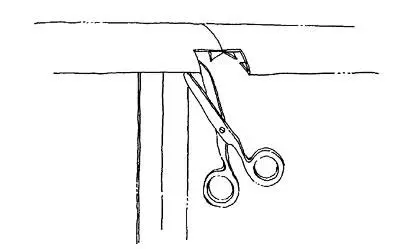
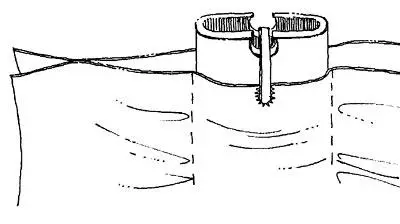
| Expose the bottom edge on the front side of the canopy (soft short piece). Then, using sharp scissors, cut off a piece, approximately 10 cm wide and 6cm depth from the center of this edge. Turn out the edge of the resulting cutout and wash. This excavation forms an open space for fastening, to which the canopy will then come. |
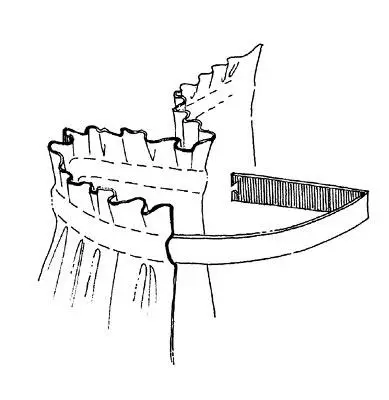
| Stop both layers of fabric by stepping down 12cm from the bend to fix the front part. Make another line retreating from the previous up to 6cm to form a stem for the frame. |
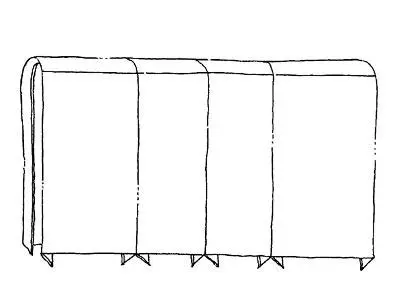
| Turn the bottom edge of the edge and set. Then position along the opening sides on the sides to connect the fabric of the strip and in the flower. Do the remaining edges. |
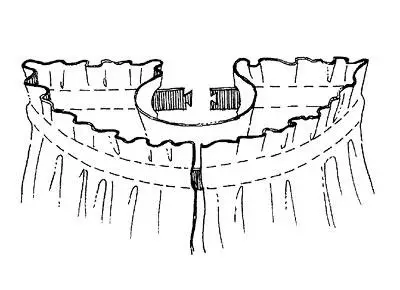
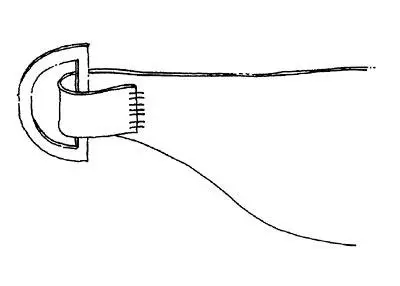
| A semicircular frame for a canopy can be made independently or purchase ready. It should be located above the bed strictly in the center and form a small erker. |
| If you want to make ties, pre-enumerate the hooks on both sides of the bed. Do not handle a small segment where the fabric in the flower is converged with the back to be able to turn the strings and attach the rings (letterd letter) on the hooks. |
| Finished self-adhesive seal (fliseline) Place the shiny side on a piece of fabric. Slit, having spent a warm iron. Cut the cloth, leaving the allowance in 1 cm. Cut the second piece of fabric of the same sizes and place it on the top side of the seal, the front side inside. Single around the curved part of the pattern close to the edge of the seal. Cut the fabric close to the line and remove the front side out. Stay and wash off the outside. Insert the ends in the D-shaped rings, wrap the edges and the trick. Do the same for another risk. |

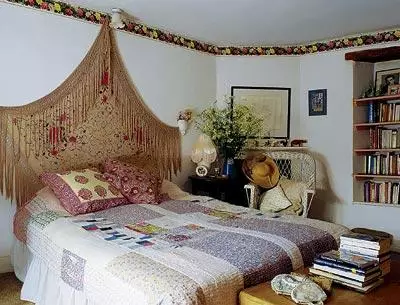
Rustic style
| You will need:
|
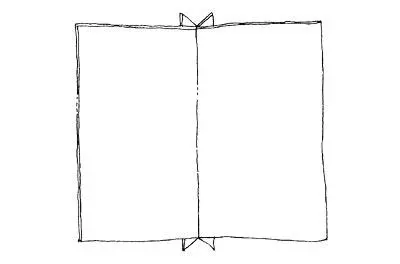
| Cut a piece of fabric 40cm across the share thread for making sockets. The remaining fabric cut into four pieces of 240cm long. Complete pairs along the long side, the front sides inside. Slide the seams. |
| Connect two finished slices of the front sides inside so that the top edges and drawing coincide. |
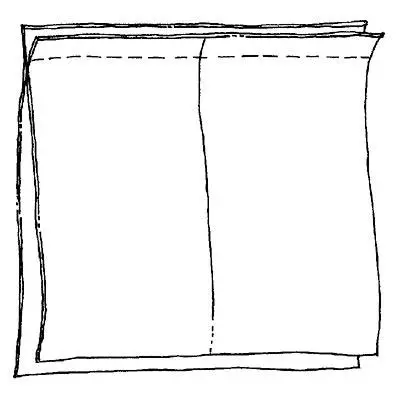
| Fold the fabric in half along the seam by typing it on the front side. Scoliate, then step up, retreating 4cm from the bend. Make a second line, retreating 4cm from the previous one to form a skeleton for the bracket. |
| Cancel the lower edges of the fabric. Secure the bracket on the wall in the center above the bed. Put the curtains and create. Attach a small piece of gum to the front of the scene, so as not to give tissue to slip. Grind the ends of the canopy in the hooks installed about 40cm above the headboard, then attach the outlets. |
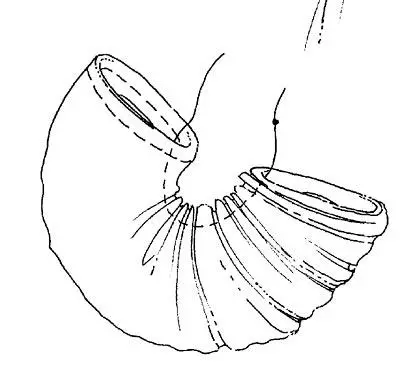
| To make sockets, you need to cut off for each piece of veil 2060cm. Turn the short ends. Then fold the cloth along half the front side inside. Stop along, forming a pipe. Remove the fabric. Using a double thread, touch the assembly line along the finished lines. Create fabric to get the shape of the socket. Sustrate the short ends of the socket together. Then we cut the button with a veil. Sing it to the center of the socket. Secure the rosette on the string. |

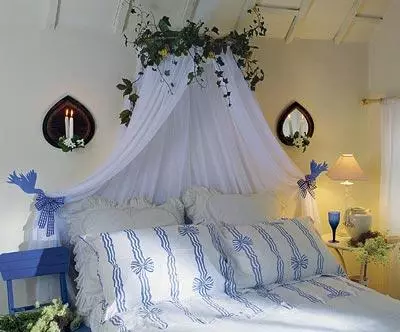
Blue drawn
Head-Diadem
You will need:
- Approximately 8m fabric (two widths of the fabric for finishing the rear wall and two widths for drapes around the bed).
- Artificial ivy.
- Blue tape in a cell with a length of 2m.
- Carticle
- White paper painted in light blue color.
- Simple brass hooks.
- White fabric tape.
- Universal glue.
- Acrylic lacquer.
- Scissors, thread and needle.
Sust together along the length of all sections of the fabric. Expose the top edge, scatter and secure a tape for assembly. Hang the curtains and decorate the top of the canopy with artificial ivy, consulting it throughout the circle of the diadems at intervals of 30cm.
Transfer a suitable drawing of a dove on the traction to the trash, increase it on a xerox and cut out. Then place it on a sheet of painted paper and cut through the billet. Turn the pattern (the keys of the pigeon should look in the other side) and cut the second pigeon.
Come on the wall of the hooks next to the edge of the mattress on the same line with the top edge of the pillow. Sew a small loop from the braid to each of the outer sides of the canol around at a distance of 1.27m from the outer edge of the curtains and the thread them through the hooks to fasten the curtains on the spot.
Place the pigeons on the wall so that their beaks look at the hooks. Stick and apply two layers of protective varnish.
Cut the blue ribbon in half. Tie two bows, entering them to the base of each loop and disappear carefully.
Gypsy Shal
Drapery over the bed
| You will need:
|
Soft folds of white, air, translucent fabric will give a bedroom with patterned wallpaper. Sensation of magic and mystery. This is perhaps one of the simplest in the manufacture of bed jewelry, for which only three decorative hooks are used in the form of gilded angels in the style of revival.
Position and reconnect the hooks so that the triangle is formed above the headboard. The central hook is better to strengthen at a distance of 1.5 m above the mattress in the center of the bed. The remaining two hooks should be nailed at an altitude of 1m above the bed on one line with the outside sides of the bed.
Find the center of the veil by folding it in half. Make it on it a noteing line, not reaching the edge 50cm to then dwell the fabric.
Mark 2 other lines at a distance of 1m from each edge of the fabric and make the assembly line along these lines. Change the unprocessed edge.
Make assemblies according to three trimmed lines and tie fabric to knots.
Tie a golden braid for angels around three tissue knots. Beautifully straighten up drapery.