
Wooden external shutters made by a rather unconventional way. Assembly scheme. Additional recommendations.
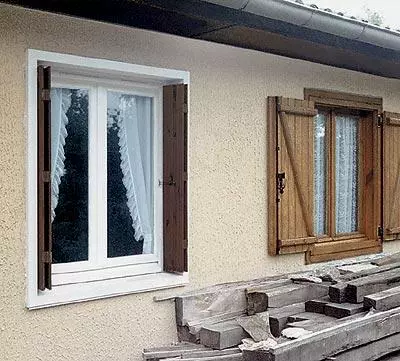
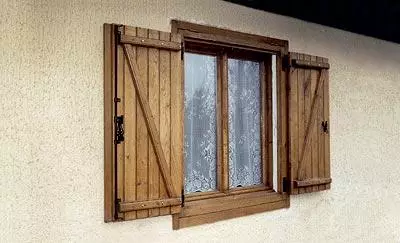
If you live in a country house or cottage, an early morning sun, probably wakes up you or the light or dawn. Apoto in the evening in the windows seemed to look mysterious silhouettes or a raised wind knocking on the glass with a branch. Equabling the nerves will help you with a simple fitting, wooden shutters made by rather original way. Install them on the windows and in your house will immediately become more comfortable and calmer.
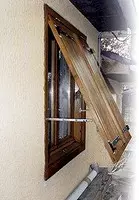
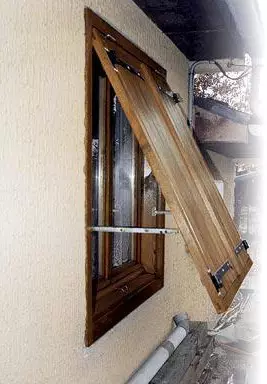
Shutters made in a similar way can be opened by opening them, as well as the so-called French way. This allows you to do two specially designed frames: one fixed, and the other is lifted on the loops located at the top, and is held by adjustable stops. Shutters themselves are installed on the frame by a classic way.
For the manufacture of one set of shutters (the dimensions of the parts depend on the dimensions of the window openings) you will need:
- Bar 5555mm;
- 27mm thick boards (shutters and cladding);
- Support strips 3050mm;
- 4 bracket for fastening in the opening windows;
- rapid cement (for example, "Fiedal");
- 2 loops with screws;
- 4 door welts with bolts and nuts;
- 1 Wooden lining 1050mm;
- 1 ordinary score;
- a circular saw;
- grinder machine;
- drill;
- Bitumen mastic cold solidification (MHG).
Installation
After marking and measuring the window opening, the necessary parts are cut with a circular saw, then they are eliminated by the plane and polished if you use untreated sawn timber. Relevant details can also be purchased in specialized stores.To mount the carrier frame, it is necessary to handle the window opening of the grinding machine. Initially, its outer part is processed to determine the sizes, then the internal parts. This work requires a certain qualifications, and do not forget to wear protective gloves and glasses. For installation and fastening the carrier frame of shutter, the outer edge of the window opening in accordance with previously defined dimensions is treated with a chisel.
Rama
Both frames, carrier and mobile, consist of vertical and horizontal bars, collected by "Wiship". The sizes of the frame of the carrier frame are determined by the dimensions of the window opening. Two depressions are made of the frame racks (basement on each side) to install brackets that are fixed to the frame. After mounting the frame in the wall on the inner perimeter of the window opening, four boards are installed. They are cladding, when determining the width of which should be proceeding from the depth of the opening and the movable frame.
The movable frame is carefully seen by the internal sizes of the main frame of the carrier frame with a reserve in 2mm. Before starting assembly to vertical and horizontal bars, stop staps are installed to install shutters in a closed position. Two frames, carrier and movable, are connected in the upper part with two loops fixed in specially prepared grooves.
Shutters
Shutters are made of twisted 2mm thick boards, but you can use lining or rail. The collected shield is tightened by the width of clamps. Other clamps are placed on the front part using pads so as not to damage the wooden surface. The remnants of the adhesive from the surface of the tree should be removed immediately.The blanks of shield shields are cut in accordance with the final dimensions of the movable frame. At the same time, the loops dimensions are boring.
On the inside of the shutter of the shutter is enhanced with wooden slats attached to them in the form of the letter "Z". Then loops are attached from the outside.
Installation and decoration
Before installing the shutter, it is better to paint the blade with a bright oak. After polishing and removal of dust, the first layer of strongly diluted nitrolac is applied.
After stripping, a second lacquer layer diluted by 50% of the initial volume is applied after stripping. After drying, the entire surface is spoiled again, then the third is applied, the last layer of varnish, this time no longer diluted with solvent.
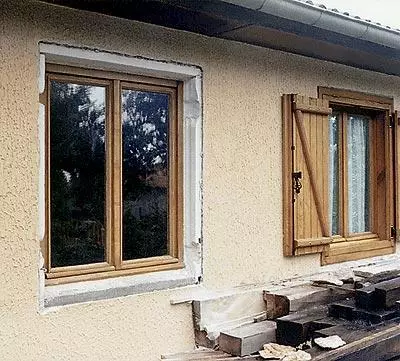
The fixed frame with the brackets come to it are strengthened in the opening of the windows with a rapid cement. When it dries, a facing boards are attached to the edge of the window opening to the edges of the frame with a bitumen mastic of cold frost and then further fastened with screws. Then you can proceed to connect the frames in their upper part and the installation of adjustable stops (clamps). The loops are first installed on the movable frame, and then on the shutters themselves.
The fastening of the loops is carried out by bolts with nuts. Nuts need to be corrected so that there is no possibility to unscrew them outside. In the last queue, the scorehold is installed for fixing the shutter in a certain position.
Assembling sash
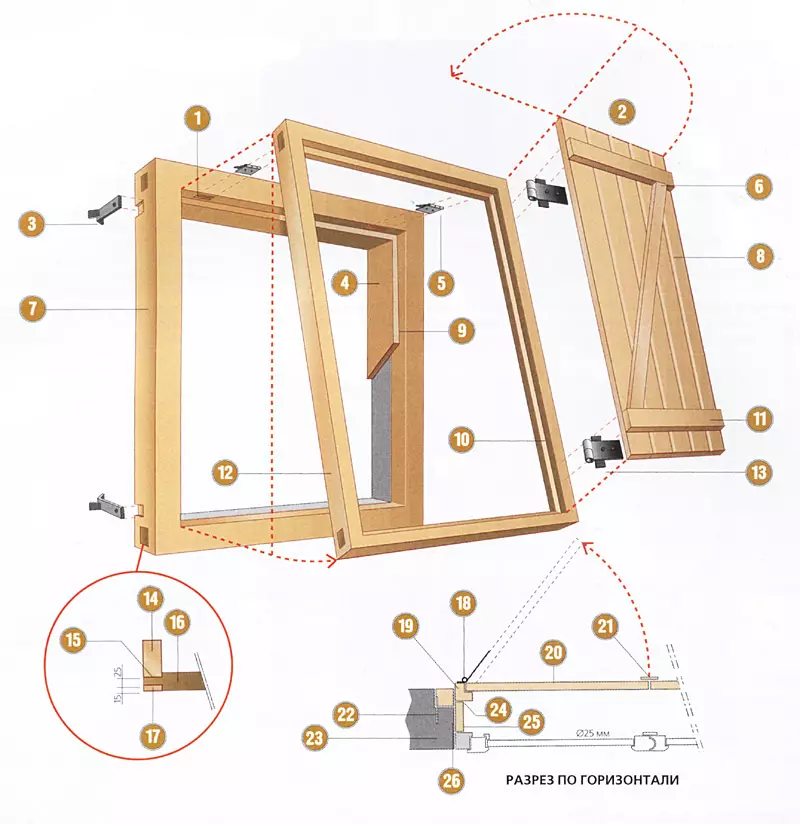
- Place for loops of the movable frame.
- Shutters.
- Bracket.
- Facing opening windows (2mm thick board).
- Loop moving frame.
- Diagonal rail.
- Carrier frame, timber 5555mm.
- Shutter, 27mm thick boards.
- Open windows.
- Stubborn bar 1527 mm.
- Cross rake.
- Movable frame of shutter, timber 5555 mm.
- Overlay door loop.
- Vertical rack carrier frame.
- Through groove.
- Horizontal rampage ramp.
- Spike.
- Patch loop.
- Movable frame of shutter.
- Shutters.
- Laying.
- Bracket.
- Wall.
- Stubborn bar.
- Facing board thickness 27mm.
- Open windows.
Additional recommendations
In the absence of special machines and equipment, you can make the grooves drill with a 12mm diameter tree drill. The sizes of the carrier grooves and mobile frames are 2525mm. Drill four holes in the corners of the slots, then carefully treat the grooves by the chisel.
In the same way, you can cut the spikes using a tree with a handwheel on a tree (refer to a small stock), then process them with the chisel and sandpaper.
Facing (15mm width) of the movable frame can be made of 2727mm rivers, which are attached to the movable frame with screws.