Illustrated Instructions for Walking Surfaces. Practical advice.
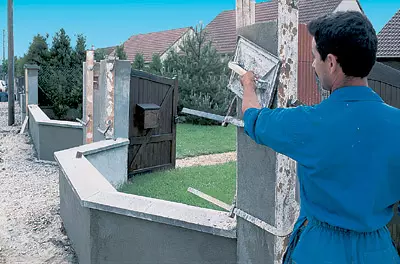
The "traditional" plaster is applied in two or three layers. The quality of application depends on how well it will withstand weather conditions. We will show how to watch the outer wall on the example of the two surfaces of the wall blocks, framing entry into the courtyard and ending with brick columns.

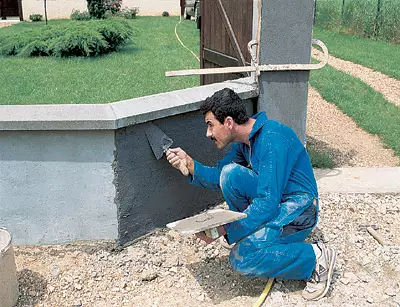
Depending on the air temperature, the second layer is superimposed 2-8 days after the first. After another 2-15 days, finishing, quite thin (7-10mm) decorative layer is applied. It consists of the same components as the main layer, but in another proportion, or in our case, is a solution of white portland cement and a hazed lime with the addition of decorative, for example, granite crumbs, water-repellent additives, for example, sodium aluminate and mineral Pigments.
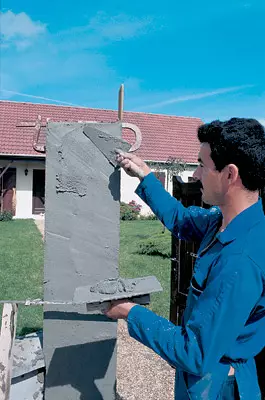
Only two layers of plaster are applied to the poles. The main is superimposed directly to the surface of the pillar moistened with water for the best hitch. The final finish is the same as for the walls.

Preparation for work
Before starting work, clean the surface from dirt and dust should be carefully cleansed.The solution for the primer layer should be liquid. It is prepared from one volume of cement and three grades of sand diluted with water. A cement-limestone is prepared for the main layer: one cement volume and one volume of harated to lime for five sand volumes. All this is stirred until a homogeneous mass is obtained.
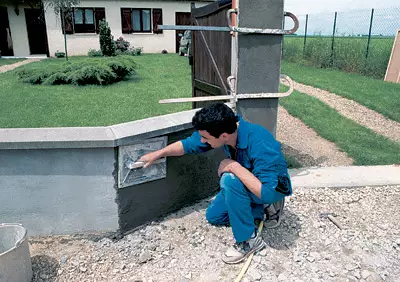
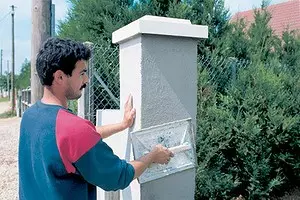
Maminating the surface with water so that the plaster does not crack, apply the solution with a trowel on the wall blocks.
Two days later (if it is hot and dry weather) on the walls and poles you can apply the main layer of plaster. Before the cooler of the first facet of the pillar on it on both sides, the boarded cover is attached, tightened by clamps. The boards must perform above the plane by the value corresponding to the thickness of the applied layer of the solution.
Practical advice
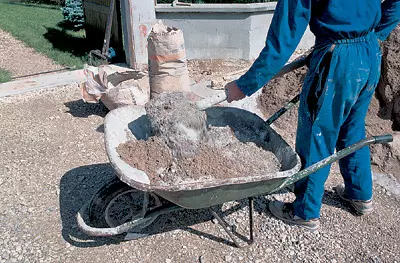
Approximately calculate the required amount of cement mortar for applying at a time. Never apply a solution if it has already slightly hardened and lost plasticity, otherwise it will later turn. If the street is too hot, it is better to cover the container with freshly prepared solution with a tarpaulter or some case so that water is less evaporated.
| To facilitate the transportation of the solution it is better to cook it if possible right in the wheelbarrow. First, prepare a dry mixture of sand, cement and lime, and only then pour water and stir up to obtain a homogeneous mass of the required consistency. |
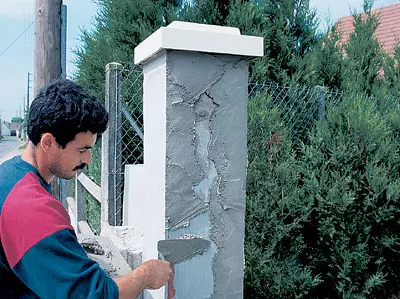
| Two layers of plaster are applied to the brick base of the pillar. After wetting the end surfaces, it is possible to evenly put a lime solution with a trowel and crumpled a little. To deceive the surface of the plaster below up. |
| Install the male cover for two faces of the pillar, adjacent to the one that is plastered and crumpled with a smoother solution. |
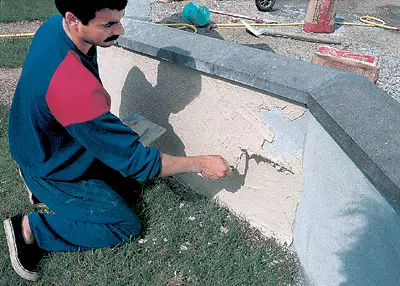
| While the solution is frozen on the post, process the wall surface. |
| As in the posts, after applying a trunk, he must be discarded. In this case, it is necessary to periodically check the vertical of the wall. |
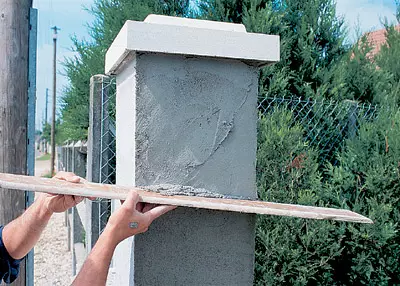
| While the first line of the pillar has not dried to the end, turn the three others, without installing the sheathing from the boards. |
| Then, by checking the board with a flat edge on the edge of the column, remove some plaster with the corners and crumple the surface with the ironing. |
| Finishing plaster is also better to cook in a wheelbarrow. The solution should be homogeneous so that after drying it does not become different shades. |
| This plaster is superimposed in the same way as the preceding layers: first a trowel, and then smoothly. |