
Floor laying technologies from granite slabs and wall cladding marble.
Preparing this material, we understood that this technology was not designed for the mass consumer. Such a delight can only be boasting the palaces of the Palaisian era, and some modern buildings designed for a wide human stream.
But if you are a real connoisseur of the beauty of the stone and want the house that you will serve as not to one generation, then our recommendations may be acceptable and useful.
I'm not a border, I'm just learning
You will need:building level;
Master OK;
Rubber hammer (kiyanka);
cement mortar;
Durable kapron cord with a diameter of 2mm;
Mop with a rubber nozzle or a piece of organity;
Dry sawdust;
Construction pencil;
Metal ruler.
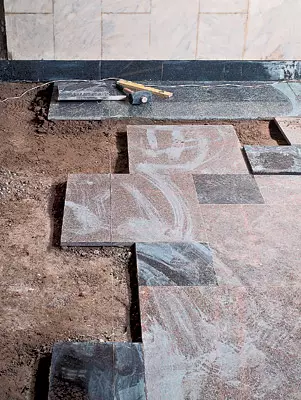
Any business, as a rule, begins with the choice of materials. It is advisable to immediately buy plates, splashed to rectangles and squares and polished on one side. Floor pattern is made up of different multi-colored rectangular elements. For their final fit, at your disposal should be a special stone machine. Stones are put on jack, so the parallellessness of the side edges of the stones are very important. Since the laying of the stone is the process is quite time consuming, it should be considered very seriously, because this floor is not even much designed for dozens, but rather to the century.
When all the necessary tools and materials are cooked, you can proceed directly to laying a concrete screed for the future floor. On top of the rammed soil, fill the liquid ceramzit concrete solution. After the first layer freezes, put the second and thoroughly align. When a thickness of a thickness of approximately 100-150mm dries and will be ready, you can start styling stone plates.
How to put and walk
Natural stone - marble, granite, although it seems to us superproof, actually enough fragile material and requires a rather delicate relationship. Try to choose the slabs without cracks and choose, from it really depends on the durability of your sex.
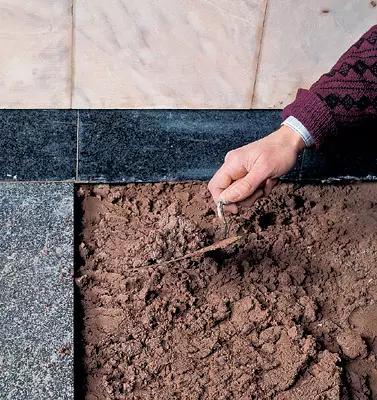
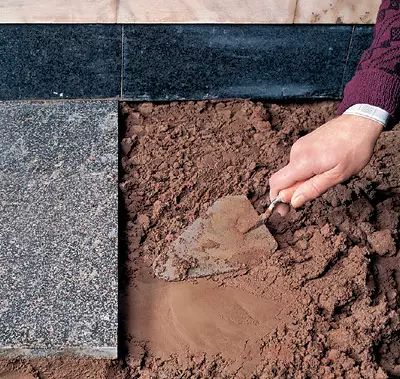
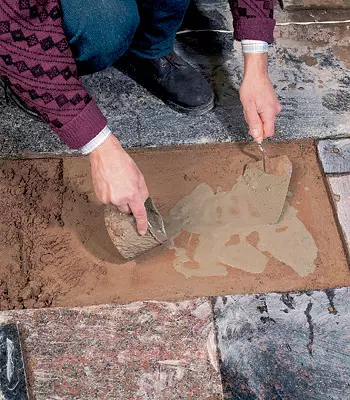
In order for the stove to be firmly and smoothly laid, it is necessary to make a special mortar "pillow" from sand and cement (three pieces of sand per part of cement). It is advisable to use sinding sand. The cement should be homogeneous, and when it is compressed in a fist, how to leak through the fingers. Add water to the solution until the consistency of thick sour cream is achieved, after which you can start working.
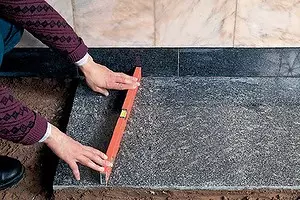
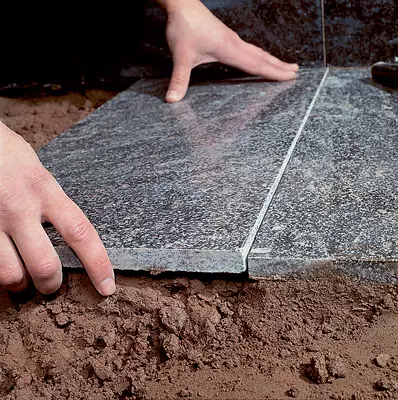
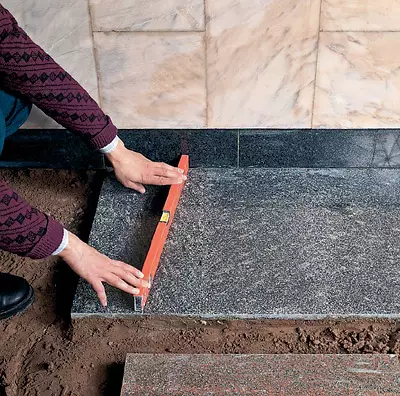
Well stirred, a homogeneous solution laid a trowel to the place where it is supposed to put the first plate. It is necessary to start the deployment of the room and at the same time note that the curb wall should be located below the surface level of the stove plate. Granite slabs are put in bulk to the wall. Putting the first slab on the prepared surface of the "pillows", please give her an ideal horizontal position by checking it using a level. By placing several plates in two adjacent indoor corners, with the help of a cord stretched along the upper plane of laid stoves, we produce the first row laying.
Put the first row along the walls of the same on the shape and color of the stones. When working with subsequent ranks, you must alternate wide and narrow rectangles and squares to achieve the desired color effect. You can make a geometrical pattern using slabs of various colors and shapes. Laying the second and subsequent rows is also performed using a cord and level. If the plates are of large size and it is difficult for you to control the laying process, it is advisable to pull two or three rows of parallel cords. This will help you smoothly put the plates and fit them together. Note that the distance between adjacent plates should be minimal.
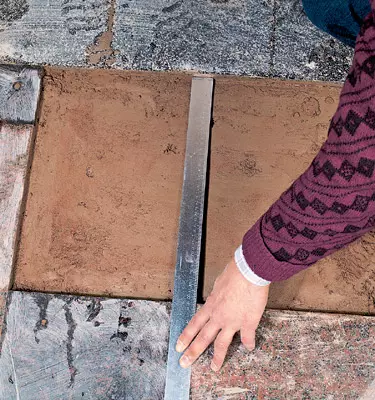
At the final stage of laying it is especially important to correctly cut the latest plates. To achieve the desired result, the metal ruler thoroughly measure the distance between the already laid stoves. Based on these sizes, the granite tile of the desired size you have to be carefully cut off on the machine.
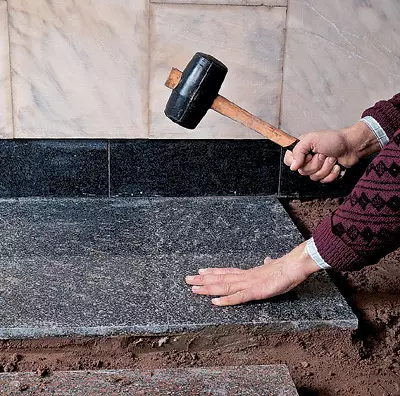
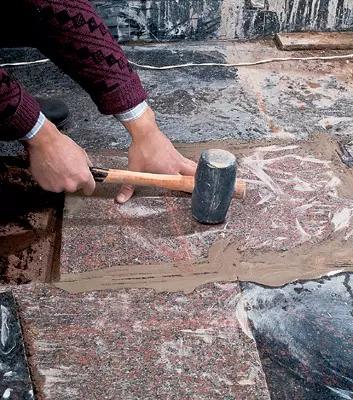
Having laying out a layer of "pillows" and raving it in the deepening trowel, secure the plate in the floor. Failure the surface of the slab with a rubber image of a complete horizontal level and do not step on the laid floor in the next two days, a dot moment, until the solution grabs. After that, proceed to the final stage.
Revision
The final edge of the floor is carried out in three stages.
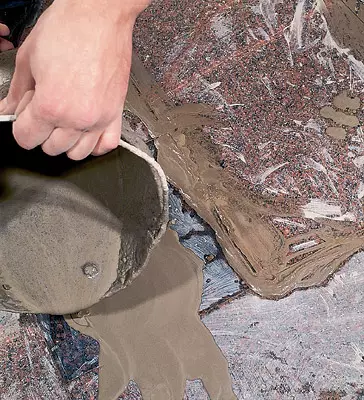
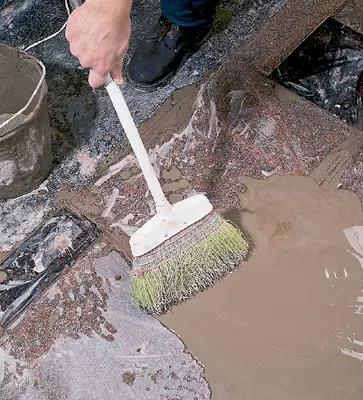
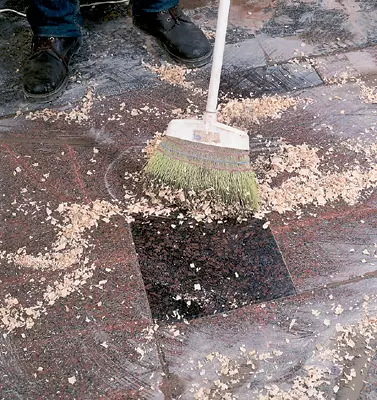
Stage 1 - This is a fill with a liquid solution. Pour the floor with a thin layer with liquid cement mortar and evenly distribute it into the slots between the mop plates with a rubber nozzle. Required condition - complete filling of the gaps between the plates. Now you need to give the floor to dry.
2Tap. Fully clean the surface of the left and dirt with water and sawdust, then remove the sawdust with an ordinary brush.
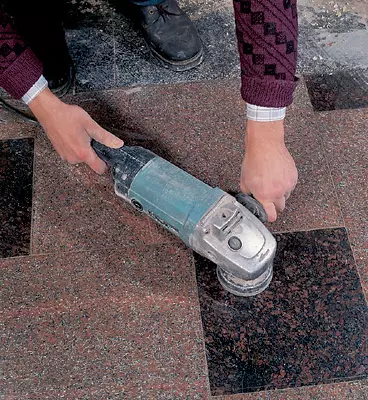
3Etap. Roughness, irregularities, protrusions on stone slabs need to be seized with a grinding machine with fine-grained polishing stone. It will have to do in the event that you worked with unlocked plates.
Here is the ready your new granite floor, and you can relax and admire the result of the hard work done: brilliant, smooth and mysterious granite surface.

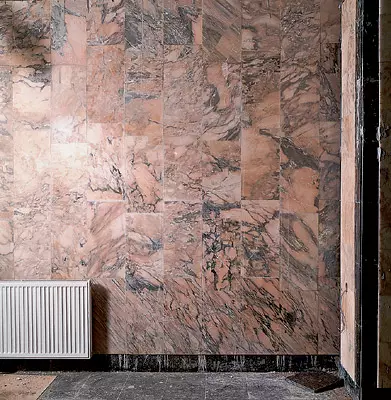
Walls from marble
How beautiful marble cut! This is a magical inner glow of a stone with subtle streaks of pink-brown shades. Marble is considered one of the most majestic building materials. He is a very multibo-white and white dorozon-red and black colors. The wall posted by marble plates is a real work of art. Using marble in the finish of the house, you thereby emphasize its personality and peculiar majesty.
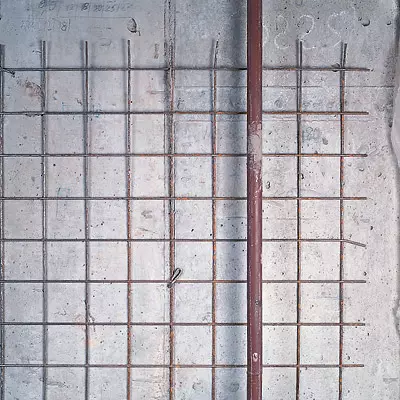
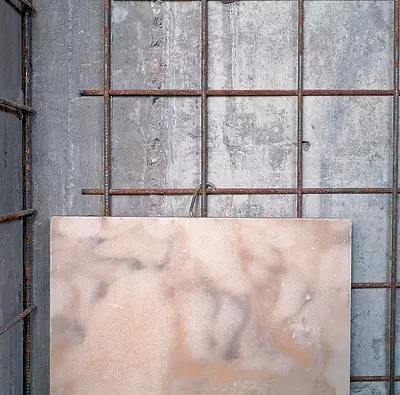
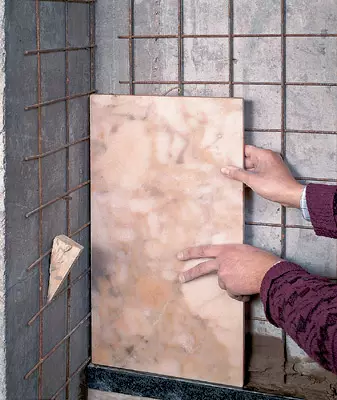
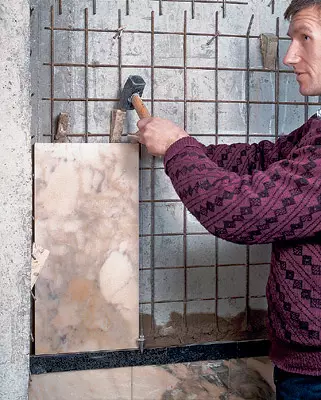
Preparation of wall cladding walls is a reinforcement with a metal mesh with cells of 100-150mm, which is nailed to the wall. First, you do a dowel gun in the wall of the hole, lean the wooden dowels in them, and then with long nails, with a diameter of 4 mm. Send the metal grid. Marble plates will be attached to this grid. From above, in them drill holes in a depth of 20mm and insert metal hooks in them, which plates are attached to the wall strictly vertically, by leading.
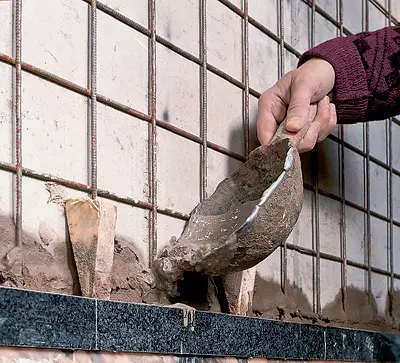
With such a cladding technology, the distance between the wall and marble is approximately 25mm. Small triangular wooden clins, lock the plate in this position. Having placed on a plumb and securing the first row, tightly pour into the gap between the wall and the stove of the liquid solution. After a day, two, when the solution is grabbed, pour the next layer of solution, let's dry and repeat the operation for the third time. The main condition for this technology is the density of clamping parallel plates and the reliability of their mounting to the wall. Having finished the laying and cementing of the first row of plates, proceed to the second.
The position of each plate should be carefully checked on a plumb, after which it is fixed on the wall. Insert the wooden wedges between the plates of the reinforcement grid and the back wall of the marble plate. They must firmly fix its vertical position. Perform operations gently and without a rush.
Each top row of tiles is attached only when the cement of the lower row is firmly grabbed. The plates can be putting both the same and different sizes, and when laying upper, ceiling rows align them. When trimming marble, also use a clinker machine. During the cutting, it is necessary to direct the water stream into the place of contact of the abrasive and the slab cutting. Punching decor you can use borders from dark marble.
Imagine yourself an ancient Greek master whose work is preserved in the original form of a thousandth. To achieve quality, follow the technology. Perhaps your descendants will repeat about the fine taste and the skillful hands of their ancestors.
The editors thanks for help in holding the shooting of the General Director of AOZT "Union" MetrospecStroy "O.A.levina