
Once in each family, the question arises: "Maybe throw old kitchen furniture and buy a new one?" We offer another option - make a kitchen yourself.
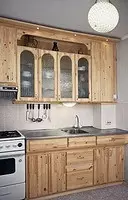
Over time, in each family, the question arises "Maybe throw old kitchen furniture and buy a new one?". But will it be reasonable? We offer another option - make the kitchen itself from environmentally friendly material: natural pine.

The most needed is good hands and an ordinary tool that is in every home. True, it may not be a mill. Wonderful apparatus! Allows you to choose a quarter under the glass or paneur, make a panel on the cabinet door, pump the groove for a reliable connection of parts. Replaces the mass of special plans, buildings and tongs. In general, the desired thing for a person with hands. Do not buy very expensive. Using the cheap model, it is unlikely to come across difficulties, with the exception of small inconvenience.
Before you need to decide what you can make. Draw a sketch. Determine the amount of materials and buy them.
You will need
Rake 18303000mm- 3pcs.Joinery boards 185002500mm- 16pcs.Plywood 6mm.
glue
Screws
nails and other fittings
Shpaklevka
varnish
Glasses
The main material will be joinery boards from which both cabinets and shelves and doors are made.
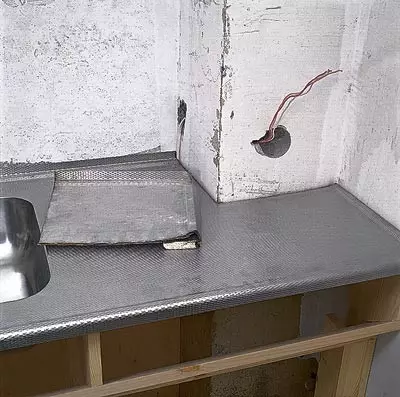
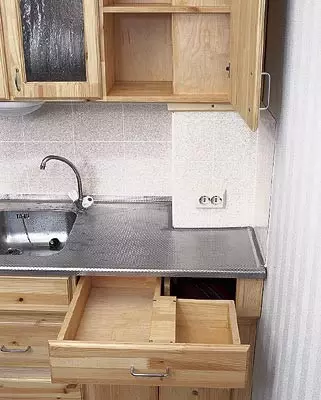
Metal countertop with a built-in sink you can buy or make to order
The entire set of materials will cost you $ 230.
Layout
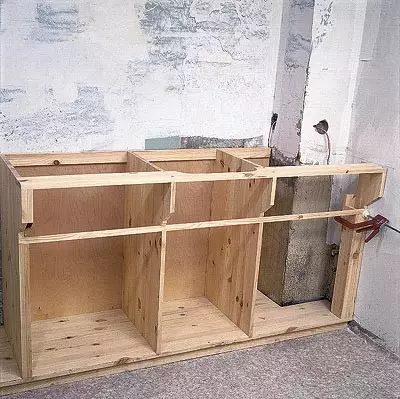
Our option is designed for small sizes of kitchen (2.53m2), which led not to the corner, but a linear form of furniture. It consists of two separate elements: the suspension cabinet and table stands, the height and depth of which are determined by the dimensions of the gas stove. The table has lateral compartments - for boxes, shelves and mean - under the sink. They are formed by four transverse walls. Side compartments are closed with double-handed doors, and middle folders. Left table adjoins the stove. Since there is a vertical protrusion in the right corner of the premises, then the right side of the sidewall is already made and attached to the wall of the building.
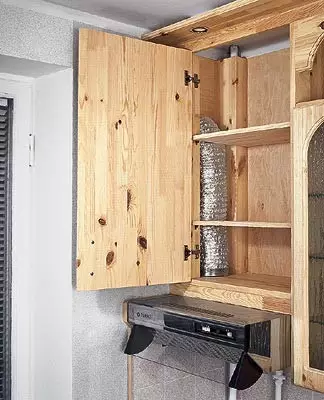
On it, as the desk element, the box is strengthened, covering nozzles for entering drain and water pipes into a kitchen room and an employee with a stack for mounting the door. The cabinet is completely assembled from the shields. Its left office is shortened in height for the placement of an air cleaner (exhaust), inside which the flexible aircraft hose is hidden. The cabinet is attached to the wall with a dowel. Such is the overall idea of the design. We will proceed to implement it.

Baking frame
Carpentry, or furniture shield, assembled and glued along with smooth, smooth edges (Nalfegu) from slats (furniture makers are called "defensions"), has all the advantages of the tree. It is environmentally friendly, allows a wide range of decorative finishes. It is processed by any tool for wood, starting with Dedovsky Fugankov, Caleev, and to the most modern electroballs, manual milling machines. Board as a board, only very wide and smooth, simplifies work, for it has the correct geometry and factory cuts. Available boards (shields) with a thickness of 18 or 25mm, 200-800 mm wide and a length of 600-3000 mm from different breeds of wood, but predominantly coniferous.
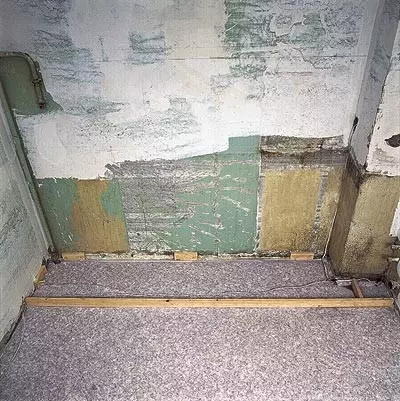
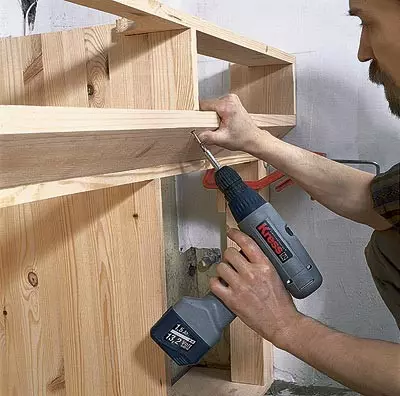
The horizontal reference plane is the stove of the design, which is based on the facial bar "Sfasada" and several bars laid along the wall. Customizing the facial plank, taking into account the irregularities of the floor, achieve the horizontal of its upper edge and immediately fasten. Many options, and we, for example, The hole vertically spoiled through the bar into the floor and put on the screws with a dowel. For the support plate along the wall, put short bars of the same width as a facial plank, and attach screws to the wall. The top edges of the front plank and bars must lie in one horizontal Plane.
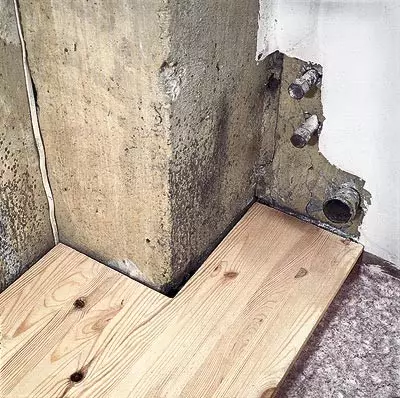
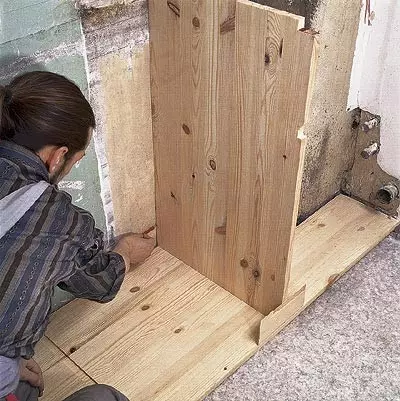
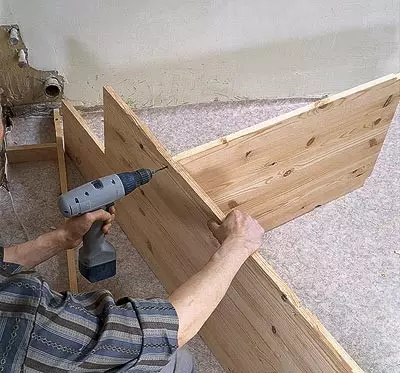
Then make the stove plate itself. Her faceplate will be a factory edge of the shield, and the rest of the three sides are tight so that they, if possible, repeated the bends of your walls. On the back edge, select a quarter mill for mounting the rear plywood wall. Next, on the basis of the location of the sidewall table, taking into account their thickness. Perpendicular to the front edge of the base to fueled the line along the steel line with a dummy knife. Frewever Choose to a depth of 5-10 mm grooves under the side walls.
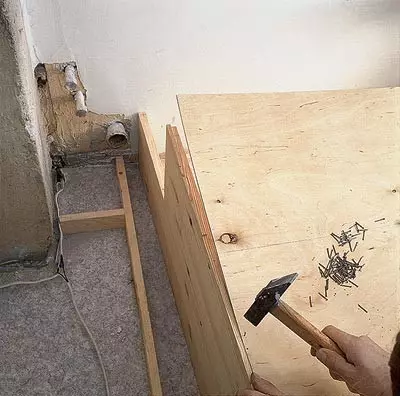
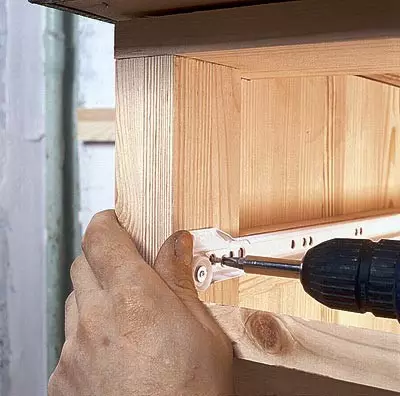
Follow and cut the sidewalls by adding the groove depth at the base. Pick them in place. The front edge of the sidewall should be flush with the edge of the base, and rear-repeating the contour of the wall, but to defend it from it, equal to plywood thickness. Slide the grooves in them to accommodate longitudinal planks. Holes for pipes to the washing is better to do at this stage, but you can also postpone. To fix the walls in the upper part of them, install the back plank. Its width is enough to do equal to 100mm to securely fasten a few screws. Locate where it will be attached to the sidewalls, focusing on the base. The sidewalls must be parallel to each other. Choose a 4/3 of its thickness in the rear layer of its thickness, the remaining 1/3 of the sideways in the sideline so that the back plank installed in place does not protrude beyond the side of the side walls. Now you can mount the sidewalls to the bottom of the screws below. For the strength of the design, put them on the glue. Put the back plate and screw to the side walls.
Cut the rear wall from plywood and come back to the base, side walls and rear plate. You can apply glue. Note that plywood will fix the design sufficiently rigidly and direct angles should be set in advance. What collected, put and attach to the wall screws through the back plank.
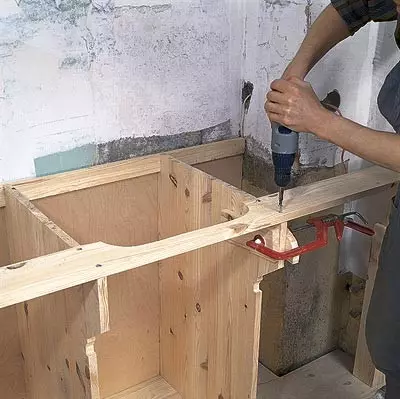
Facial part of the table
If it is designed flat, like in ordinary kitchens, then the front planks are installed under and above the drawers by analogy with the back. The presented table is decorated with decorative details (extensions), which cut and glued to the sidewalls. To simplify life, you can make the side walls in advance of the corresponding form, but it will increase the cost of shields. The upper, horizontally located bar with a cut-out under the sink, makes wider and secure it the sidewalls and the extension.Next, you will need a longitudinal plank with a beveled edge, fixed in the beams of the extensions, and a rail of 1830 mm under this plank. It is better to customize it in place, and it is necessary to mount with screws and glue to the oven and rail. The latter serves as focusing for the door, and also creates the finished plane of the table under the oblique strip.
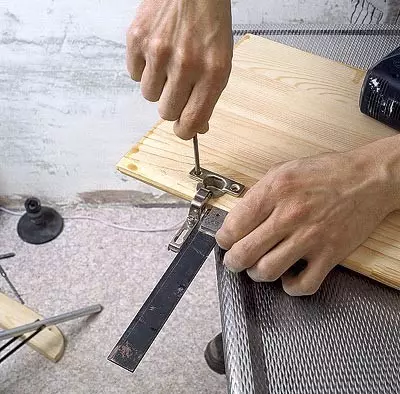
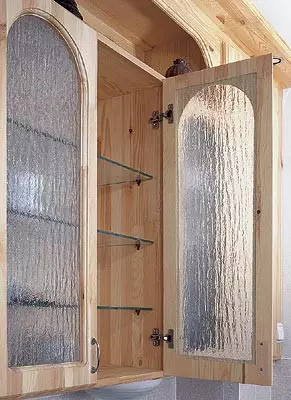
In general, the basis of the desktop is ready, it is worth sanding, shook the slots and cover with varnish. The main thing in the manufacture of the door cabinets is the same size in height. Cut out of the furniture shields of workpiece and pigeon them in the size of the doors of the plane. It remains only to go around the perimeter of each billet with a shaped mill and remove the chamfers. It is advisable primarily to treat end bounds where the cutter cuts across the fibers, and after milling the remaining two faces. Doors with glasses are first performed in the same way. Then the electrolovka or narrow knuckle make the window (in the case it is a circular arch) under the glass and treat the shaped cutter from the front side, and with a reverse line, select a quarter in the form and thickness of the glass. Before covering the doors with varnish, cut and pigeon the loops. There are also more complex faces of the manufacture of doors, but it requires a certain experience. It is possible to search for sale and finished doors.
When buying carpent shields, it is important that
The thickness of the panels was the same;transverse seams in the components of the plank shield were as little as possible;
The cellophane boards was not damaged, as it protects from dirt and guarantees the normalized moisture content of the tree.
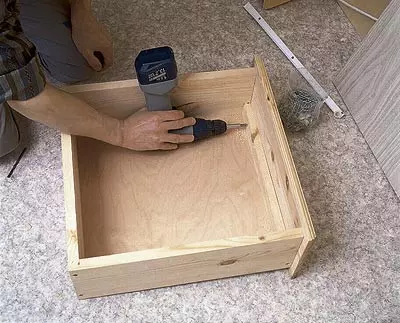
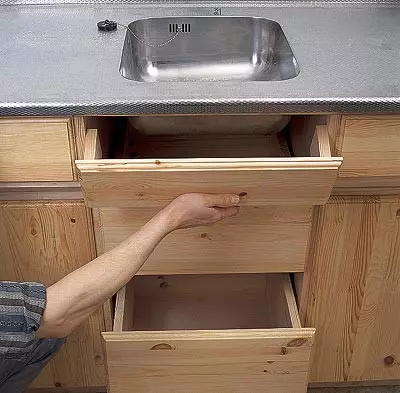
Boxes
Cut the front panels so that they cover the holes under the boxes, and process the cutter around the perimeter. The inserted kitchen boxes move on the guides on the guides that you can buy in the construction markets. Construction options There are many. In love, they are driving down to a rectangular box with a bottom of plywood. The height of the walls should be less than the height of the front panel. The easiest option is to mount the walls on the screws, and the bottom of nails. The main condition is the rectangle of the box. Having gathered a frame without a bottom and having to Fauer on one side, align the frame with the help of the square and approach the Faneur around the perimeter. As an option, make the bottom exactly in size and assemble the walls on it. The front of the box is better to glue the box and attract screws from the inside only after installing and adjusting the guides. Their complete four parts (left and right is important). Two are attached to the drawer, two response - on the sidewalls of the table. The left guide, if looking from the front side, is made on the principle of the lock and the box can not jump out when the box is closed. The right is made so that freely unlocks in any position. If the box is obviously less than the calculated width, the right polishes will fall out if wider than you need, it will be badly closed or will not be closed at all. The sequence of action when assembling boxes is not principled, the main thing is that the previous operation does not interfere with the subsequent. Actually, this applies to the entire process.
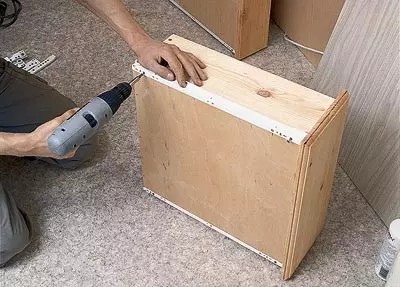
Afterword
How to make a wardrobe with shelves, there is no need to describe in detail. Actually make it much easier than the table. The idea is also created by the frame for the shelves and gradually delive the details: partitions for individual sections of the cabinet, visor with lamps, doors with glasses and without them. This kitchen is good and good that nowhere exists exactly the same. You can give the will of your fantasy, paint it into any color, to implement any ideas that peeped in ready-made kitchens of your friends or magazines.