Make the most furniture wall of five sections - not easy, but nothing impossible in it.

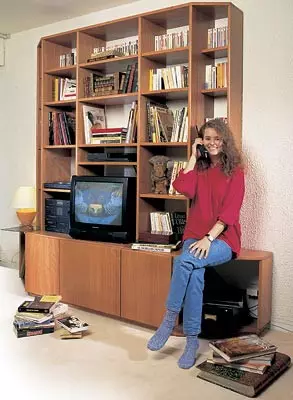
The wall of five sections made from solid wood wood will decorate the interior of any living room. The base is provided for two open and three closed compartments. If the room allows, you can also collect the base and mezzanine. For its assembly and final finish will be required about a week.
Before work
Determine the sequence of sawing parts and mounting, and then sort the boards.
Tips Masters

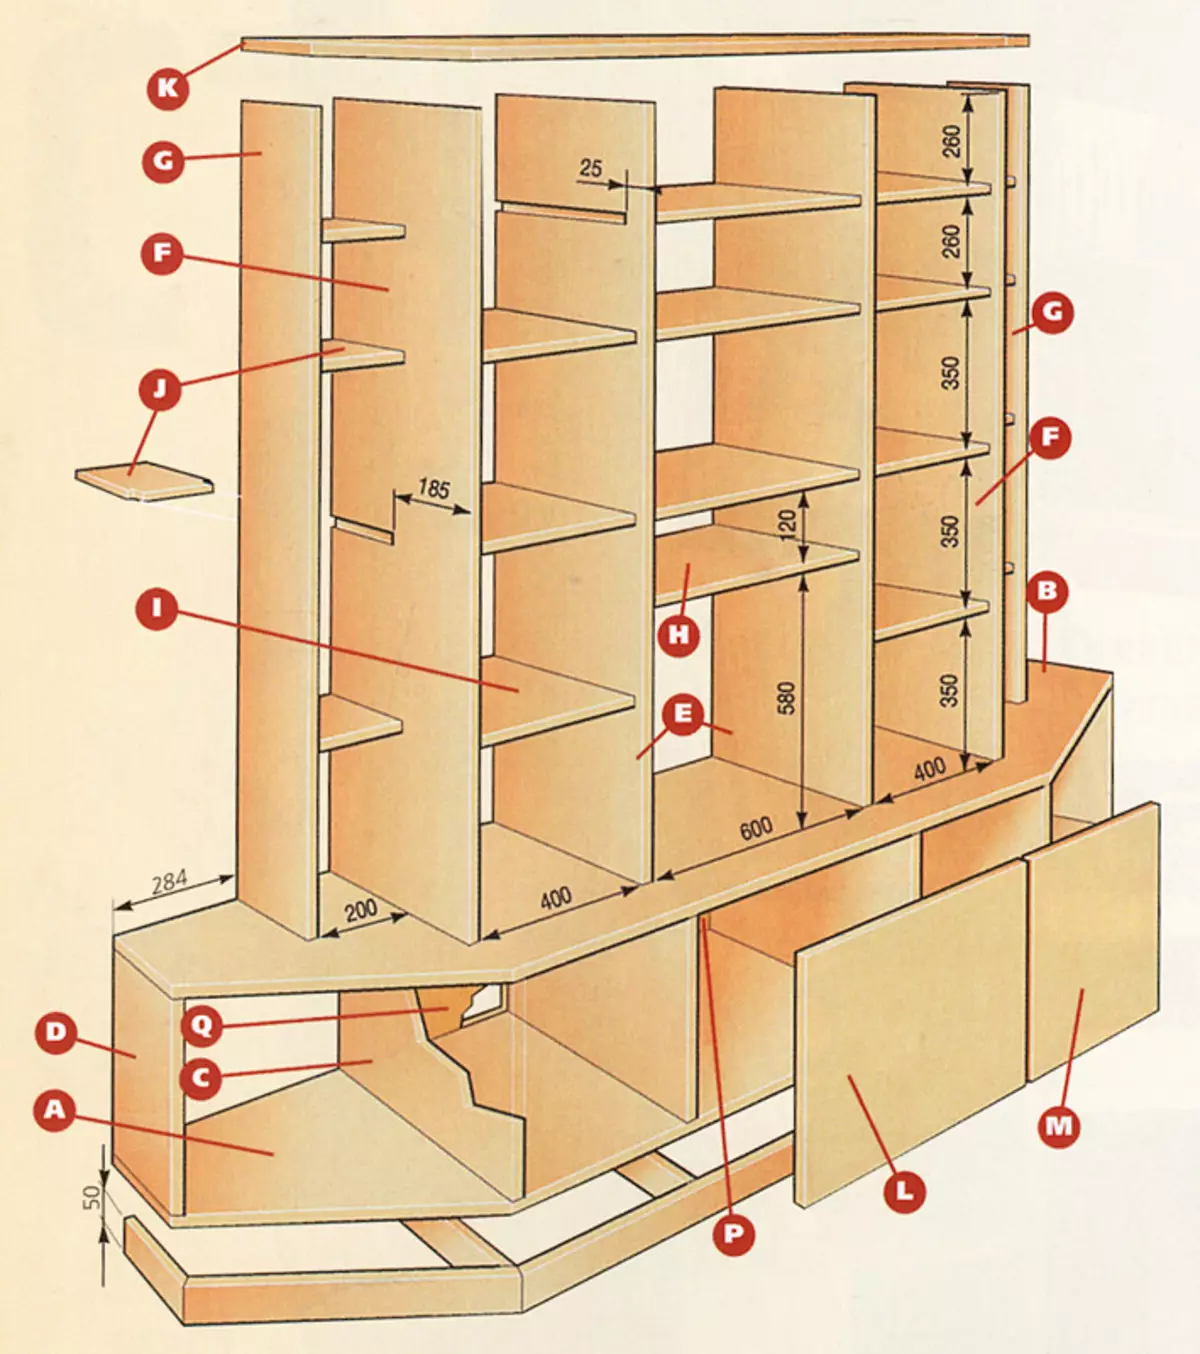
The sizes of the wall (width 250, the height of 223.4 and the depth of 48cm) can be changed proportionally, based on the area of the room.
Given that the foundation is quite large and hard, it is better to make it collapsible. We recommend using cylindrical wooden wizards (plug-in spikes) without glue for installation (6-8 for each fixed part) or seasons and screws (then you will need 3bpt and 3 shops).
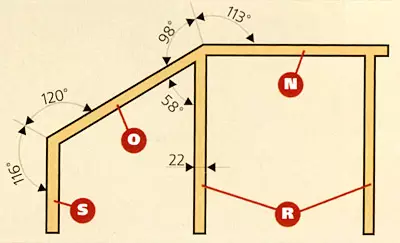
The base consists of six transverse bars (two side S and four central), which are attached under the bottom shelf of the base on one line with partitions, and from three decorative linings connected by a fold. It should be noted that the base must be deepened by 3 cm with respect to the outer plane of the base.
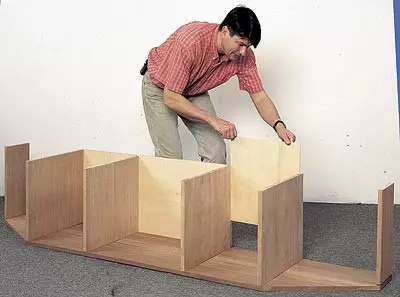
The work starts with the pair assembly of the shelves of the base A and B and partitions S. The next stage of the central line, intermediate rack, shelter and i, top panel and side doors.
Shelves are inserted on the side of the groove of 22 widths and a depth of 5mm, which should not reach approximately 25mm to the outer end of the racks (then they will not be visible). It is necessary that the shelves have appropriate protrusions.
The final finish of the wall is the case of your taste and fantasy. But it must be started not earlier than you complete the installation. If desired, the wall can be painted. We applied two layers of furniture paint, polishing the surface after drying each layer, and then twice the wall was plated with polyurethane colorless varnish.
Sequence of assembly
The table consistently lists all the necessary parts indicating the size. The thickness of the wooden elements is 22 mm, plywood - 5 mm.
| Name | Quantity, pcs. | Dimensions, mm. | Material | |
|---|---|---|---|---|
| BUT | Lower shelf base | one | 2500480. | Overtiganic |
| IN | Upper base regiment | one | 2500480. | Boards |
| FROM | Intermediate base partition | four | 460480. | |
| D. | Side rack base | 2. | 460200. | |
| E. | Central stand | 2. | 1658360. | |
| F. | Intermediate stand | 2. | 1658360. | |
| G. | Side Stand | 2. | 1658200. | |
| N. | Central Shelf | four | 610355. | |
| I. | Intermediate shelf | eight | 410355. | |
| J. | Side shelf | eight | 210195. | |
| TO | Top panel | one | 1932360. | |
| L. | Central door | one | 610470. | |
| M. | Side door | 2. | 410470. | |
| N. | Front element of decorative ground cover | one | 146550. | |
| O. | Side Element Decorative Cod | 2. | 53550. | |
| P. | Central back wall | one | 610470. | Plywood |
| Q. | Side back wall | 2. | 410470. | |
| R. | Bar of the central part of the base | four | 43050. | Bar |
| S. | Side Side Bar | 2. | 18550. |
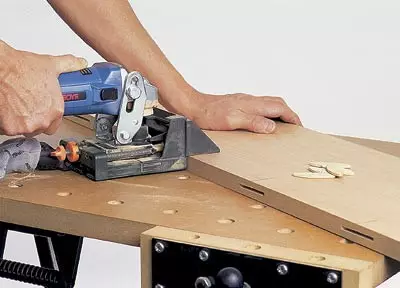
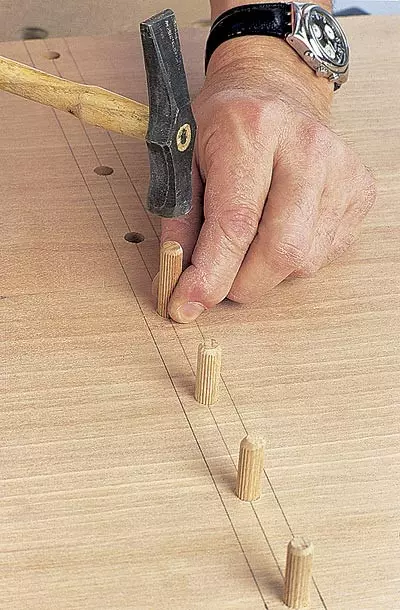
| By making markup, shift the grooves (they should be slightly wider than the knaps - it will facilitate the installation) on the end surface of the rack, putting it on the workbench plastics. |
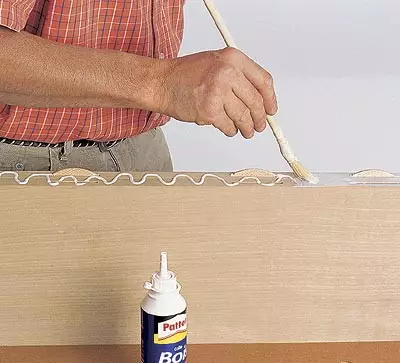
| Lubricate the grooves and swings with glue, and the knaps are better to pour glue first, and then smear it with a brush. Details press each other carefully in order to avoid damage to the key. |
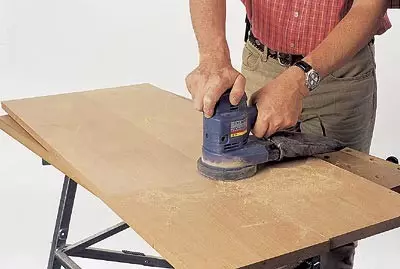
| After all the panels are assembled, the glue spoke to the glue and ground surfaces, for example, using an extension with an abrasive disk N80, and then N120. |
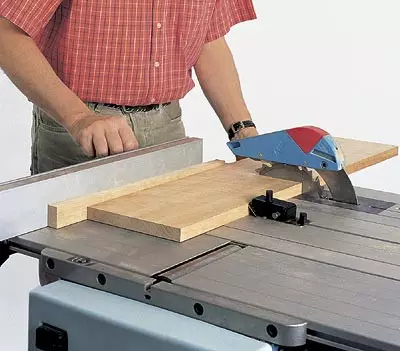
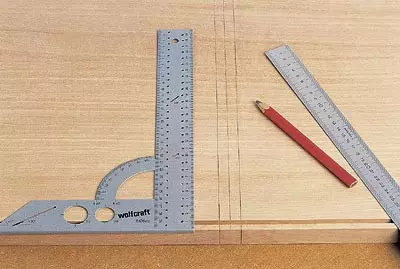
| Apply the markup on the panel and cut the parts using a circular saw. |
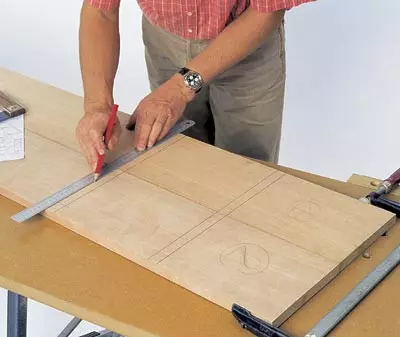
| From how far exactly the grooves will be cut, the horizontal of the installed shelves depends largely. The line of the line will notice their location immediately on two racks, closely adjacent to each other opposite edges. |
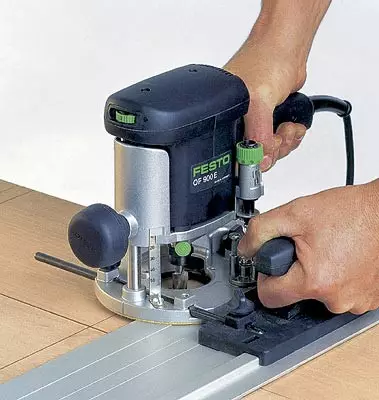
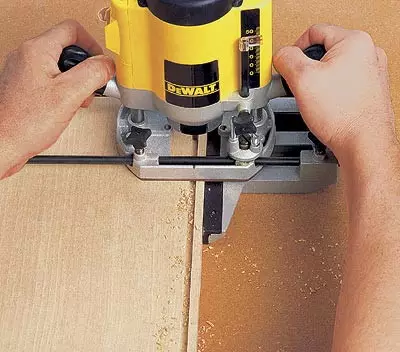
| Make grooves using a special machine with a guide fixed by two non-drinking clamps. If you do not have a cutter with a diameter of 22mm, you can use a cutter with a diameter of 12 mm, but then perform two passages on each side. |
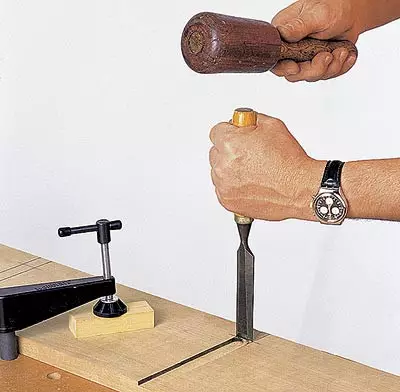
| To choose a well-sharpened chronicle to the turning area formed when the cutter exits, not reaching 25mm to the edge of the board. |
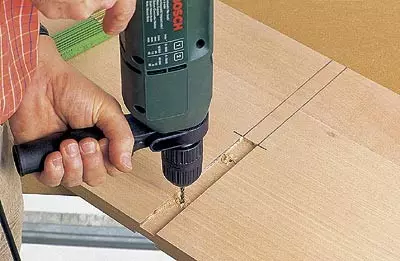
| Drill two holes in the grooves with a diameter of 3mm for fastening the shelves. Then manually or drill make chamfer for screws. |
| On the front of the shelves with a saw or electruruck, make grooves 5 width and 28mm. |
| Cut at the bottom of the base of the pump with a depth of 6mm, retreating from the edge of 8mm, using the right cutter with a diameter of 6mm with the left guide. |
| After all the grooves are made, check the correctness of the bottom connections. |
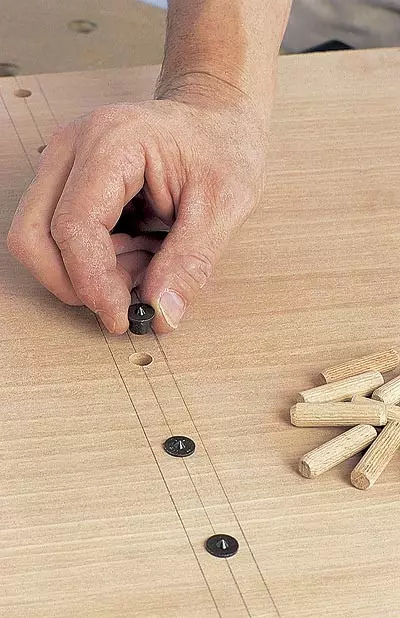
| To attach the shelves, take the axis on which wooden wars will be located. |
| Then on the edges of the racks and partitions, take place space for holes and drill them. |
| As in the case of the grooves, the deaf holes must be somewhat deeper than the length of the dust. The left clearance left will facilitate the assembly. |
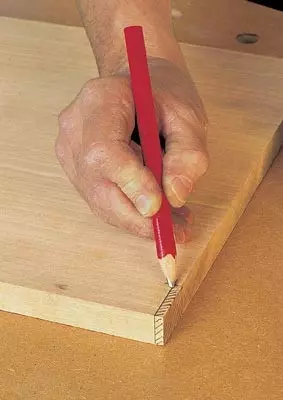
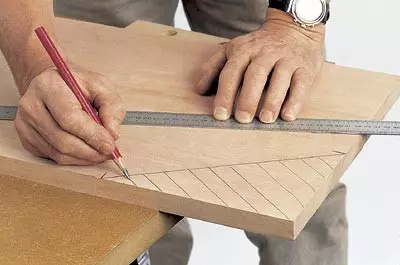
| Note the oblique cuts of the base shelves, accurately applying markup on the cut parts. In the absence of a special guide, enter the circular saw strictly along the straight rail, securing its clamps. |
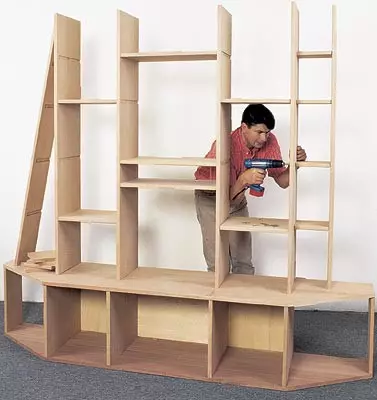
| Build the base Start from the bottom shelf to which you attach the side racks and partitions. If you decide to install the base, then under the bottom shelf, lay the bars. Decorative cover of the base to secure last. |
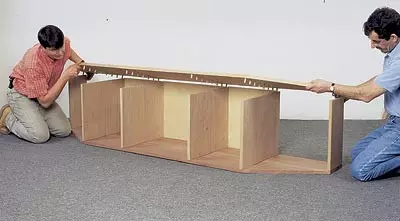
| Install the top shelf of the base together with the helper. You can fit it with Cyanka, using the stand. |
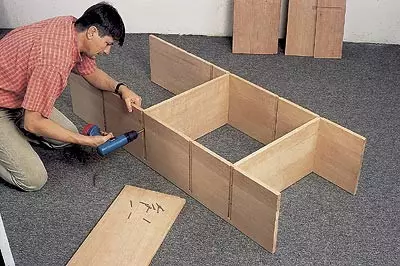
| Collect the central part of the wall, screwing one of the two shelves to the rack. Must be sure to make sure the reliability and correctness of the assembly. |
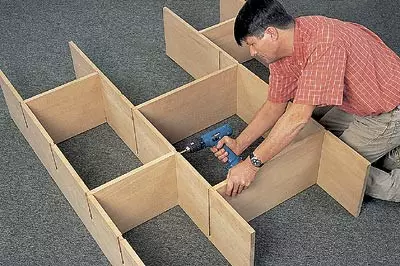
| By the same principle, connect other details on both sides of the section using the grooves to install the racks. |
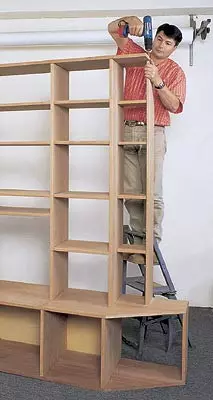
| Install side removable panels. Since small shelves are fixed with screws only on one side (from within), then you need to screw the base of the rack. It is better to carry out this operation with a partner. |
| The upper shelf racks gives the rigidity of the entire design. She was propylene she was propylene for further fit. Temporarily secure it for layout of oblique cuts, treat the saw, then set to the previous place. |

Installing Door
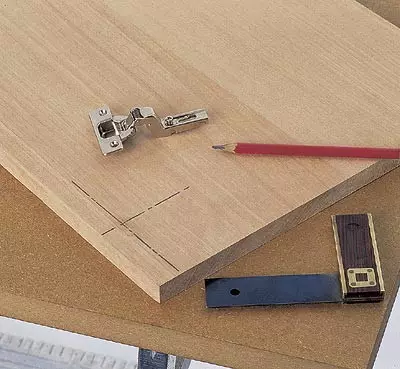
| Note the location of the hinge loops on the door at a distance of 8mm from above and below and 2,5 cm. Pay attention to what way they will open. |
| In the absence of a cutter cutter, use a drill with a limiter so as not to make the hole through. |
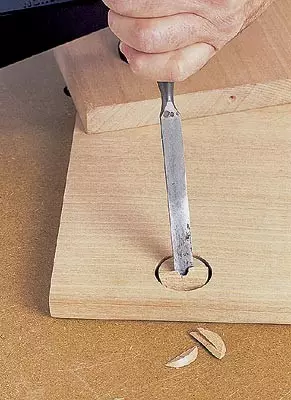
| After cutting the cutter, remove sawdust and chips, then clean the hole well sharpened by the chisel. |
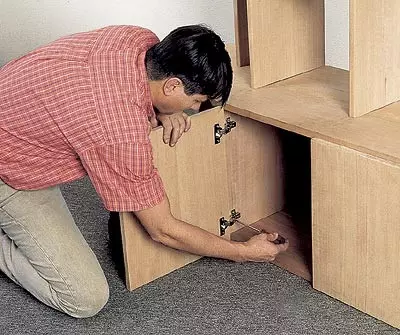
| It remains only to fix hinged loops on the doors and corresponding walls, then with the help of adjusting screws, align three doors in the same plane. |