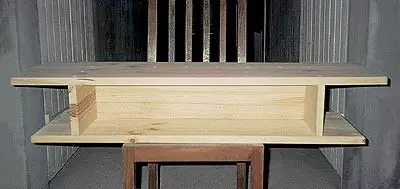
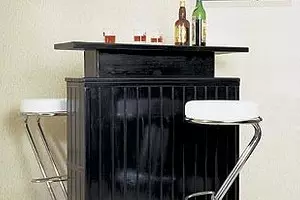
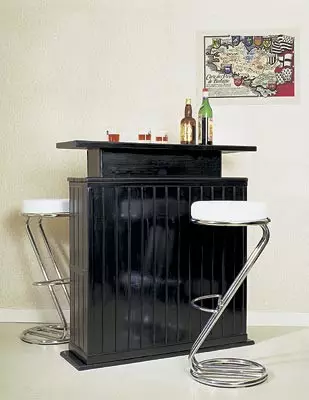
Wooden design in the form of a small buffet with a mirror table. The outer side is covered with decorative slats.
By its design, the bar is quite simple. It is a small buffet with one closing section and an intermediate shelf.
A mirror is built into the worktop, and from the outside, the stand is covered with decorative liquefying slats (for our rack it took a 2112mm in length).
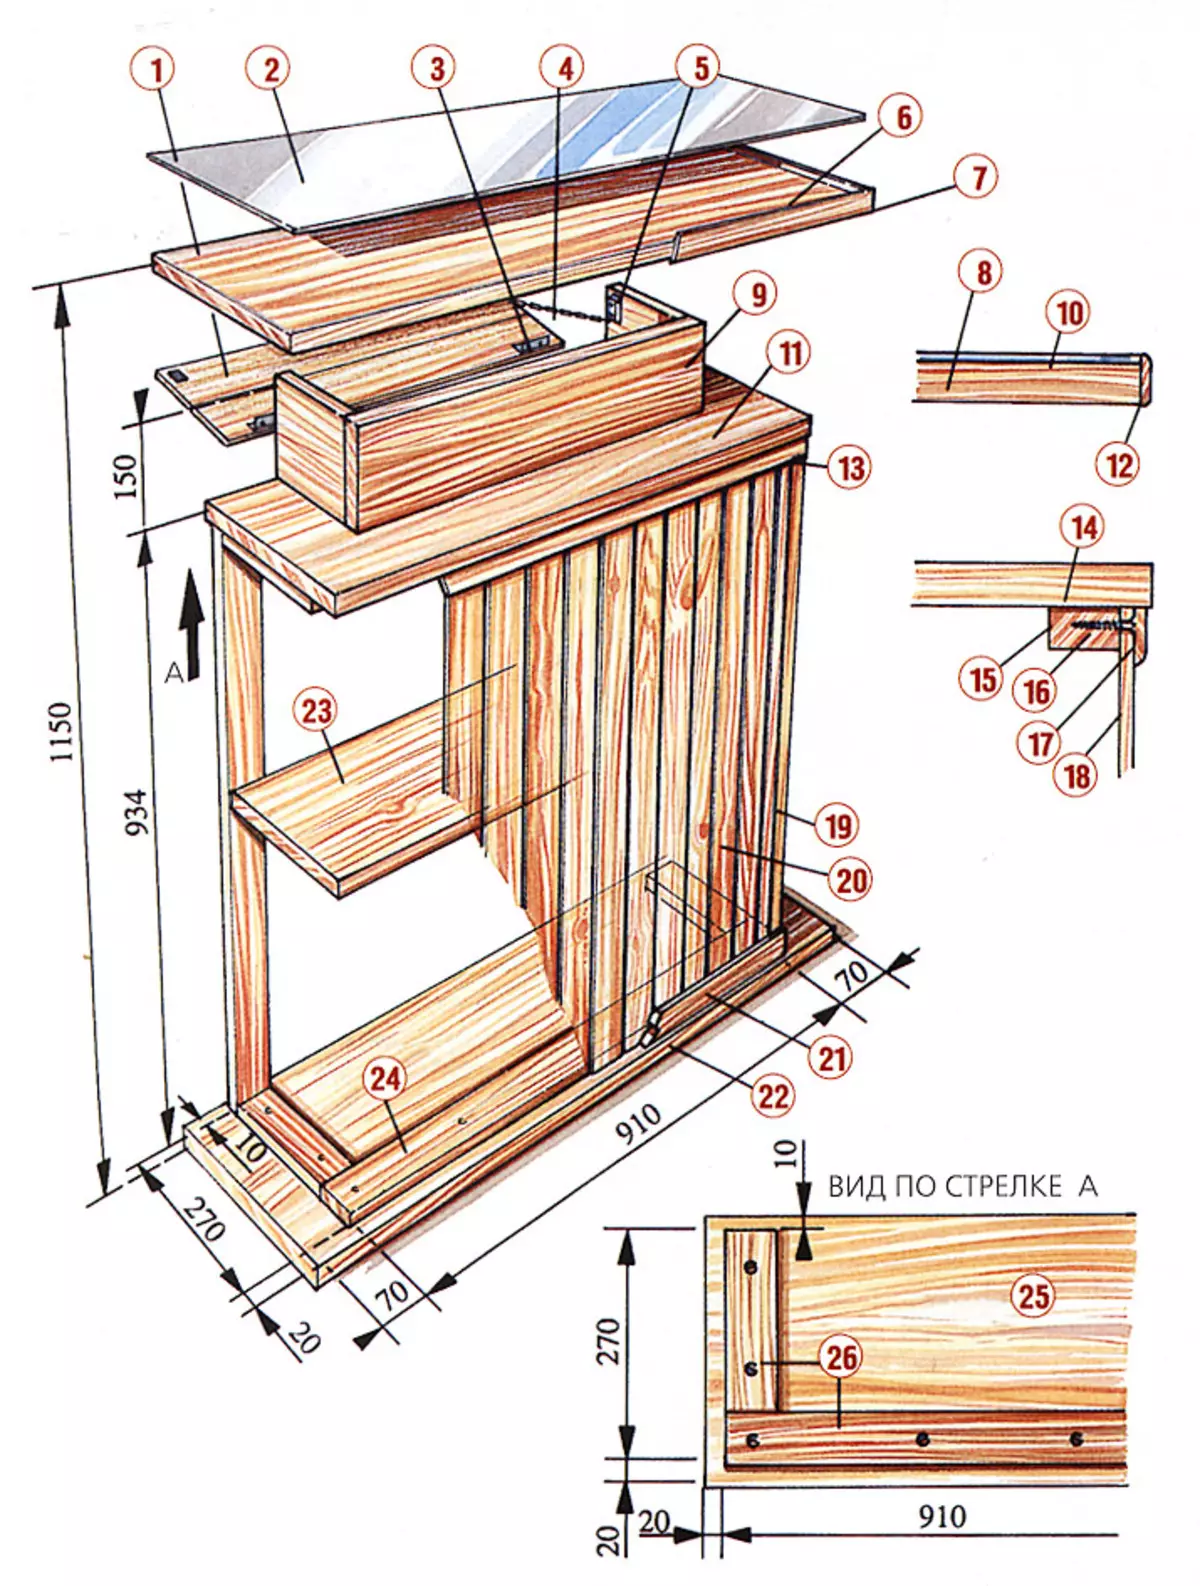
- door;
- mirror;
- the loop;
- chain;
- magnetic latch;
- Countertop;
- Country rack countertops;
- Countertop;
- closing section;
- mirror;
- top panel;
- seating rail;
- connecting plank;
- reverse side of the top panel;
- bar;
- screw;
- connecting plank;
- Decorative sheat rack;
- corner decorative rail;
- Decorative sheat rack 10mm thick;
- Plinth;
- base;
- intermediate shelf;
- bar.
- reverse side of the top panel;
- Bruks (Pals).
View by arrow A
Cover Masters
To work, you will need tools: electrolovka, grinding vibrator, drill, planer and transverse saw.
Necessary materials
| Name | Number of | Length, mm. | Width, mm. |
| Pine board thick 22mm | |||
|---|---|---|---|
| Table top | one | 1050. | 300. |
| Base | one | 1050. | 300. |
| Top panel | one | 950. | 300. |
| Intermediate shelf | one | 930. | 280. |
| Facial part of the closing section | one | 650. | 150. |
| Side walls section | 2. | 178. | 150. |
| Pine timing segment 5030mm | |||
| Stands | 2. | 912. | |
| Side struts | four | 220. | |
| Longitudinal struts | 2. | 910. |
As well as 3m dischargeable flat rail, 1050300mm mirror, 1,5m plinth, 2m corner rail, 20m decorative railway racks, two flat loops, two magnetic latches, door handle, chain about 25cm, quick-drying adhesive for wood, screws 440 and 320mm.
Beginning of work
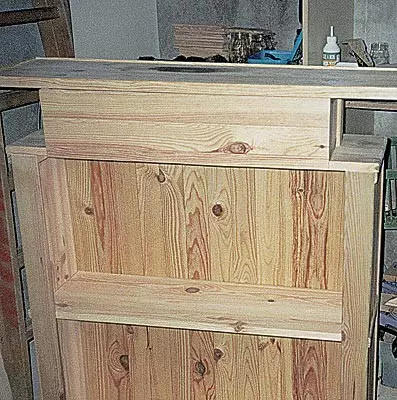
Of the two boards with dimensions of 2000300mm, drink four parts: base, worktop, upper panel and intermediate shelf. It is better to perform this job with a circular saw or an electrolovka (use sizes in the table).
Perform three walls of the closing section from the board with dimensions of 2000150mm. Then from the bar with a cross section of 5030 mm, make two racks and six spacers (four transverse and two longitudinal).
Assembly
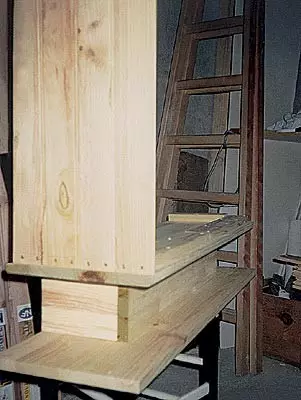
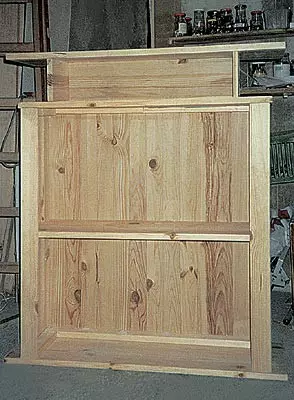
On the basis and reverse side of the top panel, install the bars (spacers) to which the decorative sheat racks will be attached. Pre-apply the markup with a pencil using a metal ruler and a square.Slit and secure 440mm screws three walls of the closing section, controlling that there were straight angles in the joints. After the glue dries, install the worktop and the top panel, also using glue and screws. At the same time, the closing section should be located strictly in the middle of the table top.
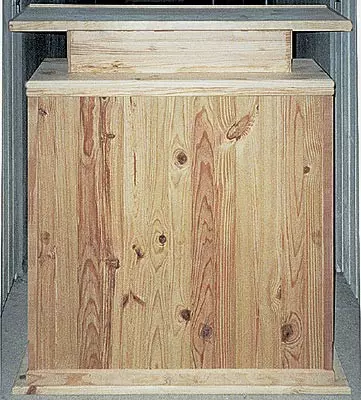
Start and drill holes to install the plating rails. Tighter the product to the tabletop down and secure the rails on the top panel bars (four on the sides and thirteen on the front). Do not forget to trim the electrolovka protruding parts of the planks, especially in the angular connections. Then set the base with the bars (struts) and attach the decorative rails of the skin decorative rails.
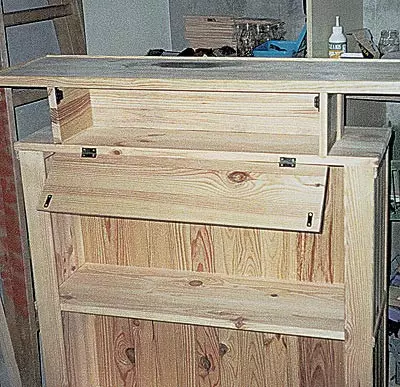
To give the stiffness of the structure with screws and glue, fasten two racks along the edges of the bar and the shelf. Make the door. To do this, glue two boards and attach them with screws to the top panel. The door is carried out with a chain, and in a closed-two magnetic latches. Set the handle after painting the product.
Finish
With the help of glue and nails, attach the connecting bar to the plates and the edges of the table top. After that, using the planer and sandpaper, slightly round its ribs. In the same way, install the plinth. Shakes on the corners Close the corner rail, which will also hide the screws of the screws.
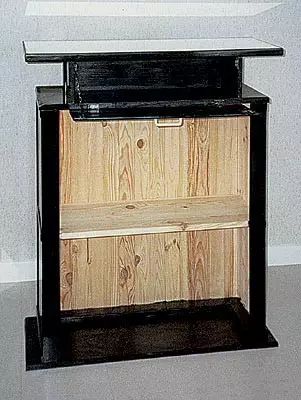
Select the product and remove the sawdust, then apply a layer of special primer for wood to the outer surfaces. It is advisable to make it immediately before the painting rack for which the black varnish is used. The inner walls of the bar cover the colorless polyurethane varnish (it will make it easier).
| Collecting the closing section of the rack, make sure all the ribs of the boards (including vertical side) lay in the same plane. |
| Attach the decorative sheat racks to the top panel bars, and only to be advocated. |
| The initial stiffness of the structure give side racks, and the final - provides a base. |
| Plinth and connecting plank Close the screws of the screws. Especially neatly perform joints of the slats at the corners. |
| Install the loops, magnetic latches and a chain that holds the door in a horizontal position. |
| With the correct assembly of the closing section, the magnetic latches will easily hold the folding door in the closed position. |
| The stand is ready for final painting and installation of a mirror, pre-cut according to the size of the table top. |
| We advise on the inner surface of the rack to apply a colorless varnish, which will protect it from accidentally spilled fluid. |