Photo report on the mounting of the figure drywall construction on the ceiling in the bathroom.
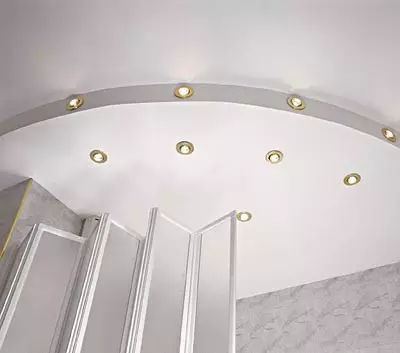
We are accustomed to not paying special attention to the ceiling in our apartments. And the truth is that there may be an interesting: even, monotonous surface painted in boring white color. And now imagine that you are entering a cozy entrance hall or bathroom and your attention attracts an elegant curved ceiling lesset with halogen or point lamps. Such a ceiling characterizes the owners as people of creative belonging to their home as the site of the use of original ideas. We decided to show how to create such a ceiling with our own hands, and that's what we did.
Start
To implement this idea, we will need several smooth wooden bars with a cross section of 4050mm and length along the length of the side walls of the suspension, the bank of putty, the waterproof paint and the adhesive "Bustylate", as well as several long anodized screws and a strip of sickle (technical bandage). From the tools you need a hacksaw, drill, hammer, chisel, screwdriver, two spatulas (metal and rubber) and motors of threads with a pencil. For lighting, several point lamps, and for the wiring, a two-housing insulated wire. The shape and height of the border can be different, the main thing is that they harmoniously fit into the interior. It is also worth alive to recall that such a design is more likely relevant where it allows the height of the ceilings, for example, in large-sized apartments with high overlaps. Although such small-scale premises, both kitchens and bathrooms, may well be decorated with an elegant novelty. Our illustrative range proves the correctness of such solutions.
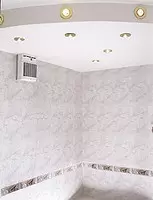
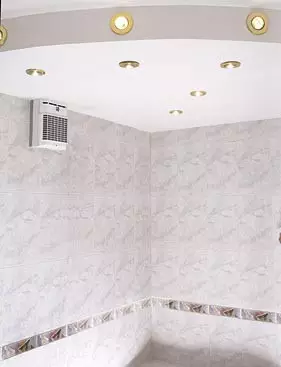
The bathroom, illuminated by spotlights of the suspended ceiling, acquires some airiness and volumetricity. Arc-shaped ceiling ledge from drywall makes a room more lively and cozy. Easie If you build a minibar in your apartment, then applying drywall, you will immediately "kill two hares": solve the problem with lighting and mark the boundaries of the functional zone.
Since it will take some time to embody such an idea, it makes sense to be patient and invite to the aid of a friend.
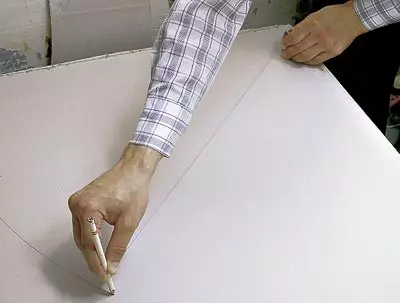
Marking
Like almost any job, you need to start with markup. It will be right to have a ready-made suspension drawing at hand, taking into account the scale of your room or a corridor. If there is no such, you will have to measure the ceiling and place the boundaries of the future design yourself. The markup is made in three parameters: in height, the length of the design and its contour. To do this, the slide of the suspension is applied to a whole sheet of plasterboard. Drawing a clear line, carefully cut the ceiling profile by a narrow tree with a tree. Then attach it directly to the place of attachment on the ceiling and check the location of the application.For this and subsequent operations will require an assistant. By building a sketch of the suspension and thoroughly prepare the place of attachment (scruples old wallpaper, cleaning roughness on the wall), transfer all sizes to the place of attachment. It is convenient to do with cord, thread and pencil. Fixing the end of the cord in the geometric center of the circle, measuring the calculated radius length and attaching a pencil to the thread, draw the required outline. For direct lines, a long ruler is used or a straight wooden rail. Lines must be clear and smooth. On the walls and ceilings, tick the place of attachment of the bars, taking into account the fact that their lower edge will become the ceiling boundary.
Fastening the ceiling
Drill drill holes for fastening bars. The openings should be quite deep (35-40mm) and large diameters (10-12mm) so that they can drive wooden or plastic dowels. They must be tight into the holes, as the reliability of the ceiling fastening depends on it.
Brucks for fastening of drywall also need to be squeezed in size and make the grooves in them in those places where they will be attached to the ceiling and walls.
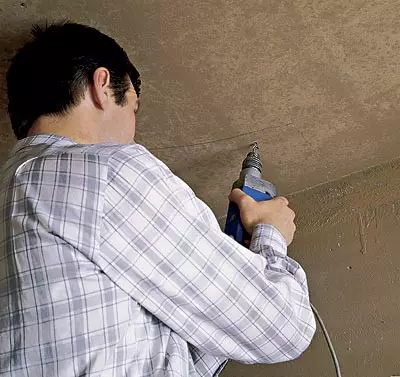
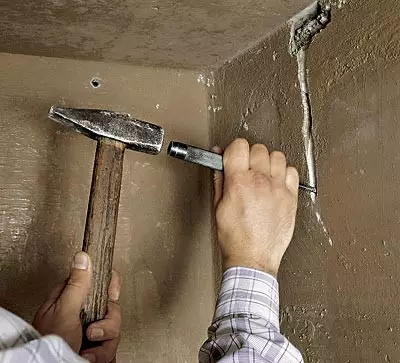
To lay the cable for lamps, it is necessary to make a depth in the wall, sufficient for laying the cable with a margin for a putty (approximately 10mm). For this purpose, you can use chisel and hammer. Insert the cable from the switch to the ceiling lamps and close it with cement mortar.
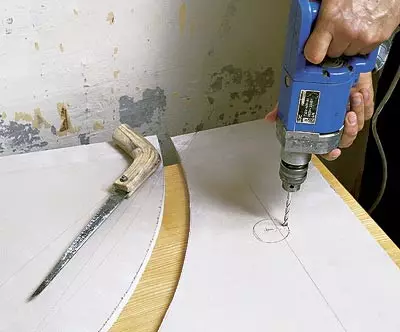
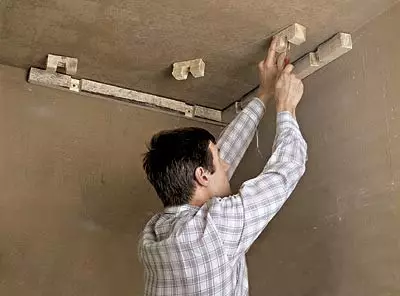
The next operation will be the fastening of bars to the ceiling. Pre-absiled and processed billets are clearly welded to fastening places and screw the anodized screws. The curved side surface profile will be held with the help of short bars attached at different angles, taking into account the bend. For greater reliability of the attachment, the contacting surfaces of the bars and walls can be lubricated by a small amount of glue. Now you can proceed to drumming in the drywall holes for the lamps. The circumference of the required diameter marked by the number of lamps, drawn with a pencil on the finished profile. Then the holes to the desired diameter are driven by drill. Each of them is subsequently inserted by a point lamp.
To mount the profile of plasterboard to the ceiling, call for the help of a partner. It must maintain a sheet of drywall in the right position, and at this time it is properly poning the plane and, drilled by a thin leaf drill, screw screws into plasterboard and wooden bars. After that, run the electrical cable to the cartridges of point lights through the open side walls. Electrical connections should be carefully insulated, as the ceiling is not subject to further reconstruction.
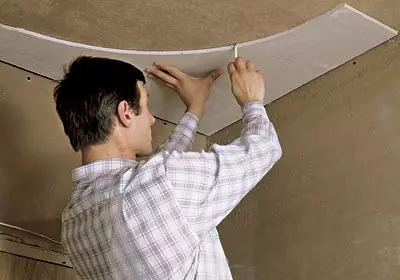
Fasteners side surface
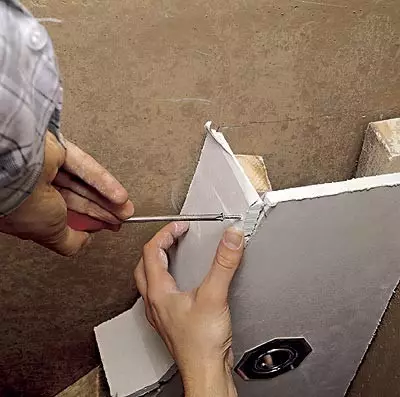
One of the most complex processes is fitting the side profile, as it has a arc-configuration. We offer two ways to install.
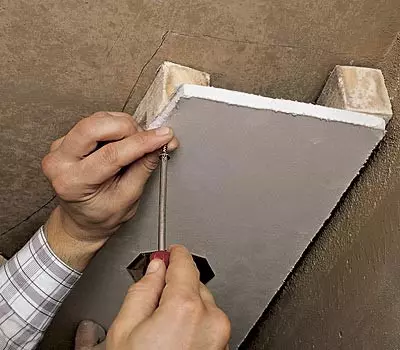
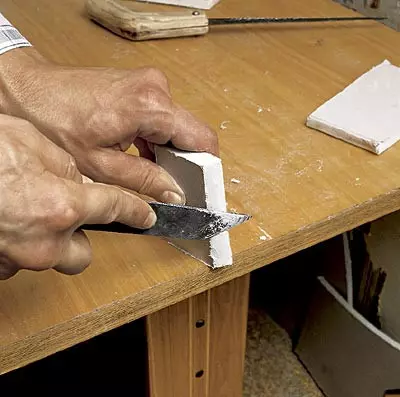
The 1st method shown in the photographs of the gypsum of plasterboard. It is quite difficult to make it, as it is assembled from individual strips of drywall, damned at an angle, which is determined by the radius of the bending arc. The number of such strips must correspond to the number of fastening bars on the ceiling. This will make it possible to make a uniform surface of an almost proper round shape.
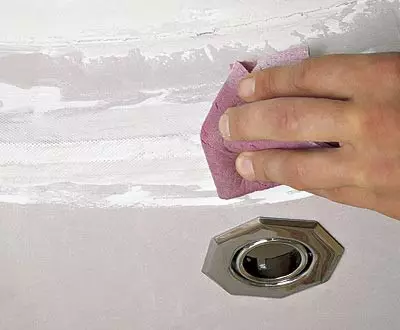
The easier and more common method is used as a "sidewalk" of a leaf of organity (soft fiberboard with a thickness of approximately 4mm). It is easily bent and attached, as well as easy to process. Introducing the strip, fitted in size, secure it so that the lower edge coincides with the lower plane of the suspended ceiling. The resulting box is treated with sandpaper so that its edges become more even and smooth.
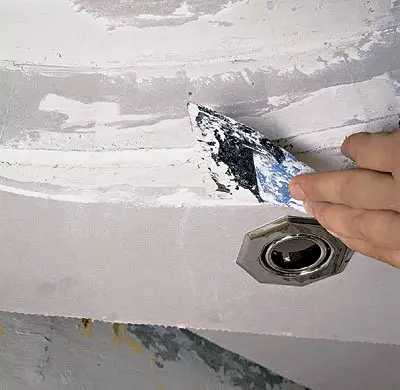
Shpaklevka
The whole suspension is completely prospailed. For this purpose, 2 sweepers are metallic and rubber. Especially carefully places the joints of the suspended ceiling elements and the mounting holes. From the top to the corners, a narrow strip of the sickle is glued and after it is spacing again. The finally the surface of the suspended ceiling is treated with water-level paint suitable color.Lamps
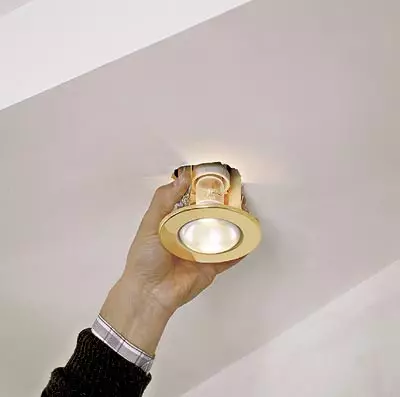
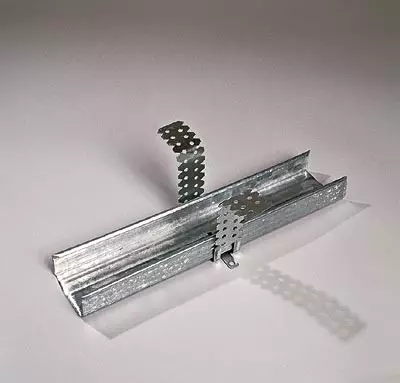
In the market of point lamps a very rich choice, so you have the opportunity to choose yourself in size and power. It is important to remember that the hidden part of the lamp (cartridge + fastener) should not exceed the depth of the suspended ceiling. The lamps are attached (as can be seen in the illustration) is simple enough, it is only necessary to push the brackets into the hole, and they, when it, will ensure reliable fixation.
For those who want to create a suspended ceiling of large volume, there are special fastening metal brackets on sale. They made notches on the height of the suspended ceilings and the installation with their use more corresponds to modern technologies. Our option is designed for small corridor-kitchen structures that are not so bulk and material consumption. Such a project is fully able to embody a person who has a skill of communication with simple construction tools and having the above materials under hand. Judgered from the work done by the work will be present in you constantly. After all, the most important thing is to try, and the result will not make yourself wait.