
Unlike metal tile, flexible does not rust, it is not deformed and not noise. In addition, the process of replacing the old coating to the new is quite simple, if you follow this visual instruction.
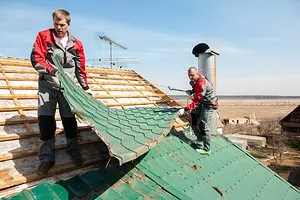

Photo: Tehtonol
The selection of a new roofing material is not easy to replace the old metal roof. Today the market presents a huge number of options. Take the choice is serious, because the replacement of the roof requires serious investments and labor costs.
It is necessary to choose the material, the service life of which would be long, and during operation, if the repair required, it is very rare and cosmetic, while the aesthetic kind of roofing should be happy with every look at the house. Also special attention should be paid to the technical properties of roofing material, simplicity of its installation, weight.
An excellent modern option for replacing the metal roof is a flexible (multi-layered) tile. Manufacturers provide a guarantee for such material up to 60 years.
Roofing with flexible tile is mounted in a complex building system. The roofing system ensures the necessary protection of the house and its roof from leaks and their negative consequences.
Flexible tile, unlike metal tile, is not no cozy during rain and hail, and most importantly, it does not rust and is not deformed under the weight of snow, resistant to falling acute items due to a solid base from PSL or moisture-resistant plywood.
In this article, we will consider the phased process of replacing the metal roof on flexible tile.
Stage 1. Dismantling work
Any roof renovation begins with the demonstration of the old. Metal roof is dismantled, old waterproofing, old insulation. Only after all dismantling works are installed in the installation of a new roofing system.
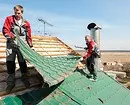
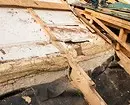
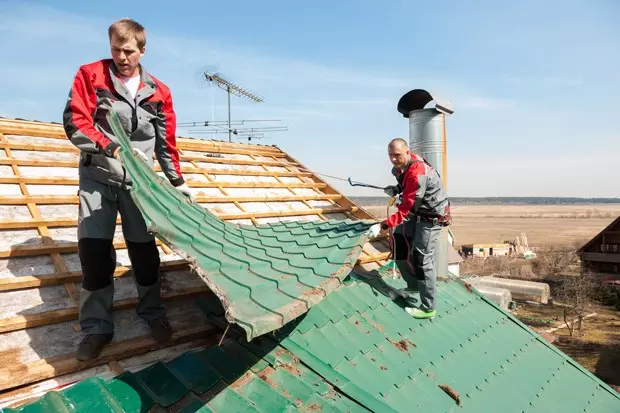
Photo: Tehtonol
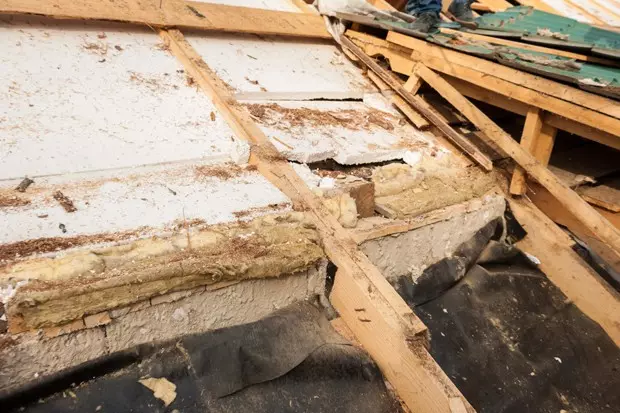
Photo: Tehtonol
Stage 2. Installation of a new vaporizoation layer
After dismantling, styling vaporizolation. The system uses a steam-insulated film TechnoNIKOL for scanty roofs, which has the ability of partial diffusion of water vapor to create an optimal humidity regime indoor. The joints of the vapor barrier film are sampled by self-adhesive acrylic tape technoNIKOL, which serves to connect vapor insulation films, roofing membranes and other construction products from artificial materials.

Photo: Tehtonol
Stage 3. Installation of new heat insulation
The next layer is thermal insulation. At the rafted roofing structures, a stepted lamp under the insulation is fastened. In the TN-Shinglas system of the Attic, it is recommended to use heat-insulating plates based on stone cotton technologight Extra, Technolate Optima or Rocklaight. These are natural non-combustible plates. The insulation is placed in two or three layers.

Photo: Tehtonol
Stage 4. Installation of wind and moisture protection
Over the insulation, the superdiffusion membrane TechnoNikol is stacked. She delays the wind and moisture outside, and a couple from the inside comes out freely. Rolls of membrane rolls are made from eaves to a skate with overweight at least 10 cm for each layer, attached to the rafters by a construction stapler.

Photo: Tehtonol
Stage 5. Mounting Contribrus
The counterbus is stacked from above to create ventilation channels and a doom, which will be support for large-scale flooring. The shaft step is selected taking into account the thickness of the OSP. For a plate of 9 mm, the shade step should not exceed 300 mm, and for OSP, a thickness of 12 mm is a maximum step - 600 mm. When laying an oriented-chipboard, 3-5 mm gaps are left to compensate for the expansion of the material.

Photo: Tehtonol
Stage 6. Installation of eaves and lining carpet
Farmers of the roofs are mounted on the roofs of the carnation technone (length 2 m, thickness 0.45 mm). They provide water removal, protect against rain moisture.

Photo: Tehtonol
After installing the eaves, rolling the Anderep lining carpet. On the skes, electrons and places of the roof adjoining, self-adhesive canvas are used, and on the rest of the surface you can use a lining carpet of mechanical fixation. The canvas are fixed with galvanized nails with a wide hat, and the places of the allen are missing the Mastica TechnoNIKOL №23 Fixer on a width of 8-10 cm.

Photo: Tehtonol
Fronton strips are attached over the lining carpet, for the direction of water in the drain. The jokes are missing by bitumen mastic for sealing.
Step 7. Laying Flexible Tile
The final stage of the work is to lay a flexible tile. Installation begins with an eaves. The second and subsequent ranks of the tiles are stacked with the displacement. So that the roof has a beautiful homogeneous shade, it is recommended to mix the contents of 5-6 bundle packs before laying. For installation, you can use a conventional hammer or a nail gun, which increases the mounting speed.

Photo: Tehtonol
The first row of flexible tile shots is missing the fiber mastic on a width of 10 cm. The layer of mastic should be no more than 1 mm.
Stage 8. Installation of undercase ventilation
At the top of the roof, the skiing aerator is mounted for outputing extra moisture from the roofing system. The aerator has a filter for additional protection of the undercase space from insects and atmospheric precipitation. The plastic skiing aerator is closed by plate-in-roofing plates, which are fixed with roofing nails (45 mm) so that the backrest of the overlay tiles overlap the nails of the underlying. The tile for laying the skate is obtained by dividing the skate-carnice tiles into three parts along the punching lines and is conducted from the side opposite to the prevailing rose of the winds.

Photo: Tehtonol
When replacing the old roof from metal tile on flexible tile, there are no complex stages if you follow the phased instructions.