
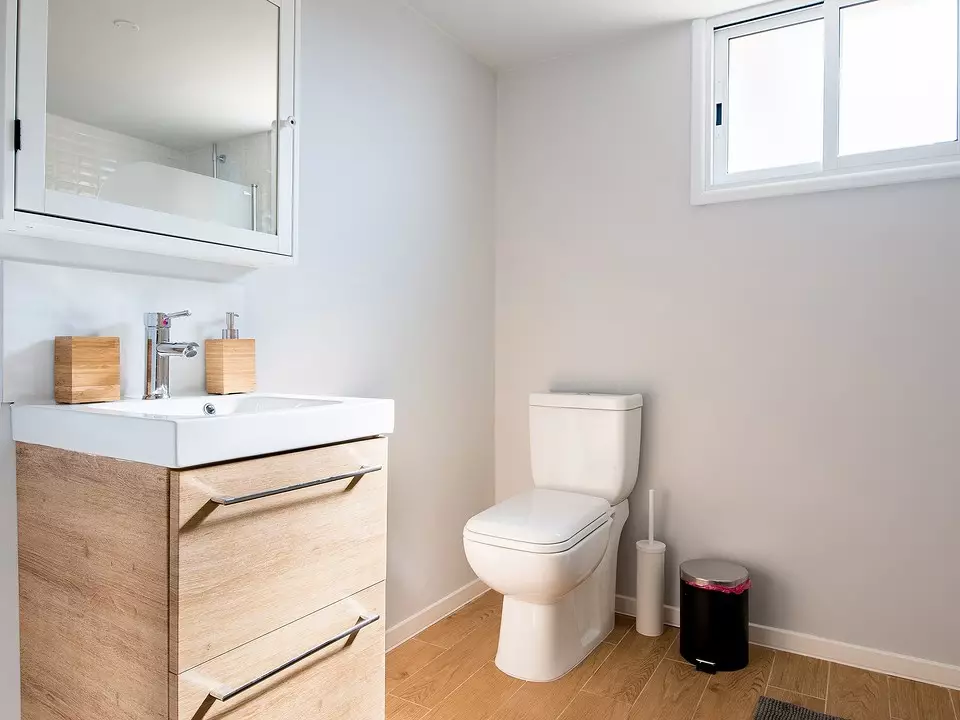
We tell about the advantages and minuses of the installation of corrugations on the toilet and the correct installation process.

The corrugation is a flexible tube with ribbed walls made on the principle of "accordion". Wavely folds are easily stretched and compressed. Products can be given any form. They are produced from thermopolymers. High strength possess the walls with reinforcement. As a fittings, a metal wire is used, which gives structures stiffness and makes it less mobile. Flexible communications are inferior to conventional plastic on technical characteristics, but sometimes it is impossible to do without them. Such situations arise with an uncomfortable location of plumbing relative to the entrance to the sewer riser. The ability to change the form significantly simplifies the installation process. In the article, we will tell you how to install the corrugation to the toilet.
All about installing corrugations on the toilet
Characteristics of different materialsPros and cons Installation
Step-by-step installation instructions
- Tools and consumables
- Dismantling equipment
- How to shorten the sleeves
- Connect to riser
Use smooth PVC pipes instead of corrugations
Features of materials and their characteristics
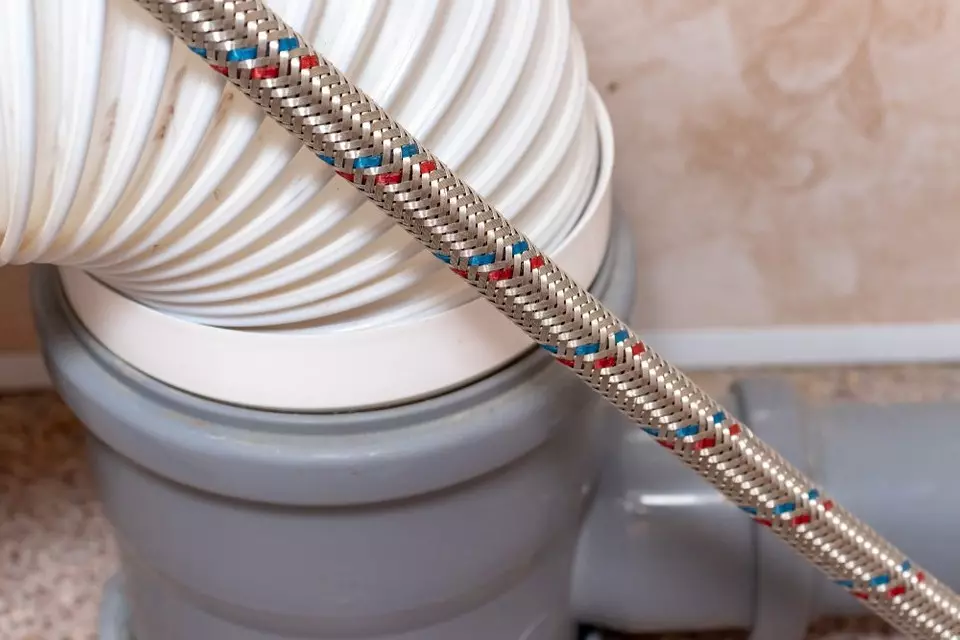
Products are made of polymers with improved properties. They can be used in urban apartments and private houses. There are no restrictions. They are channels with cuffs that are fastened to the release of a plumbing device. The inner diameter of the cuff is 7.5 cm, external - 13.4 cm. The other side is connected to the sewer riser. It has a diameter of 11 cm. The length of the product ranges from 23.1 to 50 cm. Inside the channel was laid with a smooth surface. Its width is 7.5 cm. It is needed so that the flow to interfere with irregularities, and deposits did not accumulate in the folds of the outer layer.
Plastic struts to aggressive media and does not spoil when contact with detergents containing active chemicals. In the absence of extreme loads and contacts with a heated surface, the product will serve over 50 years.
Power types
Before installing the corrugation to the toilet with your own hands, you need to understand what operational characteristics are required. The eyeliner can be rigid and soft.
- Tough - durable and resistant to wear. She has thicker walls, so the flexibility is lower.
- Soft - it is easier to bend and stretch. Such a lining is used with significant differences vertically and horizontally between the outlet and the inlet in the riser. It is easy to damage when washed with sharp fragments. Walls are quickly stretched and start to sign. Water and solid deposits are accumulated on the saving area. They create additional loads leading to even greater saving and channel tool. The service life is small. Use soft pipes when there are no other options. They are good as a temporary measure before the re-equipment of the bathroom and the correction of the skew.
Materials CORFR
Products are made from ordinary and reinforced plastic.
- The reinforced material is reinforced with a thin metal wire, fused in the rib. The walls do not break and confront mechanical loads better. When tensile, the space between the rings turns out to be unprotected. If the thickness is small, it is easy to break the sharp object.
- Unnamed plastic - its properties are completely dependent on the wall thickness.
Features of materials do not affect the montage method.
Pros and cons Installation of corrugations on the toilet
The rigid eyeliner is usually made of plastic. Steel and cast iron are rarely applied. They are difficult to trim and mount. The inner surface accumulates a precipitate that reduces the cross-section of the channel. Metal and cast iron are subject to corrosion. They are distinguished by resistance to mechanical loads, but the internal pressure is small. It is withstanding ordinary PVC. Consider the pros and cons of flat and ribbed surfaces from polyvinyl chloride in more detail.Benefits
- It is convenient to use them in the axial displacement of the release relative to the entrance to the riser, as well as in cases where the sanitary appliance removal has non-standard forms. The bowl can be positioned anywhere at a distance of 50 cm from the riser. In typical apartments, the entrance to the sewage is designed for oblique release. Horizontal in this case will be difficult to connect one element without junctions. The leakage, as a rule, arise in the seams.
- Products with ribbed high strength walls allow you to compensate for minor axial displacements. At the same time, their reliability and service life do not differ from the usual smooth liner.
disadvantages
- Fast wear, ability to damage.
- Schedules with long length.
- The ability to break in case of sagging.
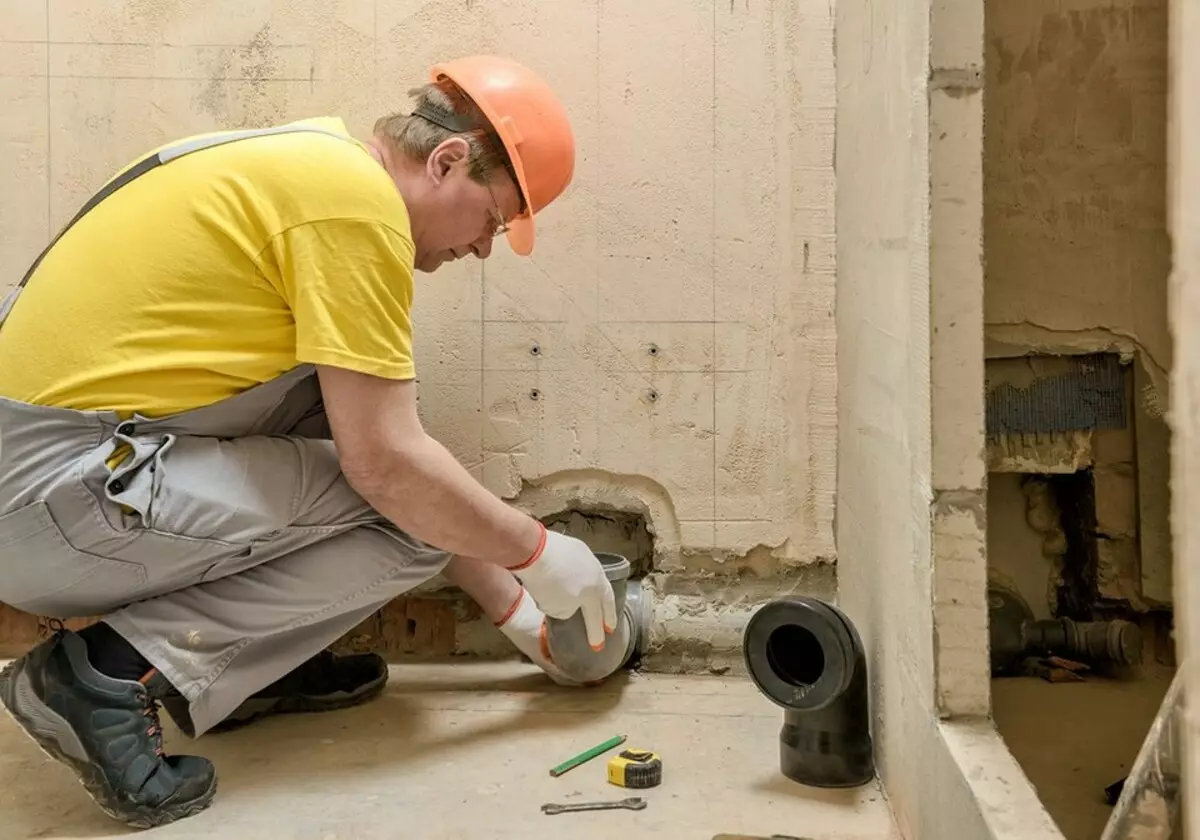
How to install corrugations on the toilet with your own hands
You should start with measurements. Length takes with a margin of several centimeters to avoid tension. It is taken taking into account the bends. It is necessary to measure the diameter of the inputs and outputs - they may be non-standard. It is possible that the rigid angular adapter will be required.Tools and consumables
- Sledgehammer.
- A hammer.
- Chisel.
- Roulette.
- Building level.
- Set of wrenches.
- Liquid Nails.
- Pacle or sealing tape.
- Silicone sealant.
- The hose - it will be needed to drain the water from the bowl.
Work on dismantling
As a rule, communications change when replacing equipment. If the cause is the leak or scheduled repair, install the channel more convenient when the bowl is removed.Dismantling includes several stages
- Water supply to the tank is turned off and click on the descent. The tank is empty and remove it.
- To remove the old corrugation, it does not need a lot of effort. First, it is disconnected from porcelain base. The sealant is scored with a knife. Another end is removed from the entrance to the sewer. The hard tube PVC is more convenient to cut, putting the floor with rags. The jokes with the cast iron are cut or rolled the base.
- The screws at the foot are cleaned from rust and unscrew. If they are very closed, they hit with a hammer.
- For several years of service, the foot is merged with the floor. Remove it is not easy. To do this, it is necessary to hide the neck with a cloth and make a few sledge hammer blows. When buying new equipment, it is not necessary to maintain. So that it was more convenient to carry out work, it is important not to split porcelain. Beat better at the bottom. Do not hit the cast-iron eyeliner, which comes from the riser - it can split, and then it will have to be changed.
- The bowl is gradually swing and removed. If it does not give in, the bottom is cleared with a hammer and chisel. The destruction of the cement base does not always pass well. Better stock rags in case porcelain will not stand. Water in a broken neck rushes to the floor, and with poor waterproofing, you can pour neighbors.
- The released hole is purified from garbage and cement-reacted residues. It is plugged with rags or a special plug, which prevents the spread of smells around the house.
How to shorten the sleeves
Before installing the corrugation on the toilet, you need to measure again. In case of an error, it can be exchanged while it has a commodity look.
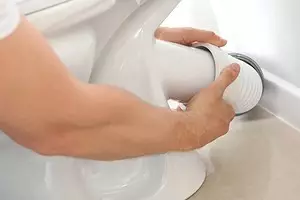
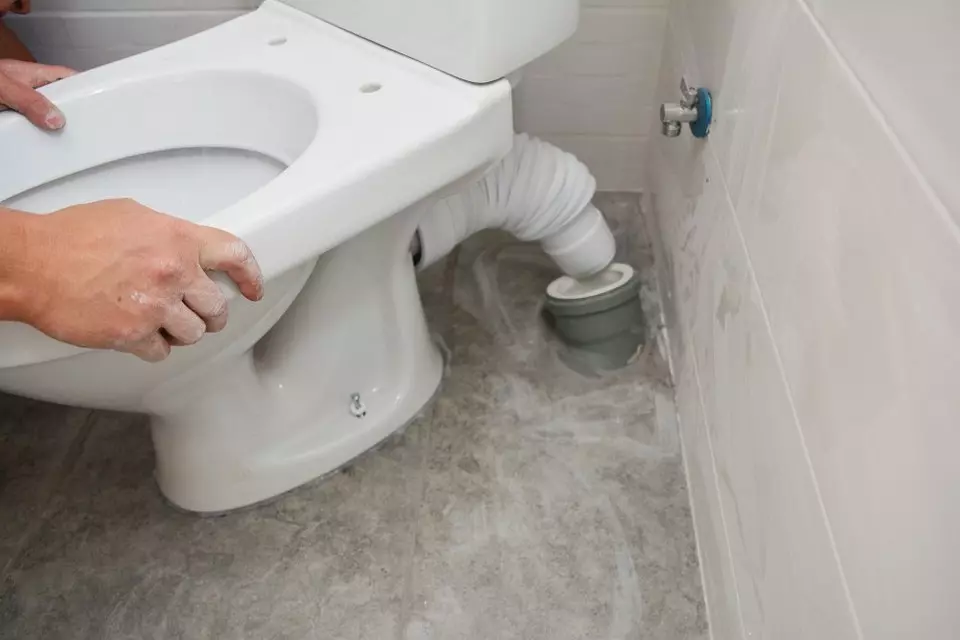
The product, if necessary, is trimmed with a reserve of several centimeters. It is better not to do this - leak most often appears on the joints. The pipe is cut by the pipe, measure the desired length and cut off with a metal with a metal - it leaves less burrs. The end is set into the nozzle by treating it with silicone sealant. They are missing the entire surface inside the joint. The detail when docking turns to the sealant evenly filled the entire cavity. He dries two days. During this time, installation work is impossible. When the device is connected to verify the quality of the connection, water is allowed from the tank.
Connecting fittings
- If the base has been damaged, they are close to cement mortar.
- The sleeve from the inside is washed with sealant and put on the release of a plumbing device. It is stretched by 5-7 cm. After three hours, the strength of the sealant already allows you to move the bowl on the base.
- On the floor drawing markup under the dowel, with which the foot will be fastened, and drill holes under them. For tiles use special drills with pointed tips. Holes in the tile should be wider by 1-2 mm than in reinforced concrete. Otherwise, when working in shock mode, the drill on concrete will damn the edge of the facing.
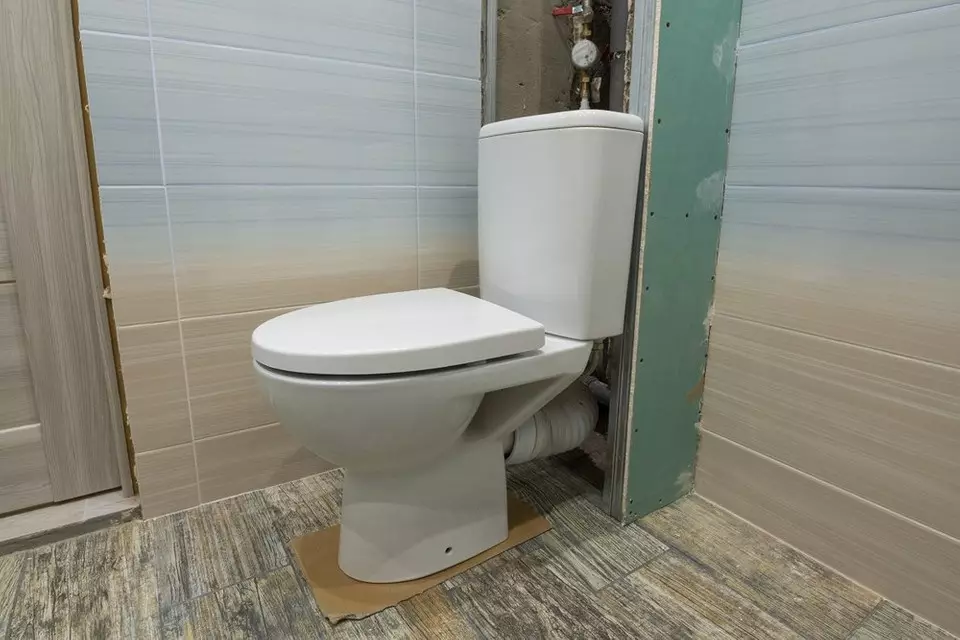
- If it is planned to install an old instrument, its release is cleaned of building materials and dirt. The foot screwed to the ground. It is placed on an elastic polymer gasket or on a cement mortar pillow. With a dense adjoining to the base there is a fairly thick layer of silicone. Installation should be carried out at the construction level.
- The inlet in the riser is cleaned, dried and processed by a sealing composition. It introduces the second side of the channel. After three hours they make a trial launch. First serve a small amount of water. In the absence of leaks, the full tank pour.
Is it necessary to put the corrugation when the toilet displacement
There is another way how to connect to sewage when the axes of the entrance and release axes are shifted. PVC pipes allow to achieve higher strength. There are swivel adapters with different angles. It is convenient to use them when connecting the horizontal release to the standard entrance under 45 degrees. It will take one direct segment of the desired length and the corresponding angular adapter. The joints are scattered from the inside. To increase the strength, they are tightened with a metal clamp twisting with the screw. Prefabricated elements occupy a lot of space. It is possible that the bowl will have to be shifted towards the door.
If you choose the desired angle fails, the pipe on both sides is attached to the sealing cuffs. It is impossible to get a smooth junction with such a method, so the seams are closed with a mortar.
With a minor discrepancy in terms of plastic, the construction hairdryer is heated and bend. It begins to melt at 70 degrees. This is not the best solution - the wall can be damaged or weakened. Staying the whole, she will give to flow at the first start.