
We tell how to identify a malfunction, restore the seal and replace it with a new one if the recovery is not possible.
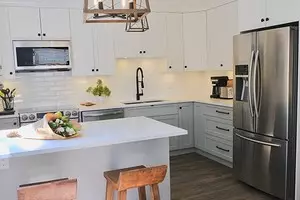

The refrigerator is an indispensable assistant in any kitchen. It effectively reduces the temperature for storing products and supports the specified cooling mode. An important role in the process plays a seal that provides tightness of cooled compartments. With its malfunction, the compressor accounts for more often, the efficiency of its operation is reduced, energy consumption is growing. How to understand that the unit needs help, and how to change the elastic band on the refrigerator. We tell.
All about replacing the seal
How to identify a malfunctionMethods of repair
Gasket Replacement Instructions
- We select tape
- Dismantling of a worn element
- Installation of new
How to understand that the seal is faulty
Rubber item fails unnoticed. Explicit signs of its wear: cracks, dents, other defects. Old rubber dries up, loses elasticity, becomes breaking and can no longer compact the door as before. Faced with this, it is worth thinking right about replacing the element. But not always the problem is manifested so bright and unequivocally.
The first feature that should alert, - the appearance of a land. It appears because warm air goes inside the compartment. It penetrates even through a small, imperceptible eye of the gap. Air is always saturated with water vapors. It is they condensed in the cold and form an icy thymus. You can get rid of it with defrosting, but this is a temporary measure. Shortly, score will appear again.
Another feature is frequent inclusion of the compressor. It is forced to activate to reduce the temperature that increases due to the receipt of warm air. In such conditions, electricity overruns are provided. And if it is not possible to correct the situation on time, the likelihood of a breakdown of expensive part, which is not intended for too intensive operation.
It is not always possible to notice the gap. In the detection workshops, proves with a diameter of 0.1 mm are used. The home master of such a tool is most often no, but he is not needed because the experience of working with it is required. You can do everything much easier. If there are suspicions, a test with a sheet of paper is carried out with a rubber band. The door of the compartment is open, insert paper and closed. If a sheet can be moved in this state, it's time to replace the sealing system.
How to restore the refrigerator seal
It is not always categorically necessary to replace the part, in some cases it can be fixed. So, a deformed or dug element is subject to restoration. Here are some tips on her.
- Lost elasticity or slightly deformed gum is removed, soaked in containers with hot water. Arriving, it restores the former shape.
- Sometimes the details are restored without dismantling. For this, it is heated by a construction hairdryer included at a moderate temperature.
- If the gum fragments are departed from the base, they are neatly lined. With this task, silicone sealant or glue "Moments" copes well. On their packaging should be marked, indicating that the tool is well tolerate low temperatures.
- Small cracks on the sealing tape are neatly close by sealant. To do this, choose only the material safe for humans.
If the restoration is not shown, you will have to change the damaged part. It is not difficult, you can cope with yourself.

How to change the seal on the refrigerator
Start repairs with a shutdown of the unit from the network. It is freed from the products, they defrost, wash and dried. Well, if you can remove the door. Conduct manipulations on weight is inconvenient and not so effectively as on the support. If possible, the door is removed and stacked on a solid horizontal plane.1. Choose the desired replacement
If the sealing element is not suitable, it is useless to put it. It will not work. Therefore, it is important to choose the item to choose the item to get a good seal. Note several important points of choice.
- We select the detail on the refrigerator model. Such a sealing tape is ideal for the door. True, it can not always be done. For outdated models, it is selected similar to the fastening and size of the product.
- Carefully examine a new seal. Sometimes defects are found even on new products. These can be various damage, cracks. They should not be. It is worth abandoning the purchase, if the structure of the material is inhomogeneous, there are stretching, lumps. This indicates low quality plastic.
In the most difficult cases, when the technique is old and no longer produced, it is not possible to find a suitable sealing tape. In this case, you have to take a similar model and customize it in size. Excess plastic is cut off with a sharp knife, the joints are stuck. This is the worst version of all, but it will not work differently.
2. Remove the old detail
Dismantling it served his tape is carried out carefully and neat. The risk of spoiling the basis for which it will later be necessary to install a new part. Then it will have to be repaired, which is undesirable. The dismantling method depends on the method of installing the sealing structure. There are three options: on glue, screws, in the groove.
The latter will be easier. To do this, slightly push the edge of the groove and gently pull the tape up. So as not to break it. You can help yourself a flat screwdriver. It is inserted between plastic and groove, carefully uploading element. It is not difficult to remove the sealing system on the self-drawing. A screwdriver or screwdriver are twisted fastened. The most important thing is to try not to break the self-sufficiency and not to break his landing place.
The glued ribbon is harder. At first, it is tightened with an effort throughout the perimeter of the structure. Then carefully cleaned the base with a sharp spatula or knife so that even the smallest crumbs from the old rubber remains. Otherwise, gluing a new one will be more difficult, the quality of work will suffer.

3. We put a new seal
In all the recommendations, how to replace the sealing gum on the refrigerator, emphasize that it is impractical to change the installation method. Only if the attachment elements are spoiled or broke, it is necessary to think about it. But it rarely happens. We will analyze the sequence of actions.Fastening in the groove
The edge of the groove is carefully drawn by itself. In the resulting hole neatly inserted the Christmas tree of the seal. It put in place by helping himself a small flat screwdriver. Next move around the perimeter of the base. After the sealing system gets into place, it is sometimes further fastened with glue or screws, screwing them out at a distance of 15 cm one from the other.
Fastening on a self-tapping screw
We inspect the seating fasteners. If the unit is old, the likelihood is very high that the fasteners are crushed. In this case, you need to put screws larger than before, diameter. This will ensure their dense landing. New rubber is applied to the base, fix with screws.How to glue a sealing gum in the refrigerator
The foundation is laundered from possible pollution, dried and degreased. The last operation is obligatory because it provides good adhesion of two surfaces. Before work, you must get acquainted with the instructions for glue composition and act in accordance with it. There are all features of application and gluing, the time of rejection of the material.
At the end of the work, the new element is carefully examined. It should not be damaged during the installation process, otherwise it will have to be changed. If everything is fine, the door put in place, the device is connected to the network. It is ready for further operation.
Repair or replace the sealing rubber with their own hands is easy. The main thing is to perform all operations accurately and neatly. An indicator of the quality of the work done will be the lack of feeling of coolness near the door and some effort with which it can open. We offer to watch a video where the replacement process is shown in detail.