
We choose the material, prepare the surface and put it with your own hands.
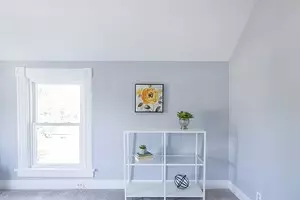

Ideally smooth ceiling plane - decoration of any room. It can be painted or saked by wallpaper, stick tile or arrange somehow. It is important that the plane was initially smooth. To remove small defects, a spacion mixture is used. It closes fine flaws, leveling the surface. Let's wonder how to put a putty on the ceiling.
All about the shtlivania ceiling
1. Selection of material2. Preparation of the basis
3. Puckuckle
- Start Plast
- Finish Plast
- Features of the shtlocking of drywall
We choose the material
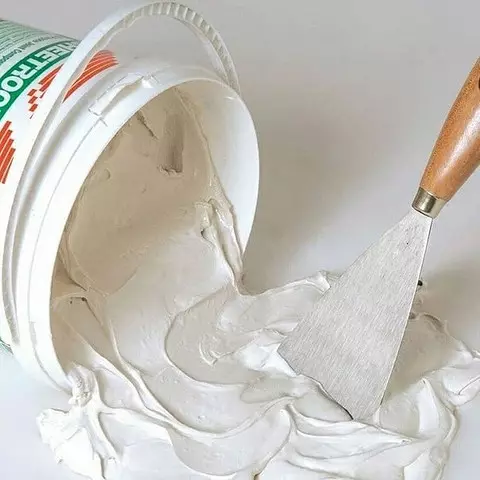
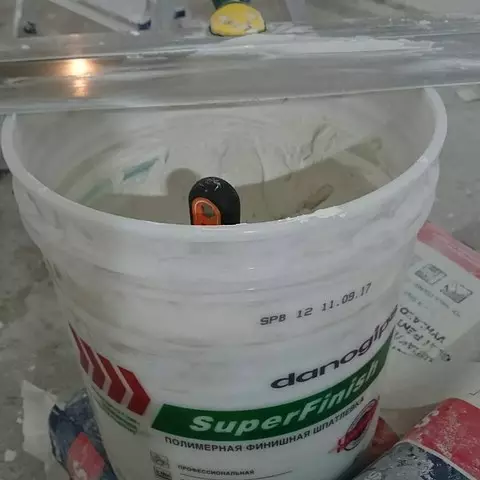
A putty paste is used for work. This is a thick plastic mass intended for aligning various bases. The mixtures differ in several categories.
- The basis. It may be plaster or cement. Lime, vinyl, polymers are used as additives.
- Dispersion. Dimensions of particles in the mixture differ. We produce heavy, medium and fine-dispersive formulations.
- Type. The material is produced in the form of a powder, then before work it is divorced by water, or in ready-to-use form.
- Permissible thickness of the formation.
- Additives. Plasticizers, solidification regulators, pigments, etc. are added to obtain additional properties in the paste.
In addition, the clutch force with the basis, viscosity, permissible humidity and temperature when applied are distinguished. The putty is chosen taking into account all these moments. To work with the ceiling surface, you will need two different material:
- Starting. A coarse mass that aligns minor height differences, closeing in small defects and cracks. The starting layer should not be higher than 15-25 mm. If you need to remove large differences, plastering the foundation.
- Finishing. The fine mixture applied to the final alignment. Its layer should not exceed 0.5-3 mm.
In stores you can find universal materials that are superimposed as start-up and as a finishing layer. Their price is slightly lower, so work will cost less. However, their quality is significantly better if different mixes are used.
Preparing the ceiling under putty
The tool is applied only on a dry level base. Therefore, the whole old finish, if present, it is necessary to remove. The design is completely removed to the slab overlap. The most difficult thing that will be done if there are several decorative layers.Sequence of work
- Sponge or roller abundantly wet the coating.
- After some time we repeat processing. Old decoration should be soaked with water and "RESCILE".
- We take a spatula and carefully remove the sword decor.
- Freed from layering the base is washed with clean water. We leave for drying.
- If the first time cannot be removed, we watches it again, repeat all the procedures.
The ceiling tile is gently fit with the edge with a spatula, after which they remove. Wallpapers are swollen with warm soapy water, then remove the strips. If they keep too tight, wet again, then scrape. It is not always possible to wash the water-emulsion. Then it is better to remove it with grinding. Oil paint is cleaned with a special washes. This may seem like an excess operation, but otherwise the new design will not hold on. Because the whole old finish is removed, proceed to inspect the foundation. To do this, it is best to climb the stepladder.
Height differences are determined using a construction level. They should not be more than 25 mm. In this case, it will have to put too much reservoir mixture, which is not allowed by technology. All creams and cracks are detected.
Small defects in the form of convexities or dents are clearly visible when the flashlight is highlighted. No matter how much it is, the location of everyone needs to be remembered or somehow noted. All detected flaws need to be removed.
How to smell a crack
- A sharp tool will be extending the crack. That is, we remove the remains of the old coating from it, expand it to 2-3 mm.
- Rigid brush clean dust and pollution.
- Gently shrink the fracture with a repair solution, polyurethane foam, primer.
- Cut the required number of sickle tape. This is a reinforcing mesh, produced in the form of strips of different widths. It must completely overlap the crack. We glue the tape on top of the defect.
The selected agent is superimposed on a dry surface. The easiest way to do it with a roller. In the corners and the walls, the composition is applied with a brush. The number of layers recommends the manufacturer, the information will necessarily be on the package. If you need to put more than one layer, the following is superimposed only after the complete drying of the previous one.
Put the ceiling with your own hands
We begin with mixing the solution. This is an important point that is not always covered in the recommendations how to put the ceiling. Whereas the quality of its application depends on the embosceration. The packaging of dry material indicates the proportions in which it is divorced. They need to be accurately observed. There will also be time curing. If the paste hits quickly, such as gypsum, portion for the kneading must be small.
A measured amount of pure water is poured into the suitable capacity. Then in small portions there the powder is poured there. Each time the mass is well mixed.
Manually do it difficult, it is better to take a building mixer or a drill with a nozzle. The finished paste on the consistency reminds very thick sour cream. It is left for 12-15 minutes, then stirred again and begin to work.
Shpocking starting mixture
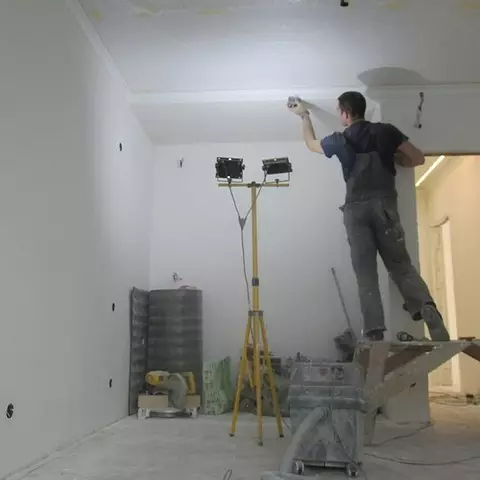
Apply a mass on the ceiling surface is more complicated than on the wall. An uncomfortable posture quickly causes fatigue. Therefore, it is desirable to choose the goat or other stand suitable at the height.Sequence of work
- We take a wide spatula. Narrow impose a portion of pasta, evenly distribute.
- We start from the corner. We press the tool with the edge to the ceiling at a small angle, with its effort it. The solution should seem to be in a base, evenly distributed over it.
- Smooth stripes and small irregularities with a narrow spatula.
- We continue to shtpocking. If the recesses come across, carefully climb them with two and three layers of the solution.
- We take a plaster grater, fix the abrasive grid on it. We start to rub the screaming surface. Moving in a circle, better counterclockwise. In the process of rubbing, it is desirable to highlight the plane with a flashlight so that the defects are clearly visible.
So the starting layer is superimposed.
If it turned out not enough to align, the second is similar. But only after the first will dry out. Then the base is stuffed under the further finish.
Shpocking finish composition
The process of applying putty mass is very similar to the described above, but there are some differences. The finishing layer is stacked the thinnest. It is necessary to work quickly so that the paste does not have time to "grab" at the edges.Sequence of work
- Narrow tools impose a paste on a wide, distribute along the edge.
- We start with the same place where the starting mixture began to lay. We press the spatula to the plane at a slight angle, with the effort we lead it to the side.
- The following movement remove the excess material. At the same time, we deploy almost perpendicular to the basis.
- We put the finishing mass on the entire surface. Periodically highlight it in different directions to notice the defects and remove them.
- The grater with the abrasive mesh is equalizing the spike solution. Correctly do it with circular smooth movements.
- We are waiting until the base dry completely. We clean it with shallow sandpaper. To accelerate the process, you can use a grinding machine.

Ceiling sushpaklevan. Further actions depend on how it is planned to be issued. Most often, it is grounded under the painting suitable type of coloring agent or under the sticking of wallpaper.
How do it yourself put the ceiling of plasterboard
Suspended structures are used to align significant height differences. After their sheathing sheets, the GLCs requires putty. It is used in this case only the finishing solution, but there are some subtleties.Sequence of work
- We prepare the coverage for the shtlock. We will extend the seams. Some sheets are produced with a cut edge. If not, you will have to remove it with your own hands. Take the stationery knife, gently cut the edge at an angle of 45 °. Chips and dust remove a hard brush.
- Ground prepared surface. Use for this roller. Inaccessible areas with brush.
- We mix the solution. Before that, you need to make sure it is designed to work with plasterboard. We divorce powder in accurately according to the manufacturer's recommendations.
- After drying the primer, we glue all the extended seams with sickle. We apply a portion of the solution on the reinforcing tape, literally bleed it in the mixture. Less spatula, put another layer of pasta, once again align. Close up with a solution of hats of screws.
- We are waiting for the tool.
- Put the base. We recruit a narrow spatula of the mass, put it on a wide, recall.
- We press the tool to the surface, with the effort we lead to the side. Immediately remove the surplus. So close the whole base. Check that everything was exactly.
- Circular movements grater finally equalize the coating.
- We are waiting until it dry. Small sandpaper we clean the plane.
The inexperienced master will be difficult to carefully sharpen the ceiling surface. But this does not mean that it is not necessary to take for the execution of the finish. In conclusion, we suggest watching the video, how to put the ceiling with your own hands: newcomer and not only.