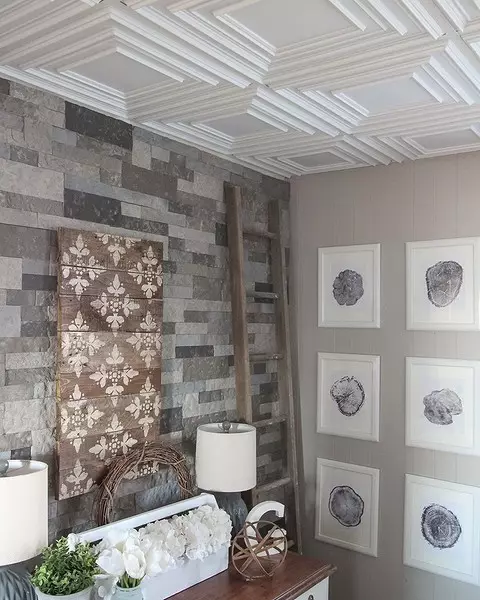
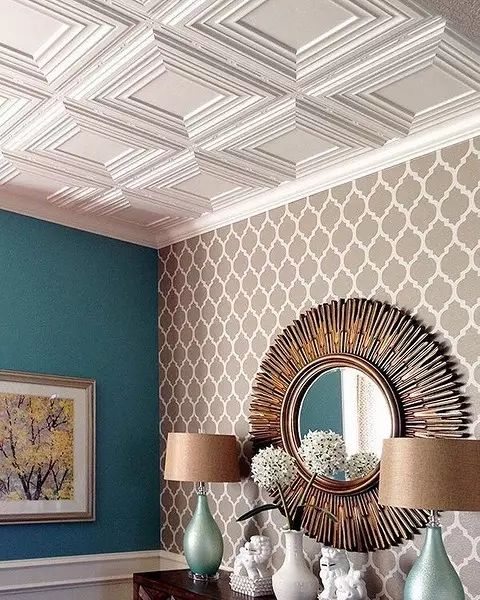
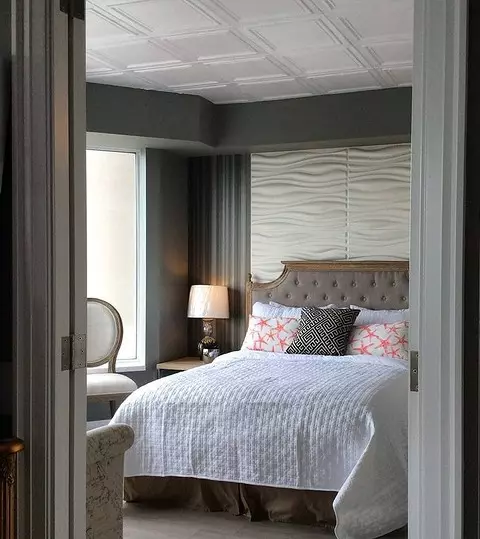
The ceiling tile is good because it can be literally in a matter of hours to update the interior. We will tell how to stick the facing so that it serves for a long time.

All about installing polystyrene decor
Varieties of materialMounting instructions
- Preparation
- Laying panels
- Final finish
Work on an uneven surface
Varieties of ceiling tile
Before you know how to glue the ceiling tile, it is worth understanding its varieties. Moreover, they do not equally behave when installing. All cladding is made of polystyrene, only its production technology differs. Severe three types of finishes:
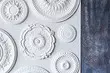
Stamped
It is a plate with a thickness of 0.6-1.2 cm made of foam with the pattern extincted on them. On the surface is clearly noticeable graininess, which can be large or small. The main advantage is low price. The material is loose, easily absorbs pollution and smells. It is very difficult to get rid of them, therefore foam panels paint. It is difficult to work with them: impenetrate, crumbling, break. Therefore, they buy with a reserve: not less than 10% of the required quantity.Extruded
It is made from foamed polystyrene, which changes its properties. Details are dense, without grains, with a smooth surface. We are produced with a thickness of 0.3-0.4 cm, painted in different colors. Registration can imitate wood, stone, etc. Unlike a stamped analogue, it is very easy to care for him. The number of pores is minimally, so they are not clogged with mud. The disadvantage considers the high cost, compared to other polystyrene tiles.
Injection
A peculiar transitional option between stamped and extruded facing. Foam blanks are placed in forms and "baked" in special furnaces. The result is a sufficiently dense surface with a clear pattern. Pollution and smells she absorbs weakly, so it's easy to care for it. If necessary, you can paint it. It is necessary to glue the panels with caution, they break and impel. Although not as strong as stamped.
All varieties are available in the form of square, less often rectangular plates.
If the edge of the element goes a kant, which means that a clear visible joint or seam is assumed. On seamless models of Kant, there is no edge most often with bends. It is easier to make the butt invisible.
How to glue a tile on the ceiling in several stages
To lay the polystyrene panels is easy, but you need to do everything correctly. First choose the coating, then glue for it. These can be liquid nails or any special composition. All of them hold well plates in place.A small disadvantage about which you need to know is that the item will have to press for some time to the base. It is released only after the composition "grab", which is not entirely convenient. It is easier to work with mastic for ceiling plates. This is a paste, packaged in small buckets. It is distinguished by a consistency that makes a mass of more sticky. Therefore, the plate immediately sticks to the base and do not need to hold it for a long time. Sometimes a putty is used as a locking solution. This option is chosen when you need to lift the ceiling slightly and at the same time paste the decor.
Preparatory work
Start with the preparation of the base. It is carefully examined and evaluated. Everything that keeps unreliable will have to be removed. The spatula is removed fragments of old putty, wallpaper, plasters whitewings, etc. If the coating had to be coated and the layer of paint is small, it is washed off with water. Purified base should be smooth, dry. All cracks, irregularities and other defects close up with plastering or putty.
For a better clutch of the decor with the base, it is ground. Pricewer is chosen according to the ceiling material. For porous concrete, a mixture of deep penetration is well suited, drywall is treated with adhesion solution, etc.
The soil is applied with one or more layers in accordance with the manufacturer's recommendations. It is possible to start further work after its complete drying.
The next stage is marking. Plates are placed in parallel walls or diagonally. Start better from the chandelier. Well, if it is located in the center of the ceiling. Then there will be no difficulty with markup. It is enough to take the cord, to dip it in the paint, stretch between opposite angles and press to the base to remain next. Then repeat the operation. Lines for laying facing diagonally ready.
For parallel placement, you will need to spend two more lines. The cord is stretched through the center between opposite walls. The most difficult thing when the room is rectangular, and the chandelier does not hang in the center. In this case, the point from where the installation begins is shifted to the lighting device, everything else is performed similarly. The first row of plates is subsequently exhibited on the markup lines. It is very important that everything is done exactly and neatly. Otherwise, the quality of work will suffer. Tie tile is put from the corner. In this case, it is placed only in parallel walls.
If this method is selected, almost always one row has to be trimmed. Therefore, it is recommended to start the wall on which the entrance to the room is. So the forced trimming will be less noticeable.
Laying cladding
We will analyze how to glue the ceiling tile from foam. Before starting work, open packaging with facing, carefully inspect it. It is impossible to be the difference in the shade of the material from different packs. In addition, pay attention to the ends. If there are influx or irregularities on them, cut the flaws with a sharp thin knife. After that, the plates can be glued. Do it in such a sequence:
- We take a decorative plate, put it on a flat surface face down, we impose a locking mixture. Depending on the composition, it can be applied to a solid layer or point: at the edges and diagonally.
- First we determine the place where the item will be. We put it, the most accurately singing it with the previous element, slightly pressed to the base. If necessary, we wait until the adhesive composition grabs.
- All the following elements are placed similarly. For trimming, the plate is placed on a flat base, placed, cuts out with a sharp thin knife.
So that the seams on the facing were smooth, the details pressed one to another very tight.
The easiest way is the smooth seams make a wooden plank. It puts to the edge of the plate and gently pressed. So remove small gaps. Do not try to press the elements with your hand. Not enough durable material may break.
Final finish
Bloom the plates without getting excess adhesive masses on the front side of the parts will not work. They are immediately removed by a clean cloth, otherwise the ugly stains will remain. After the installation is over, once again check the seams and remove the remnants of glue not seen before. If the gaps are detected between the elements, they are filled with white putty or mastic. Well suits acrylic sealant. The mass is distributed on the seam with a spatula, the surplus is cleaned with a damp cloth.
How to glue the ceiling tile on an uneven base
The ceilings are not always smooth. Very often they spoil their joints and a different level of laying concrete slabs, depressions or bulbs of the base, significant deviations horizontally.
Experts recommend correcting the uneven surface. It is aligned with putty or plaster. Sometimes there is a suspended design, they are squeezed by it with plasterboard or similar material.
Sometimes they are doing otherwise and level the foundation with simultaneous finishing. It is not easy, but doable. Installation is carried out in such a sequence:
- Putamy is dragging to the state of thick paste. If the design of a bathroom or bathroom is assumed, choose moisture resistant composition.
- We take a toothed spatula and a thin layer apply a solution on the ceiling. The covered fragment should be small, a maximum of four decorative plates.
- We put the first element, according to it, align the rest.
- We take the level and check the horizontal. Gently shifting and pressing parts, exhibit them in the same plane.
We repeat until you fill in all the base. It is very important to monitor the thickness of the adhesive layer. It is impossible to be too high. Exceeding 3-5 mm extremely undesirable. The risk appears that the facing will fall off over time. Correct with your own hands, significant differences will not work. We offer to watch a video where this technique is clearly shown.
The polystyrene decor is practical in use and easy to install. It is suitable for fast and little costly update of the subprofit interior. You can put it literally in a few hours. It does not take a lot of strength, will not hit the wallet. You need to choose material very carefully. Low-quality facing when heated can be separated toxic substances. It must be remembered that the polystyrene is combustible, so its use in residential premises is unsafe.