
Simple tips for the selection of a brick bath furnace, its construction and selection of building materials.

How to build a bath oven
ViewsErections of construction
Dimensions
Materials
Construction and masonry
Security use
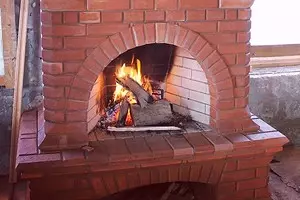
Brick oven for the bath is a very important element of any country house. But at first glance it may seem that its construction is a long and complex process. However, this is not so.
Types of design
Now in construction stores you can see the diversity of portable heating elements, however, people basically prefer a traditional brick stove.
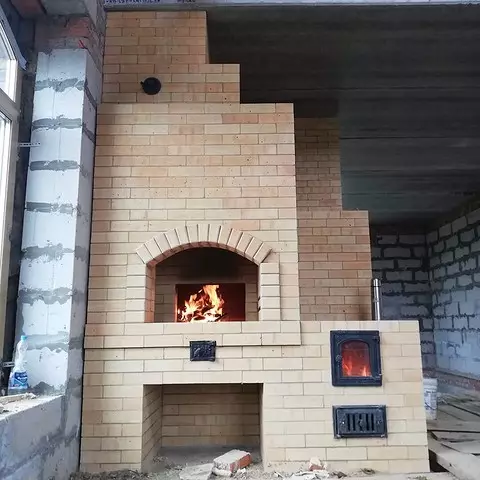
If you decide to install, then before starting it with the construction, measure the room, because the traditional type of heating element there may simply do not fit. Most often, their width exceeds 100 cm, and the height varies 160 to 220 cm.
With all its massiveness, such an aggregate has a number of significant advantages:
- fireproof;
- Well keeps warm;
- He warms large rooms.
However, if you do not have enough funds for the materials or the space does not allow you to build a full-fledged oven, then your preference is worth paying a compact metallic option.
Erections of construction
When the design is erected, you can select four installation options. Each of them will consider separately.Historical
It has another name - "in black". That is how our ancestors treated the baths in Russia. There is no chimney in such a design. The principle is that it is smoke very quickly warms the room. After all the firewood burns, it comes out through the windows or other special holes.
Mixed
There is a pipe to remove smoke, but it will still fall into the room. As in the first way, the room warms pretty quickly, but it is worth considering the nuance that it is possible to bathe only with a fastened flame in the furnace.Clean
In this system, the stones are heated from the stove, so there is no smoke and smell of Gary in the steam room. However, this method has its own minuses. So for the heating of the space you need a large number of firewood, while the process itself will take up to 12 hours.
Double
He received its name due to the fact that the brick oven and two cast iron plates installed above the chimney include a brick oven.
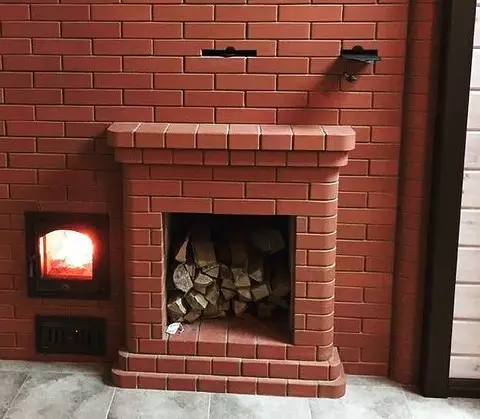
Stones and water containers are installed above them, which is surrounded by a brick masonry to maintain the temperature.
Calculation of sizes
The size of such an oven depends on the room. ELECT TO THE ROOM 2, So you will receive the desired kilowatt required for the furnace. Then the resulting digit multiply by 2.5 or 3 - these are the final parameters. With existing computing, you can proceed to the search for the structure of the structure. If you do not have the skills of independent compilation of such construction plans, they can be found in special literature or online. Pick options based on the figures obtained and the size size.
Materials
After you all decide to sizes, found a suitable drawing, chose the embodiment and placement of the heat design, it is necessary to think about the selection of quality materials. We will analyze the most popular.Brick
When building bath furnaces, many make a mistake when choosing the main element - bricks. The masonry must be refractory, since the combustion temperature can reach 1,400 degrees. Often sellers in stores issue an ordinary product for fire-resistant. To test material for strength and suitability, check it on chips and cracks. If the surface is uneven, with a multitude of defects, it is not suitable. You can also try to hit the hammer on it. From a quality product, the tool will bounce, while making a subtle sound. There is another hard way to check - drop it. If building materials crumbled on small pieces, then you should not take a large volume.
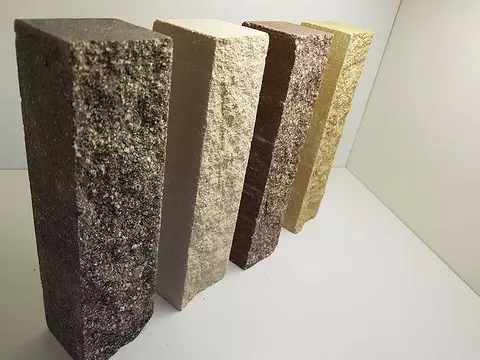
Give your preference chamoten bricks that have increased fire resistance and impact resistance. But it is worth considering that they are much more expensive than ordinary species.
To reduce costs, we advise you to lay out only those sites that will be exposed to the highest temperatures. For all other elements, including cladding, conventional building materials of this species will be suitable.
Solution
For masonry furnaces for a bath of bricks, clay solutions are usually used. However, there are subtleties here. For example, building material and the solution must withstand the same temperature, so it is advisable to select them in the component. Also in the composition necessarily turns on the sand, which must be sifted. Pay special attention to cleanliness and freshness of water.
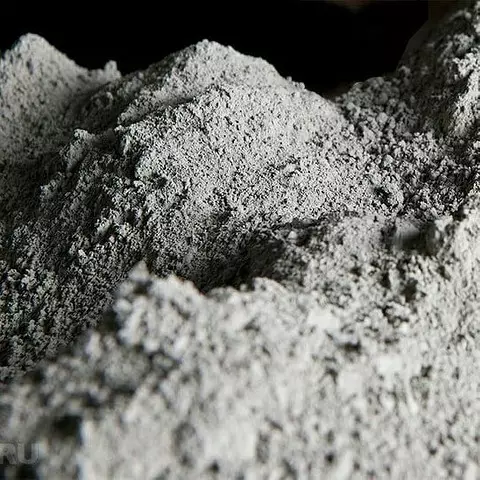
Before mixing, put clay in a comfortable container, grind it and fill with a liquid so that a homogeneous substance is turned out. After that, mix well the resulting solution, thus getting rid of Komites, and leave the mixture for 24 hours. The next day will only remain straining the building material, lumps in hand and fall asleep sand into it.
Pay attention to the proportions: one bucket of water usually accounts for sand bucket.
To build a brick oven for the bath, you will also need a concrete solution, which will need to be prepared from one piece of cement, three sand fractions and 4 pieces of rubbing and water in proportions equal to half the weight of cement.
After everything is prepared, you can start erection.
Stages of laying a brick coat
1. Build the foundation
Due to the aggregate of its materials, the product is obtained by weight about a ton, which has very serious pressure on the base of the room, where it will be. Therefore, it is better for her to prepare a strong foundation. To do this, it is necessary to post along the edges of the space that you assign under the base of the installation. Drop the pit in a depth of about 60 cm, while we advise to expand the lower 10-20 centimeters for the stability of the design. Next, firmly fall asleep the expanded part of the sand, and on top of the same tightly pour 10 centimeters of rubble and broken brick.2. Making opal
Now, at the edges of the dumped pit, install the formwork. It can be made of boards and nails. Put in the recess on the stand reinforcing network at a distance from the walls and the bottom of about 5 centimeters. After installing the metallic fortification, you can pour concrete. Do it evenly, while not reaching the floor level by about 15 centimeters. After that, measure the upper slice - it should turn out to be absolutely horizontal. The driver should succinitive for 7-10 days, and after this time you can safely dismantle the formwork and the formed empty areas should be chopped with chopped gravel. After the concrete is dry, it must be covered with a double layer of bitumen and rubberoid. Such waterproofing will protect the design from moisture exposure.
3. Get to the masonry

Time to start masonry. Do not be lazy to thoroughly think over the first row. It should be perfectly horizontal and not to have the slightest flaw, otherwise all further work simply will lose sense. Next, you will focus on the first row to check the verticals of walls and straight corners.
When installing the third row, do not forget to secure the door pissed. Previously drank the grother in bricks: you launch galvanized steel wire, on which the door will hold.
Also, the deepening in building materials will be needed on the fifth row laying. There you will need to install steel corners to which grate is installed. This metal lattice will help air circulation and support fuel material.
4. Place the furnace
The firebox is laid out of chammed brick. If for the "indoors" of the furnace to use the usual red and ceramic building materials, then the unit will not last long and collapses due to aggressive temperatures.So, with a constant fit, we bring the work to the overlay of the top wall of the furnace. Since the space will be quite large, we recommend parallel to lay two stripes of steel so that they combine two opposite walls of the structure. Before putting them on the laying, make a depression in it. Such trick will help to avoid the material of the material inside the design. Also, when overlapping the structure of the structure, leave the hole for the formation of the chimney. The pipe itself is displayed on the height that you originally conceived in the project.
Your oven is ready. The principle of its work is extremely simple: during the combustion of the fuel, hot gas heats the walls of the structure and the inner container with water, after which it passes through the pipes, a stone backfill, and then goes into the chimney, while not leaving the gary and obvious smell of Gary. The detailed laying process is displayed on the video.
Security rules use
To make the design of fireproof, consider the protection of all surfaces that are with an aggregate in one room. Walls that almost come into contact with him or are at a distance of 10 centimeters, it is necessary to cover with heat insulating material.
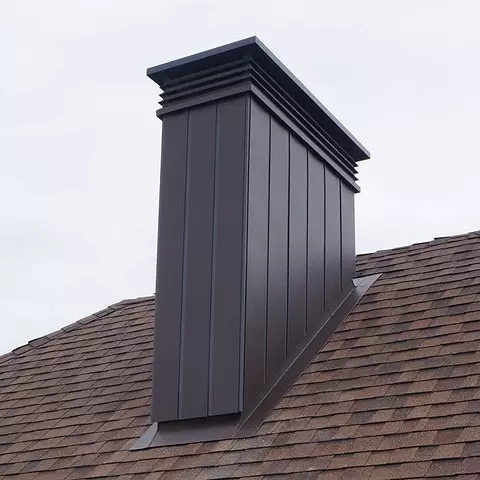
Do not forget to pay attention to the arrangement of the passage of the pipe through the roof. The release of the chimney should be chopped by a heat-resistant sealant.