Decorative plaster - practical, durable and very beautiful coating. Its cost increases significantly if professional professionals are engaged. We will tell how to do it yourself.

How to work with textured plastering
FEATURES OF TECHNOLOGY WEPORTANTFour simple techniques
- Spatula and Kelma
- Roller
- Sponge, Film, Fabric
- Pussy
Correction of shortcomings
The decision to apply decorative plaster with their own hands may seem erroneous, since people are far from construction believe that this is a very complex process. They invite specialists and pay for their expensive services. Indeed, the embodiment of exclusive design solutions requires experience and skills, but a beginner fingerboard will be able to lay a standard textured plastering mass. Talk about how to do everything right.
Features of the technology of decorative plaster
Plaster pastes for finishing works are very diverse. With their help, you can get a pronounced or slightly noticeable relief, imitation of a variety of surfaces, bas-reliefs and even complex pictures or panels. Each result will require a special composition and possibly a special tool. But the laying technology in general features is the same. Consider its main stages.
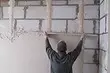
- Preparation of the foundation. It begins with cleaning the base from the remains of the old coating, if it was. Then, all stains of dirt and fat are carefully closed, dust removes. Close up all large cracks and other defects. It is done with a putty, a sealant or foam is introduced into the crack of the gun. Perhaps the basis will need to wash and dry carefully.
- Padding. Mandatory procedure, which is carried out to improve the properties of the draft surface. A competently selected composition will prepare it for subsequent work, will improve the adhesion of the decoration with the basis and reduce the absorbability of the latter. In addition, if necessary, you can choose a drug with special additives: antiseptics, fungicides, etc. The tool is applied in one or two layers, after which it will be necessary to wait for its complete drying.
- Wall alignment. The starting plaster is superimposed on it. Its peculiarity lies in the presence of a filler of large fractions, more often than sand. This makes it possible to effectively level even significant irregularities. For internal and exterior work, different material is selected. If necessary, it is superimposed in several layers. At the end of the procedure, time is required for its complete rejection.
- Padding. Applying another layer of the primer is not necessarily recommended. This will make it possible to maximize the grip of two types of plaster mixtures. Such a finish will stand for a long time, will not turn and crack. The primed surface must dry.
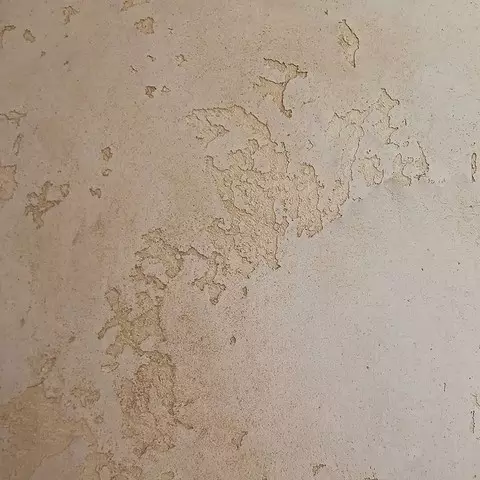
- Application of textured plastering. It forms a surface relief. It can be superimposed by one layer or several. It all depends on the technique used. For example, Venetian is a multilayer coating, and "coat" can be formed from one layer. Each of them necessarily succumbes before overcame the following.
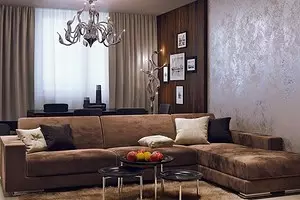
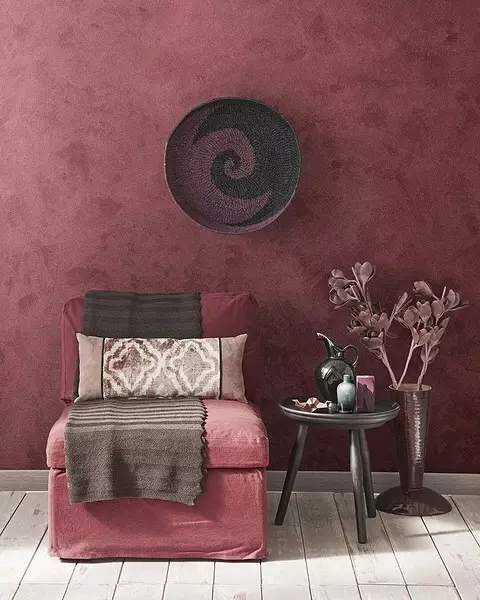
- Final finish. If the pigment was not added, the finished coating will have gray. Therefore, at the final stage, it is painted. Make it so as to emphasize the relief of the surface as much as possible. Various technologies of tinting using multiple colors are used. Ends all the application of the construction wax or varnish. They protect the surface and give it an even more attractive appearance.

The technology is quite simple, but requires strict compliance with instructions and order of operations. Ignoring any work or careless execution will adversely affect the result.
And one more important point. You can apply a finish on almost any reason, but at the same time the primer should choose. For concrete and similar materials, it will take the composition of deep penetration, for drywall it is worth choosing an adhesive preparation, etc.
4 simple ways of applying decorative plaster
Professionals use a variety of work techniques with plaster paste. A beginner master is to master the simplest of them, gain experience and gradually move to more complex options. We will analyze the most accessible techniques.1. Spatula and Kelma
With the help of these tools, Venetian is stacked, an imitation of a coarse or polished stone of various breeds is created, texture is distinguished. It all depends on the techniques of work. We offer a small master class.
- With the help of a spatula, we apply a small portion of the mixture onto a mound and distribute it to the base with strokes. The hand can move directly or on the arc. Paste smears are superimposed. Moves try to perform the same type so that the relief is homogeneous.
- Interesting technique for the carriage. Kelma is tightly pressed against raw solution, and then sharply gets back. An interesting texture is obtained, in the simplest version resembling a fur coat. Movement by Kelma can be varied by turning it into different directions.
Turning is carried out in the process of laying or first superimposed a layer of paste, and then the entire surface is drawn up. Sometimes the reception is used fragmentary, then an interesting inhomogeneous relief is obtained.
2. Valik
For those who still know poorly, how to apply decorative plaster on the walls, you can advise using a roller. This is perhaps the easiest of all possible options. First you need to decide on the texture that I would like to get as a result. Then the roller with the desired pattern is selected. It can be an original pattern, imitation of textiles, leather, wood, etc.Alternatively, you can prepare the tool yourself. To do this, on a rotating part of any painting roller, we wind rope, film, coarse fabric, etc. Working with such a tool is very simple.
- We attack the wall with decorative paste with a smooth layer of 2-4 mm thick.
- We take a roller and roll it in one direction from one edge of the fragment to another, leaving a clear print. We try to apply the same effort so that the relief depth does not change.
- Wet skill smoothed the protrusions and slightly slide the clutched solution.
You can apply roller plaster. The tool with a long-axle coat is loose in a liquid mixture and rolled down. Overview of various rollers can be viewed on the video.
3. Sponge, cloth, polyethylene
To obtain invoices, a variety of items can be used. For example, a foam sponge that helps get different reliefs in shape and depth. Step-by-step instructions look like this.
- We apply a smooth base layer of finishing, we use Kelmma.
- We take the sponge, we recruit a small amount of solution and let's put it on the surface with light stars. By changing the direction of movements we get a textural diversity.
- We are waiting until the pasta grab, after which the spatula either by Kielma is slightly smoothing the tops of the decor.
The fabric is used similarly, but there are other options. For example, a cloth with a clear structure is pressed against a wet plaster, leaving a clear print. With the help of a polyethylene film, you can create a silk imitation.
To do this, the film is superimposed on a wet base. Sometimes she is crushed to be clearly visible folds. After drying, the plastic is removed, the surface is slightly sandwiched and corganized.
4. Brushes
Very economical and fairly simple decor. The brush distributes the material very thin layer, the texture is created already in the process of applying. No additional actions will be required. Mineral fillers are used to work. It can be a marble crumb, fragments of shells, sand, and the like. They successfully complement the invoice that the brush creates when applying the solution, and give the finish additional roughness. Features of applying can be viewed in the video lesson.How to fix possible flamns
Sometimes due to non-compliance with technology or for other reasons, exemptions appear in the process of laying the mass. It can be bloating, bubbles or cracks. Defects may appear and much later. In any case, you have to think about how to fix the decorative plaster, which was badly inflicted. You can only do this in one way: remove the damaged area of the coating and re-lay the finishing material.
It is necessary to correct flaws very carefully to accidentally do not increase the spoiled fragment. During the repair work, such rules should be followed.
- The angles either the joints that have been inside the area purified from the spoiled mixture are necessarily further reinforced with a special grid.
- If the solution is prepared independently, it is necessary to strictly observe the proportion recommended by the manufacturer. Pay attention to the consistency of the mass, which must comply with the norm.
- On the repairing fragment it is impossible to apply too much volume of the mixture. She is stacked gradually.
- To eliminate the drying and, as a result, cracking the layer of the material, during operation it is periodically moistened.
Each newly applied layer must dry well before being laid next. Otherwise, the clutch between them will not be reliable enough, which will lead to the appearance of cracks and sickness
The solution to the task how to apply decorative plaster can be not so difficult if you study the techniques in advance and stretch on a small fragment of the wall. In order to be clear, it is worth using the lessons of masters on the network or take the experience of familiar professionals if it is possible.