Before applying any wall decoration is desirable to align with plaster. We tell how to deal with these works yourself.

How to stucked the walls with your own hands
Varieties of mixturesTools and materials
detailed instructions
- Preparatory work
- Plaster on beaches
- Alignment without landmarks
Sooner or later, every housing owner faces the problem of alignment of the walls. Unfortunately, the quality of their finishes is often so that it is impossible to stick the wallpaper, it is impossible to paint without prior work. The best solution is in most cases shuttering. We offer a detailed complete instruction on the plaster of the walls with your own hands. It will help even a novice master to cope with difficult work.
Varieties of plaster mixes
Two types of materials are used to align surfaces. Their main difference is based on all characteristics of the solution depend. It may be:
- cement;
- gypsum.
Quartz sand is added to the base of different graininess, plasticizers, etc. Fillers that determine the appointment of plaster paste. So, large sand allows you to level significant differences, while small is used only to apply the last layer, closing fine roughness.
Plastering can be mixed with plaster or cement
-->We will analyze the pros and cons of each type of material.
Cement formulations
Different with special strength, resistance to mechanical effects. No moisture is afraid, can be used in rooms with special conditions: bathrooms, bathrooms, kitchens and on the street. They do not destroy from temperature differences, durable, have a low cost and can be made with their own hands. Good even much even significant differences. If a layer of more than 20 mm thick is superimposed, a reinforcing grid is used.Lime, clay, gypsum giving plasticity, antiseptic properties can be used as fillers. Of the disadvantages it is necessary to note the greater mass of cement solutions. They give a significant burden on the basis of what you need to consider. Low plasticity leads to a shrinkage and a possible appearance of cracks. For the same reason, stacking such a pasta is quite difficult. In addition, it falls on all the grounds. Save cement for a long time, completely hardened only in a month.
Gypsum mixes
The main advantage is plasticity and simplicity in applying. Pasta is well stacked on any basis and sticks tightly to it. Gypsum is a little weight. Even a thick layer of such a mass does not waste the design. It never seats, almost does not give cracks. It dries a much faster cement analogue. The finishing mass aligns the surface so well that the subsequent putty does not most often need.
The most significant minus material is hygroscopicity. Gypsum easily absorbs water, turns and destroys. Therefore, use gypsum varieties for the street or premises with high humidity is prohibited. Moisture-resistant mixtures for internal laying are produced, but they should also be used with caution. The disadvantages include the high cost of the material and the absence of its independent manufacture.
Gypsum mixes are plastic, so it's good to fall on the base
-->
How to plaster the walls: the choice of tools and material
To begin to the master, it is clear that it will be necessary to carry out work, we will list everything you need.
- Plaster, gypsum or cement. Select depending on the purpose of the room and your own skills. The newcomer is easier to work with plaster, but it is more expensive and can only be used for dry rooms.
- Suitable primer. It is necessary to prepare the foundation.
- Lights. Installed in the case of large drops and the presence of significant irregularities on the surface.
- Long rule. If the lighting is assumed, we choose a length of 250 cm, 200 cm will be sufficient for pulling the solution.
- Bubble type level 200 cm and plumb.
- Wide spatula and culma for applying a mixture.
- Special building grater and metal stroked to eliminate roughness.
- A bucket and a perforator with a special nozzle to knead plaster paste.
In addition, screws, dowels, a screwdriver for securing beacons, a tape measure for accurate marking may be needed.
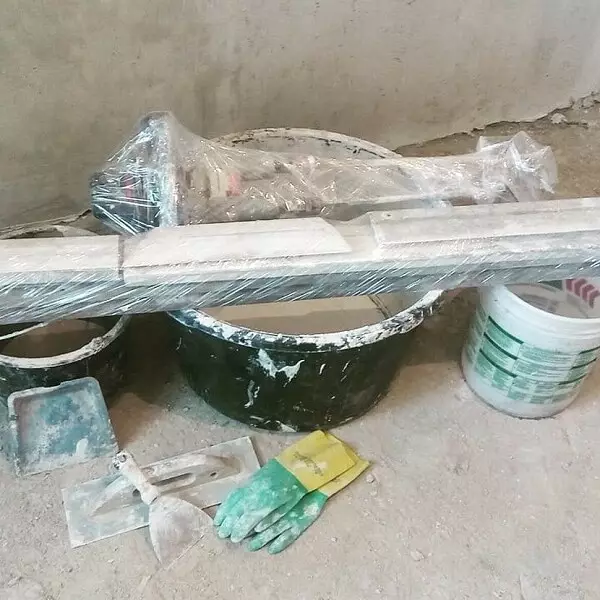
For plaster, a certain set of tools will be required.
-->
Stuccoings of walls with their own hands: Full detailed instructions for beginners
The quality of the finished coating largely depends on how correct it was laid. We will analyze all the subtleties of this process.Preparatory work
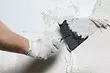
The main task of the process is to prepare the surface to lay the plastering. First carefully inspect the base, we study its condition. If it has some kind of coating, carefully remove it. Clean the surface from contamination and dust. Detected cracks, regardless of their size, should be embedded. Otherwise, the coating applied on top of them too can crack.
Deep cracks necessarily be expanding at an angle. That is, we are expanding so that you can get to its very reason. After that, we clean the plot from dust and richly ground, thereby improving the material adhesion. After drying, we close the defect with a putty floss with a surface level. Shallow narrow cracks can be filled with silicone or sealant using a thin tube-nozzle. Wide defects are removed by mounting foam.

Protecting Mandatory Stage of Preparatory Work
-->Further actions will differ depending on the material with which to work.
Concrete
Such a basis is pretty smooth to improve its adhesion with a solution, it is recommended to make notches. They are performed at a short distance from each other, deepen by 10-15 mm. After that cover all the primer. Considering the hardness of concrete, the work will be very laborious. Therefore, you can do otherwise: to be primed by its special primer. Pick up adhesive primer deep penetration.It has sand, which after drying should remain on the basis. Sometimes this technique works badly, so before plastering, it is recommended to conduct a trial application of primer. They handle a small area and wait until it dry out. Then spend your hand. If the roughness is well felt and the sand does not appear, processed the entire surface. Otherwise make notches.
Brick
Despite the fact that the brick itself is roughly rough, it is recommended to go through the purified material with a grinding or metal brush. The seams between bricks need to be sewed, so the mixture will be able to get into them, which will improve the clutch of plaster. Then the purification of dust is performed first with a brush, and then a wet cloth. In completion, two layers of primer are superimposed.
For absorbing surfaces, primer deep penetration
-->
Wood
So that the plastering mass firmly fixed on a wooden basis, it is necessary to equip the crate. She is made from the rails, which are still called duncan. Elements are nailed with nails diagonally. It is important to use only high-quality dranco, an additionally treated with an antiseptic. Otherwise, she quickly rotates and destroys the coating.To facilitate the task, you can use a chain grid instead. It is nailed on the rails that are stacked between the base and the grid. They, like duncar, can serve as beacons in the level of alignment. In this case, elements are set strictly by level. All wooden parts are processed by antiseptic and dry well, only after that you can launch the crate.
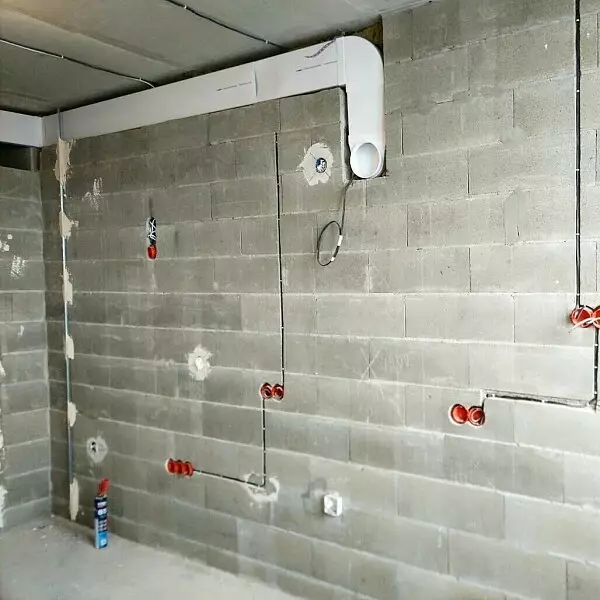
Technology of applying a solution of beacons
Used to align significant drops. As a landmarks that will show how to plaster walls, metal guides are used. On their purchase should not save. A high-quality metal can later be left inside the base, and it will not cover rust over time. Details of dubious quality is better to delete that it is quite laborious.
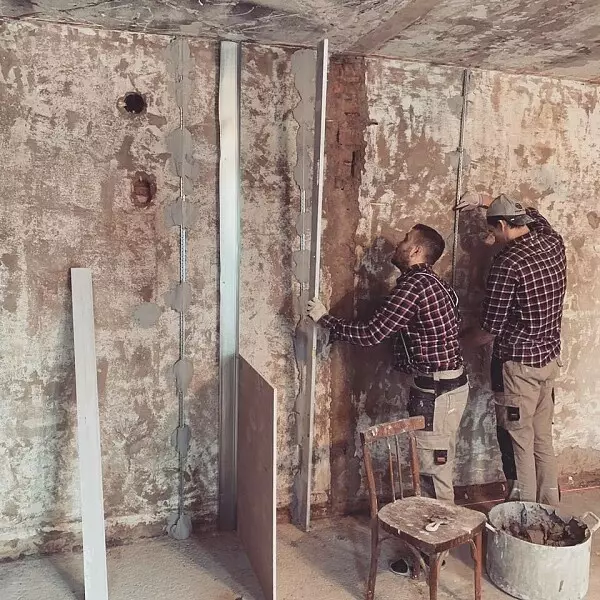
Installation of beacons is carried out strictly by level
-->The guides are installed along the entire length of the wall at a distance of about 150 cm one from another. Such a distance is selected so that in the level of alignment the rule moved along two neighboring profiles. They are exposed strictly in terms of level and securely fixed to the base. The easiest way to do was use a gypsum solution that grabs quickly and reliably holds elements. It can be mounted on the self-tapping screw, but it is more difficult.
Then the plaster solution is prepared. It is necessary to do this in strict accordance with the manufacturer's instructions. Next proceed to plastering:
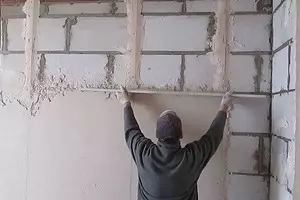
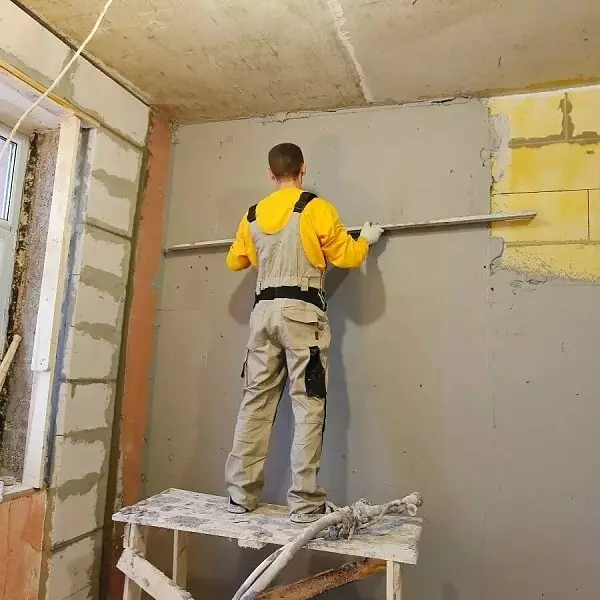
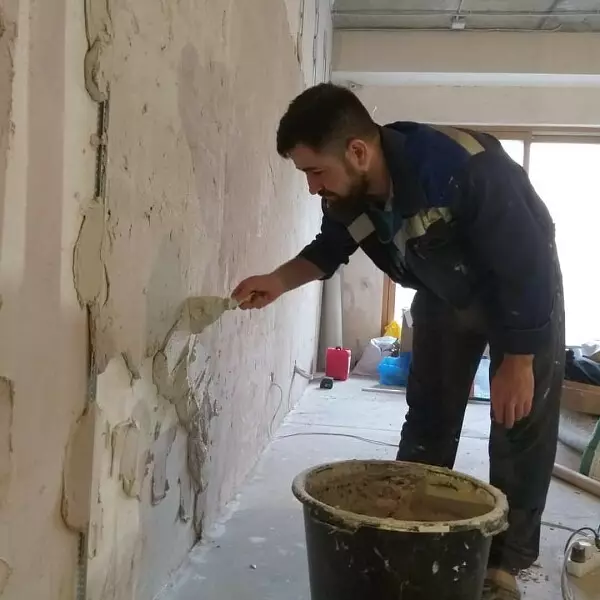
- Sketch. Plug the mixture to the base. You can do it manually, a trowel or special device, if mechanized laying is assumed. The thick paste is gaining to the tool and with some effort "hanging" to the base. On concrete and brick places a layer with a thickness of about 5 mm, on wooden 8-9 mm. We put the rule on the beams and from the bottom up stretch the coating, aligning it. Leave at least 2 hours for drying.
- Priming. Preparing a tough mixture. We apply it a wide spatula, performing movements in an arbitrary direction, but with some effort. With the help of the rule, check the level of alignment. All protruding areas remove the grater moistened in water. In the depressions gently rub a small amount of solution. We leave for a drying at least 3 hours.
- Cover. Create a solution of sour cream-shaped consistency. You can apply it to a spatula or dial into the bucket and pour a wall from top to bottom with a small amount of liquid paste. We smooth it with the rule, fully aligning the basis. Let's dry for 8 hours, after which we slightly moisturize and cleaned it with a construction grater.
So that everything was clear, we suggest watching the video as a newbie to launch the walls with your own hands.
Alignment without Mayakkov
Used to equalize surfaces with minor drops. Lighthouse landmarks are not exhibited, so the quality of work is necessarily controlled by level. All stages are performed in the same sequence except that during the outline, the milking mixture is made not by the rule, but a grater. More detailed and full technology is shown on the video that we offer to see.
It's not so difficult to launch the walls, even if a beginner master is taken for business. Skills are practiced during the work. Before you take for the finish, it is advisable to practice on a small area. So you can reveal all the "weak" places, work with them, get the necessary skills and a little experience.