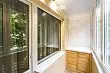
After the casing of the balcony, the clapboard often have to face the fact that the material was cracking or led him. We will talk step by step by the technology of work and give advice on the right installation.


Selection of material
When a balcony is a balcony with your own hands, the first thing to do is to look into the construction store and acquire all the necessary accessories. In the finish finish, an important, but not decisive, the role is played by the requirements for appearance. To determine the rest of the elements, you need to take into account the design features.Cleaner facing
Perform from wooden or plastic lamellas. They are perfectly fitted to each other, which are joined on the principle of groove-crest.
Wooden lamella - natural, eco-friendly material, which has an attractive, natural texture. Considering different types of wood, you better give preference to deciduous rocks. Coniferous when heated or in direct solar rays are separated by a resin.
Because of the diversity of textures, Eurovantia became popular. Its standard dimensions are 12x88 mm. In this case, the facial surface can have several types of profiles:
- Softline;
- block house;
- Landhaus;
- American;
- calm.
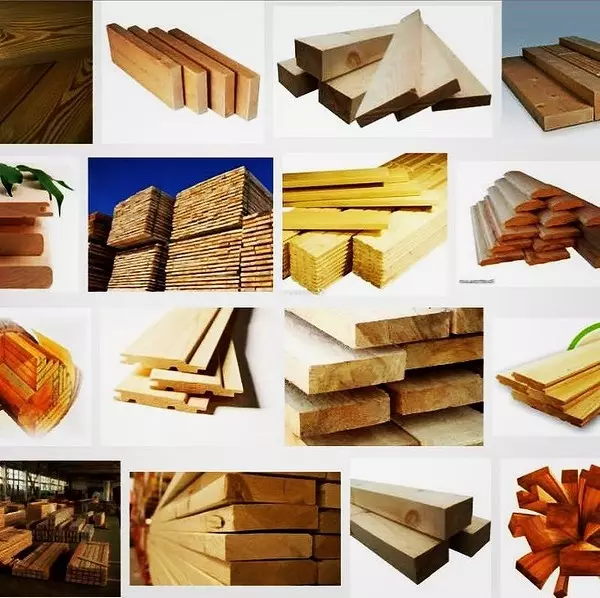
Assortment of sawn timber allows you to choose products for every taste and wallet
-->By the number of defects (chips, bitch, etc.) determine the quality of the Euro woman. This is reflected in the class of products:
- Premium - eliminates visible damage to the material. Used for decoration The interior when special requirements are presented to appearance.
- A - the presence of bitch is allowed. If you need to sew a balcony with your own hands, this variety is most often used.
- B can be resin pockets, bluish spots and other disorders of the color. Such wood is used, to align the walls or sewing insulation, if the appearance is not very important.
- C - refers to a technical variety. Due to the large number of vices on loggias, it is practically not used.
PVC panels can cost much cheaper wooden. At the same time, there are significantly more opportunities for the design of the room. With their help, you can realize any color solutions, recreate the surface of natural stone or accommodate interesting on the wall picture.
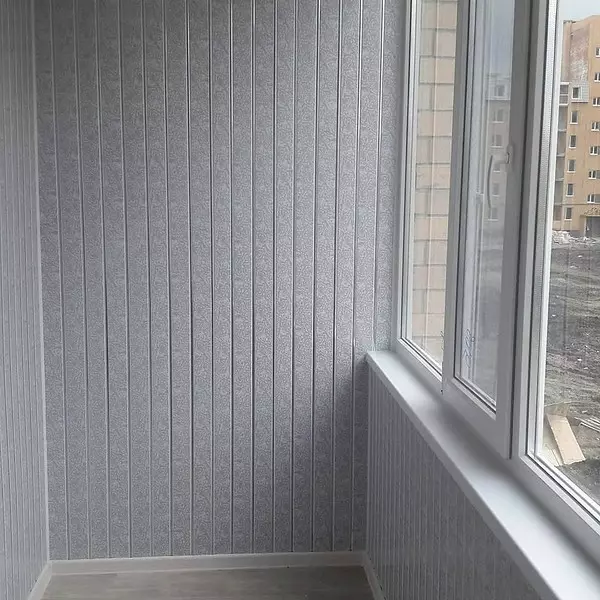
Plastic panels imitate the texture of classic lining, while more effectively look at the drawing
-->So that the image on the plastic panel looks interesting, it is better to give preference to seamless articles. The visibility of the seam affects the angle of view and illumination. This means that the drawing, which perfectly looked in the dim a trading pavilion, will look different in the light. Therefore, when choosing, use a bright flashlight.
One of the most important parameters of PVC lamellae - Strength. The more jumpers you see the panel in the cross section, the stronger the product. It should not be pushed by hand. Otherwise, damage will quickly appear on the plastic.
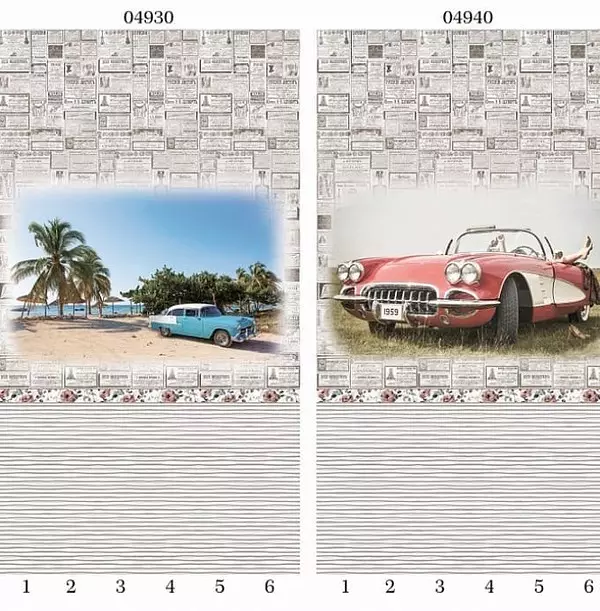
If you want to support a certain topic in the interior, you can use a set panel with a pattern.
-->Frame for trimming balcony
Often, wooden bars are used as guides. For a laptile loggia, a section is enough 20x40 mm. If you want to finish The surface with the laying of the insulation, the size of the ridge defines its thickness.
When you need to mount warming thicker 60 mm, the crate is placed in two layers perpendicular to each other. This minimizes the difference in thermal conductivity and eliminates the "cold bridges". Please note the first row of BRUSEV in this case are installed in the same direction as the finish coating.
Less frequently for mounting the frame apply metal guides to install drywall sheets. They are an orderly more expensive. And when a warm balcony is becoming good cold wiring.
If the balcony insulation is not planned, the supporting structures take away the minimum of space
-->Materials for insulation of enclosing structures
All walls of the house, including on the loggia, should breathe - pass the air. Mineral wool plates are best answered by this requirement. But in order to achieve comfortable temperature, they need to lay a layer of 100-150 mm.
A more economical option is a classic foam (white). He twice the "warmer" Minvati and takes less space. It provides vapor permeability.
Sometimes extruded polystyrene foam is used as insulation. He is the most energy efficient. But the plates are intended only for installation in a humid environment: base, overlap of the first floor, etc. They do not miss air pairs and create a "thermos effect". In a strong frost, condensate is formed on the surface.
It is possible to correctly determine the thickness of the slabs only by calculation, the example of which is provided in the Appendix to the SP 50.13330.2012. If you decide to mount a layer of insulation less than the calculated or use mineral wool, you need to protect the materials of the steamproof membrane from the possible penetration of moisture. For loggia is an internal part. Due to this, the condensation of water in the insulation is excluded.
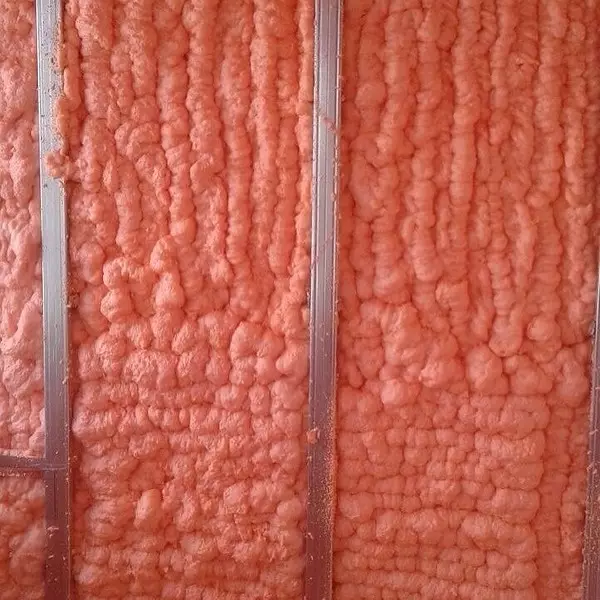
Alternative to Fume Heaters, sputted polyurethane foam
-->Fasteners for mounting panels and frame
When finishing the balcony with lining, there are several options for its mounting. You will need:
- nails;
- self-tapping screw;
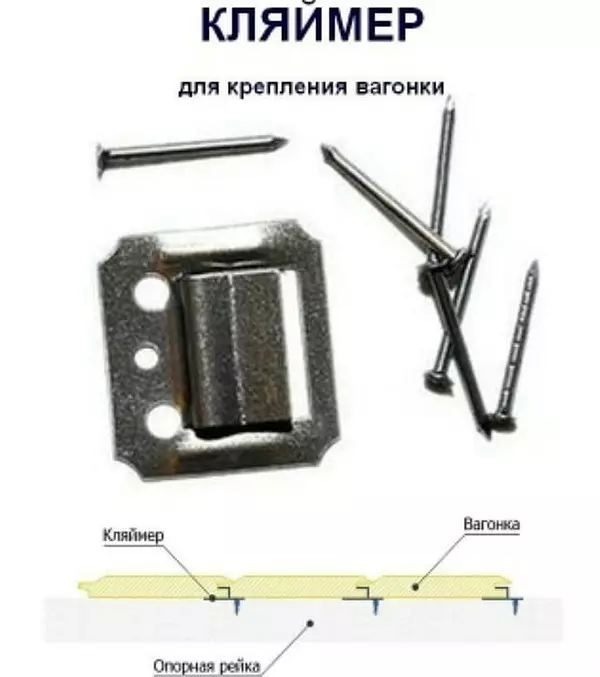
- Kleimers.
Guides are attached to walls using a dowel with a diameter of 6 mm. The length is selected depending on the cross section of the bars. At the same time, the bushing must enter the concrete to a depth of at least 30 mm.
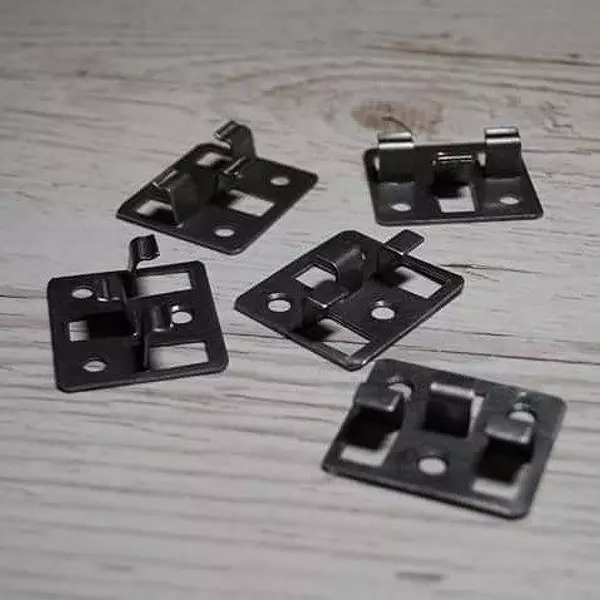
Kleimers allow you to significantly reduce the installation time of the lining
-->Paintwork
Before installing all the elements of the tree need good Process with antiseptic impregnation. It will not allow rotting during wetting.
Some impregnations give the material a bluish or greenish tint. Therefore, it is important to choose colorless liquids.
For finishing coat, dyes are used for external work. If you need to maintain the natural texture of the tree, the best way is suitable or deck lacquer.
Tripping balcony with lining: photo and Instructions for each stage

When insulating the balcony, you need to exclude all possible places of freezing
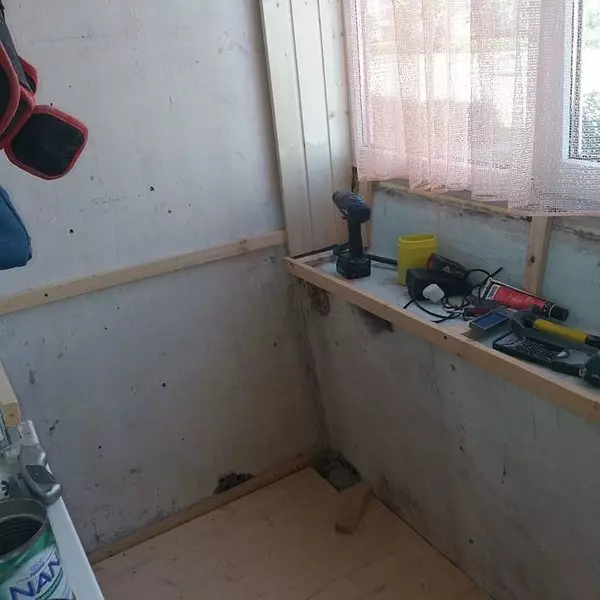
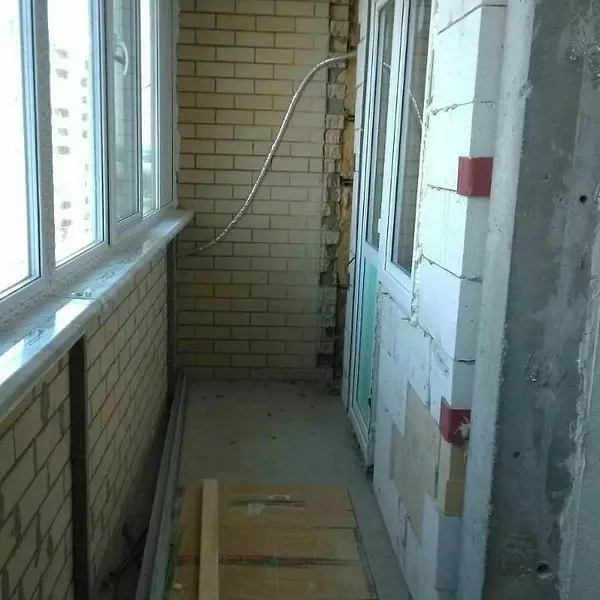
-->Preparation of the room
Before starting installation, you need to perform a number of preparatory work:
- remove all unnecessary items;
- remove from the surfaces the retained paint and plaster;
- Remove window sills, plinth, if there are - fed;
- dismantle the slopes;
- Sealing all the gaps and cracks in the enclosing structures.
If you want to warm the room, you need to eliminate heat loss through the window opening: insert two-chamber windows instead of one-chamber or completely replace the window.
When insulation, it is necessary to take into account not only the communications of the balcony, but also adjacent rooms, for example, laying the air conditioner drainage
-->On loggias with a metal fence, it is necessary to create a carrying structure for the subsequent installation of the trim. Depending on the design features it can be a wooden lamp or Penogazosilicate wall with a thickness of 100 mm. The latter reinforce the reinforcement of the seams or the device is punctuate with fastening into the walls.
It is important to use lightweight materials. The laying of ceramic brick creates a larger load on the stove and can lead to its collapse.
In conclusion, the preparatory stage is paved with electrical networks, set outlets, lighting and switches.
The loggia screen is insulated without disturbing the rigidity of its carrier elements
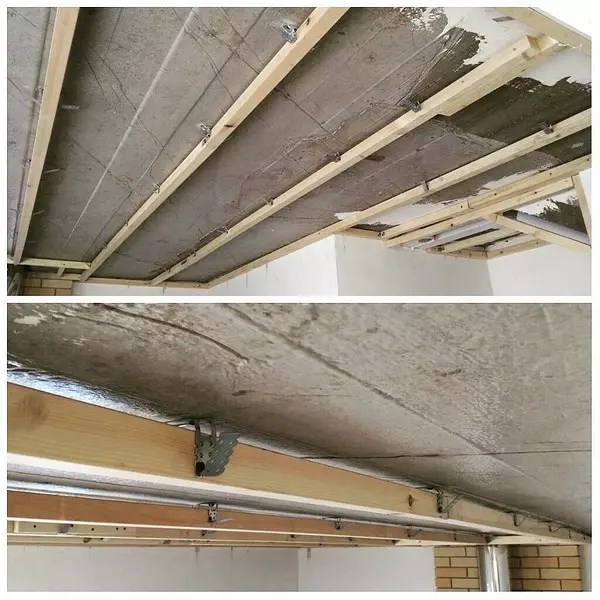
-->The framework of the frame for trimming the balcony
Before starting installing bars, it is important to determine the direction of the finish finish rail. Sometimes, due to the characteristics of the size of the loggia, long-length trimming remains. To minimize the number of waste, they make decorative inserts. Therefore, in the locations of the transition provide support structures. The crate is set perpendicular to the direction of the trim. The exception is diagonal installation.
For alignment of large checks, you can use enhanced suspensions for fastening GLC
-->Stephago Consider the sequence of work:
- First of all, in terms of the level, we mount the extreme bars. With a vertical setting - at the top and bottom. If Eurovantia Go horizontal - On the sides. Do not necessarily put them in the very corner. You can retreat from the face of 3-10 cm. To align the plane between the guides and the wall, we install wooden linings. To remove a large curvature, it is allowed to use enhanced suspensions for GLC.
- According to the first racks, stretch the cord at three points: along the edges and in the middle. By the distance from the lace to the concrete surface, check the absence of bugs that may interfere with further work. If necessary, knock them on or move the rail from the wall.
- Place the places of fastening of all bars. Between them should be a distance of 50-60 cm.
- Before you have a balcony of the lining with your own hands, we think over insulation. Guides for it are installed with a step equal to the width of the insulation slabs. This allows you to insert it without trifle and cracks.
- On the end racks under the cord, we insert the laying of the same thickness, for example 5 or 10 mm. Exposing intermediate supports, consider them.
- Holes in the wall drill through the bars a long brown. Put a dowel. After leveling the plane, the lining clog them to the end.
For clarity, we suggest see the video process.
The technology of mounting the remaining frame elements is performed according to the above step-by-step instruction. If the walls are smooth and you do not use lining, you can not close the bars around the perimeter with a single circuit. Leave the ventilation gaps between them several centimeters.
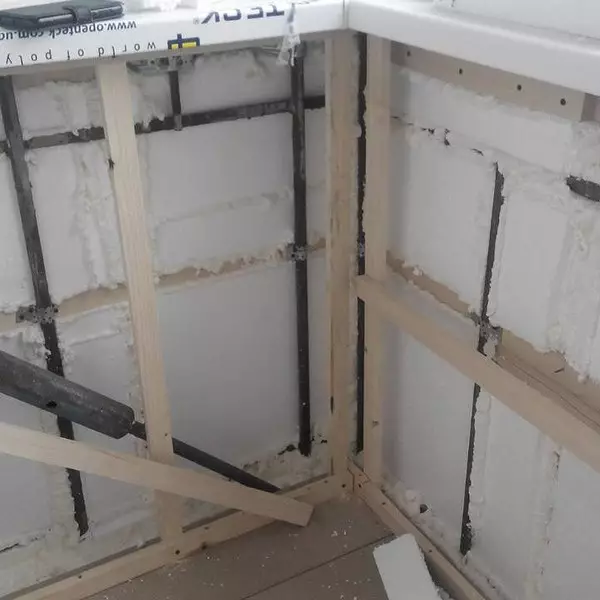
When installing the insulation, an additional fastener is not required to the mounted frame. But, if due to the irregularities of the trimming, the gaps were formed, they need to be filled with mounting foam.

The insulation under the trim does not require additional attachment
-->If it is necessary to protect insulation from moisture from entering, after it is styling, the stepimile membrane is installed. We stretch it all over the contour and press the counterclaim - 20 mm thick pars. They create ventilation gap.Touching the balcony by clapboard on the guides
There are several ways to fix the lamellae. In the overwhelming majority of cases, the first rake is installed in the corner and align in the level. In the angular part it is nailed so that nails do not advocate for future decorative corners. At the same time, the thorns clog the finish carnations as far as possible from the edge. Begin to beat with a hammer, and at the end use a metal spacer. It allows you to avoid chips.
If there is no work experience with a tree, it is better to use kleimers. They allow you to score nails only in the guides and avoid growing a thin part of the spikes of wooden lamellas.
The subsequent eurry charts are tightly inserted into the lock and are fixed in the method described above. If they come tight, you can use the Cyans.
It is important to sow the loggia of dry wood. Otherwise, after drying, gaps or cracks may appear.
The finish rail is cut along. So that it does not work out, take into account the part that goes into the groove.
With the correct installation of kleimers, damage lining is excluded
-->The principle of installation of PVC panels is practically no different. For their fixation, thin carnations or self-tapping screws are used. Apply the stapler is not recommended. It splits plastic, which in the course of operation begins to move away from the frame.Finish finish
It is to install slopes and all decorative elements. Most often, the adjacent to the window is closed by a single rail of Euroovag. If it is not enough, two are installed. At the same time, both are dissolved along to get the planks of the same width. Thanks to this, the slope looks neat and beautiful.
In the corners and on the transitions it is necessary to install wooden corners. On perpendicular adjoits to window and door boxes - Nashchelniki. They are fixed with liquid nails. Due to this, there are no traces of fasteners on the front side. At the end, wooden surfaces need to be treated with paint and varnish materials.
Even if you have a Khrushchev, instead of the eternal warehouse of household accessories after the reconstruction you get a beautiful well-maintained room.
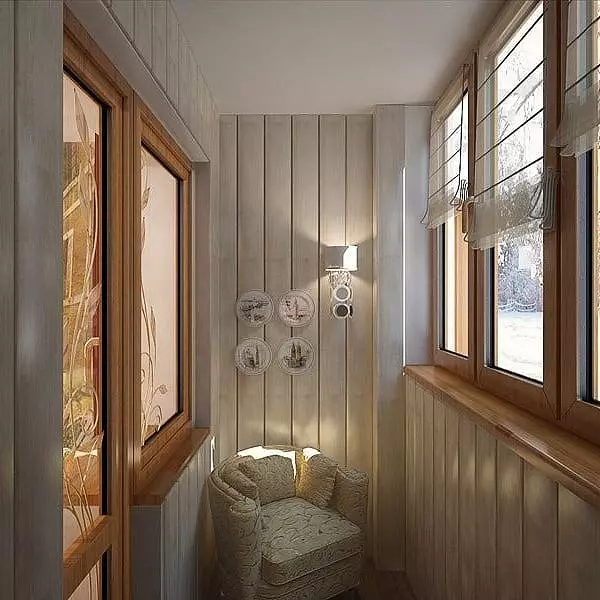
After the casing of the balcony, even in Khrushchev, an additional cozy room appears
-->For most residents, the price becomes a decisive factor before starting repair. It is impossible to definitely answer how much the balcony is the lining. It is necessary to calculate the materials based on the features of the apartment layout. One thing can be said for sure - this method of finishing is available to each and allows you to implement different ideas. In the range of modern stores there are products for any wallet, ranging from budget plastic panels, ending with a premium-class eurogram.