We tell how to make markup, install guides, make the doorway, carry out communication, to strip the frame and sharpen the surface.

A popular way to divide the space of an apartment or room to the part - to build a metal frame, filled with mineral wool and covered Glk, that is, plates with a plaster core, a sturdy constructional cardboard. This is a fairly simple system that can be installed on your own. How to make a plasterboard and profile partition?
All about mounting plasterboard partitions:
Than sowProfile size
Additional materials and tools
Installation: Step-by-step instruction
What else to pay attention to
What kind of plasterboard will suit
First of all, you need to choose the materials suitable for your tasks.
Views
Plasterboard of the following types are used for finishing urban apartments and country houses:
- Normal. It is intended for premises where the content of water vapor in the air is 30-60%.
- Moisture-resistant, which is easy to learn about the characteristic green color of the cardboard. It can be used for rooms with humidity up to 75%, first of all - in the bathroom, toilet and in the kitchen.
- Fire resistant, fire and moisture resistant, shockproof. These are specialized products that are less likely to apply in private houses. Meanwhile, shockproof material is a good choice for rooms, where there is a possibility of mechanical impact on the walls - children's, pantry, corridors. It is suitable for support for which it is planned to inspire heavy furniture.
GLC sizes
You can find sheets with such parameters (mm):- Width 600 or 1200
- Length from 2000 to 4000
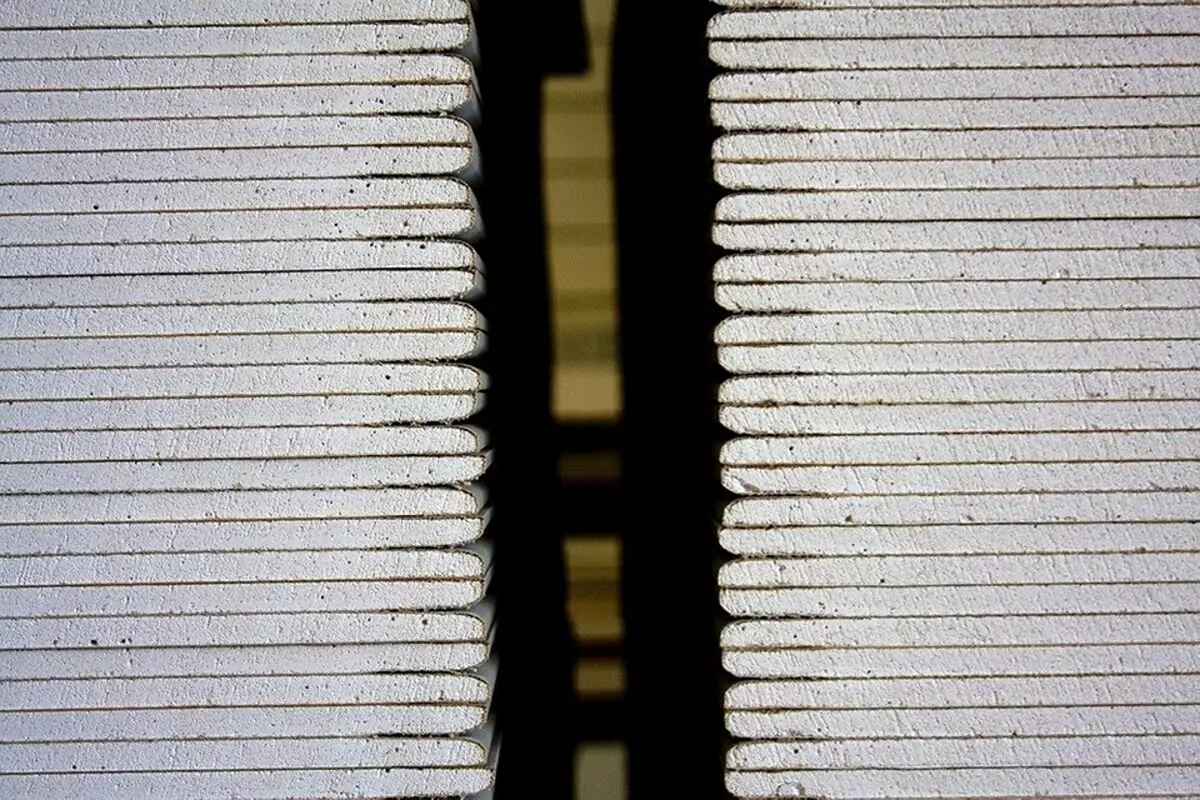
- Thickness 6.5; eight; 9.5; 12.5; fourteen; sixteen; eighteen; twenty
Popular consumer size - 1200x2500, since more overall products are more difficult to transport and move on the object. Experts recommend taking a plate with a thickness of at least 12.5 mm to ensure the rigidity and strength of the structure. Thin products are easier to be easier, the sound is worse and they don't even hang a light shelf on them.
Calculation of the number of layers
The frame is cut on each side with one, two or three layers of sheet material. The more, the stronger and tougher construction and the better his sound insulation properties - due to the massiveness. But the higher its cost. Therefore, the optimal solution for residential premises is two layers per side of the structure.
Calculation of the number of sheets
How many plates need to finish? The calculation is simple: we calculate the total area of the interior wall on the one hand, without opening. If the trim is made in one layer, then the amount obtained is multiplied by two (after all, the wall has two sides). If in two layers, then four. This figure is divided into one GLK. For example, the product with a size of 2500x1200 is 3 m2. Do not forget about the reserve, its coefficient depends on the size of the room. When its dimensions are less than 10 m2, it is 1.3, when less than 20 m2 - 1.2, when more than 20 m2 - 1.1. The previously obtained digit is multiplied by this coefficient, round up to the whole side and we obtain the required number of plates.How to choose profile size
The partitions from the profiles for drywall are horizontal (guide) and vertical (rack). They are p-shaped, made of galvanized steel. Their parameters (mm):
- The cross section of the guide -50x40, 75x40, 100x40, rack - 50x50, 75x50, 100x50.
- Length - 3000, 3500, 4000.
- Thickness - from 0.5 to 2.
The size of the product is chosen, based on the height of the ceilings, planned loads, sound insulation requirements, etc. Please note: the rack must be tight into the guide. For example, for a horizontal element, the cross section 50x40 will fit the vertical cross section 50x50.
Often, for saving an apartment area, the wall is made of only 7-8 cm on the frame of steel galvanized profiles 50 × 50. Such a system is highly susceptible to vibrations and mineral wool with a thickness of 0.5 cm not enough to comply with the construction standards for sound insulation (41 dB).
The system should be collected from elements 50 × 70 or 50 × 100. You can also take dry pendant wooden bars - some experts believe that this option is even better from the point of view of air noise isolation.
In addition, the thickness of the profile is also important. For the inner wall, the structures are chosen at least 0.6 mm. If you use thinner parts, the screws can scroll when mounting the plates, which reduces the strength of the structure. The market shows and products already, but they have insufficient stiffness and therefore they should not be applied. Otherwise there is a risk of sagging.

What materials and tools will be needed
Materials
- Sound-absorbing mats - usually from mineral wool (stone fiber)
- Dampfer (sealing) tape
- Dowel-nails
- Anchor wedge
- Self-tapping screw
- Self-tapping screws (selflessness) with a secret head
- Acrylic primer
- Gypsum or polymer putty
- Reinforcing paper belt
Instruments:
- Laser and bubble level or plumb, ruler, roulette
- Marking (chopping) cord
- Perforator
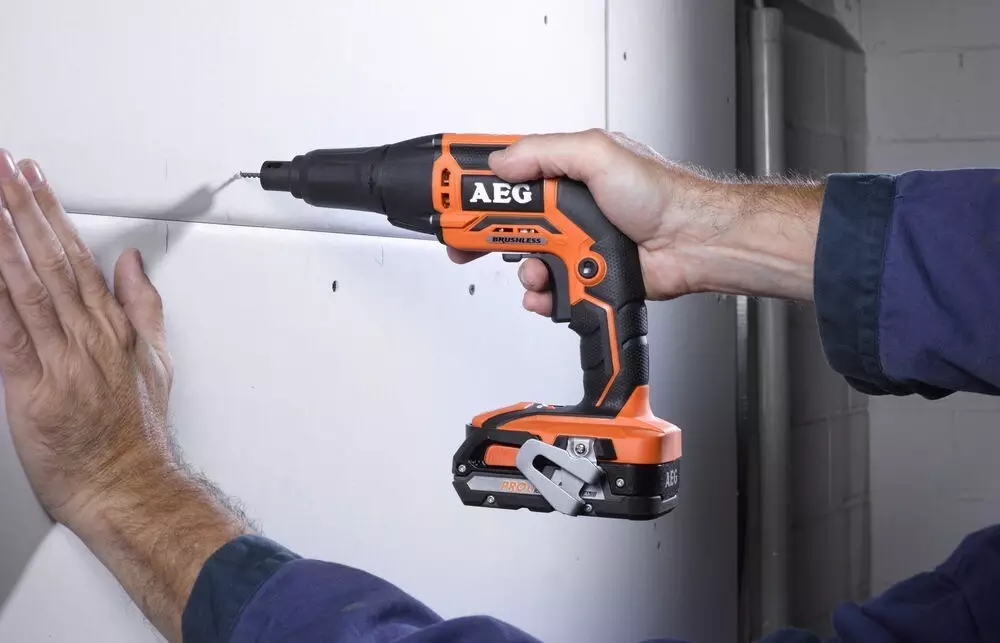
- Screwdriver
- Scissors for metal or angular grinding
- Belt
- Hacksaw or construction knife
- Robbing plans
- Edge plans
- Putty knife

Before mounting, sheets are stored in a horizontal position on the object during the day
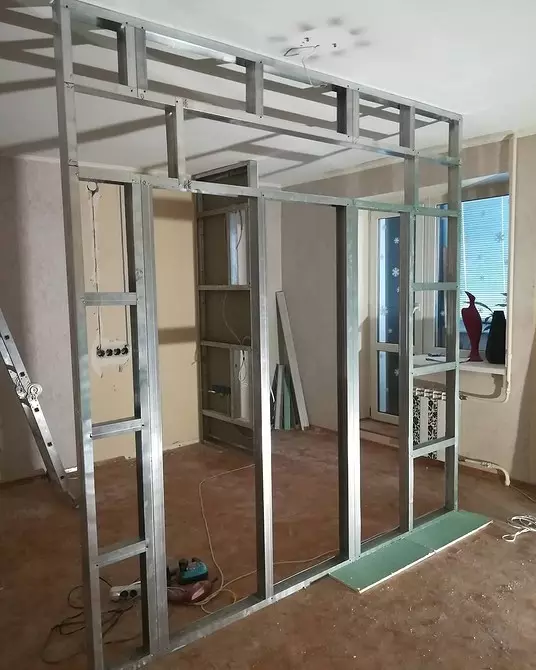
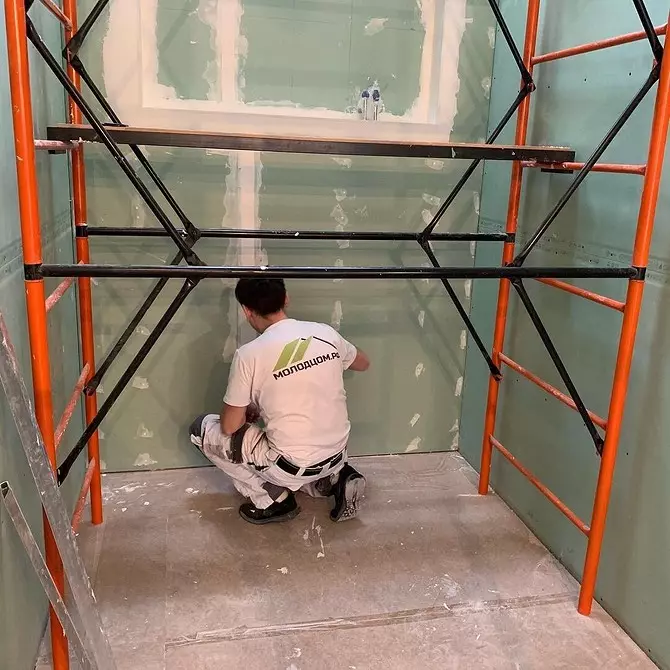
How to make a partition from drywall do it yourself
Installation of plasterboard partitions can be carried out only after the end of all "wet" works on the object. If the air indoors is rich in moisture, the plates absorb it and can be deformed.In addition, they do not recommend starting to install immediately after delivering GLC to the object. After all, they were kept, most likely, in the cheese unheated room. If they immediately put them at the heated room vertically and secured on the basis, they will begin to unevenly dry out, which is fraught with the curvature and appearance of cracks on the wall surface. It is worthwhile to wait at least 24 hours (and better - 3-4 days), placing the material in a horizontal position, and only then proceed to the main works.
Marking
The first stage is the markup of the project location. It is performed using a laser level or a ruler in combination with coloring chop cord. First, the place is noted under the partition and the doorway on the floor. Then, using a laser device or plumb, the contour of the facilities is transferred to walls and ceiling.

Marking for a frame made using a laser level.
Installation of guides
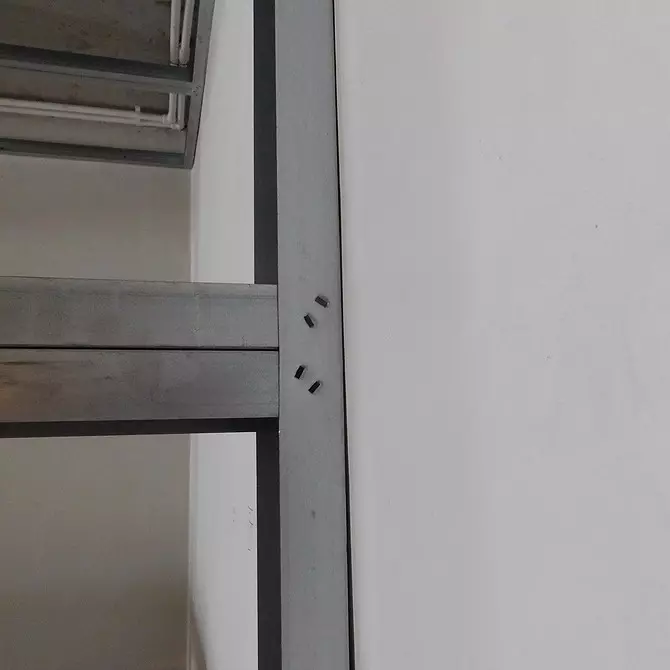
Next mounted guides. But pre-on the ends of all elements that will be adjusted to the floor, walls and ceiling, glue self-adhesive dampers. They have two functions.
- Provide tight fit of the guides to the base.
- Prevent the spread of vibration from the construction of the house, improving sound insulation.
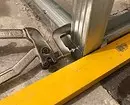
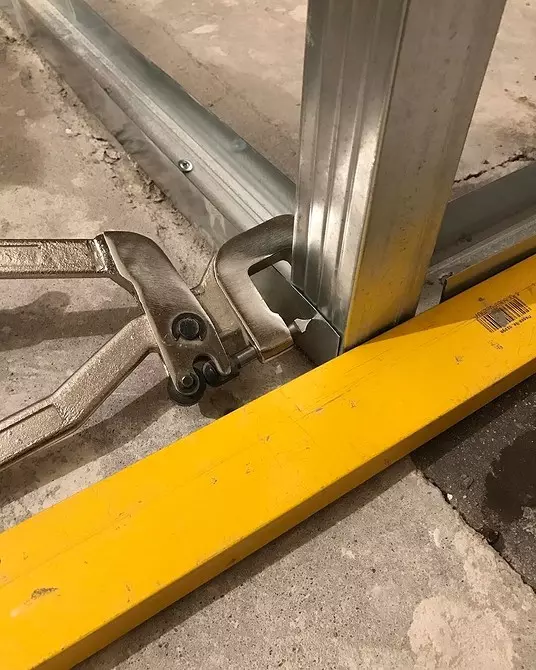
To the floor and walls, horizontal beams are fixed with a dowel-nail 6x40. The distance between the fastener is not more than 100 cm (optimally about 40 cm), moreover, at least three dowel nails should have to one guide. The holes are performed by the perforator. Nails drive the screwdriver or - in the presence of experience - the same perforator. Their ceiling is recommended to mount the anchor-wedges in the pre-drilled holes.
Crop the frame parts can be scissors for metal (mechanical, electrical) or corner grinding. But be extremely neat. Borrowers after cutting with scissors, as well as protruding heads of self-tapping screws can cause irregularities. Meanwhile, the design is not designed for plastering, and the shp can "remove" small tubercles and pits. At the same time, solid shtpocking will significantly increase the laboriousness of work.
Standing
Usually, the step of vertical supports is 60 cm. In the case of a high project load on this wall or height of the ceilings, more than 4 M step decreases to 40 cm. It is possible to increase the rigidity: to make a rack from two profiles installed by one to another and bonded by press-washers. . Also enhance it can be due to horizontal jumpers. Vertical supports must be 1 cm less than the height of the room - for the convenience of mounting and compensate for the possible shrinkage of the building. If the product is shorter than you need, it is lengthened. For this, one element is planted on another with an overlap at least 50 cm and connected with self-draws. In the framework of the places of the alternates, there are aims to prevent the weakening of the design and, as a result, the appearance of cracks.
Some masters fasten vertical and horizontal beams with self-draws with press-washers. It is not right. The hats will be addressed towards the room, will write and interfere with the trim, which will eventually affect the reliability of the entire system. As an option, you can fasten the guides by self-drawers until the assembly of the base is completed. And then immediately before finishing the GLC, step by step to unscrew them. But it will increase the installation time.
Bonding struts to the rod.
The optimal solution is the flower. It connects the details by the method with a bend. Such fasteners does not interfere with the subsequent installation. We add that vertical supports before consolidation are necessarily aligned by level.
The technical error is the absence of a layer layer between the partition and capital walls, overlaps. In this case, it is transmitted structural noise. Guides are desirable to mount to the walls, ceiling and sex through elastic gaskets (from porous rubber, plugs, polyethylene foam), which are rogged in vibration, make the design more sealed and thereby help to increase the level of acoustic comfort in the rooms. In the new building, the seams filled with elastic material compensate for shrinking deformations of the elements of the building.
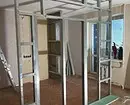
Creating a doorway
Most often it is performed using standard profiles, inside which wooden bars are placed. You can also connect two racks to the box or set a special profile element with a thickness of 2 mm, which has increased strength and is suitable for massive doors. Above the opening is provided for a horizontal jumper from the cutting part of the frame. The jumper is exhibited by level and fixed to the racks of self-draws.

Installation of jumper
Important moment: posting spaces for racks need so that the joints subsequently do not fall into vertical beams framing the opening. Otherwise there is a risk of cracking around it.
Sound-forming material is installed in space between the racks.
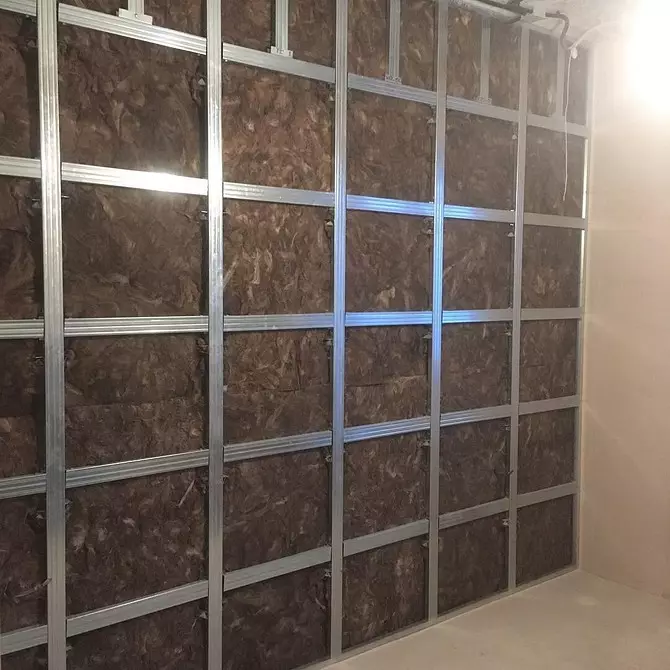
Frame filled with mineral wool plates.
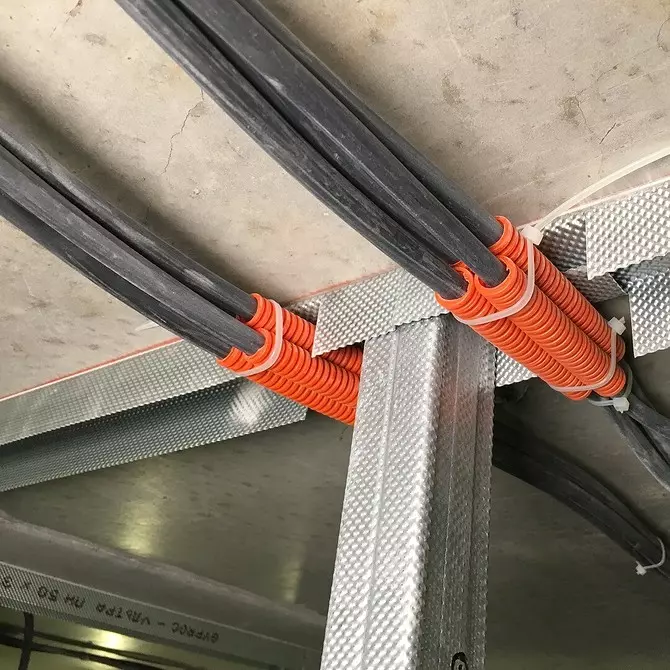
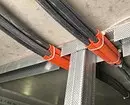
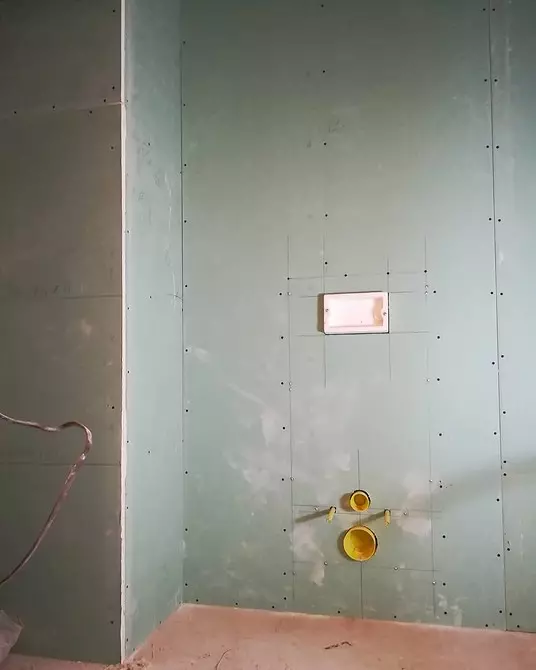
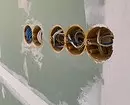
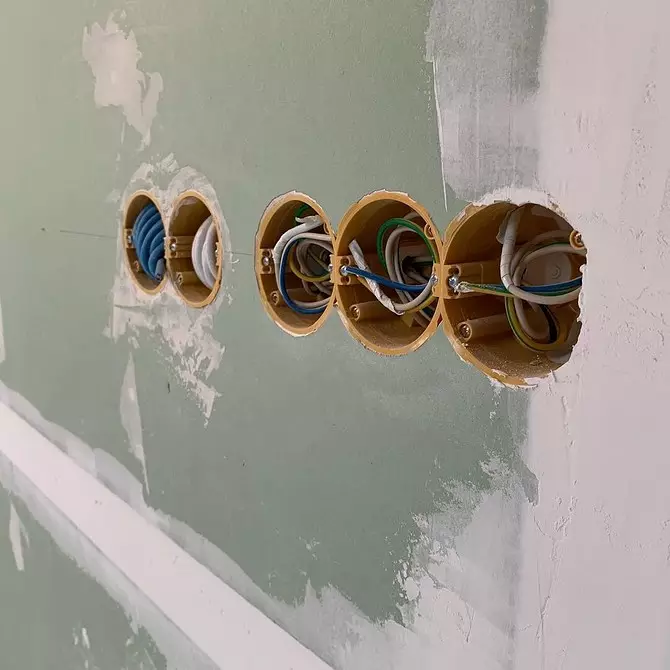
Electrical cables are carried out through a metal frame in corrugated pipes.
Soundproofing and Communication
In the racks, there are still holes for electrical wiring before installation. Cables are stretched in corrugated pipes. Holes in GCL for peavernits make metal crowns - nozzles for a screwdriver.
The space between the racks is filled with sound-absorbing mats or mineral wool rolls. They are chosen, based on the width of the frame.
As for the choice of rolled mineral wool, the product is suitable for a density of at least 40 kg / m3. Wool lesser density with time tears and settles.

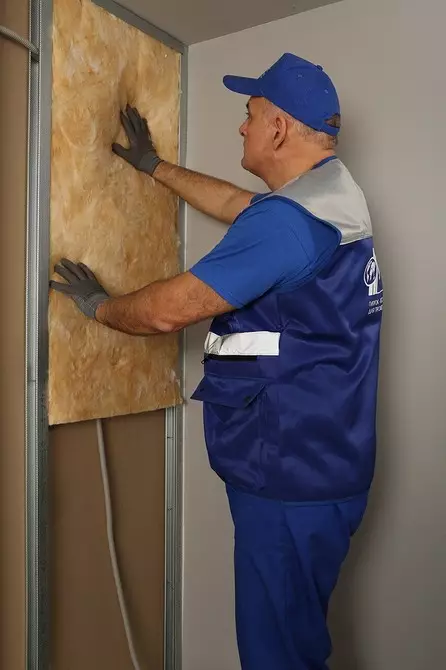
Saving frame in moisture-resistant plasterboard sheets.
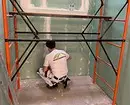
Sheaving
When executing it, the following rules must be followed:
- Use screws of the desired length. Calculation of this: Length = sheet thickness + profile + 1 cm (for such a magnitude, fasteners should enter the metal part). That is, 2.5 cm tapes with a length of 2.5 cm, for a two-layer - 3.5 cm long, are used for a single-layer casing.
- When screwing out the self-tapping screws, it is necessary to drag into GLCs strictly by 1 mm. If you do not touch them, they will become an obstacle in shtchelivania. If you twist them, they can damage the core of the product, and the fastening will be unreliable. Cheap way to set the desired depth - nozzle with a limiter for a conventional screwdriver. Professionals also prefer a screwdriver with limiting the depth of wrap.
- The installation of the screws is not more than 25 cm. In order for the stove to be reassigned, they need to be screwed up at a distance of at least 1.5 cm from its end edge and at least 1 cm from the longitudinal one.
- Often the height of the design is greater than the length of the GLC. Then, with a single-layer trim, the stoves are adjacent to the vertical stove on an additional jumper. Moreover, the adjacent horizontal is mounted with a displacement by 40-60 cm. When finishing into two layers, the jumpers can be neglected, but the elements of the second layer must overlap the joints of the first and spaced to each other.
- In order to avoid the appearance of cracks, it is necessary to leave the gap between the plates and the floor of at least 1 cm. A small gap is left from above, and at the place of the kneading plating to the ceiling, you can stick a separation tape.
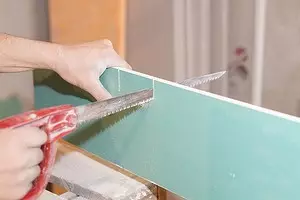
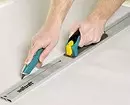
- Gypsum Carton is cut with a special hacksaw or a construction or stationery knife. When working with a hacking, dust and cut will be inaccurate. And when using a knife - neat and not forming dust. However, it is impossible to remove the edge knife from the sheets in the places of their joints (as the installation technology requires it: the cut will be uneven. The edges are removed by a special plane having an angle of 22.5 °. This allows you to make a mix of materials at 45 °. If you need to align the edge of the cropped reservoir, we use the riding branches.
- The doorway is first completely closed with a trim, which is then cut on racks and jumper - it is easier to provide the necessary geometry. Thus, the upper part of the opening is always formed by the elements of the M-shaped form in order to prevent the appearance of cracks.

Screwdriver with limiting the depth of sputtering self-press
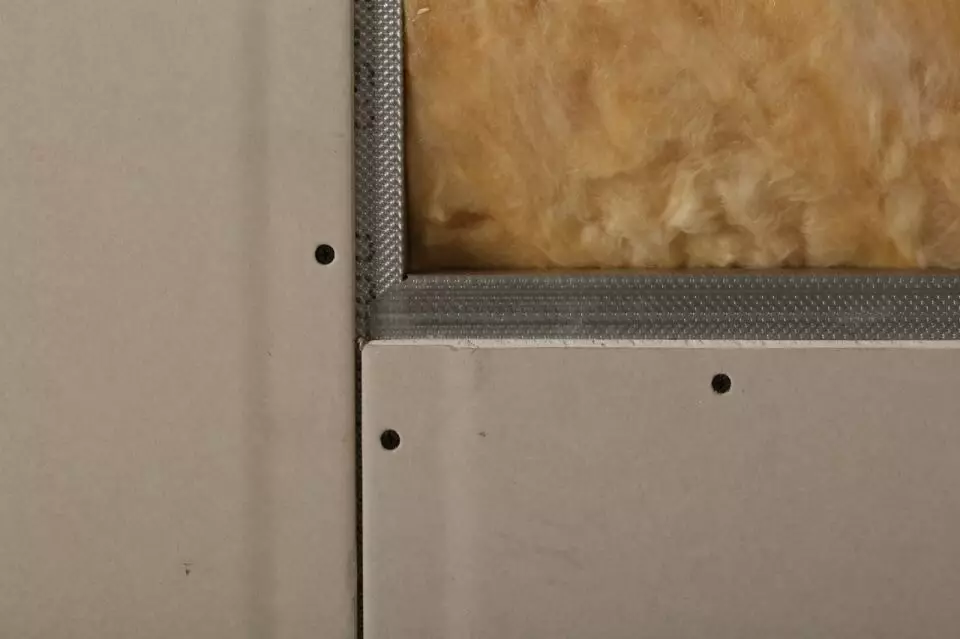
In order for the sheet to unwind, the screws are screwed at a distance of at least 15 mm from its end edge and at least 10 mm from the longitudinal
Between the GLK and the floor, the gap leaves at least 10 mm
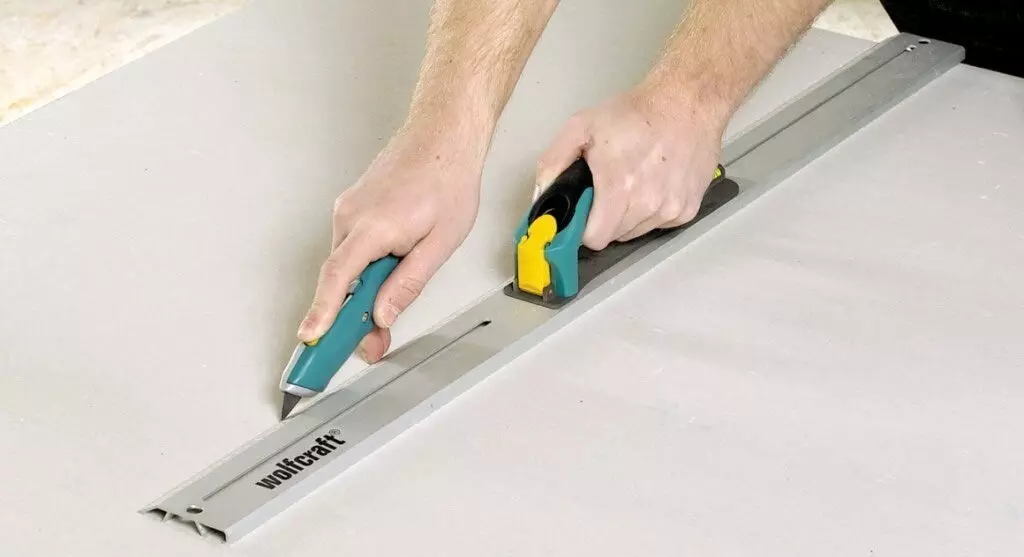
Crossing GLK with a knife

Finishing of the doorway
Shpalian
The connection location of the elements of the object is ground, and then, after drying the soil, put sand using a spatula. Immediately after applying putty, the reinforcing ribbon is bleated into it.
At the same time, experts do not advise not to apply the mesh sickle. It is not enough reliably reinforces the layer of the shtlock - the frozen gypsum mixture can crack and sharpen. Much reliable than special elastic tapes for junctions.
No conventional mixtures should be used for shtclosure, and non-shrinking thin layer - it will be greatly simplified and accelerated. In addition, they should be moisture-resistant, otherwise the meaning disappears in the acquisition of expensive components. If there are joints on short sides, then before fixing the GCL, from the edges it is necessary to remove the chamfer at an angle of 20 ° to a width of about 0.8 cm - otherwise the joints will not work well.
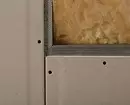
The putty is applied on the hats of self-tapping screws. Then proceed to the finish finish.
What else to pay attention to
- Among the builders are disputes about when building frame-and-wing systems. Some masters believe that the installation must be carried out before the pouring of the screed (protecting the material from the liquid mixture with a polyethylene film), others that after. SP 163.1325800.2014 "Constructions with the use of drywall and gypsum-fiber sheets ..." Stores mysterious silence on this. However, manufacturers unequivocally recommend to assemble to the device of finishing floors, but after the end of all wet processes. That is, first pour the screed with deformation seams, and then then begin the construction of interior partitions from plasterboard.
- A plasterboard partition in a country house, especially if it is heated with interruptions, inevitably cracks on the joints due to moisture drops. But if you use high-quality spit and reinforcing tapes, cracks will be barely noticeable.
- To improve the soundproofing capacity, you can use additional layers of a leaf cork agglomerate with a thickness of 3-4 mm (adds 1.5-3 dB of sound insulation), increase the thickness of the trim (each layer of 12.5 mm improves air noise insulation by 2-3 dB) Or use a double sized frame (adds 5-6 dB).