
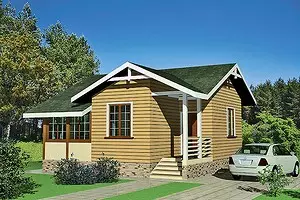
Strategy of phased construction of a country house: history and modern practice, the principles of building a growing home on a specific example

Explanation of the first floor

2. Tambour .................................. 2,3m2
3. Hall ...................................... 5.7m2
4. Kitchen .................................... 8m2
5. Dining room - living room .............. 18.1m2
6. Bathroom ................................. 3,6m2
7. Living room ..................... 7,6m2
How "grew up" Russian hutIn Russia, the tree has always been the most affordable material. It was built from it from fortresses and churches to houses-iv. How and which houses were our ancestors?
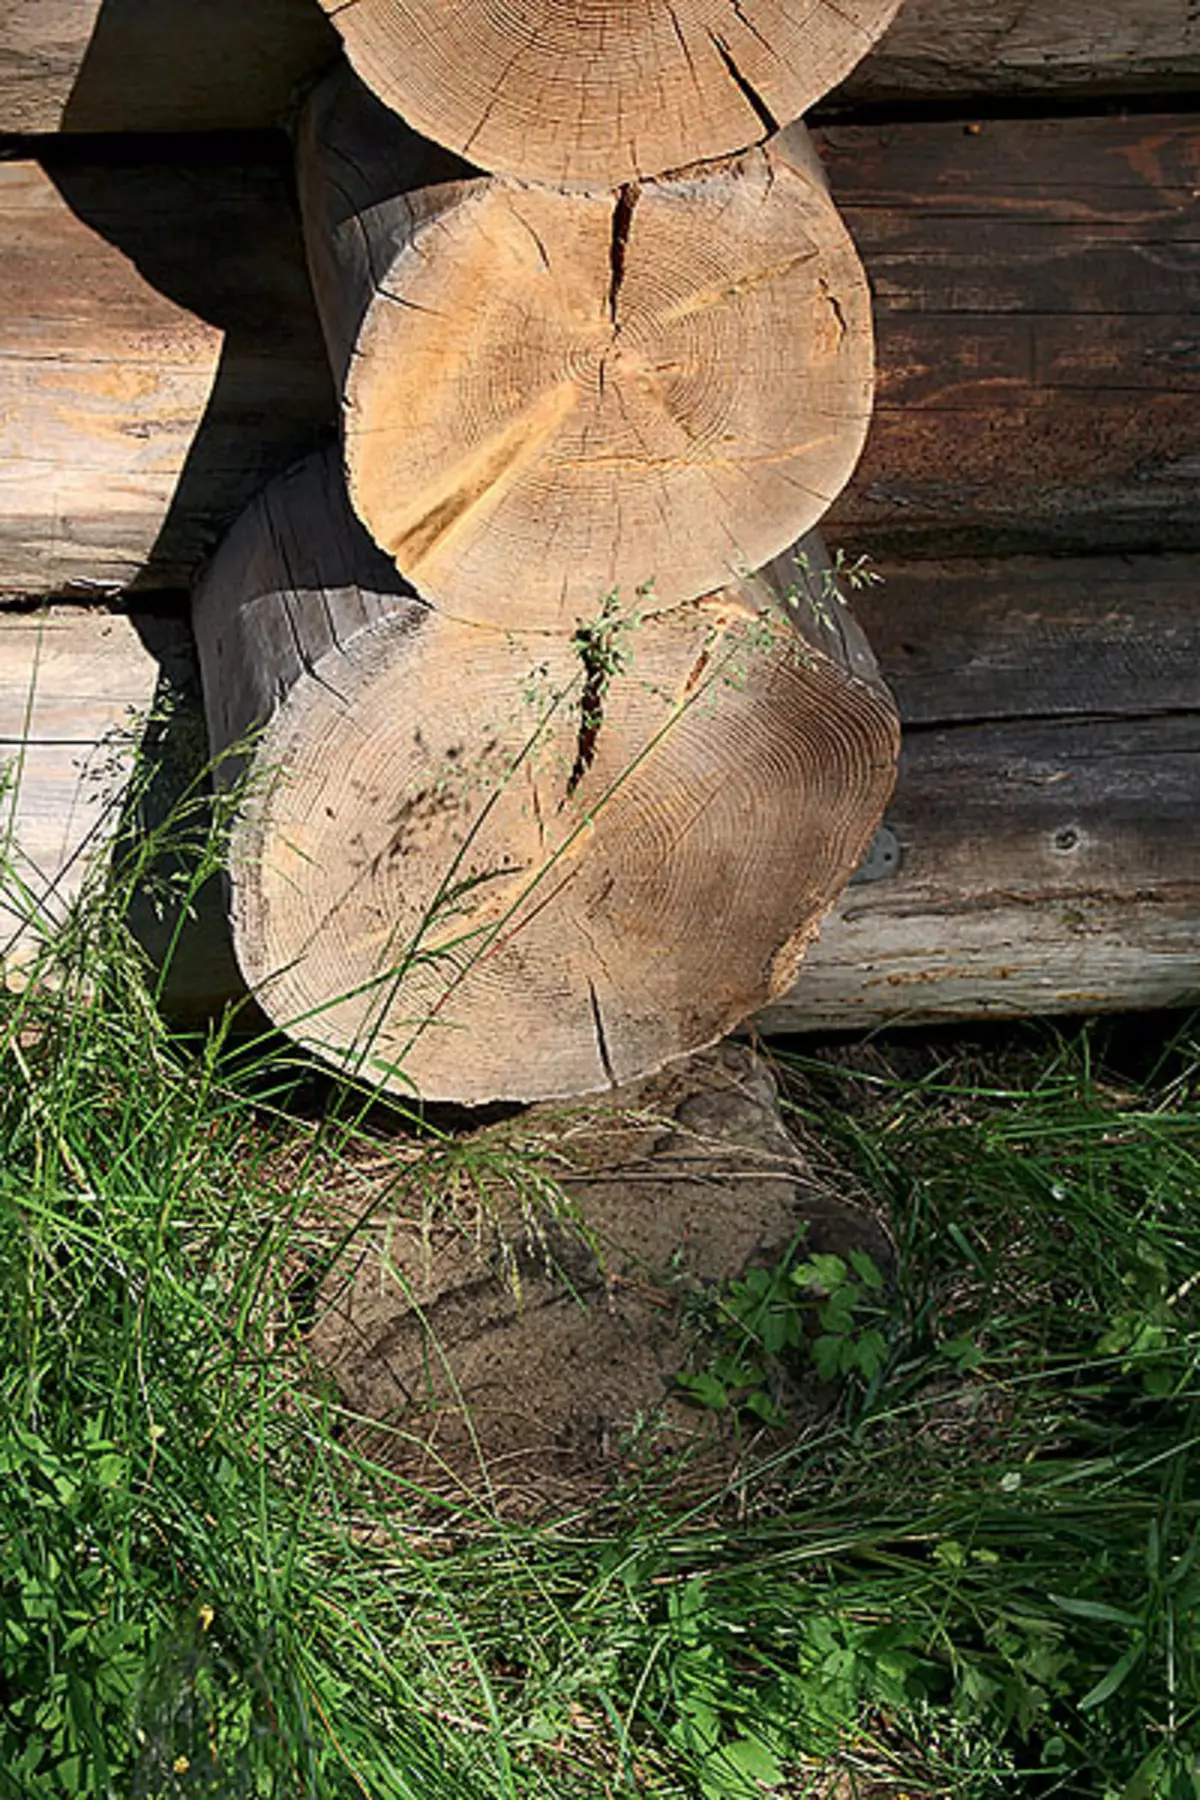
The base of the house. The basis of the residential building was a chopped cage - a four-trigonal log cabin of 12-15 crowns formed by four logs. In the corners of the log cabin, the logs were combined using several types of wrist: "In the edge", "in the paw" IT.D. (We told about the main methods of performing writing in the "IVD", 2009, №7).
Foundations. They put such a crate on the foundation of one of two types. The first type we are visible to the tape in accordance with modern terminology: under the corners, and more often along the entire length of the walls, granite boulders. The second conditionally, we will begin the column: under the corners of the cut and the liardes installed the chumbas of a large diameter - "chairs". The walls of thin logs were crowded between them, and as a result, the so-called dumplings (rizbitsa) occurred under the house: in the summer it was used for economic needs, and in the winter they kept livestock. Any foundation laid waterproofing - thick reservoirs of Beresta.
It is worth noting that the fledgest huts were characteristic of the northern regions of the country, and the north, the higher the fence was.
| 
| 
|
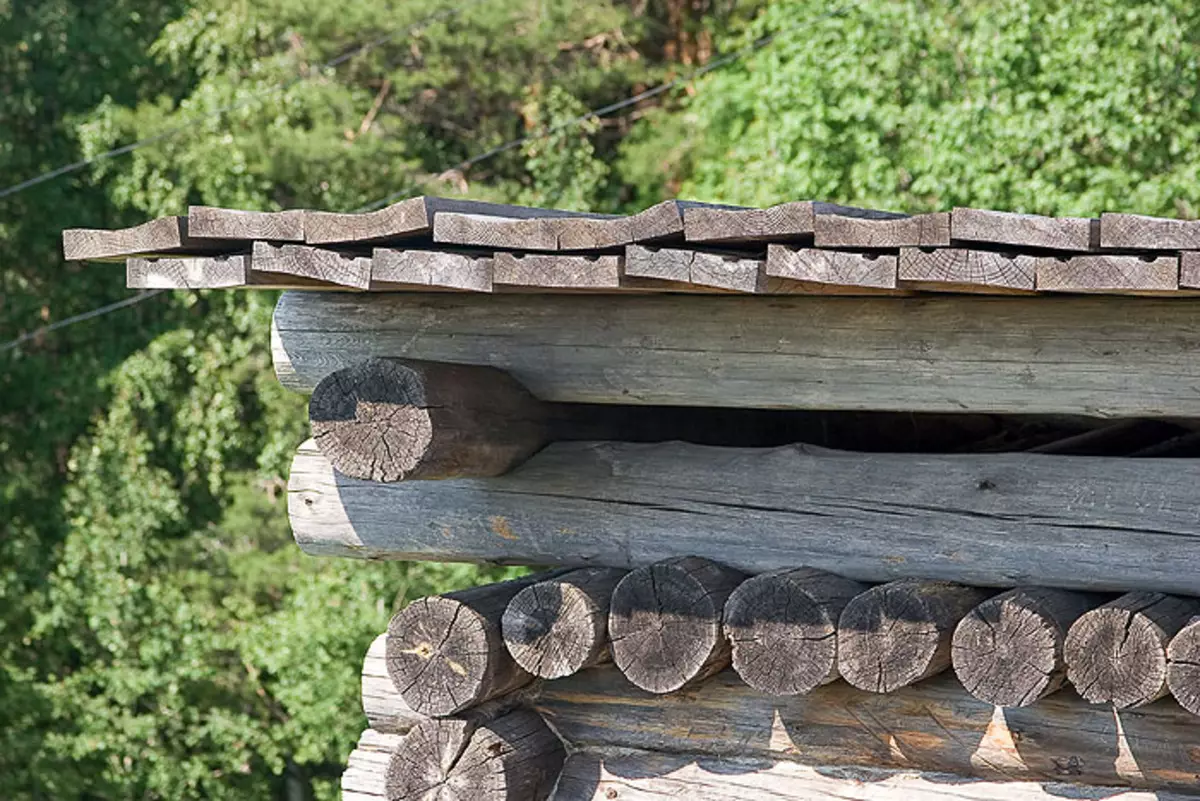
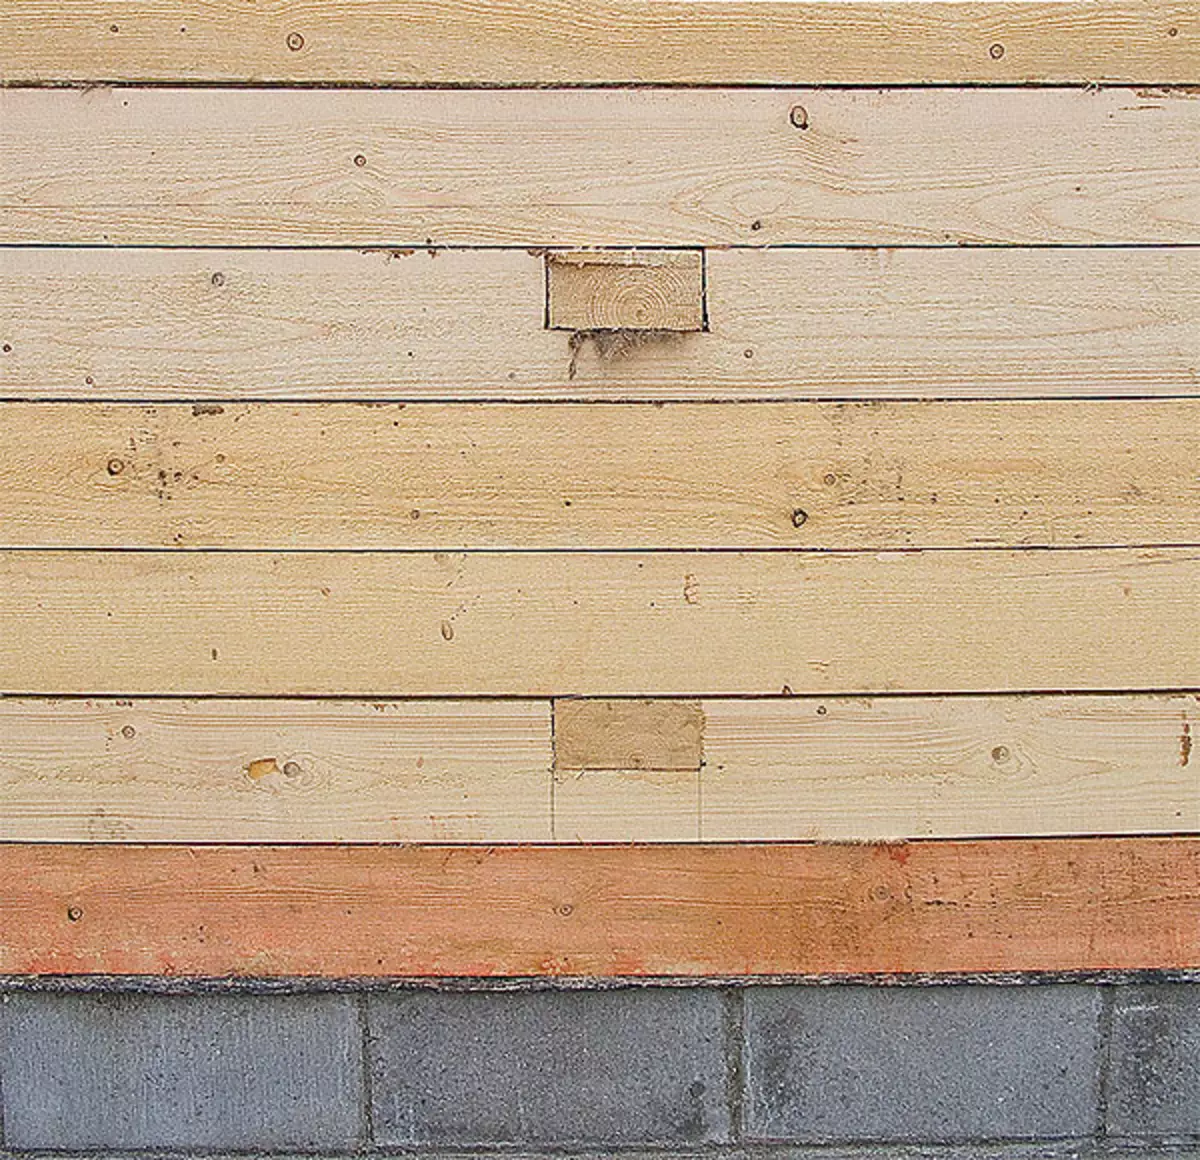
1-3.Grant boulders (1) and wooden "chairs" (2) were located at angles and subservit. The roof of the hung hungry is with TESE "in the card" (3) - the boards of the top row covered the junctions of the bottoms of the lower.
Houses and huts. Now we describe the configuration of houses. The rich people put a six-storey or a house-crusher: when it was construction at the same time, the two capital inner walls were cut into with the outer (in the cross, the inner walls intersect at right angles). People wealthy, who had a big family, built a five-ranger, in which the fifth capital wall divided the house into two parts. In relation to these two designs, we did not in vain, the term "house" was used, and not the "hut" - just so respectfully called similar buildings. But the rich and wealthy at all times were not so much, and the vast majority were built completely different houses.
To begin with, one log house was installed in size for approximately 66mola with one indoor room, but with a furnace, that is, heated. It was "East" - "Introduction" - "Istba" - Izba. Twin clasped the floors on the beams lying into the walls from thick plans (rolling along the log) so that the fees lay along the hut, from the door to the windows. We sat on the same direction on translations and ceilings from thick Tesa, which on top insulated foliage. The construction was completed, removing the male trees roof. Moreover, the peels could be long (full of the length of the skate) or short (so-called dusties). The design of such a roof is unique: it was collected without a single nail. Therefore, it was easy to disassemble the roof, and this was used both when repairing (replacing the rotational elements with new ones), and with the completion-building of the house.
In addition to Samtov, frame roofs also existed. According to the design, they were generally similar to the males, only longitudinal lords relied not on the logs of the frontones, but on the vertical vertical logs attached to the upper wool of the log cabin or laid on top of it.
| 
| 
|
4. The "twin" was made up of two log cabins. It was also widely widespread, "Communication" - two cuts were installed at a distance and satisfied between them. It is possible that such a house was built in stages.
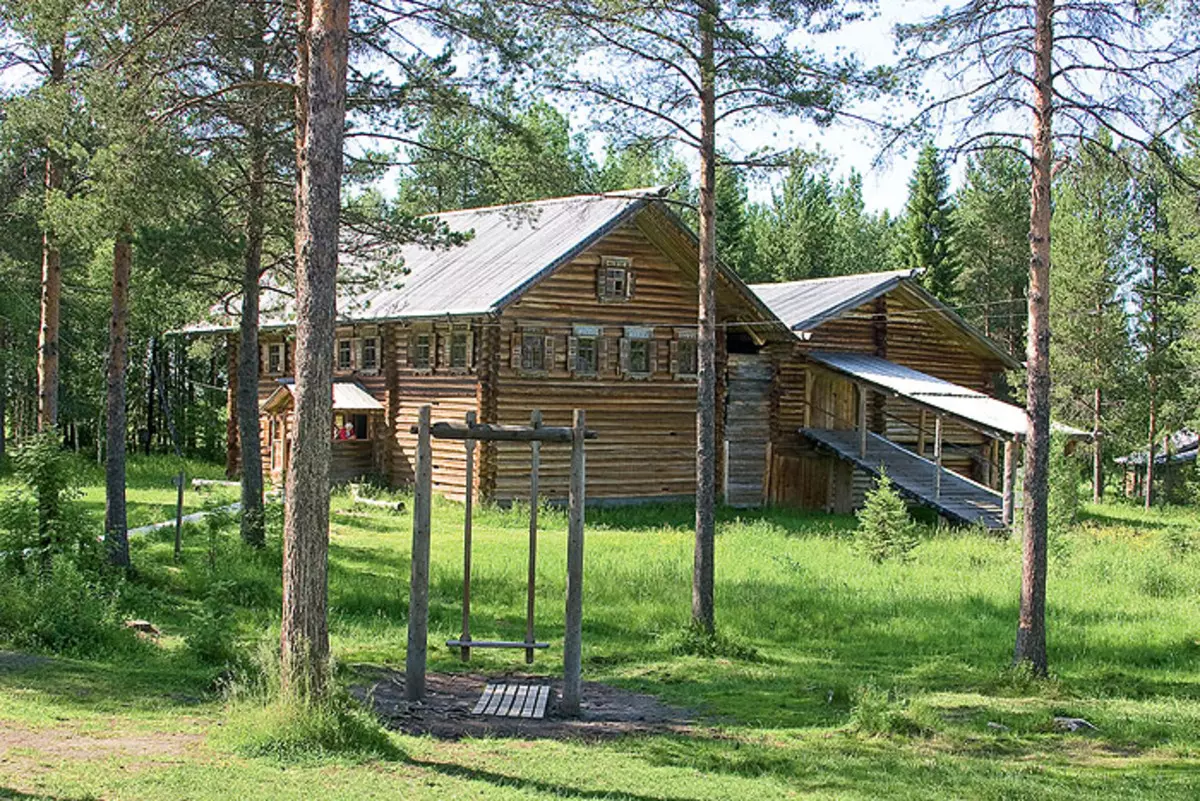
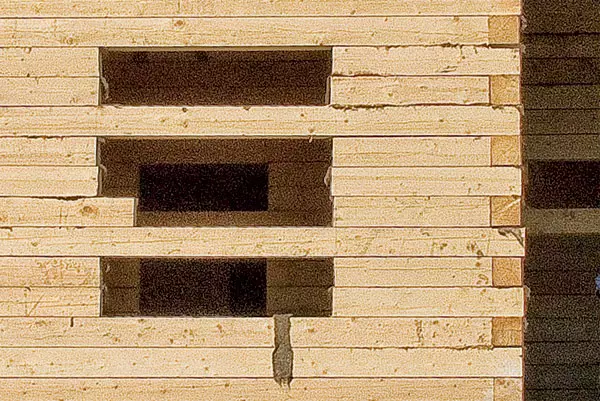
5. The genus is the top of the growth of huts: not only the living and economic buildings are removed under a single roof. "P" residential and economic buildings, but also lying between them.
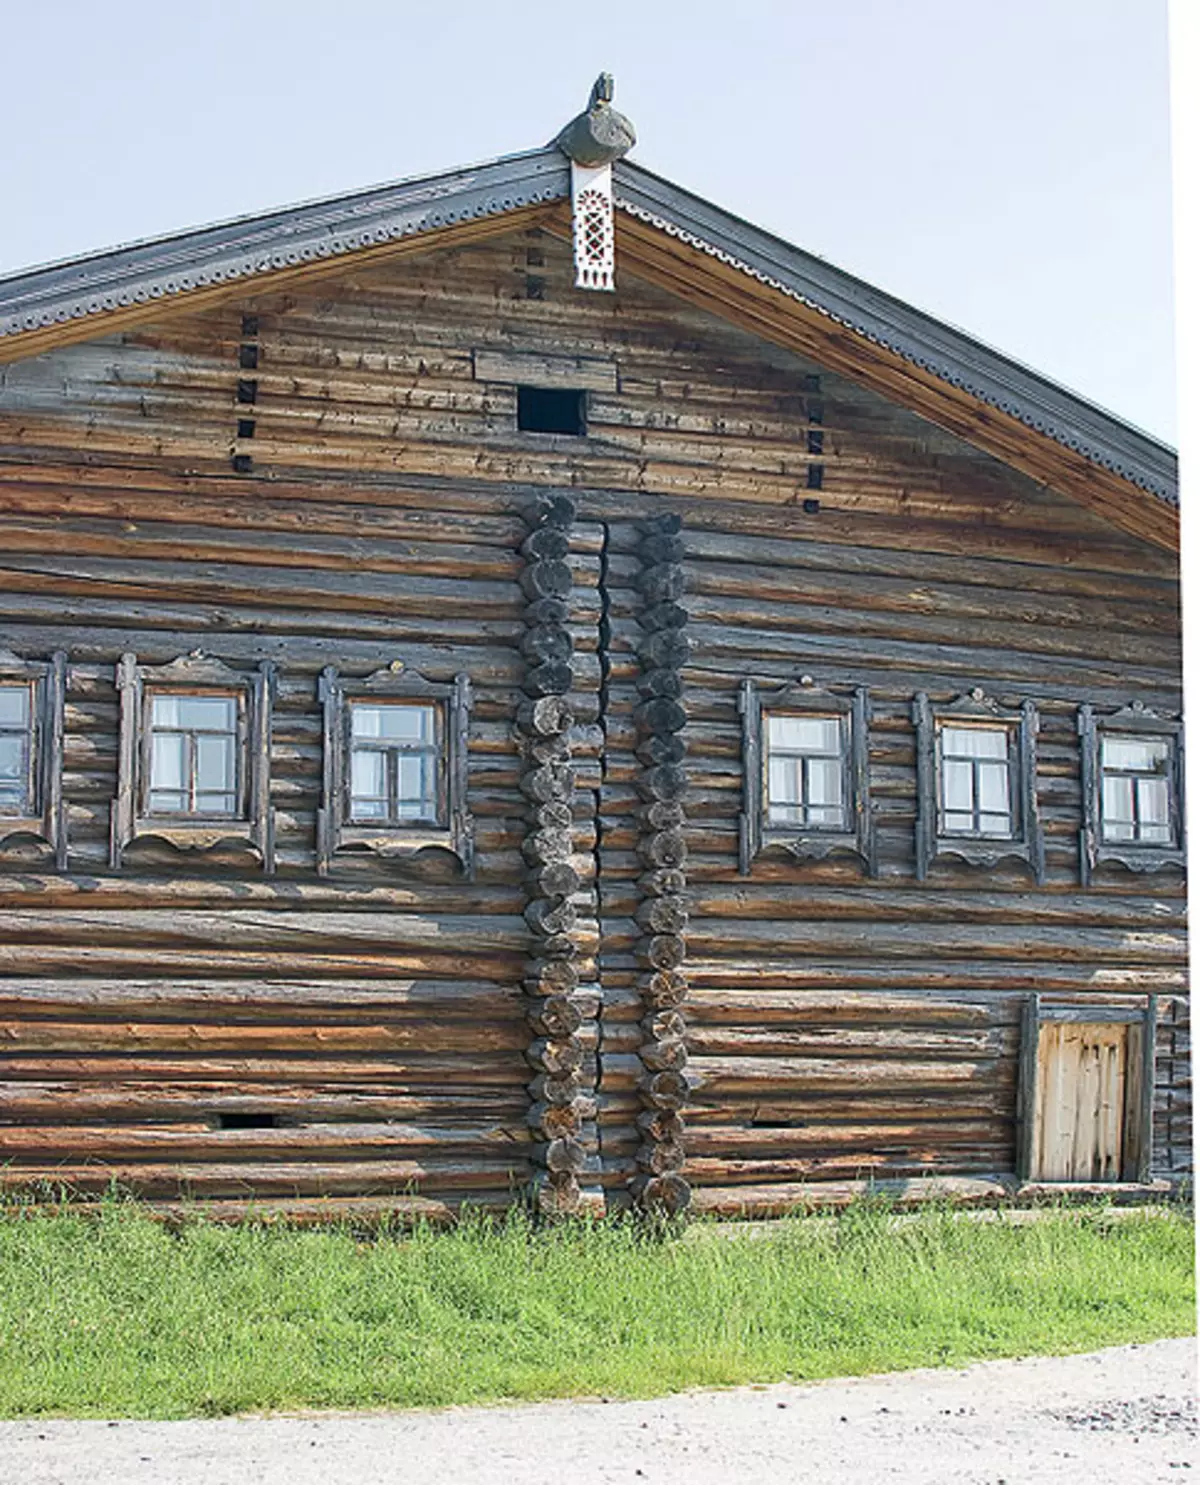
6.Ontholby high porch leads in the sense of the summer (right) and the winter (left) part of the hut. In the photo, it is clearly seen that the Wall of Seine is only downtrend to the crunch of winter huts.
Expansion of the house. At first, a lightweight tambour from thin logs or jeria was attracted to the entrance to the hut. This facility was summed up under the common with an escape roof, but it did not have overlap. It is necessary to cover it (or, as they talked to ancient, sneakely, and the name) input and keep warm in the hut. As the family grows and the number of homework extended at its disposal in the "single-chamber" housing became closely. It is a lot when the owners accumulated funds, it began to increase in size.
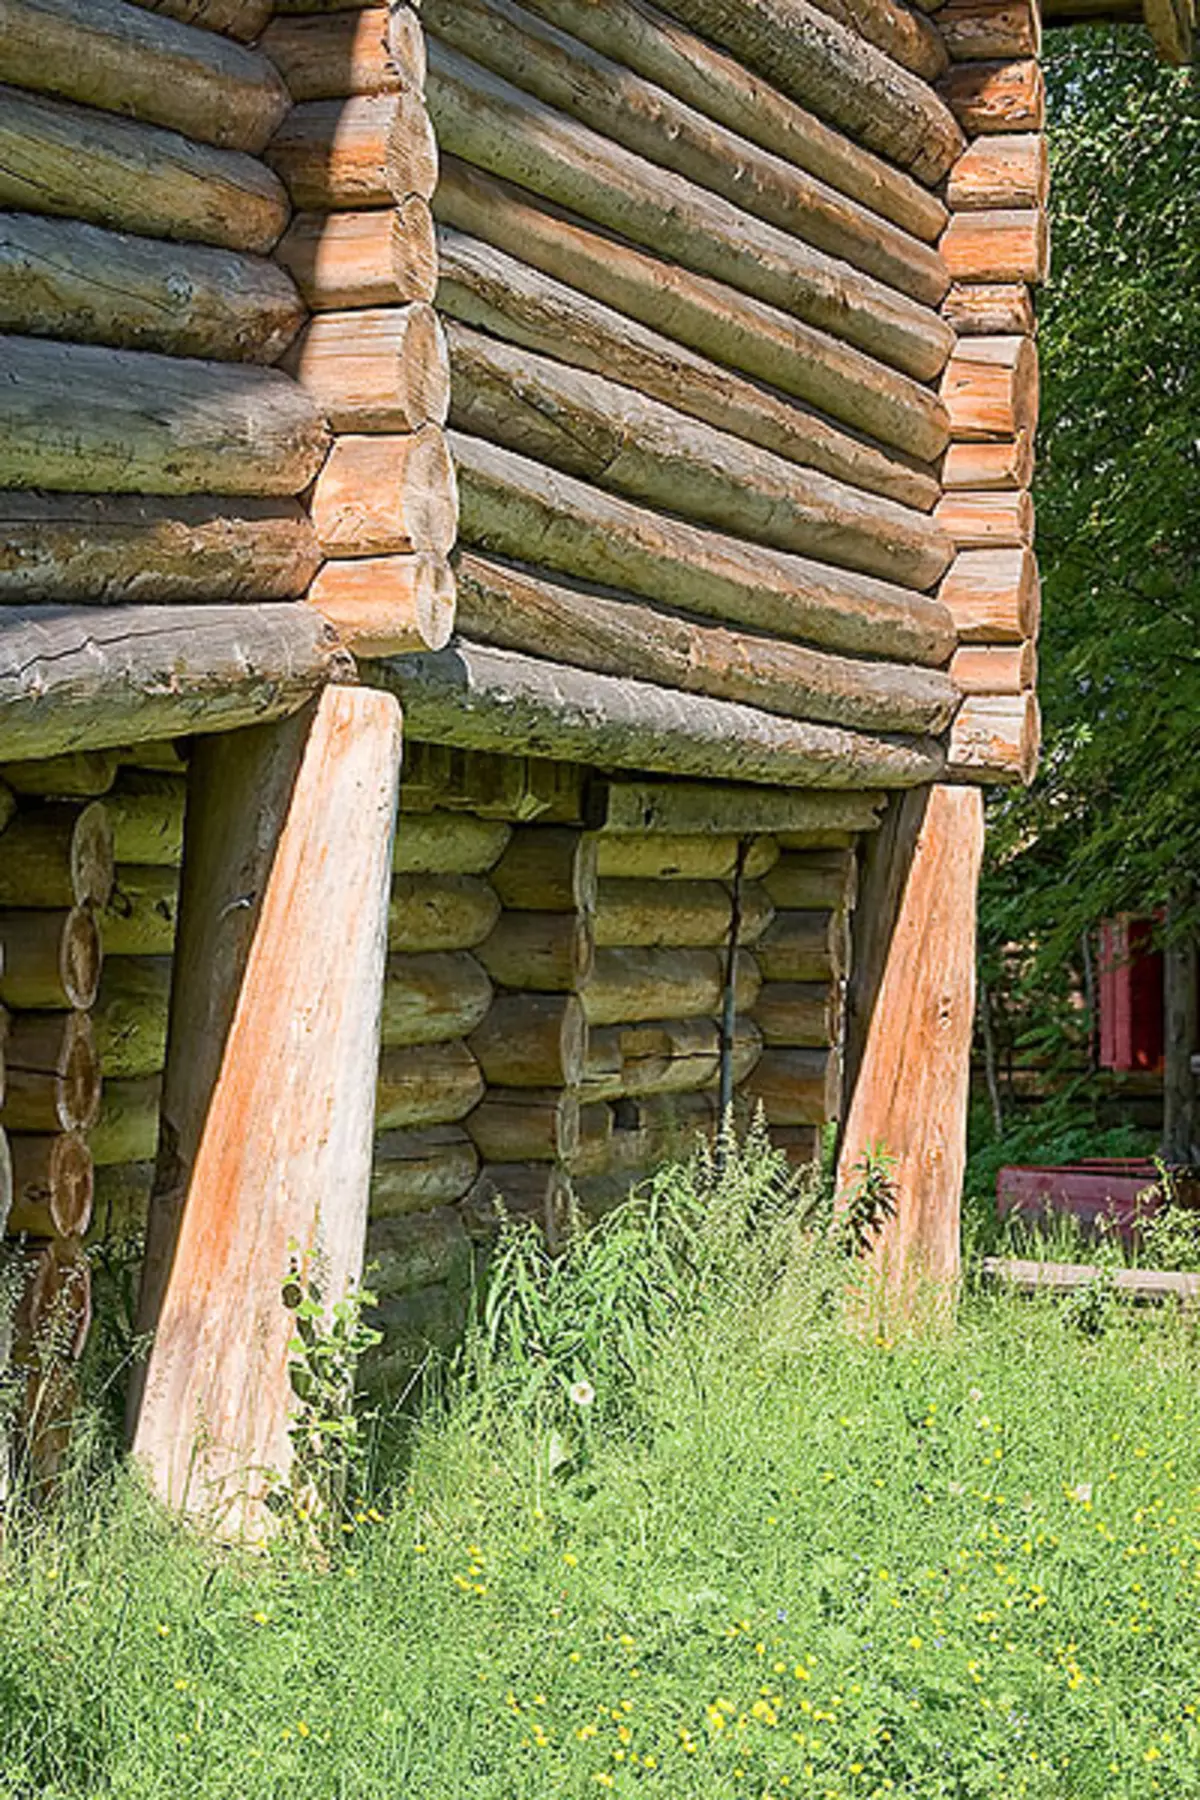
The easiest way to expand the area was the device of the so-called admission to the extension of the additional cut from the three walls. However, this way was rare, and the reason for this is quite explained: "Hip" (let the reader forgive us a similar term) foundation. Remember the designations already described, and it will become obvious that the seasonal ports of the soil will completely tear off the main of the main hut (you can make sure that by visiting, for example, the Museum of Wooden Architecture Small Cores near Archangelsk). So how did they do? In studies dedicated to this topic, it is written: "Gurban usually consisted of three walls, but could be a four-stranded." Achto such a four-sided dore? It is not different as one more hollow, installed close to the old, but without durable binding to it (both cuts existed independently of each other).
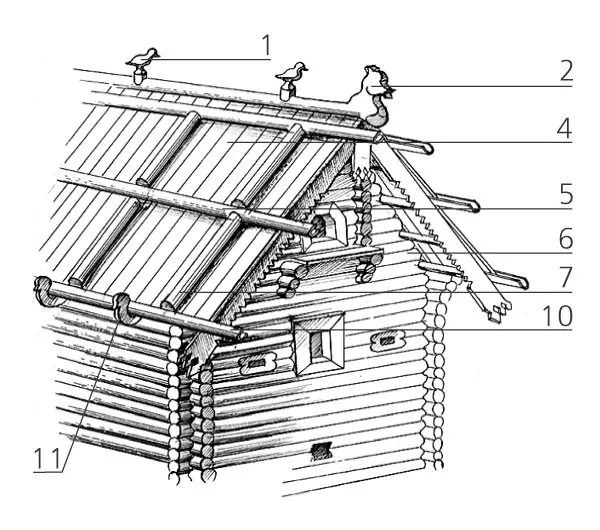
Collapsible samstaya roofing (seal and drancies)
For many centuries, original techniques of the device of seal roofs were developed, which did not require any brackets or nails. Let's start with the samstaya roof on the chicses. The males are several rows gradually decreased along the length of the logs forming two triangular fronton. The males of the frontones were connected and the frontaths themselves between themselves through the logs-slopes (full length of the hut). Their amount depended on the height of the finalon, each run bonded with each other two neighboring male crowns.
The ends of the ball performed beyond the limits of the frontones, forming the foundation of the roof. Whew-three lower escapes (across them) were driving the so-called chicken-lab neutric fir thrills with a length of 1.5-2m with hooks at the end (the chicken head traditionally cut on the hook and the name of the element). The chicken were installed with a certain step, and so that the ends of them would hang over the walls, becoming the basis of roofing sills.
On chicken, laying bark, laying logs with grooves in all their lengths - streams (water homes, waters), or, in modern language, drainage gutter. Then, the slightly stacked the lower row of the roofs of the roof, which escaped into the upper edge of the chute. On top of them, the second layer of Tesins, which were somewhat longer (their lower edge rested into the bottom of the gutter). The top ends of both layers of Tesin, nimbled on the highest (princess) in the earliest, pressed a heavy fir log with a triangular gutter across the entire length. It was two names: "Ohlupin" (a heavy log slapped loudly when installing in place, but for now it is there, more than once) and "Konk" (it is on it, and not on the top burnt out the horse's head, which served the faucet from different trouble). So that the chickness does not move, it was attached to the princess foot by wooden rods with a curly head. As a result, a collapsible design was obtained (as they say mainlike roofing).
Another variant of the china-making roof of the roof on dansher, distinguished from the already described in that it was used in it not for the entire length of the skate, but shorter. The fact is that a long wide roofing should be quite expensive should be almost without bitch that can fall out or deposit. Short perfected boards got it easier, and cheaper. Judge to cut them not necessarily enough short logs. The principle of creating a roof on the dranyers is very similar to the penetration, but there is also a difference: the grooves laid on the chicken threads were installed in two rows of short-tested dusties, the top edge of which was pressed by the second gutter-flow (he also played the role of the oppression). From slapping it was held by the semi-wood-heads, which escaped into the lower groove stream. Then they laid a new two-layer row of drangies, the top edge of which was attached to the third gutter. So, until it get to the top of the roof, where the temples will fit the horse-ochapen.
It is curious that when lengthening the rods of the roof in case of restructuring - the extension of the house, the peeling roof could be easily transformed into the roof on drank. This idea is collapsing and capable of transformation of the roof and should be used in the construction of a modern "growing" house.
1. Stamik 2. Халупень, or horse 3. Testers 4. Drany 5. Blowflow 6. Samsysy 7. Stand 8. Snow 9. Schelch 10. Flow (chute, watery) 11. Chicken (Kokore) | 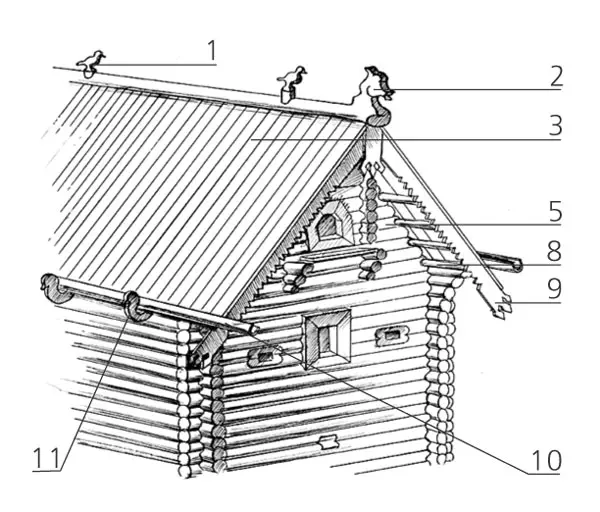
| 
|
After the overlaps were arranged in the new part, the roof was escaping over the old, they created a single frame structure over both figures, according to which, using the elements removed from the old roof, a new roof was erected. It may very well be that this new roof was no longer on the chicken, but on dansher, but all the parts taken from the old roof (tes, chicken, chute and oven) managed to fully use. ASDORE, the costs of new elements (tes, stern, heads, gutters) were minimized, as well as the deadline for the installation. Inexician seasonal ports of the ground with a frame roof covering two huts (more precisely, such a structure was considered one or wore the original name - "twin"), they were not terrible, it lived in itself, because only held for fires. In the present half of the huts installed their ovens. From one part of the house to another, a common senior can be hit through the rear facade.
| 
| 
| 
|
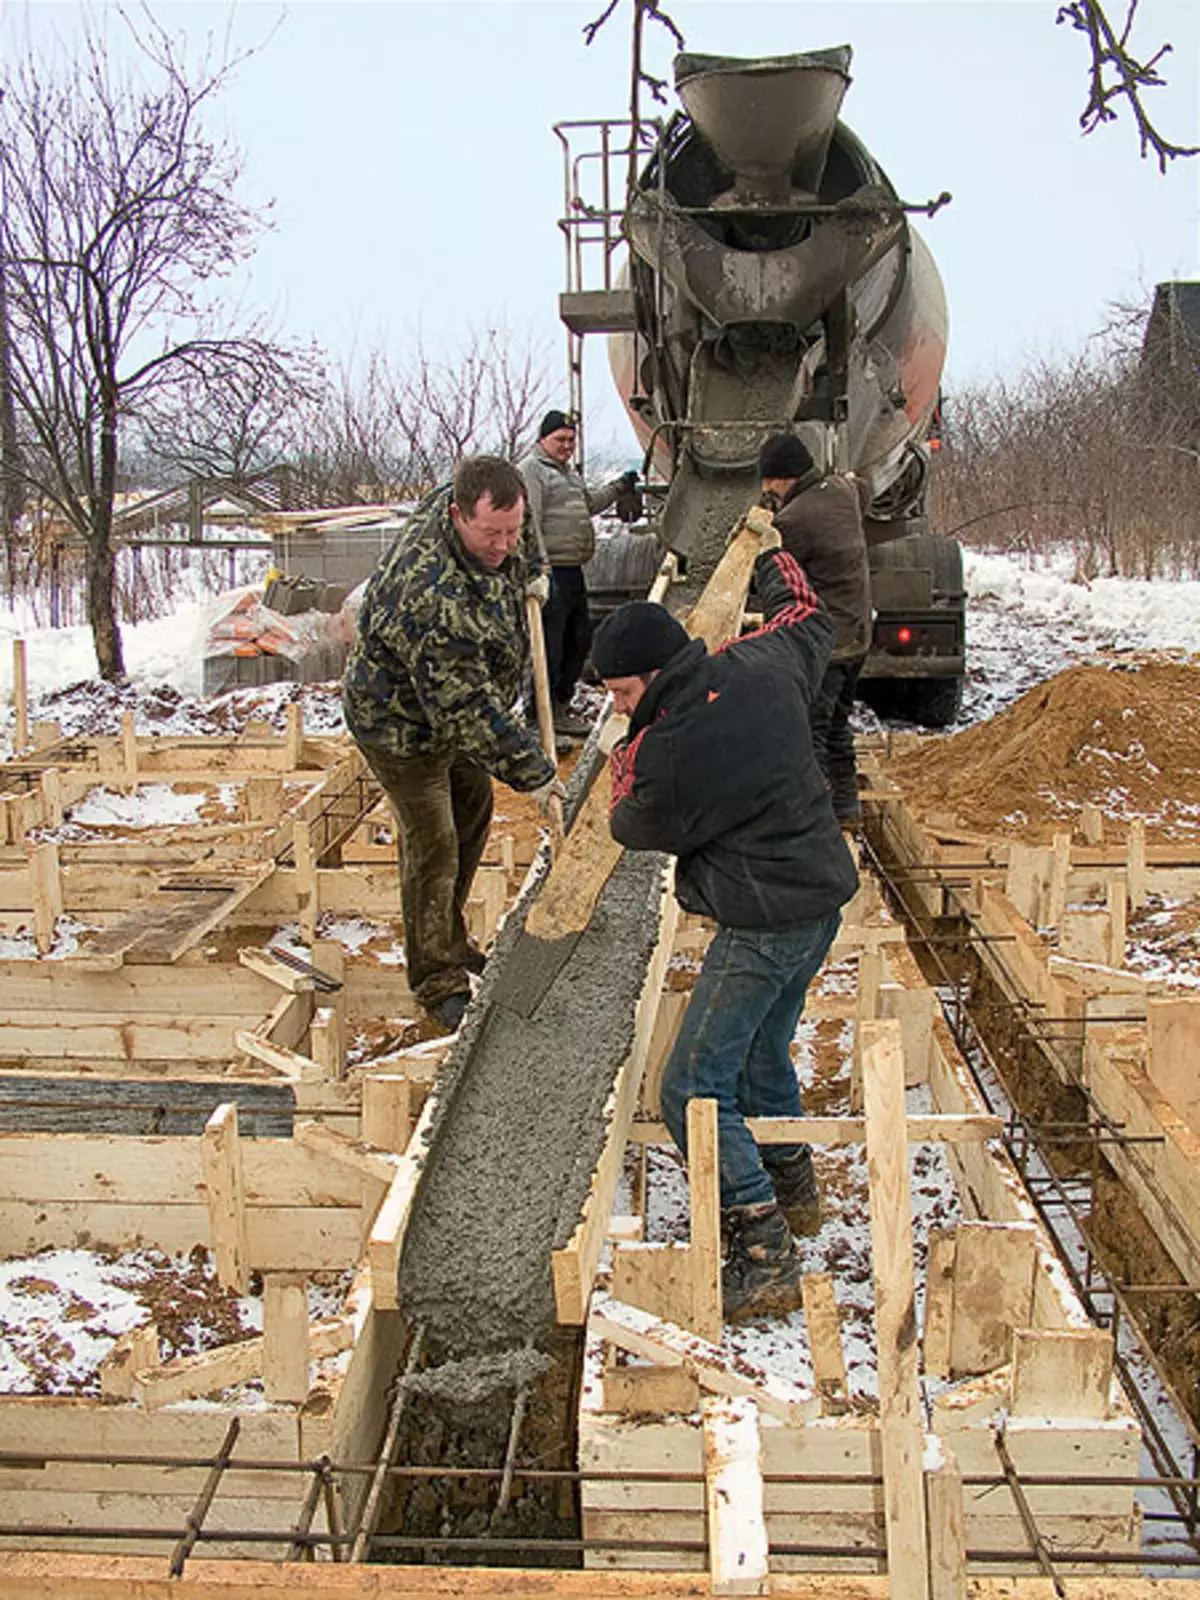
7. Betle M200 brand on the site tied mixers. To serve concrete to the far parts of the foundation tape, used a long wooden tray, and the necessary backups made in advance.
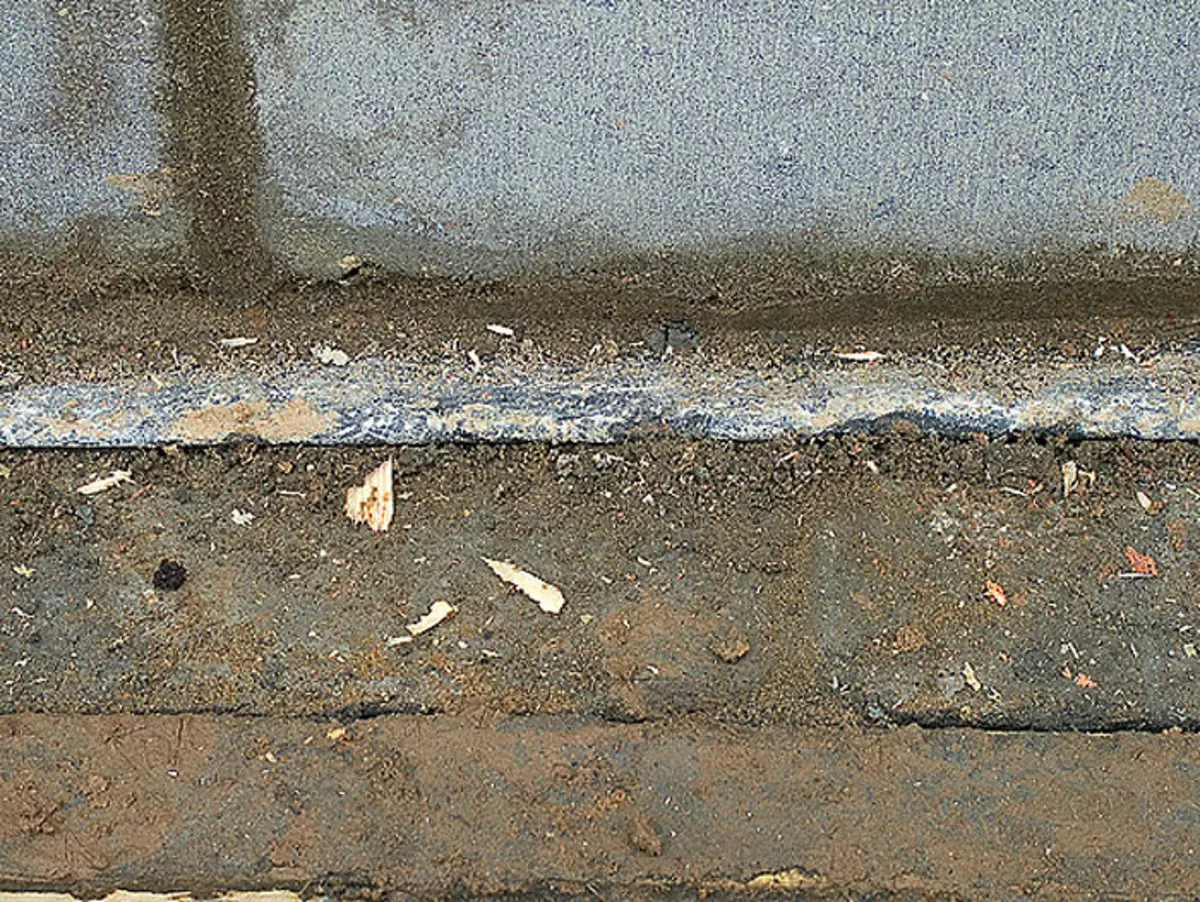
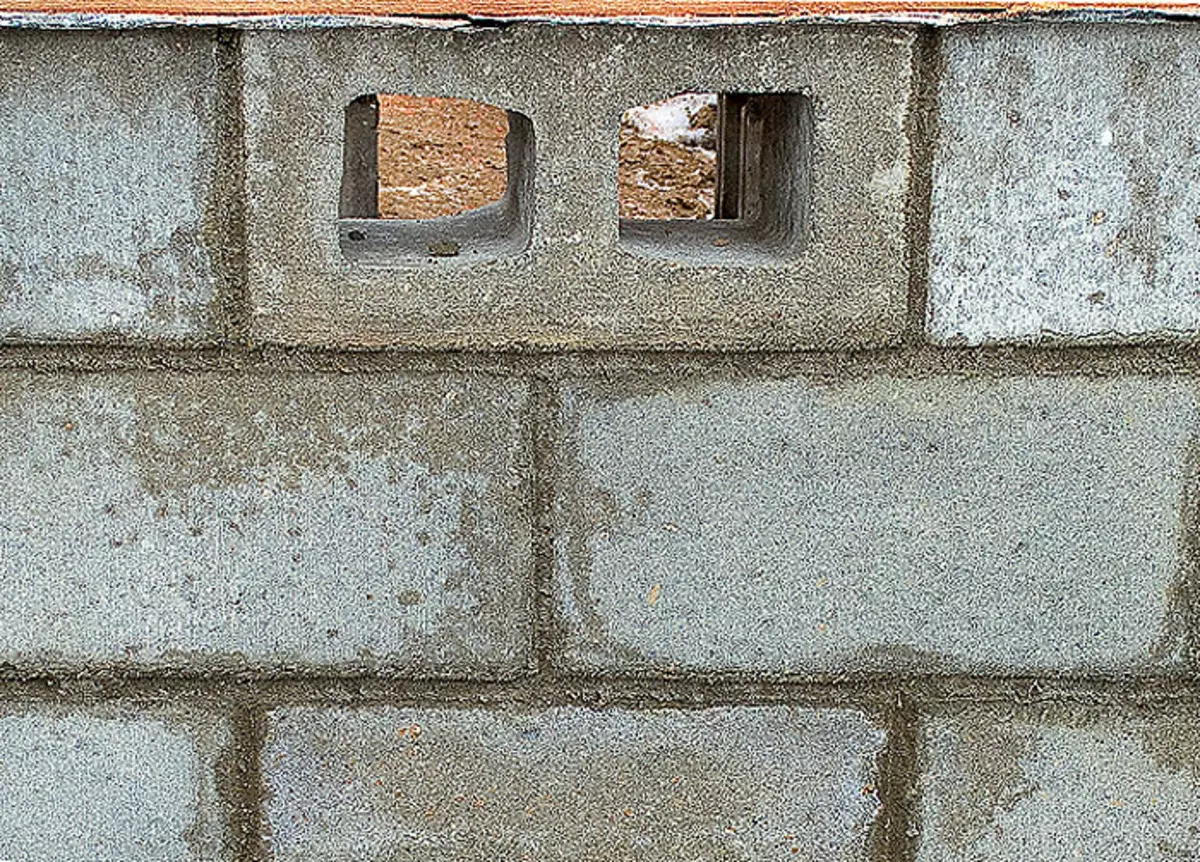
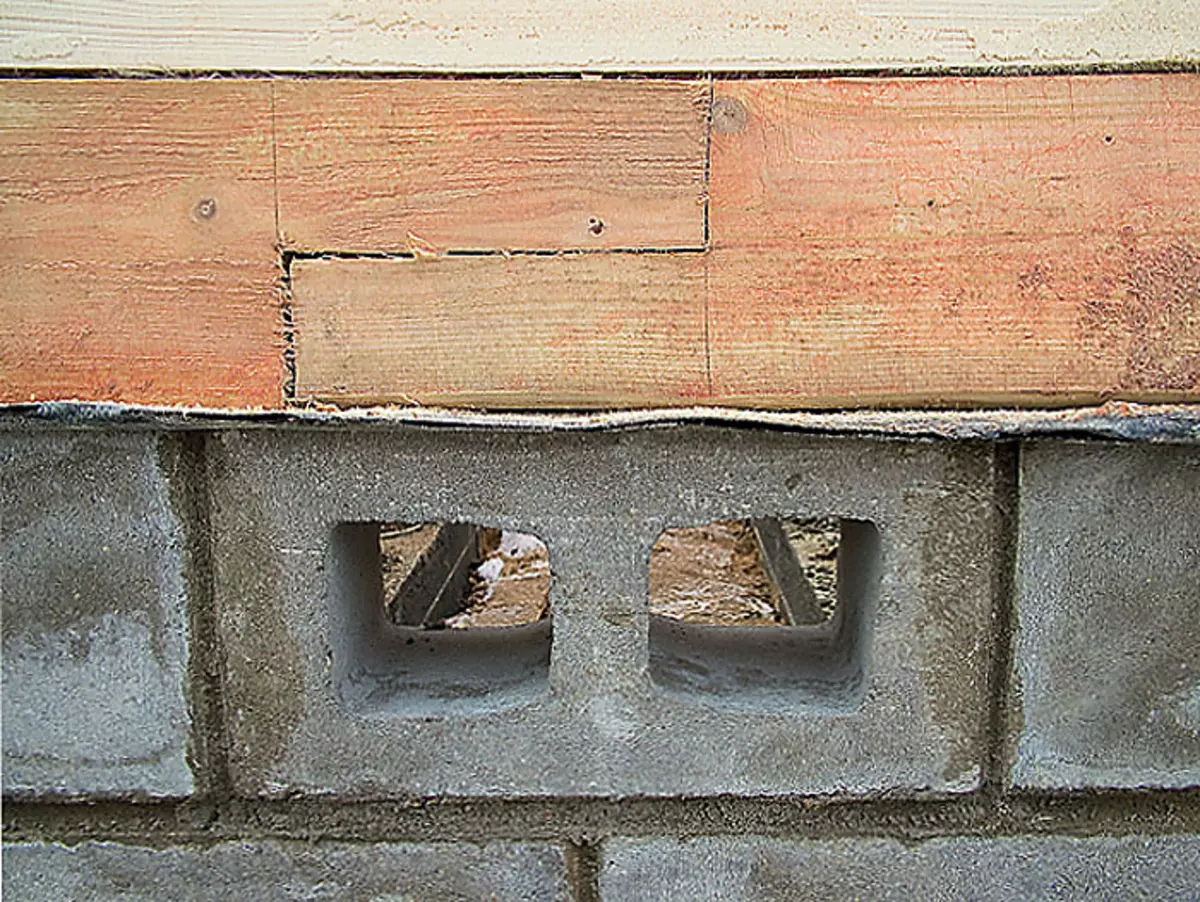
8-10. The first concrete belts were laid in two layers waterproofing (8), and then laid the base from the hollow concrete blocks (9), the seams between which were expanded (10).
| 
| 
|
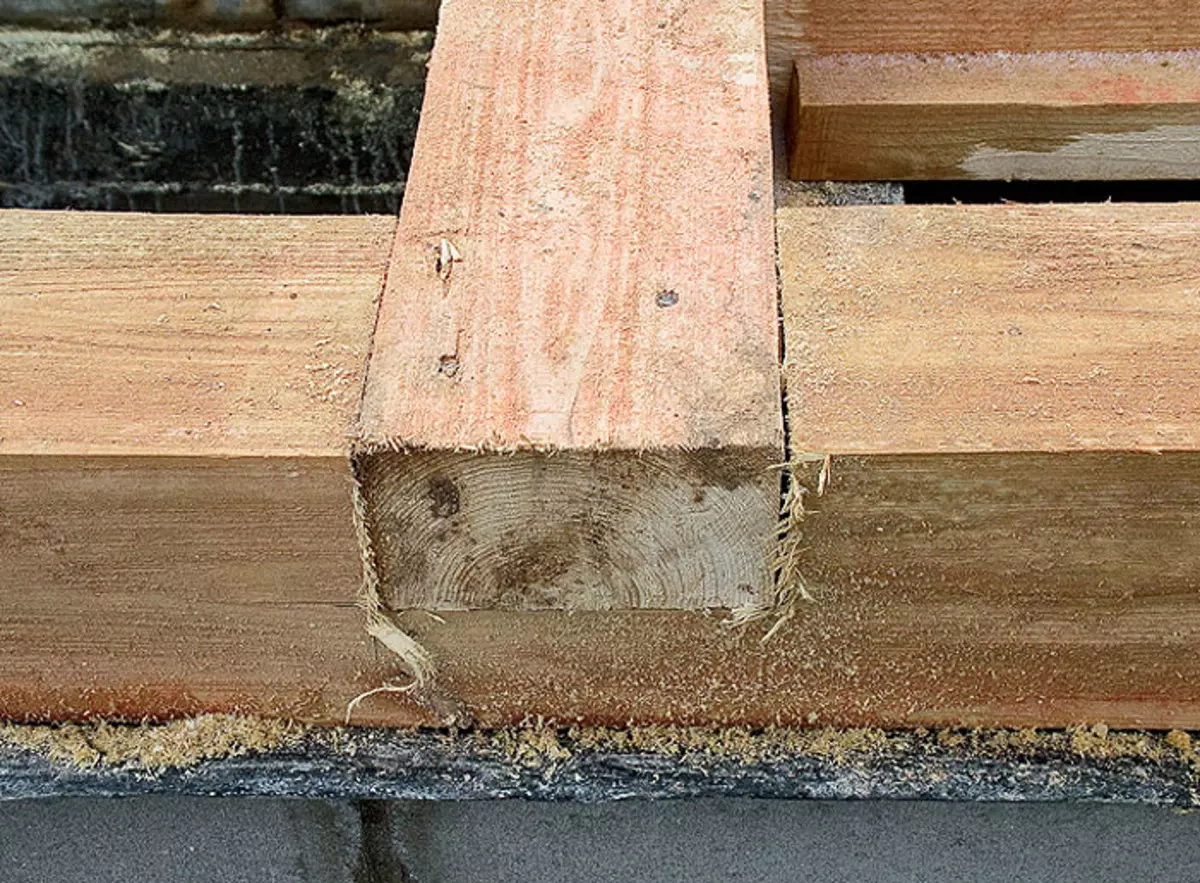
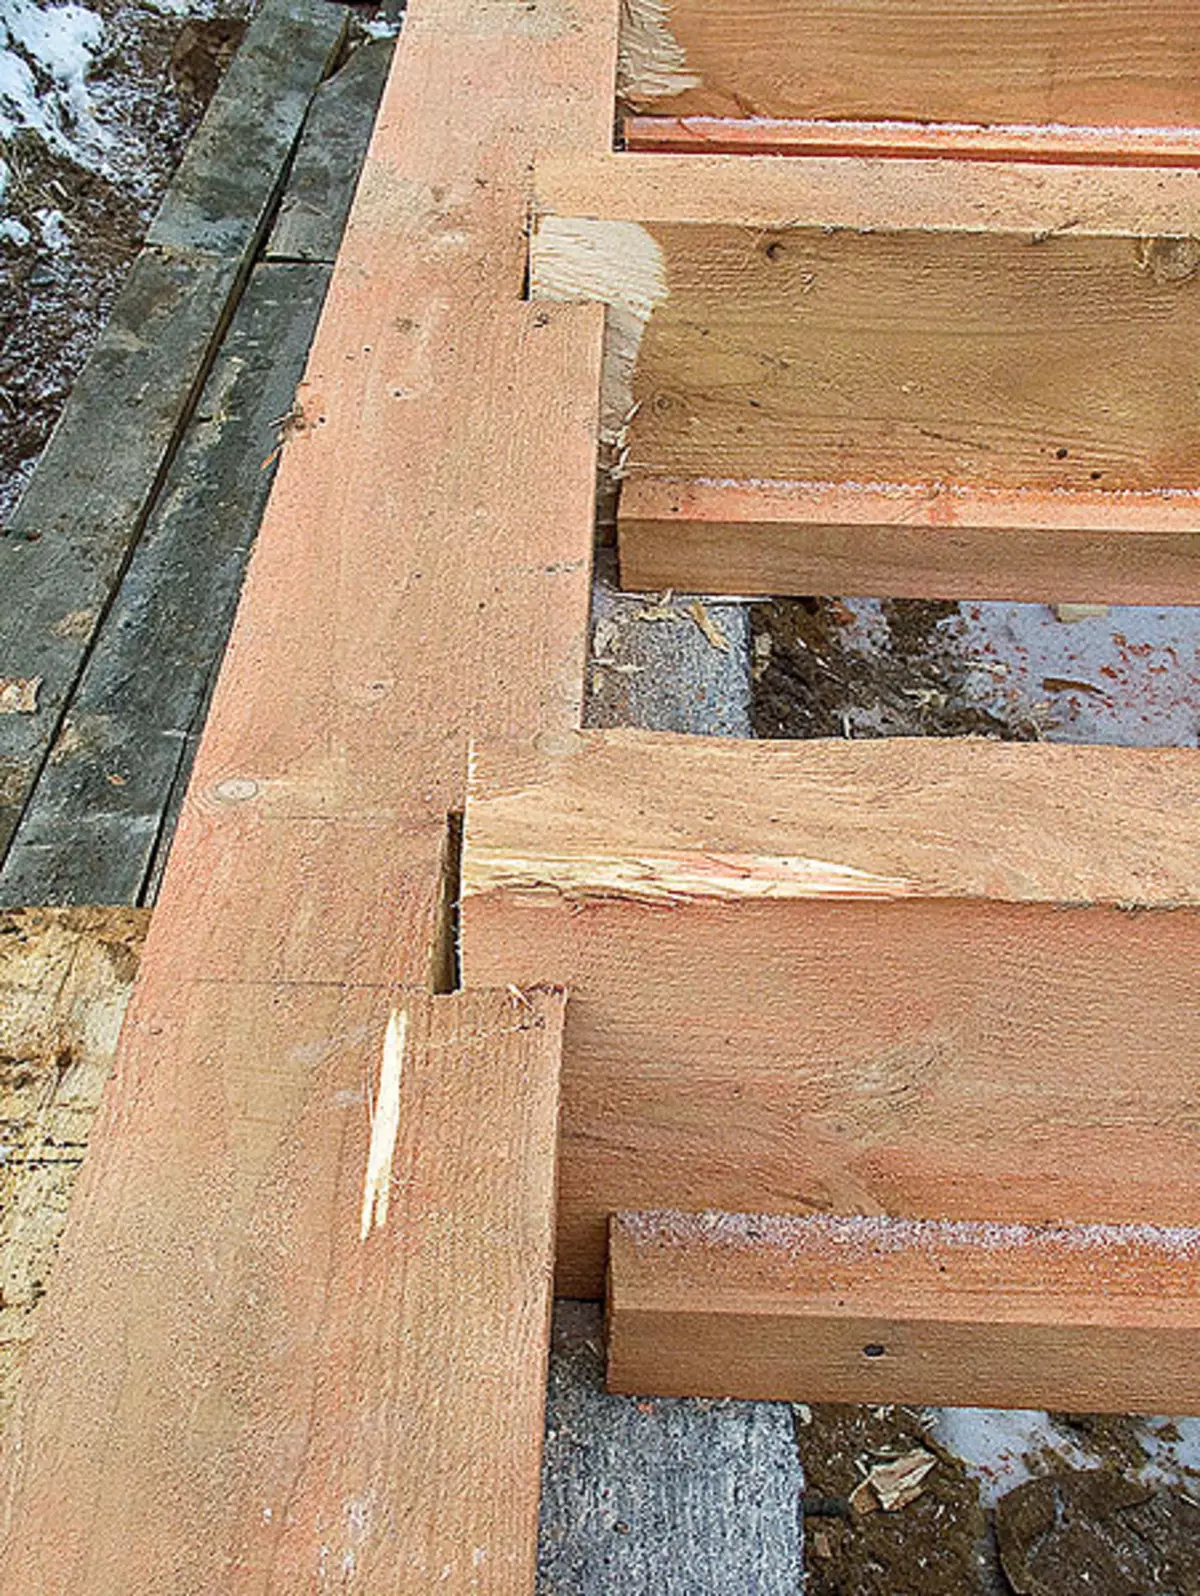
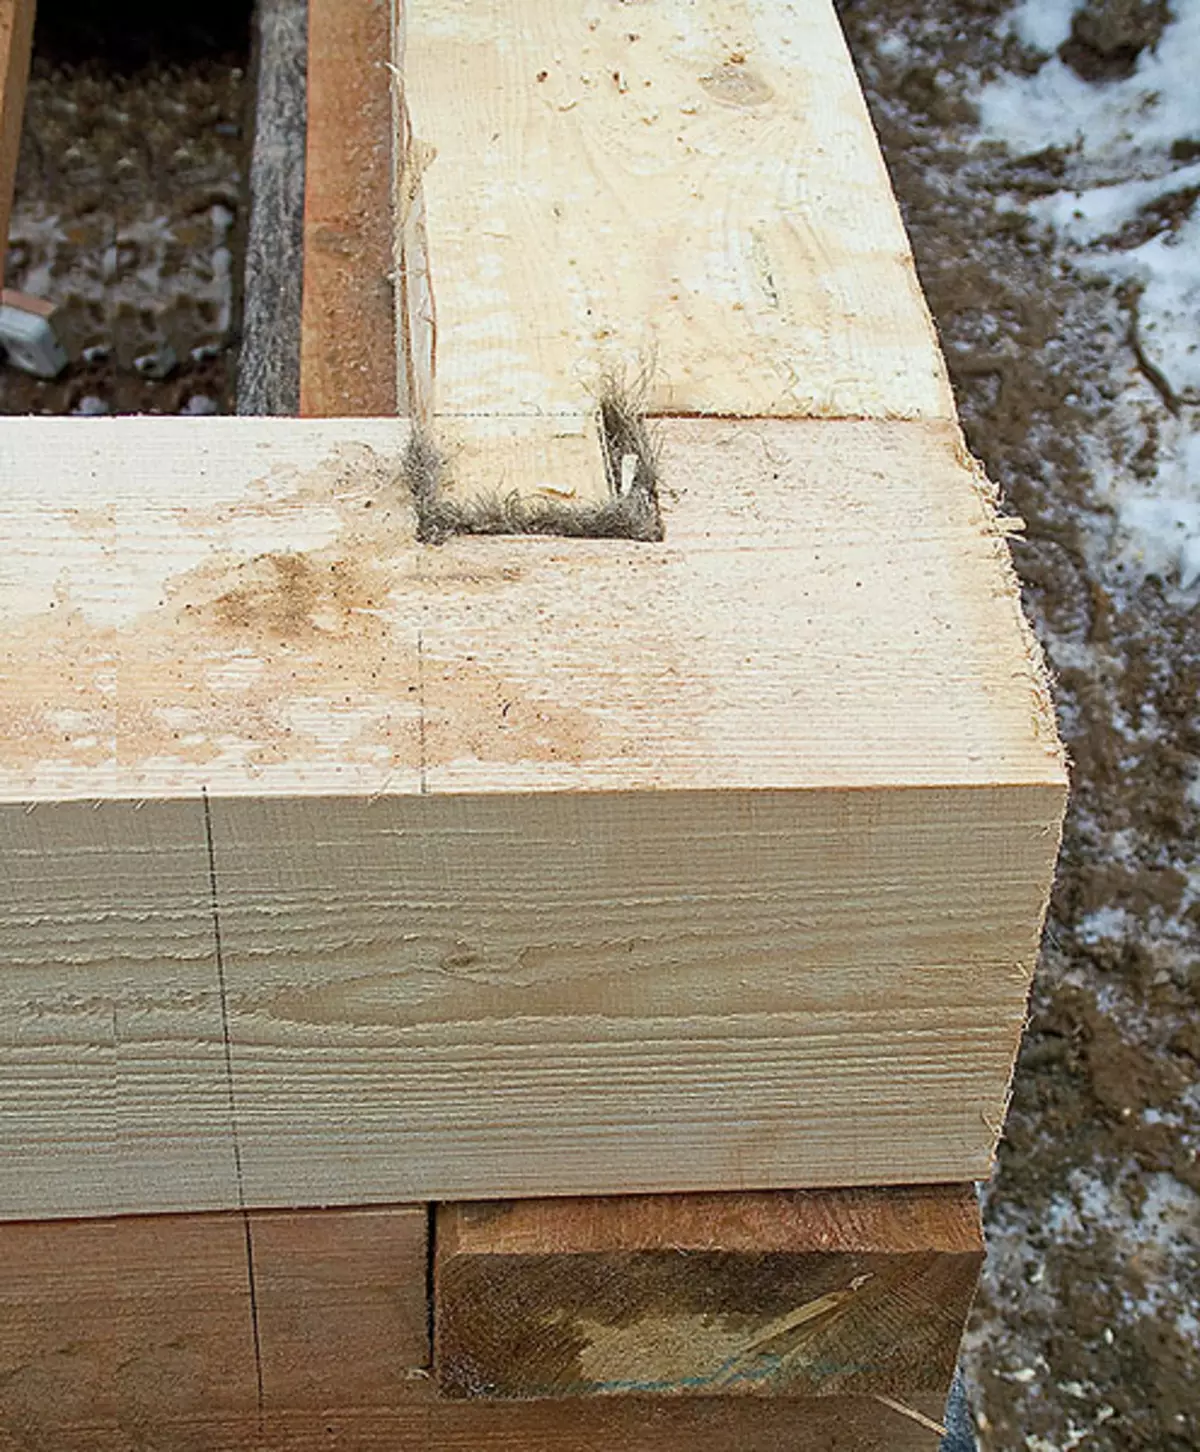
11-13. Connections of the strapping bar in outer angles (11), the interface of the external and internal walls (12) and the splicing in length (13) was performed in Poledev.
Naturally, the growth of the house did not end. Accuming the required amount, at some distance from the winter (heated) of the heared, "twins" was erected by a lighter summer (unheated) expectation, which was combined with the winter to one structure with the help of new genes located between them.
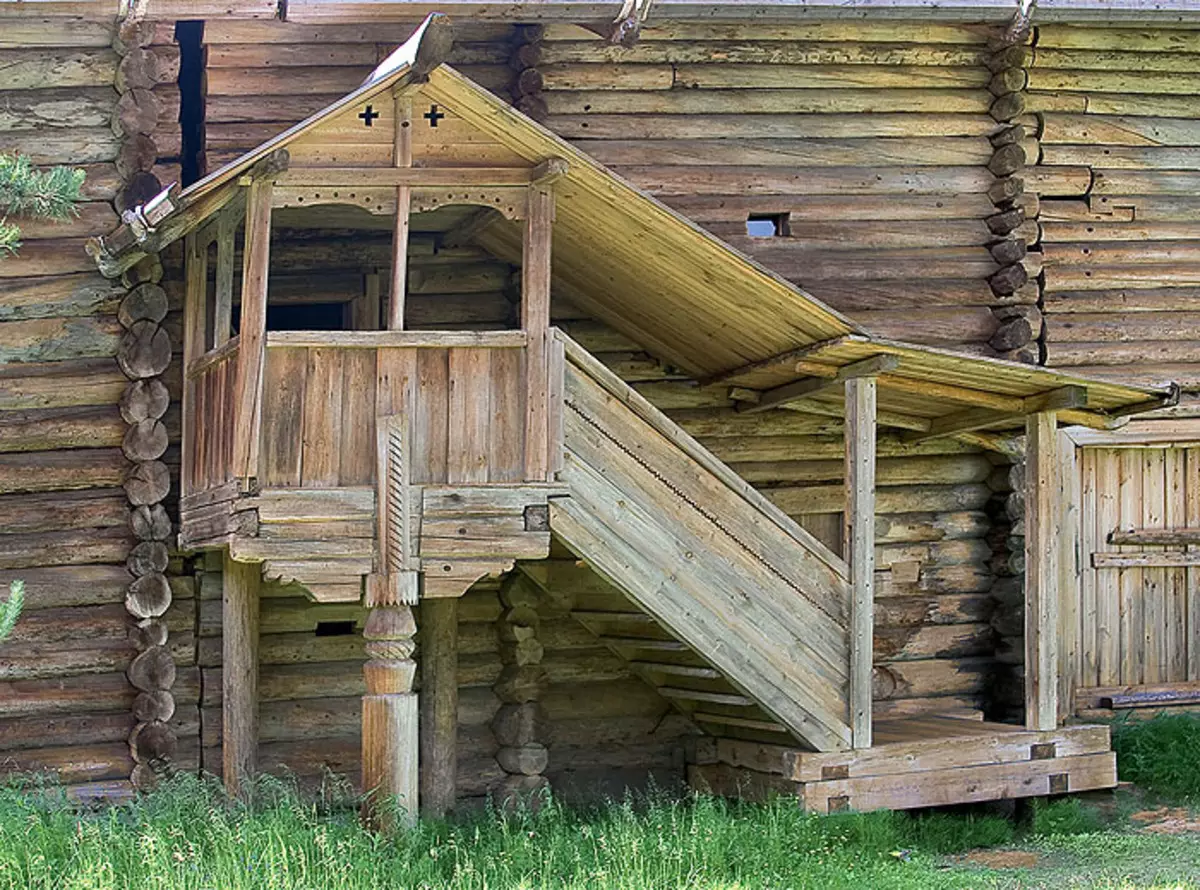
By the way, the design of the latter is very curious. Their floor was restored by one end on a log house of winter huts, another on a log house. Two walls of Seine were "tied" to the firewood of winter and summer, not rigidly, but, speaking in modern language, on a sliding landing, so that both horses could "move" during seasonal soil moves independently of each other. An aqueous of two walls of Seine arranged the main entrance to the house, decorated outside the porch on an independent support and having his own roof (this design protrudes beyond the walls of the building, like a bird's wing, "porch", hence the name). Yvsa, the newly additive parts were leaked under one roof with an old house.
| 
| 
| 
|
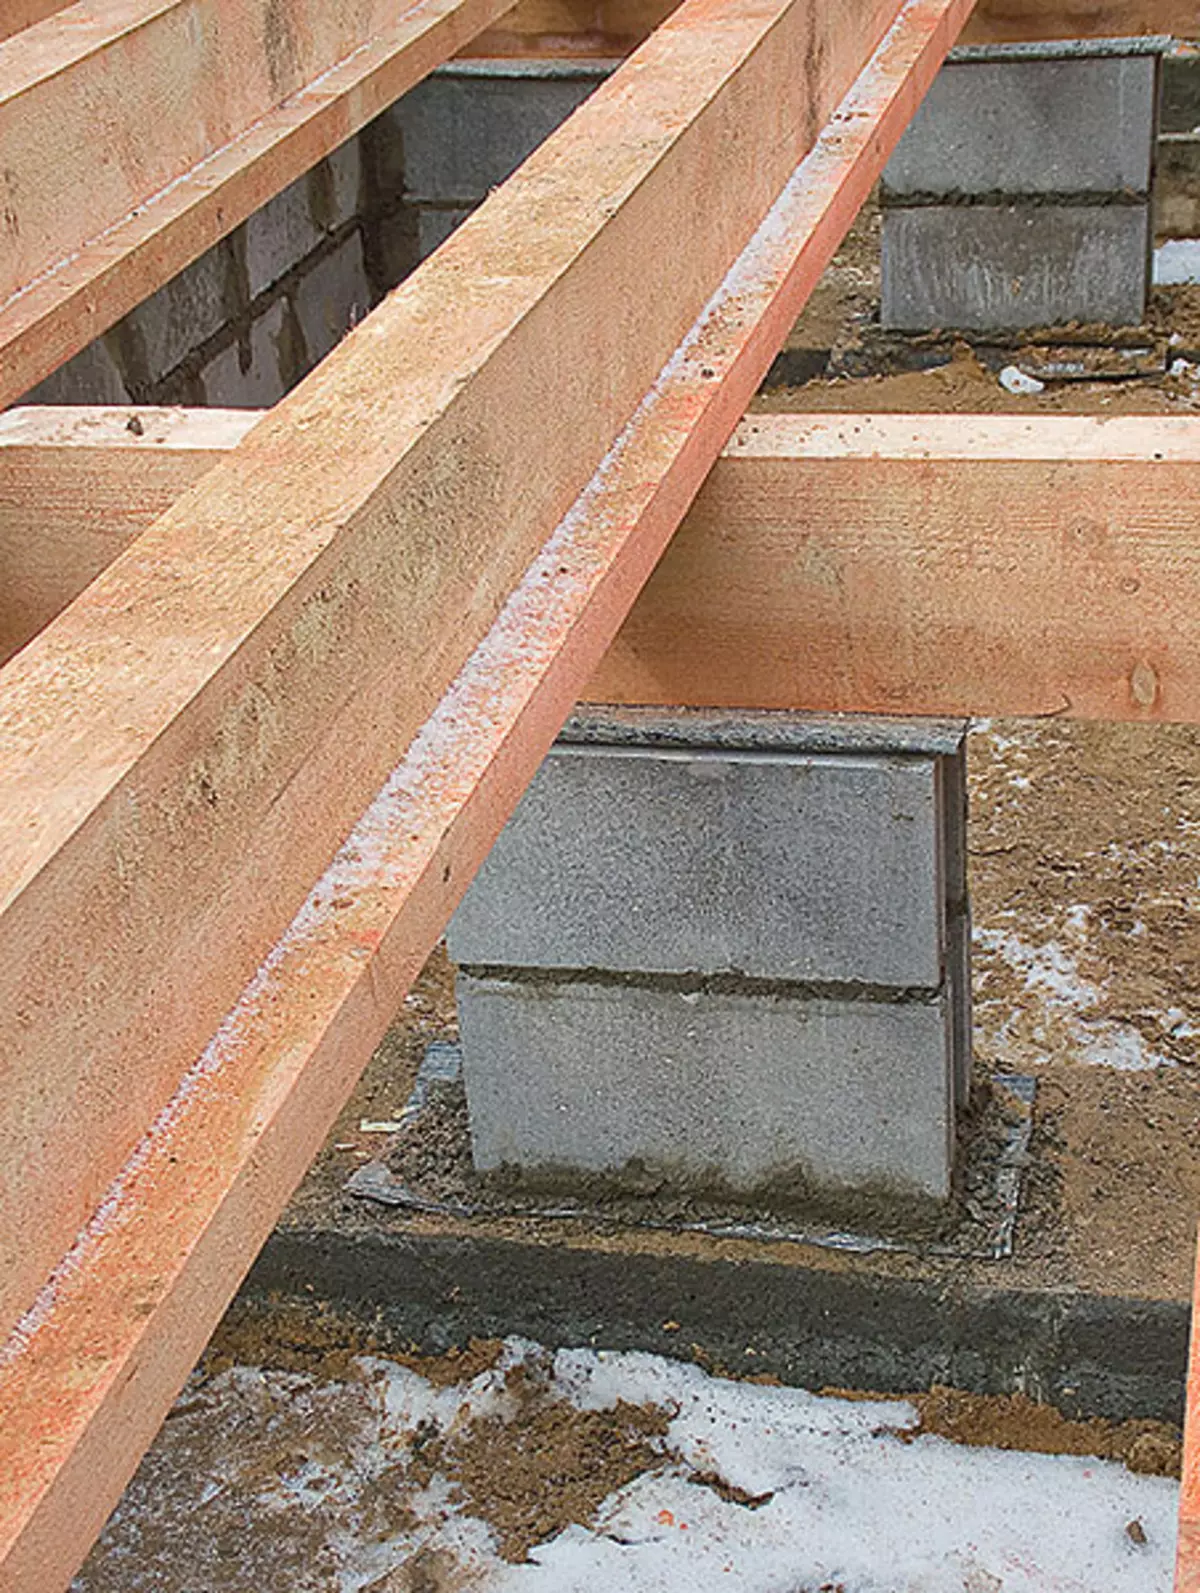
14-17. The lag of the floor lag, resting on the base, was embedded in the strapping bar (14). Extra support lags were otlips (15). They were also allowed to dock the lag in length (16). Free ends were bonded between Bru (17).
Next, the Hitter and Ambar gradually attracted to the summer hide. They, too, were on the cafeterial. Simplening, two-story. Achetoba did not have to wear bags and other gravity on the shoulders, built entry-platforms. Later attracted a hlev and a stable. Over the part of the courtyard appeared, the height appeared, which soon turned into an extension. So with time and the homes of the M-shaped form arose, and then the P-shaped.
It is curious that not only peasant houses were growing, but also the boric estates. At first they built the main house, and then two lateral flagses were attached to it in one style with the central part. For example, in this way in XIX. The house of Sophia Andreevna was erected in a clear Polyana - estate L.N. Tolstoy.
Now, when we looked into the story, we will get acquainted with the modern process of building a growing house. He was designed and began to build in one of the Moscow region settlements ABS-Stroy (Russia).
| 
| 
| 
|
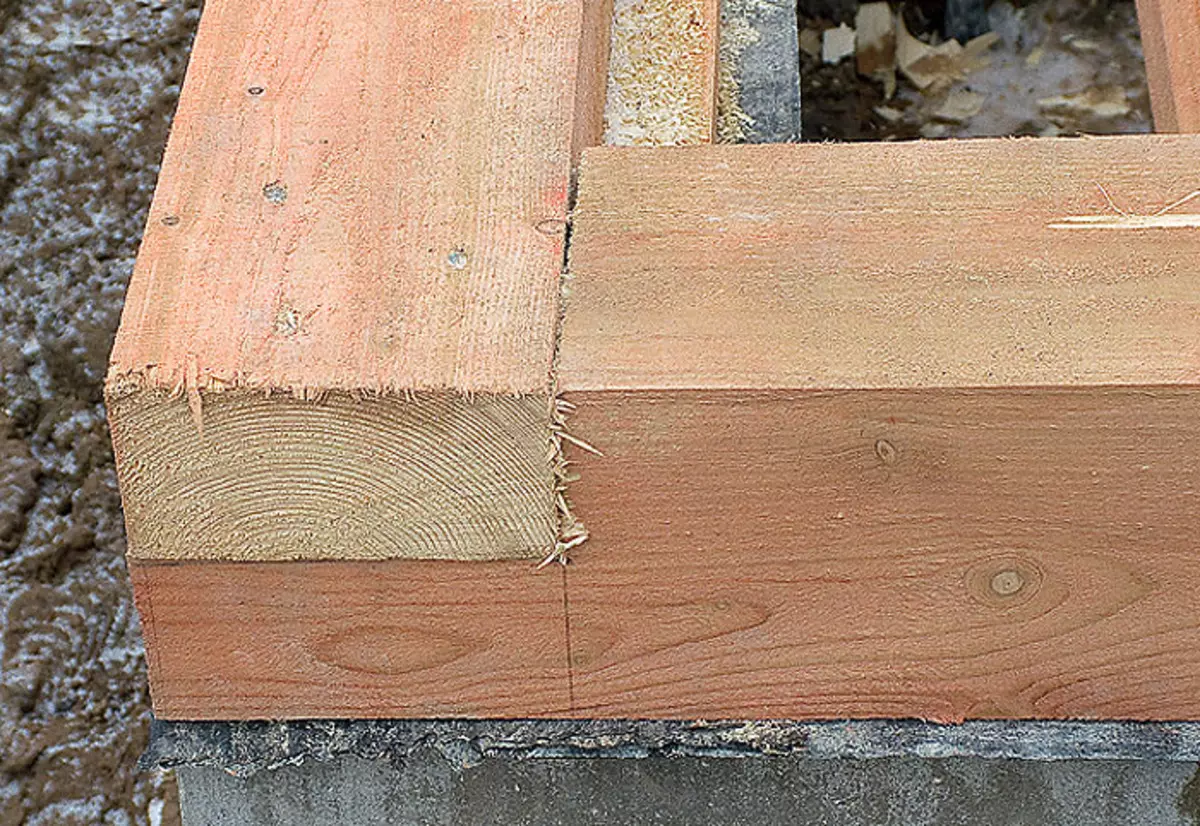
18-21. The compound of the bar on the outer corners of the cut was produced in the indigenous spike (18). The same corners on the interior walls of the house were performed in Polterev (19). The interventory insulation served as a flange cloth with a thickness of 5mm (20). They also wrapped the wooden knaps used when connecting timber in length (21).
Old ideas new lifeSo, we formulate two basic principles of the growth strategy, developed by our ancestors, in the language of modern technologies. Principle the first: Increasing the box at home is needed using lightly inspected modules. The principle of the second: the roof must be collapsible and preferably transformable. Using the capabilities of modern building technologies, it is quite possible to try to build a house that is capable of growing not only in width, but also in height.
I liked the idea as a whole to designers, and they immediately began to develop it for a simple and fast implementation: "Let's try to start with a small house and when you grow up the module, we will assume a whole floor over which you will arrange insulated overlap (on the first floor - with a flooring ). Above a cold attic. The rafter system will collect on metal-elements and self-testers. In order to succeed in inexpensive, the walls are erected from the cluster of natural humidity, they will and the superstructure of the house will stand, and the side extensions to them are not difficult to dock. For the base device, we will apply a well-proven tape constructing technology. The fine-breed foundation. It will endure both one-storey and two-storey house, and if it is necessary to increase the building in the width, it can be relatively easy to increase, it's enough to "rush" the reinforcement of the new foundation into the body of the existing one. Ichtoba this house as a result did not resemble the design of dubbed cubes, and It looked over and harmoniously, it is necessary to develop a project, In which all changes are thought out, planned and painted in advance and painted. "
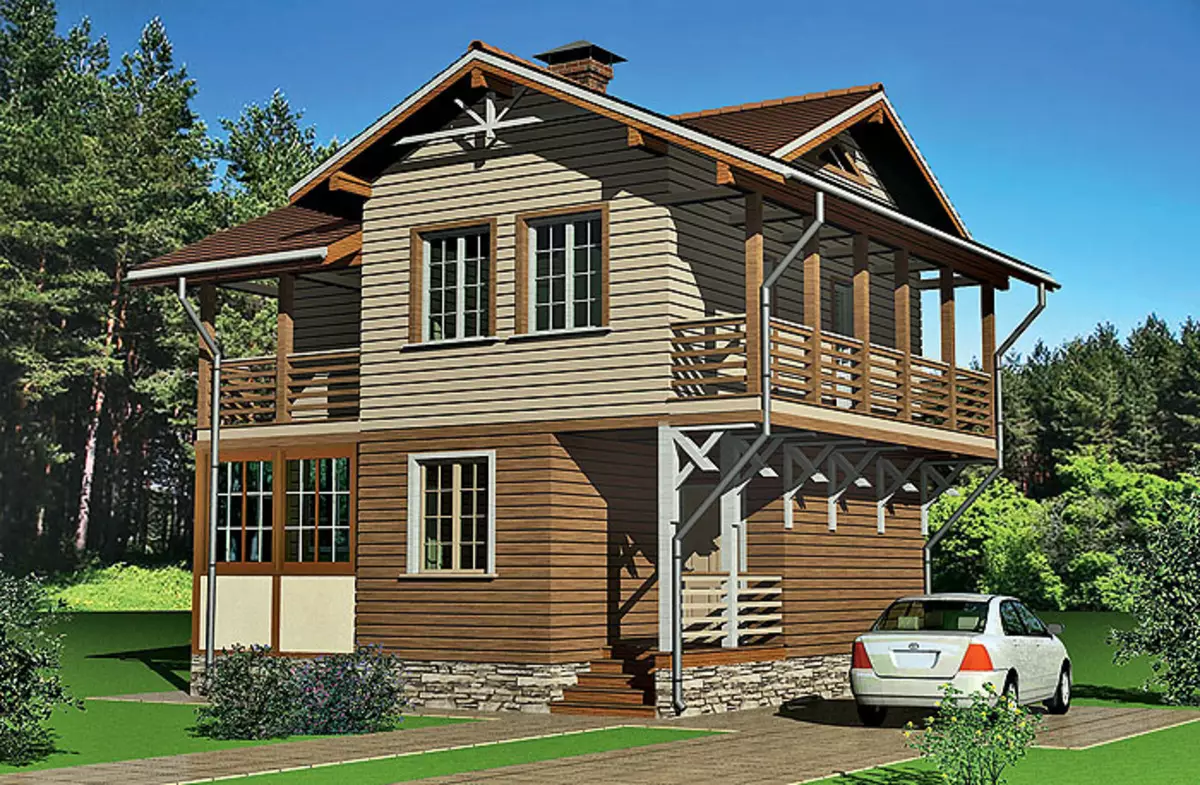
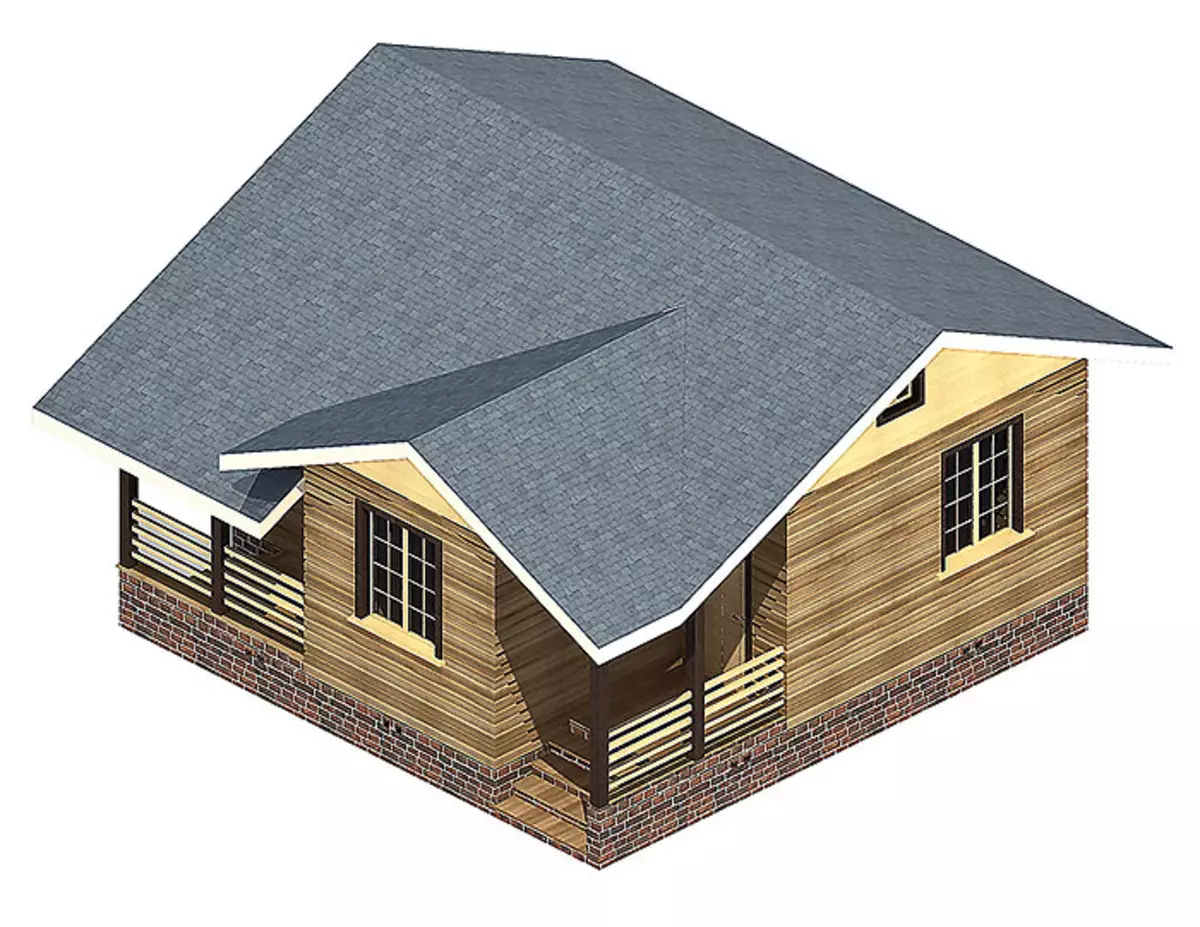
So the project of the house "Golden Key" originated. He should have been built in two stages. A results of the first of them grew a single-storey building with a total area of 50.8m2; As a result of the second, its metrah increased to 105m2. If the owner is desired, the third stage could be provided, in the process of which one or two covered (probably insulated) veranda will be attached to the house.
The customer was surprisingly quick. Carefully having studied the project and informing the idea of the idea, he happily exclaimed: "We will build! This is exactly what I can afford now, considering my financial opportunities! " In the courtyard was February, and in mid-March, builders began to implement the project.
What and how the barbed in the wall vertically connected
| 
| 
|
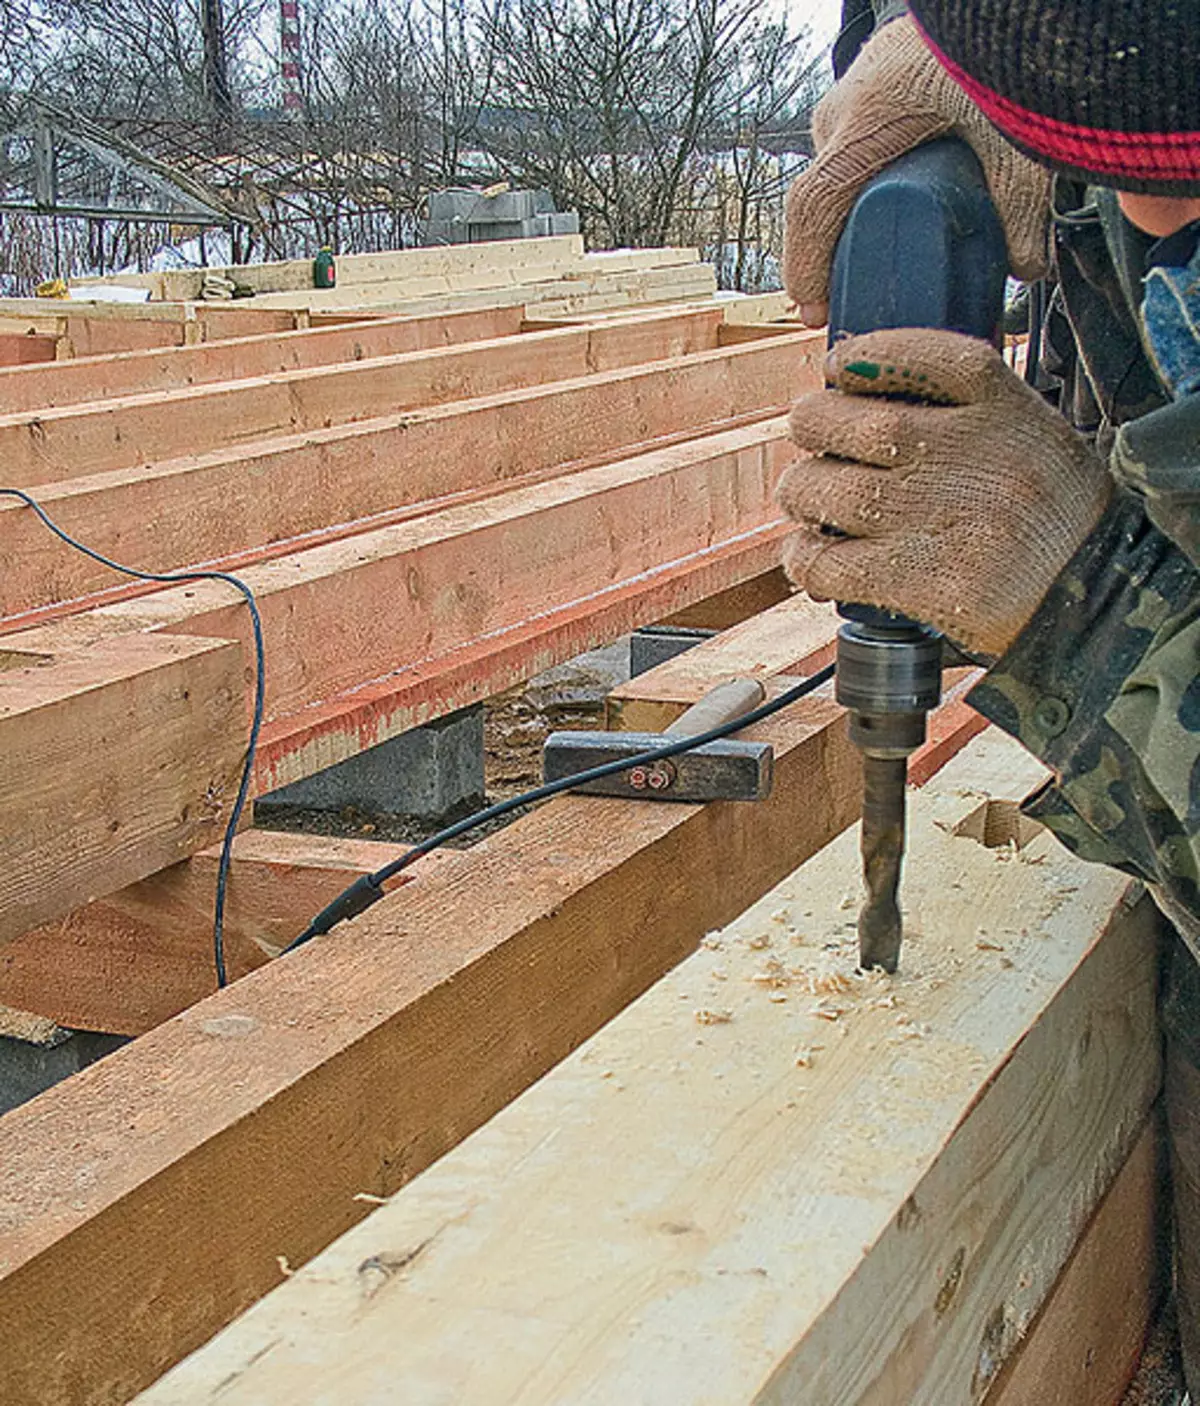
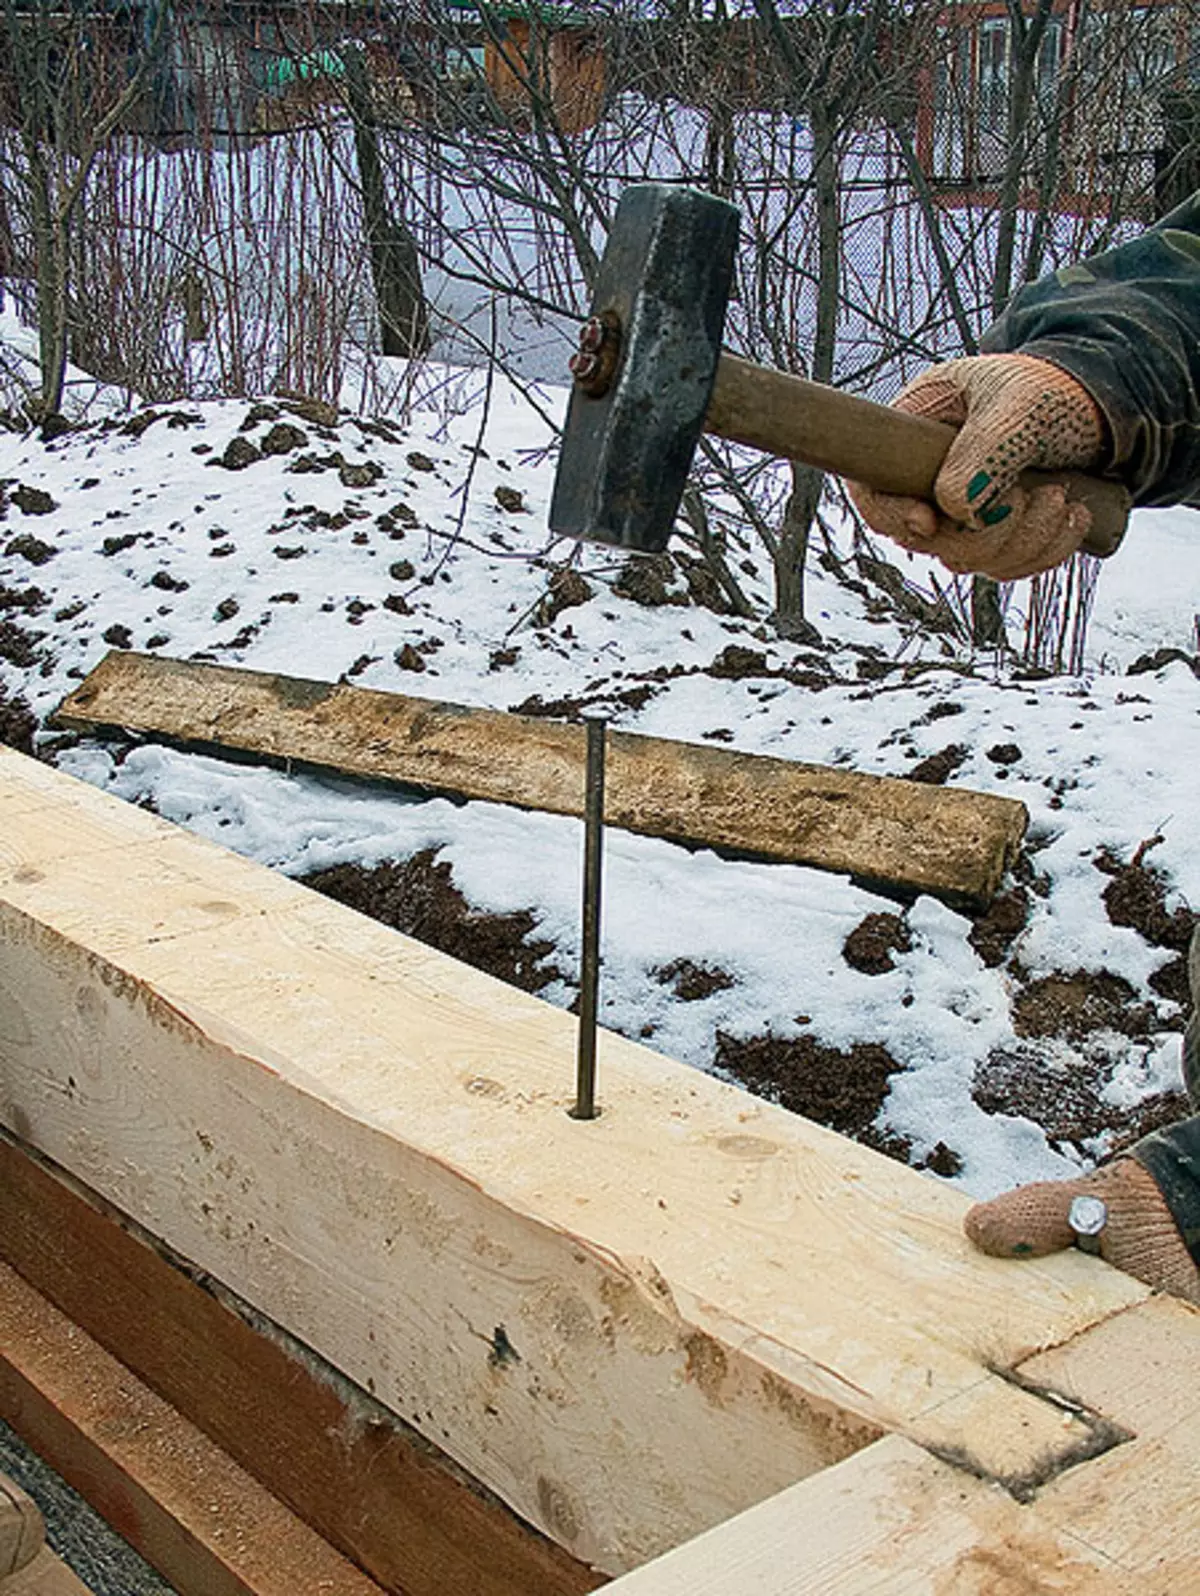
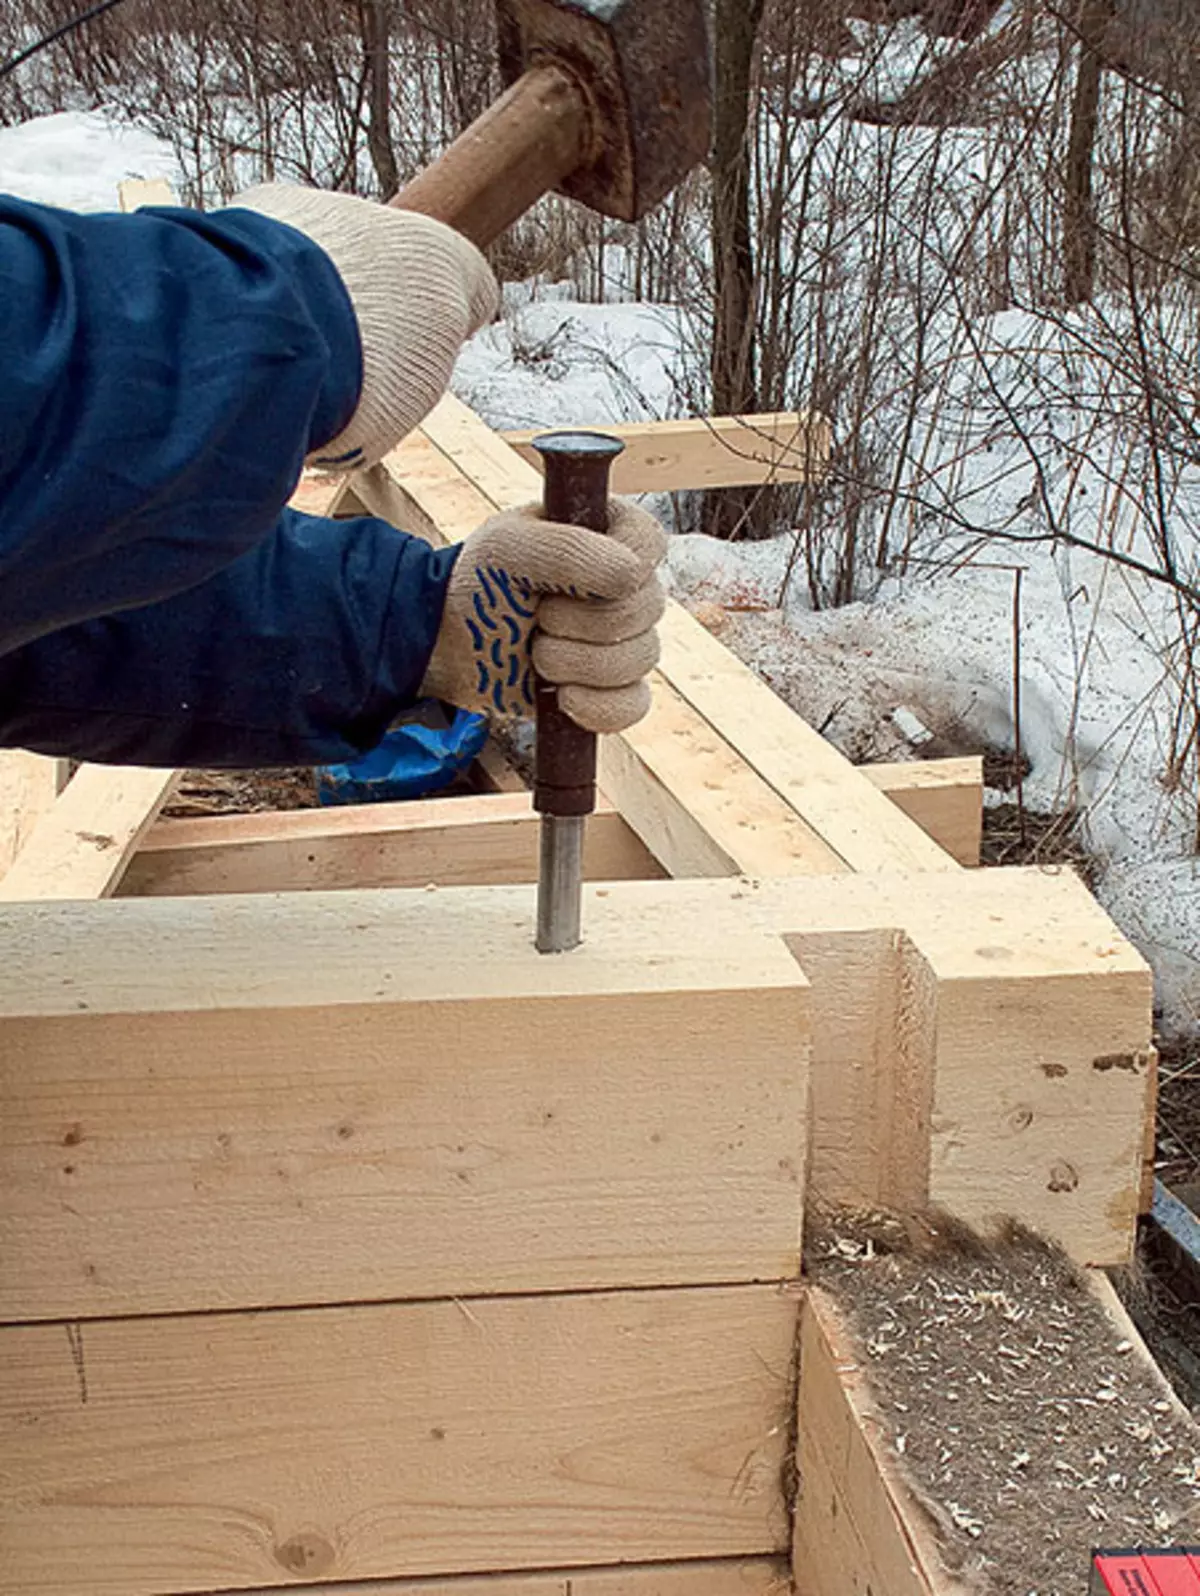
22-24.This faces laid in the wall of the wood of natural humidity were not disturbed and did not twisted during drying, they were brought together by vertically with metal naughty-nails with a length of 250 mm (these products allow SNIP2-25-80). To do this, in each bar with a step of 1.5 m, the holes with a diameter of 15mm and a depth of 30mm (22) were pre-drilled. Then they knocked up the naughty nails (23), whose caps are drowned to the depth of the drilled holes (24).
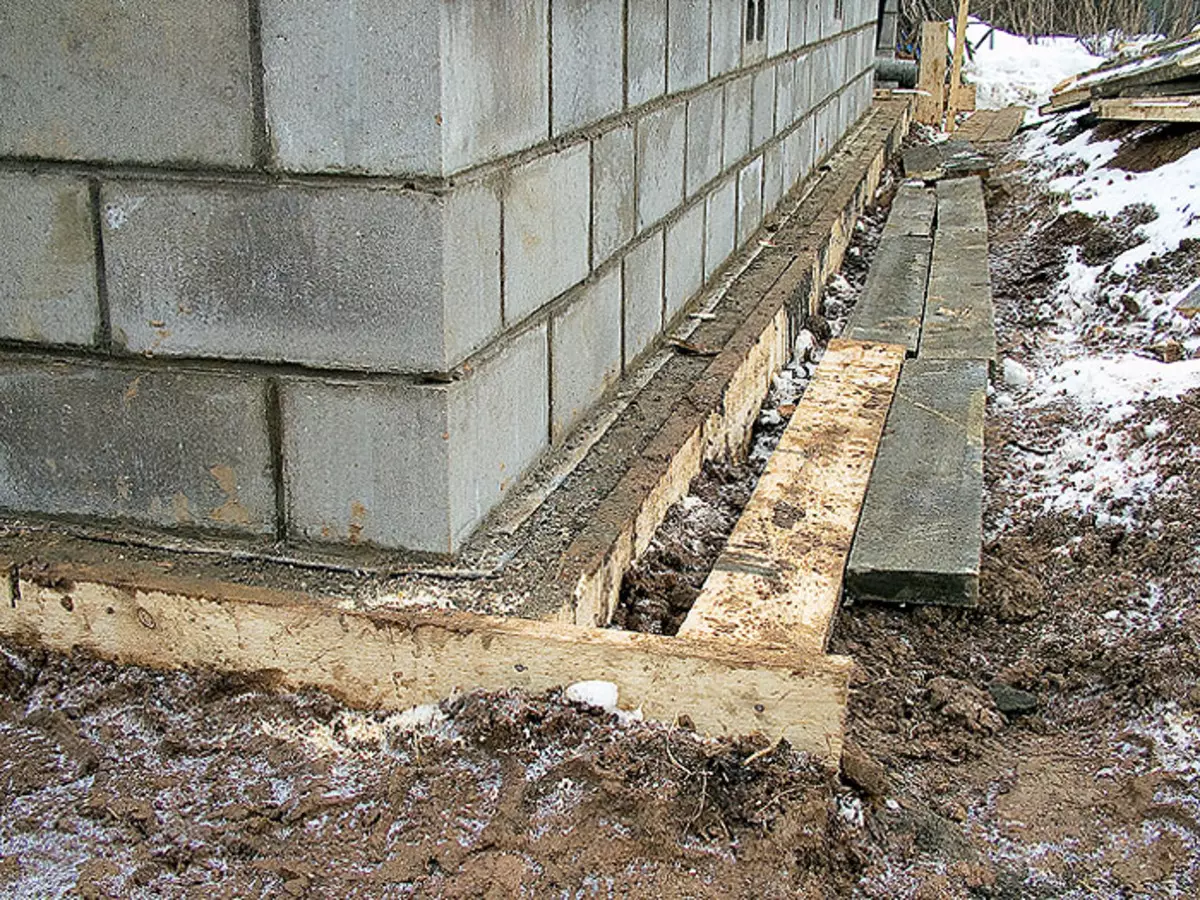
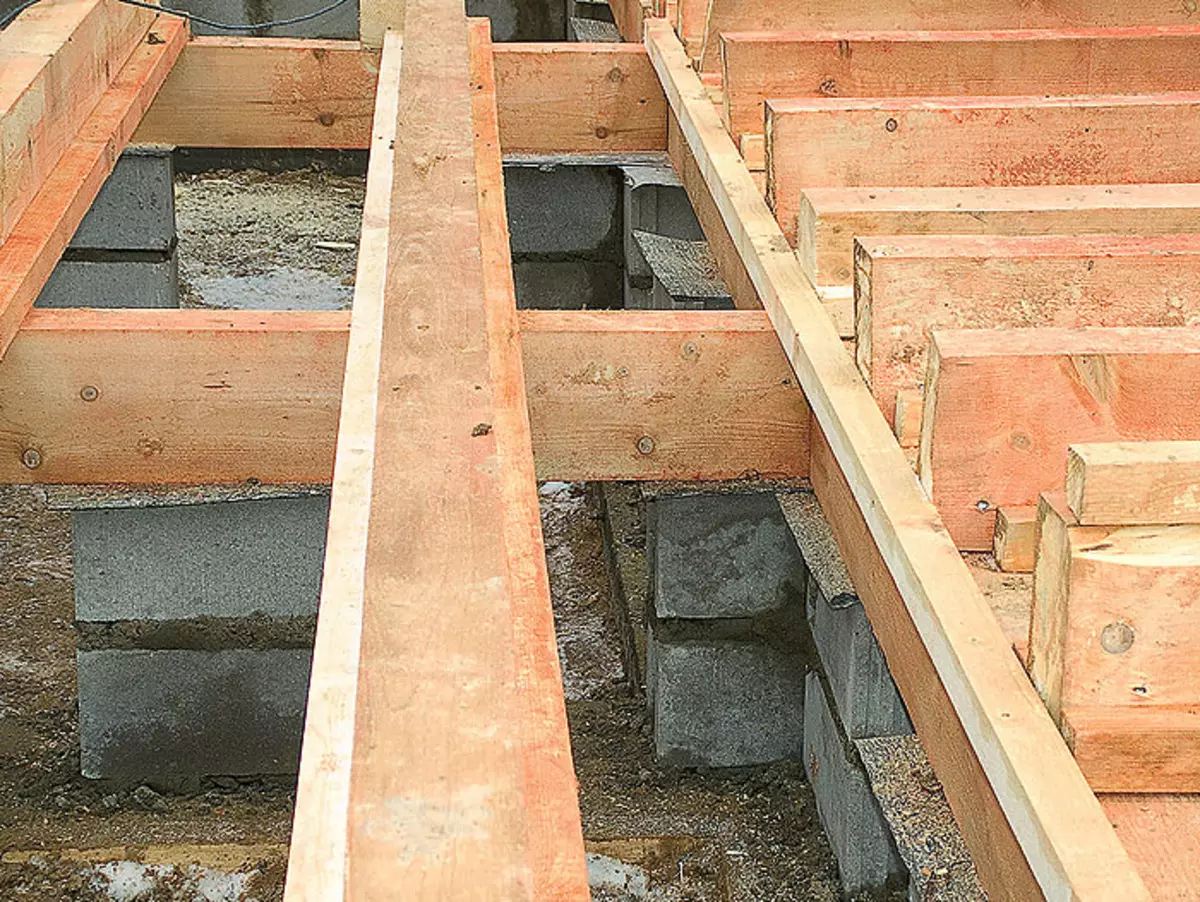
Perry stageFoundation. Since the ground on the site was a bunched, small-breeding foundation approached as it is impossible. For its device, a trench was pulled by a trench with a depth of 90cm and 50cm wide, in which a dense sandy pillow with a height of 30cm was made. Then in the trench installed a milking formwork, thoroughly putting it up at the level of the upper edge of the future foundation. Of course, all this took a lot of time, but significantly simplified the process of controlling the level of concrete during its fill. The barcask placed the reinforcement frame (four longitudinal reinforcement threads with a diameter of 12mm, related to the horizontal and vertical sections of the same reinforcement), after which the concrete tapes were cast 400mm wide, which rose over the ground about 10 cm.
After a day, when concrete acquired a certain strength (at least 15kg / cm2- in practice, this means that, if you step onto its surface, the trace does not remain), along the perimeter of future walls (for waterproofing), the base from hollow concrete blocks of 400200200mm was laid out. So that the space under the house was ventilated, in the upper row of blocks created production (one under each indoor room and two under angular rooms), for which concrete blocks laid the side. Under the inner walls with a step of 1.5 m posted columns from the same blocks.
On top of the base blocks, another layer of waterproofing was put on top, and the strapping reinforced with an antiseptic cross section of 150150mm. Under the inner walls, the so-called divisions with a cross section of 200150mm placed on the waterproofing layer was placed. While the preparation of the base was preparing, the foundation concrete just scored 50% of the design strength (it was required to start erecting the box at home).
| 
| 
| 
|
| 
| 
| 
|
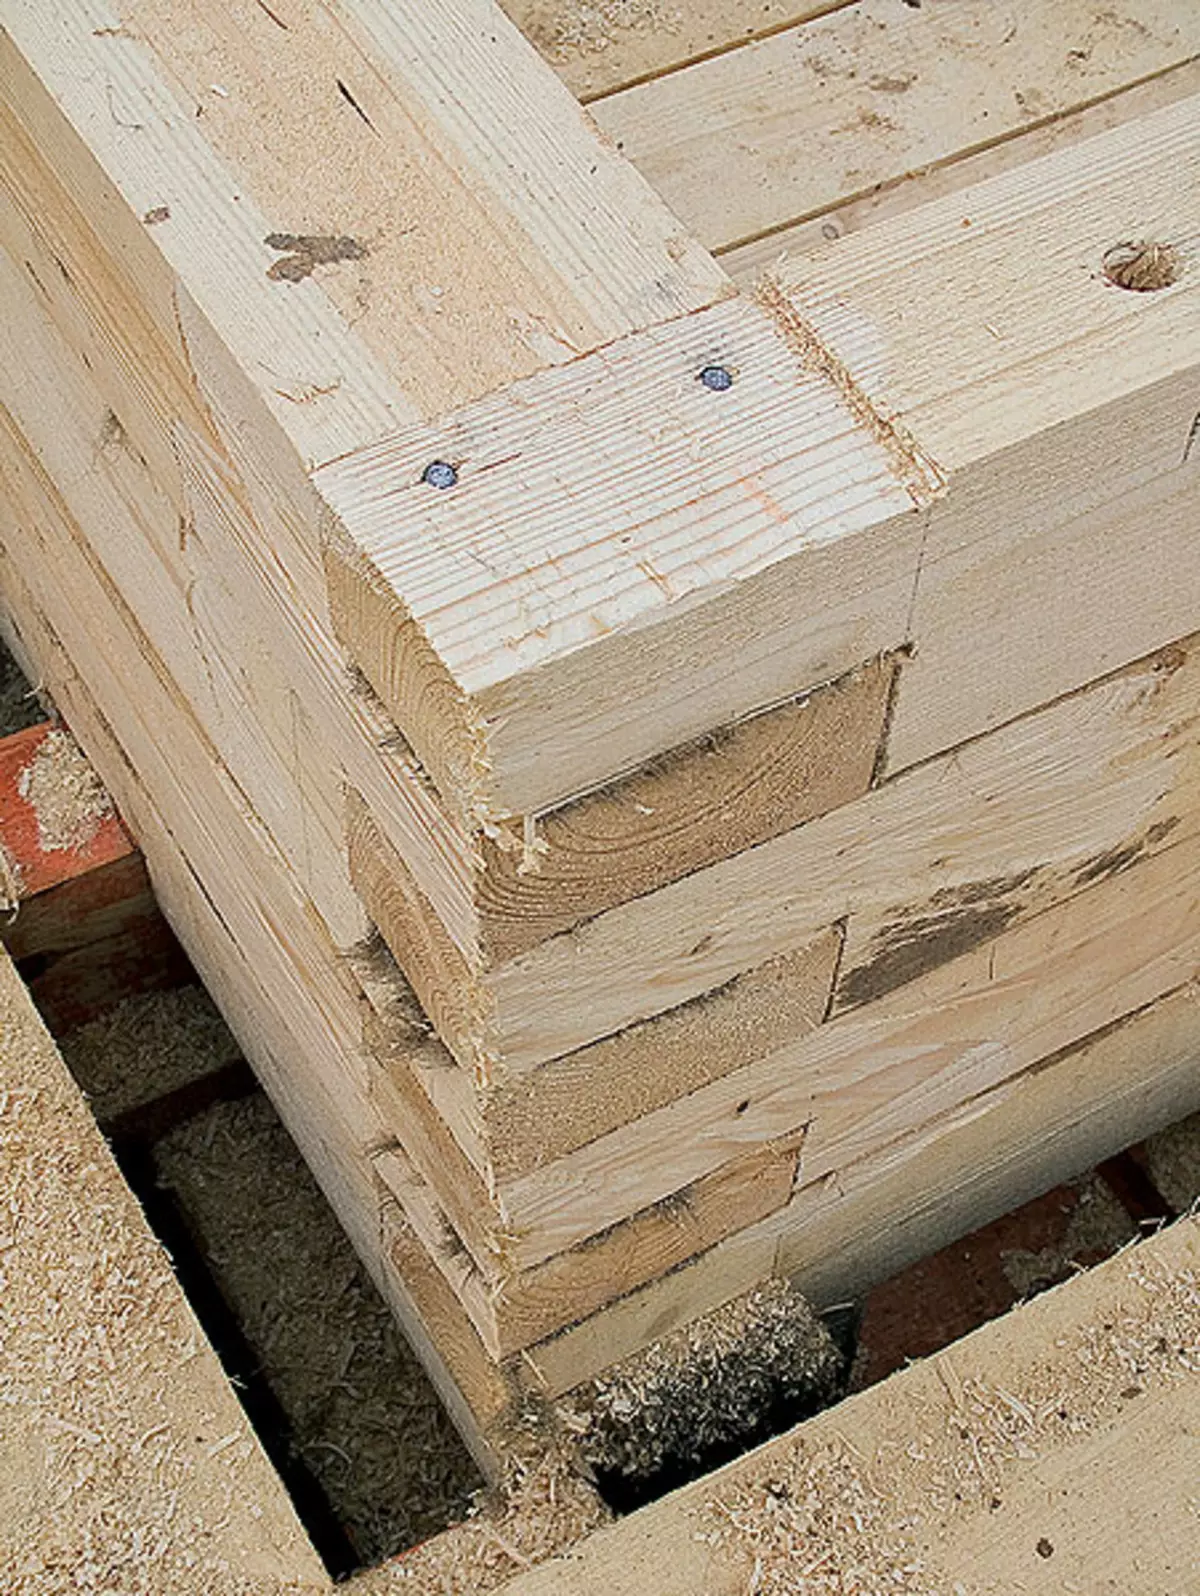
25.The Walls fastened with external in Poledev every two crowns.
26.This when shrinking the construction of the house retained sufficient strength, the openings left "dressings" from a solid bar: in the door- on the third and tenth crown (otherwise it is impossible to walk inside the house), in the window- every 2-3 crowns.
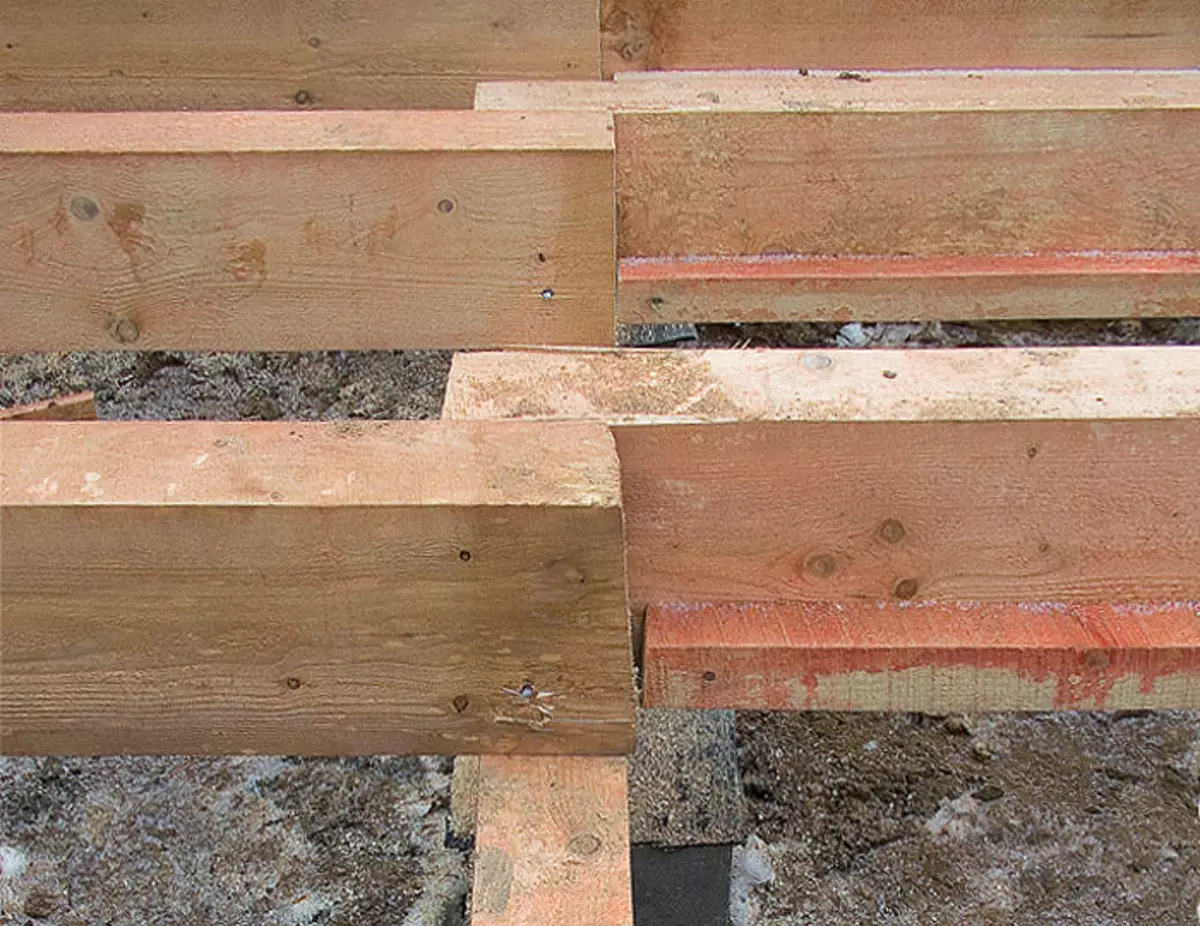
27. The first floor of the first floor was created from a bar with a cross section of 150150mm. Both ends of the beams installed in a step of 60 cm are firmly embedded in the upper wints of the walls (the depth of the cutbox should be at least 50mm). At the same time, the beams of overlaps over adjacent rooms (openings) during docking with the inner wall were placed in a checker order.
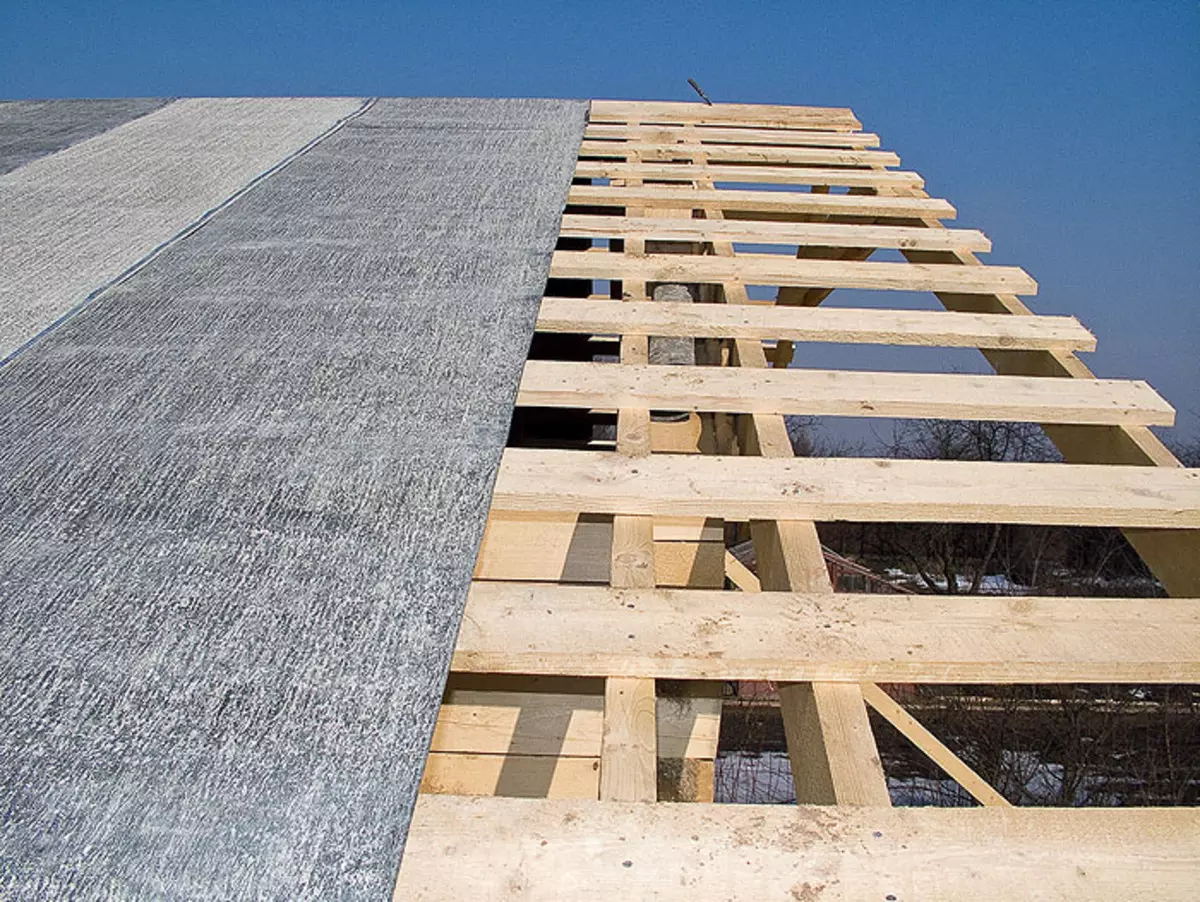
28.The survy rafter screws with a certain step to secure the crate of a 12525mm-treated board with an antiseptic board. There was a temporary coating on it: two layers of rubberoid.
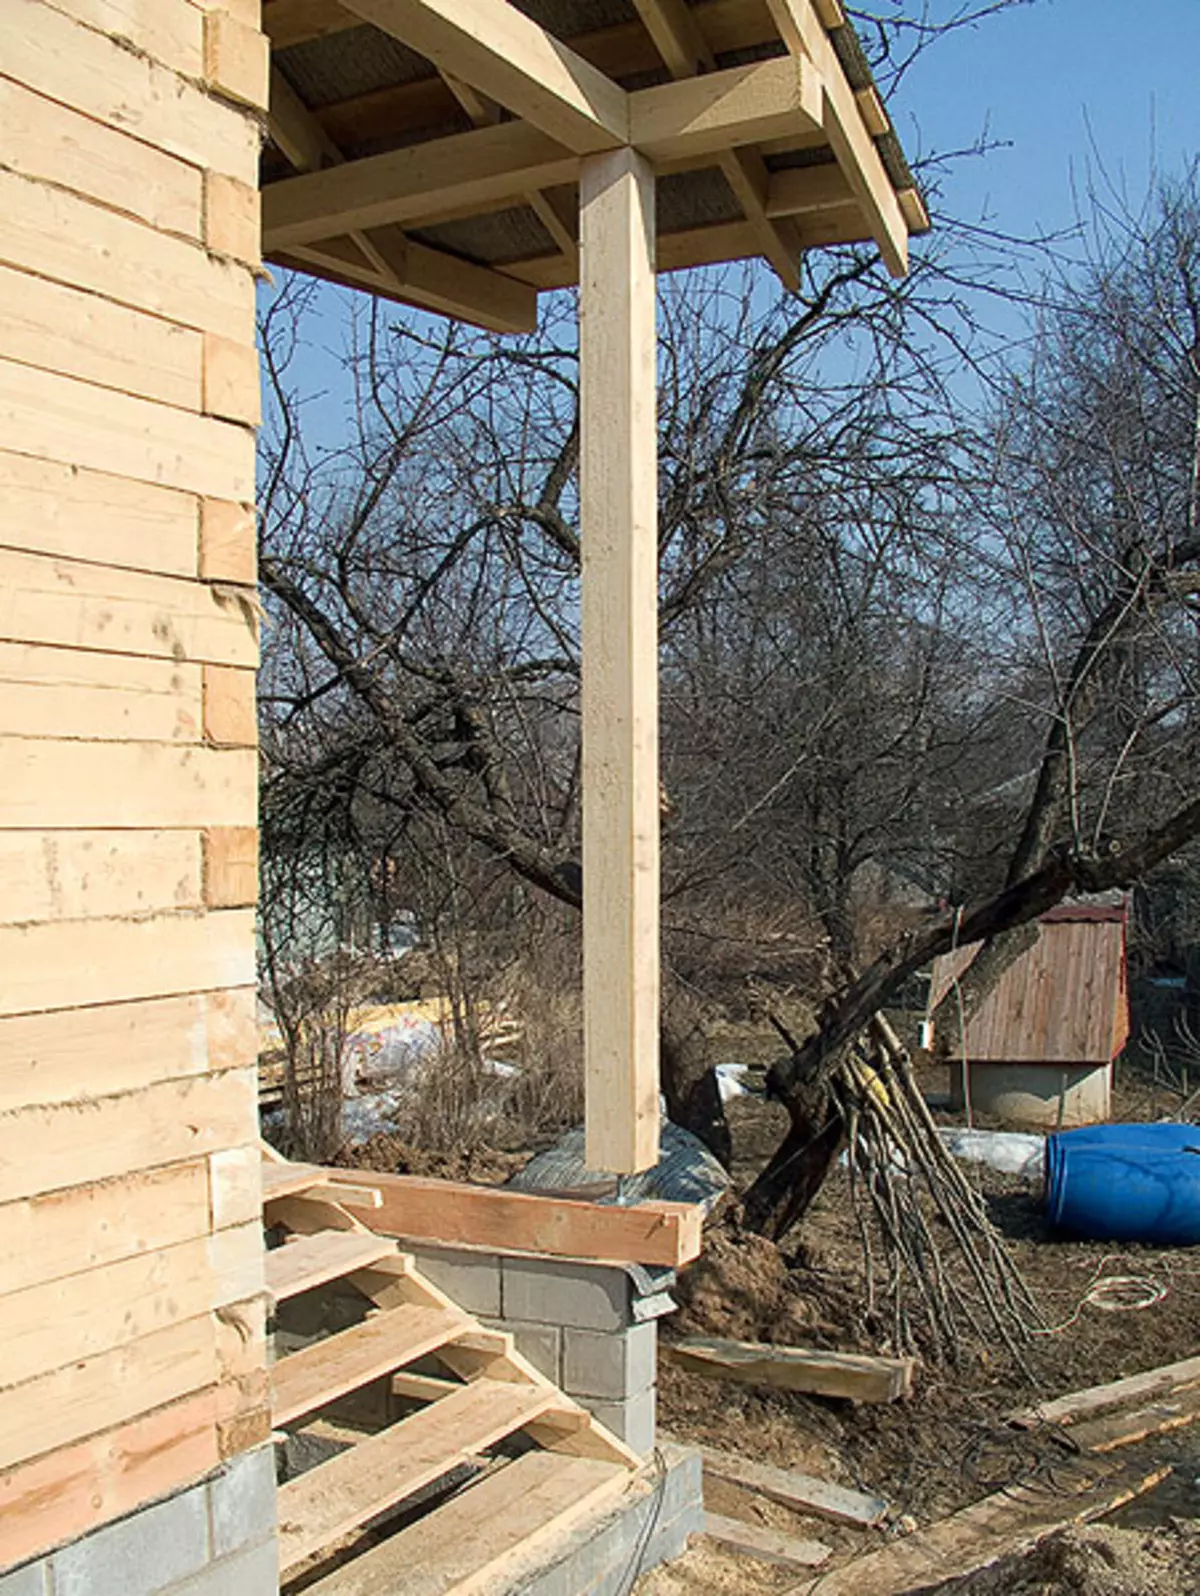
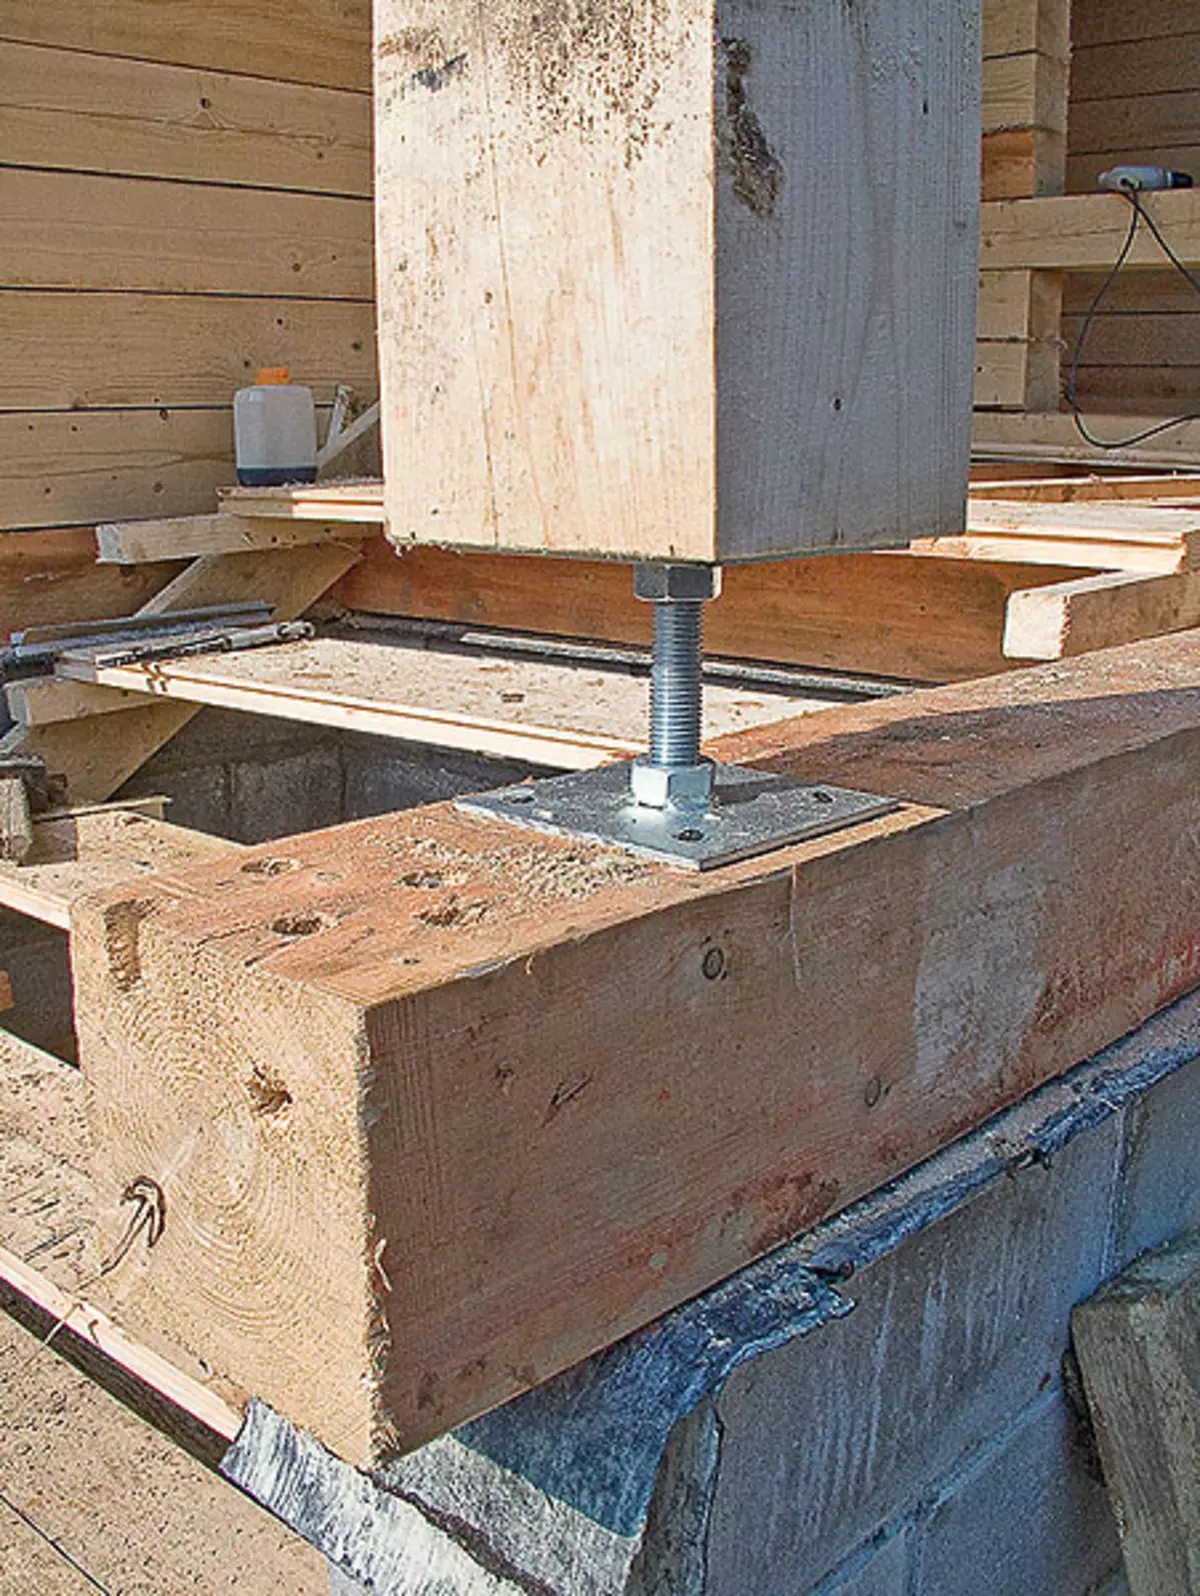
29-30. On the porch and veranda instead of temporary supports installed constants (they were made from the same wall timber), which were provided with a screw jack. For convenience, it was located at the bottom of the pillar.
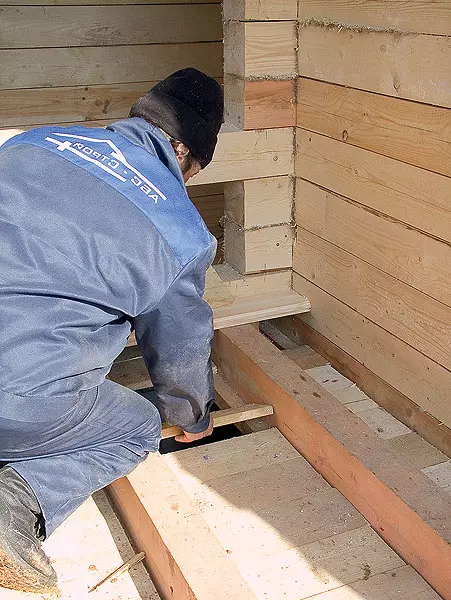
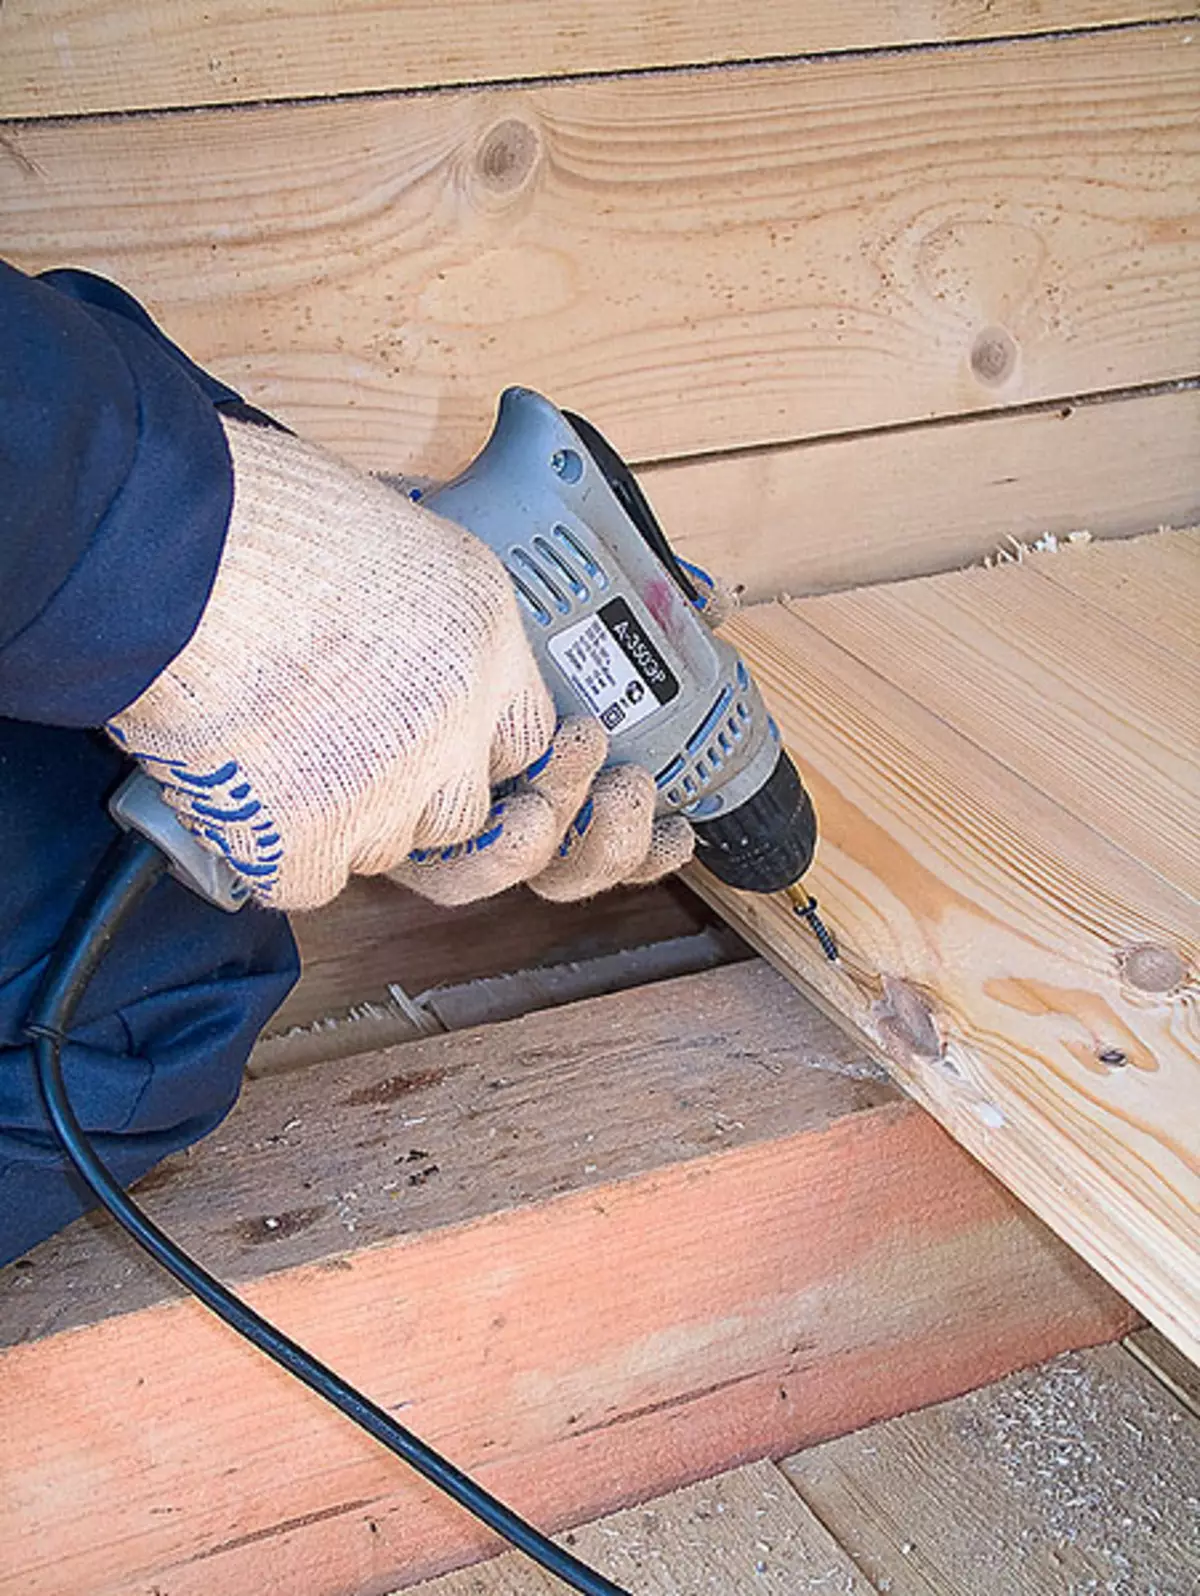
31-32. In the cranial bar, stuffed along the bottom edge of the floor of the floor of the first floor, laid the short black floor boards (31). Next was the clean floor, consolidating with self-made each fifth board (32). When the tree is dry, the floor will be spent.
Ground overlap. The technology of creating a base overlap from a bar with a cross section of 150100mm is quite clearly shown in the photos, so we will not describe it in detail. Let us dwell on two installations.
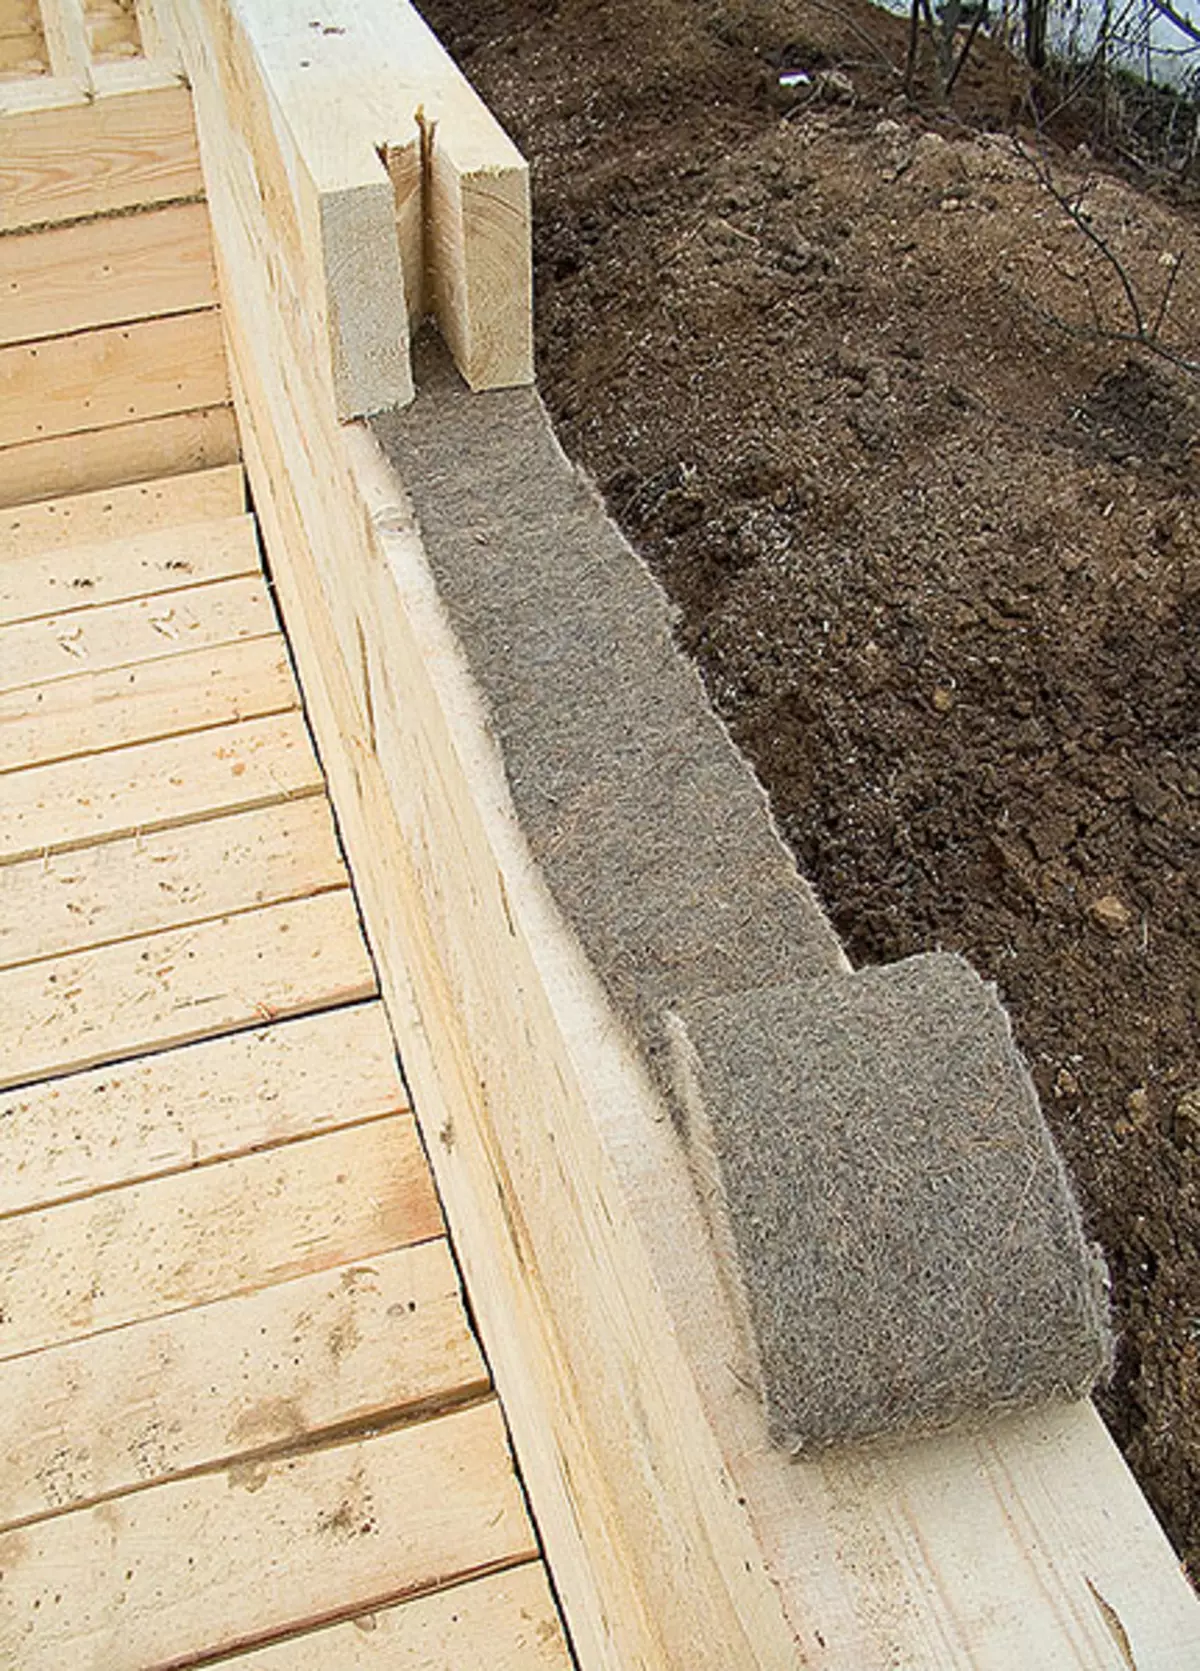
Reception first. Floor lags, parallel to the outer walls, was presented not close to them, but at a distance of 50-100mm. A tendable space when finished can be placed insulation so that cold air from the sample does not arrive. If you wish, the lags are installed further from the wall, but in this case, a bar is nourished to the wall at the level of the upper plane of lags, which will be an additional support for the ends of the boards (they should not hang over the edge of the lags by more than 100mm).
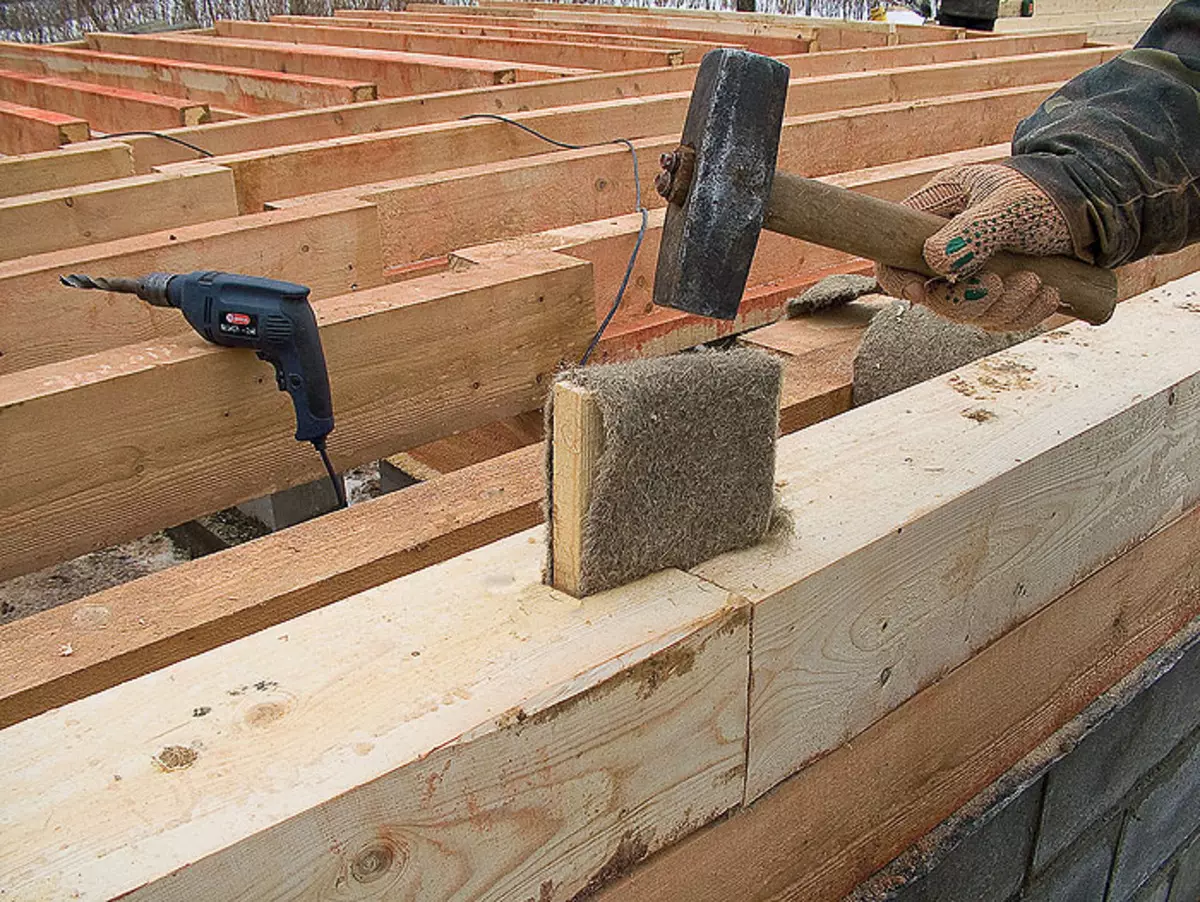
Reception second. All compounds were mandatory separated by a flask-like web, which makes it possible to air them, and also serves as a heatel. This technique was used when building walls.
Construction of the box at home. The walls of the house collected from a natural humidity bar with a cross section of 150150mm. Vertically, the crown crowns were built with metal brands. Over the finished walls of the first floor, the overlapping was arranged, and then elevated the lines of the owners with the consent of the owners, there were temporary roofing coating, two layers of rubberoid. Under it, the house is quite capable of sadding for 2-3 years, and after this time, the hosts are going to begin to begin the second stage of construction. The log house was left until autumn, it is necessary that the tree can dry and shrink the building. Tomple after this builders will begin finishing work.
When they are scheduled to remove the finishing floor on the first floor, insulate the overlap and again the floors. Similarly will be done with the overlap of the first floor. Next, warm the walls of the house outside, after which it will perform the outer, and then the inner finish using the material selected by the owner. At this, the first stage will be completed, and the owners will be able to play the long-awaited housewarming.
Collapsible lines system
| 
| 
|
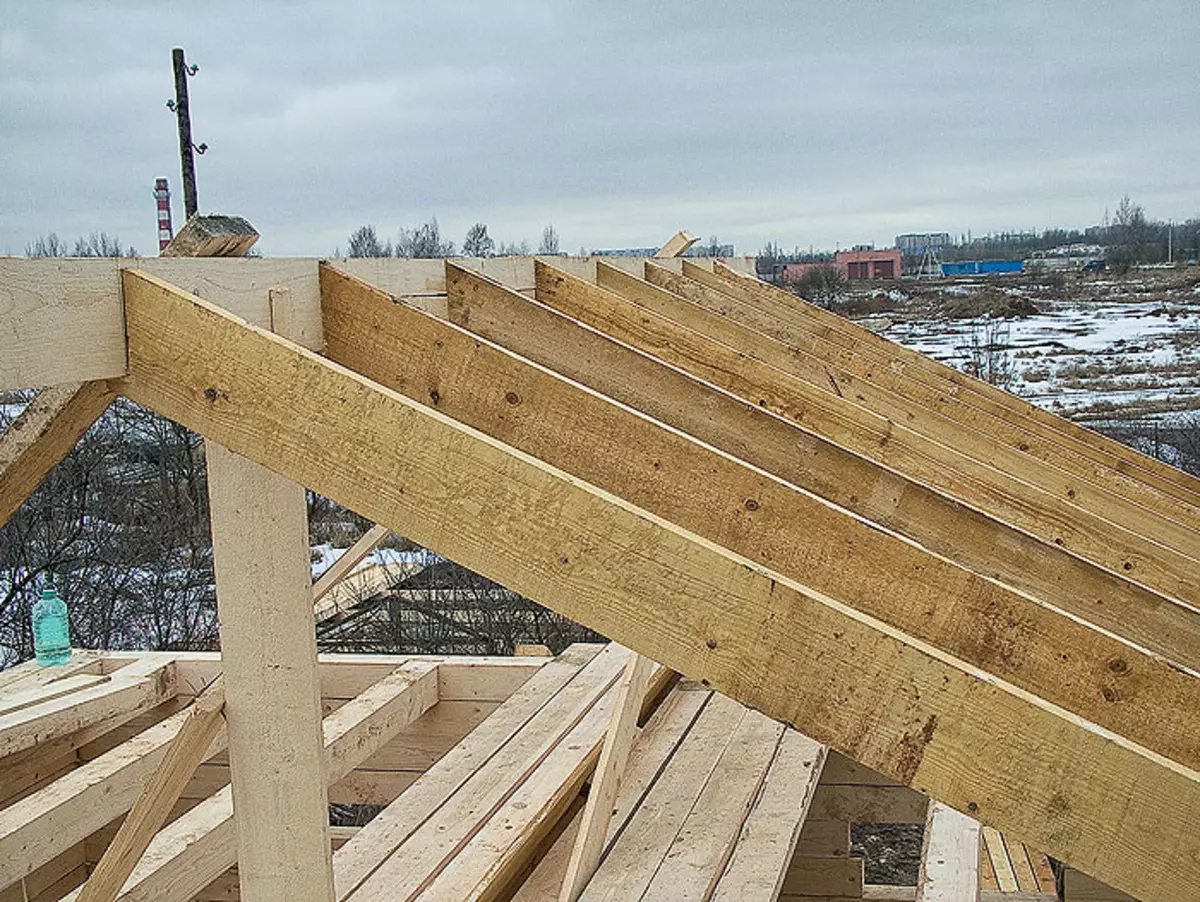
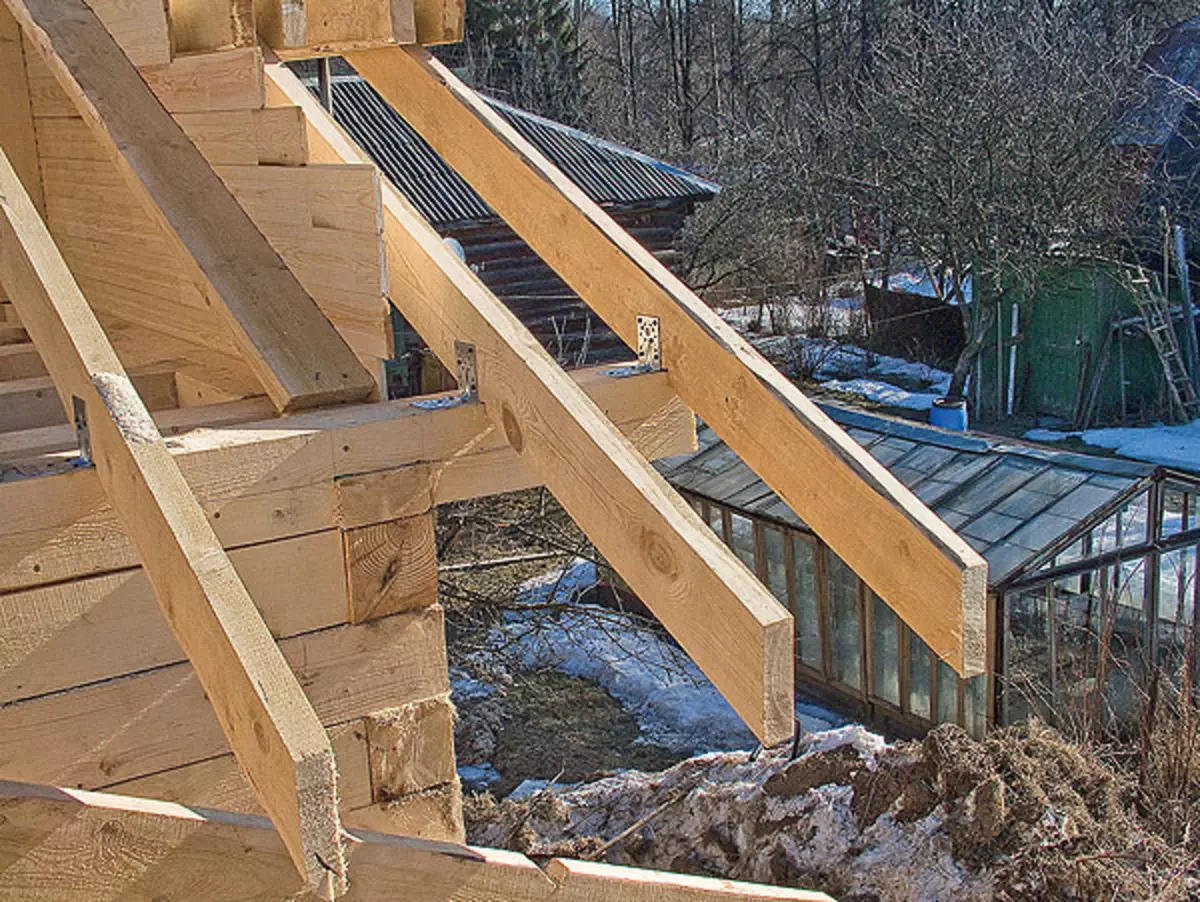
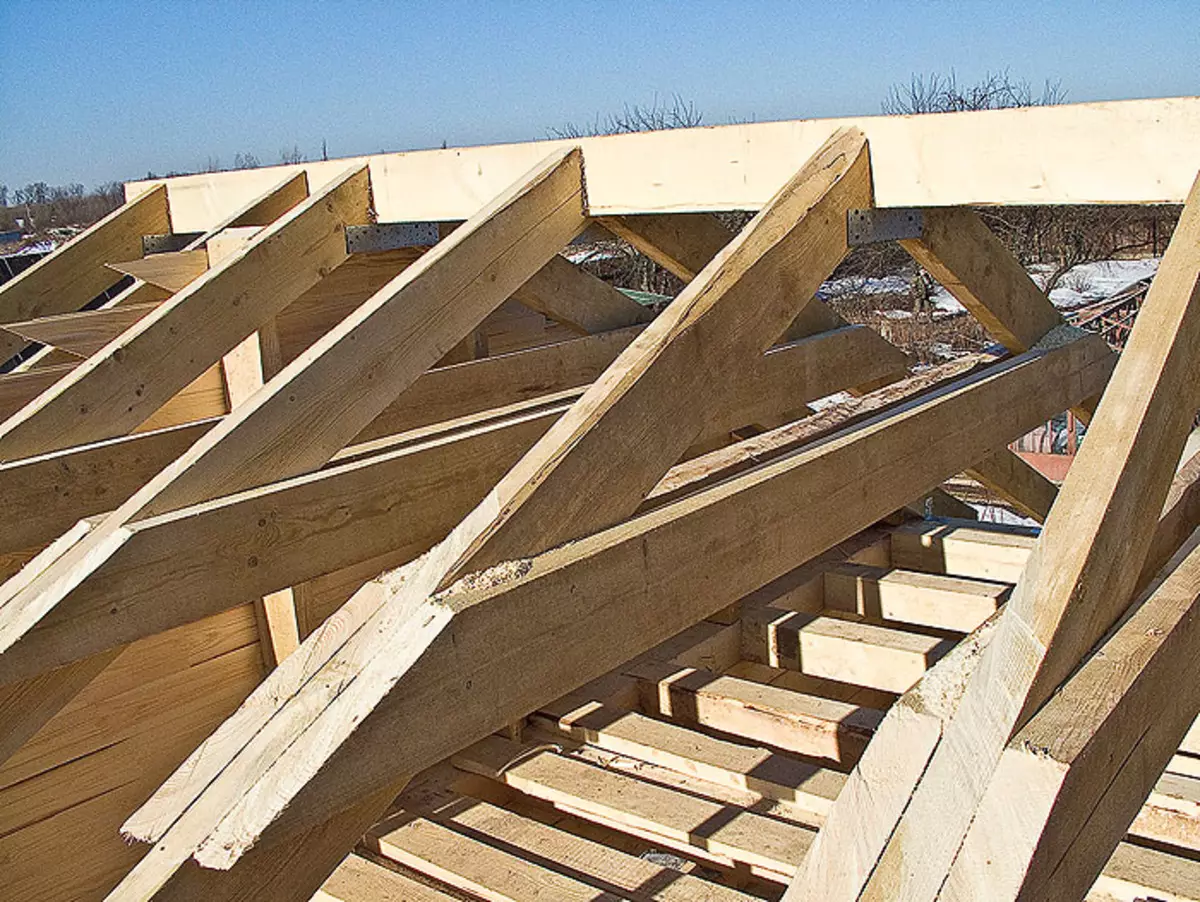
33-35. When creating this system, a skate bar was installed on temporary wooden supports, which, to get the workpiece of the required length, they smalked in the middle in the middle. Along the skate with a definite step laid out the rafter beams of drilled on the template of the boards section of 15050mm (33). The boil the crown of the cut was attached, using corners and self-tapping screws (34), the metal plate was pulled under the skate, and the powerful tightening of the same board was set below it (35). It is worth noting that metal-elements and self-tapping screws were necessarily used when assembling all the assemblies of the rafter system, even such complex as rtands.
What will happen next?The second stage of construction will pass so. First, it will remove the temporary roof from the construction, then the parts are marked and dismantled with the crate, the trimming of the frames of the frames and the rafter system (this will not be difficult - they are all fastened with the help of metal elements and self-tapping screws). Next will begin to construct the walls of the second floor. What they will be brushed or carcass - the hosts have not yet decided. But it should be noted that the second option is preferable to the first: the frame walls are easier and warmer, and they can be erected in the shortest possible time, which is important. When the walls are growing, all the parts took place earlier (the rafting system, the idle of IT.) will again take the laid place and the roofing will be laid, now it is now permanent. After that, builders insulate the attic roof, and then begin external and internal finishing work. As soon as they are completed, over one of the premises (the place is scheduled in advance), the overlap of the first floor will differ and co-staircase. IVA! You can develop a new living space, bring and install furniture and protect another housewarming.
Does the construction process hurt the hosts? Of course. It is possible that the week-other they will have to not live in the house. What will disassemble and what will be the material losses? In this case, they are minimal, several rubberoid rolls used to create a temporary roof. The design of the structure, according to preliminary estimates, is only 30-40 thousand rubles. This is incomparable with the amount that you have to pay as interest if you take a loan in the bank and build a two-storey house, let's say, in one reception.
The scheme of the second stage of construction
"ABS-STROY" | 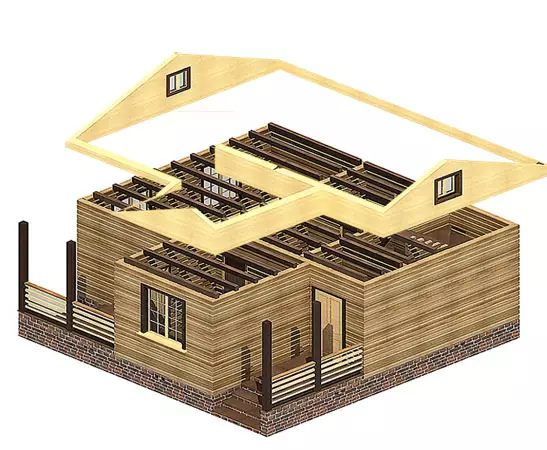
"ABS-STROY" | 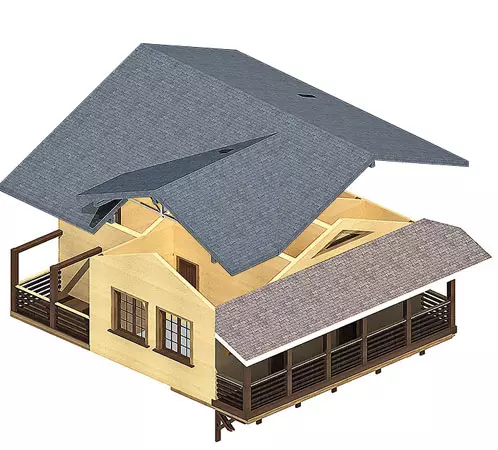
"ABS-STROY" | 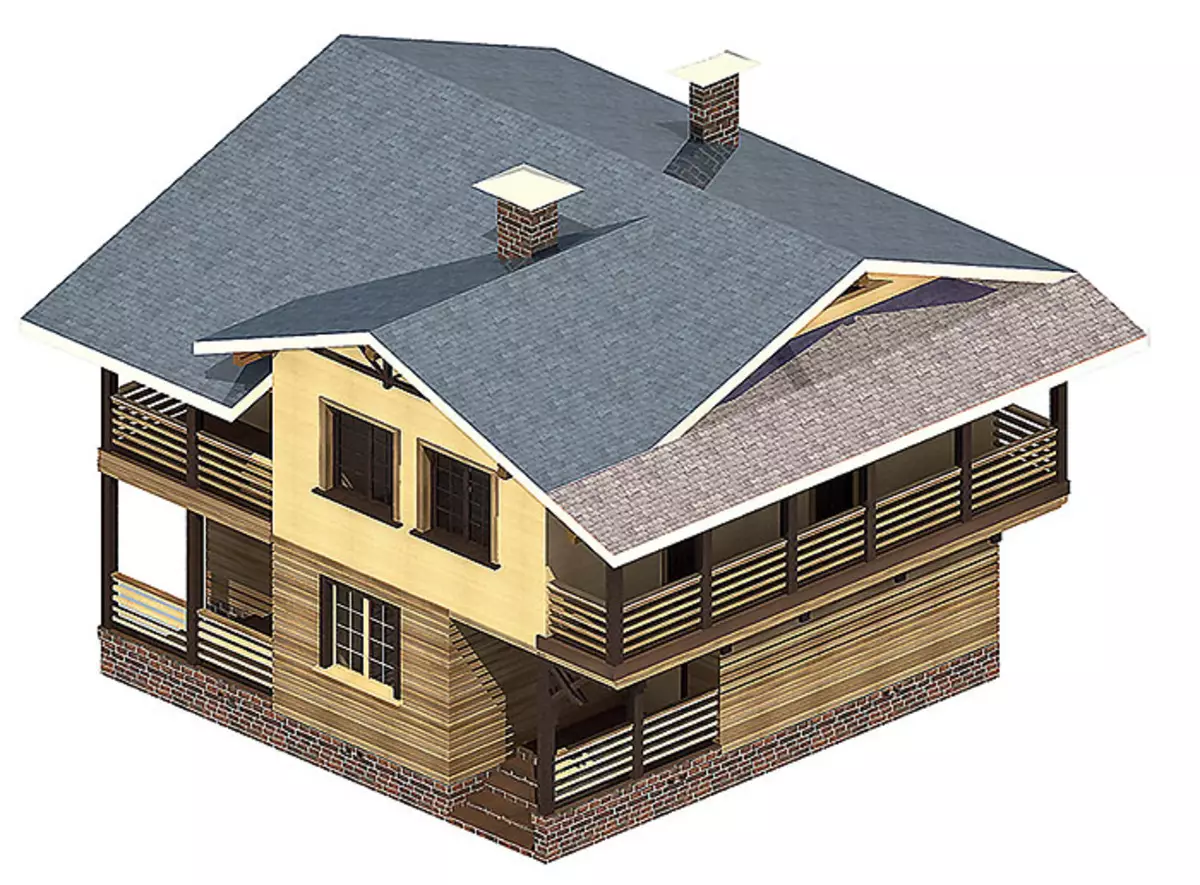
"ABS-STROY" |
36-39.Spostrated at home (36) will remove the temporary roof and dismantle the rafter design and the frontones (37). On the warmed overlap, the walls of the second floor will be erected, on which the bodies of the frontones (38), and then mounted the soling system and the constant roof (39).
Really affordable accommodationIn our country, there is a national project "Affordable Housing". Many manufacturing and construction firms are striving to study in it. But let's think: Is everything that they are currently offered to be actually affordable? Even if we assume that 1m2 housing will cost 10-20 thousand rubles. (According to modern standards, it is just a gift) to build a house at least 100-120m2, it is necessary to find 1.2-2.4 ml rubles at the start. Add to this the cost of finishing and summing up communications - and the figure is at least 1.5rd more. Well, where is the very "average Russian", for which the mentioned program has been conceived, can take so much money?
Of course, there are loans and mortgages. But in our crisis time to get such a loan will defy not everyone. Hudaleko not everyone who could take a similar loan, wants to do it. After all, a loan is a kind of sword damocles. Who will pay it if you lose your work or get sick?
Opinion of a specialist
There is one fairly dangerous moment in the technology of the growing house - when the roof over the structure of the first stage is dismantled and the builders take the walls of the second floor. It is at this time that the insulation is poorly laid in the walls and overlapping of the first floor of the first floor of atmospheric. The amokra insulation is known to cease to perform its function. Therefore, I would like to pay attention to that only hydrophobized materials should be used in this technology, they are still at the production stage give water-repellent properties. Water, falling on such a heater, does not penetrate his depth.
The tests carried out showed that even after a complete immersion of such a material into water for several hours on its surface, only a thin water film or drops is formed, and inside it is absolutely dry. The drops evaporate quite quickly, and the material itself does not lose any mechanical, no heat-insulating properties.
The use of hydrophobized insulation allows breaks during construction. For example, the Plates "Rockwool Valtts" (Russia) for outdoor insulation, being mounted on the facades, can remain not protected against atmospheric influences up to 3 months.
Tatyana Smirnova, Technical Specialist of Rockwool
But with a growing home everything is different. Jeenno is such a type (more precisely, the construction method) of buildings and can be called really affordable housing. The phased strategy takes into account two main things. First, the gradual accumulation of funds and the implementation of the next stage is precisely from this money, without addressing credit organizations. Second, demographic factor and change in requests. For example, a young family of two people at first is quite enough at home with an area of approximately 50m2. It is clear that in the future the family will grow up and the time will begin to begin the next stage of construction. Idieg by that time would most likely be able to accumulate, and their wishes formulate more clearly plan the rooms for babies, and for grandparents, which will look after them.
We think that the concept of a growing house is attractive not only for young families, but also for summer residents. It is no secret that there is a rather large layer of the population of our country, which has long wanted to build a cottage. But it's not enough to realize your dream, there is no lack of starting capital for the construction of a house that is fully relevant to this very dream. The technology of a growing home gives you the opportunity to begin to embody cherished dreams into life and do not wait until you collect the whole amount. First build a small one-storey cottage. Copy the necessary money - complete the house to the sizes of the "dreams".
However, it is necessary to understand that it is easy to perform this will allow not every construction technology, since with the growth of the house in the width you will have to drain the foundation and walls. The Iap is not any construction company can offer you a well-thought-out technical solution on the articulation of walls, overlap and roofs suitable for transforming. Avole the construction of a growing house in accordance with the project and thoughtful phased planning service from any point of view is profitable.
Enlarged calculation of the cost * construction of a brusade house with a total area of 51m2 (first turn)| Name of works | Number of | price, rub. | Cost, rub. |
|---|---|---|---|
| Foundation, Walls, Partitions, Overlap, Roofing | |||
| Takes up axes, layout, development and recess | 32m3. | 750. | 24,000 |
| The device of sandy underlying layers under the foundation | 9m3 | 410. | 3690. |
| Device of the foundations of ribbon reinforced concrete | 16m3 | 2400. | 38 400. |
| Device masonry base from hollow concrete blocks | 6m3 | 2280. | 13 680. |
| Waterproofing horizontal and lateral | set | - | 5200. |
| Foreign Furnace Device | set | - | 3900. |
| Build the walls and partitions from a bar | 25m3. | 4300. | 107 500. |
| Build overlap with laying beams, flooring | set | - | 53 900. |
| Assembling roof elements with crate device | 75m3 | - | 17 350. |
| Regular coating device | set | - | 9600. |
| TOTAL | 277 220. | ||
| Applied materials on the section | |||
| Sand | 9m3 | - | 10,000 |
| Concrete heavy | 16m3 | 4500. | 72,000 |
| Block concrete hollow | 375 pcs. | 55. | 20 625. |
| Cement | 15 bags | 270. | 4050. |
| Antiorious additive | 80l. | thirty | 2400. |
| Bar. | 29m3 | 5500. | 159 500. |
| Lengthled cloth | 8 rolls | 750. | 6000. |
| Edged board, bar | 9m3 | - | 49 500. |
| Board firmware profiled | 30m2 | 270. | 8100. |
| Ruberoid | 19 rolls | 270. | 5130. |
| Mounting tape | 2 bays | 1500. | 3000. |
| Armature, Wire Knitting, Formwork Shields | set | - | 9690. |
| Antiseptic | 10l | 150. | 1500. |
| Nails different | 215kg | - | 13 300. |
| Fasteners for timing | set | - | 10 200. |
| TOTAL | 374 995. | ||
| * The calculation was completed without taking into account the overhead, transport and other expenses, as well as the profit of the company. |
The editors thanks the ABS-Stroy firm for help in preparing the material.