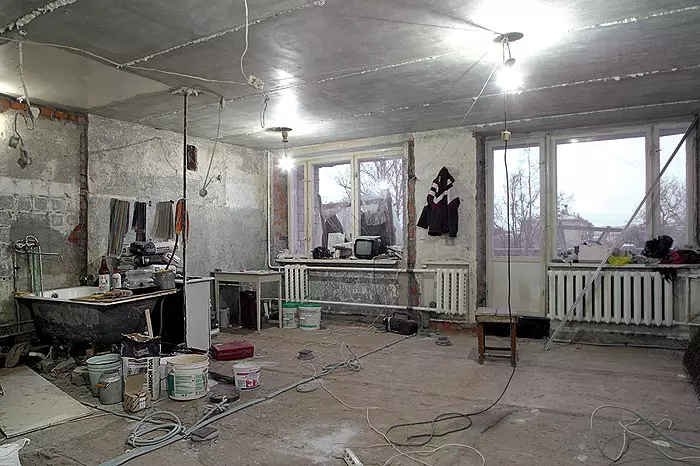
Description of step-by-step work during the repair: from the preparation of the plan, replacing windows ... before applying the finish finish on the walls. Visual material.
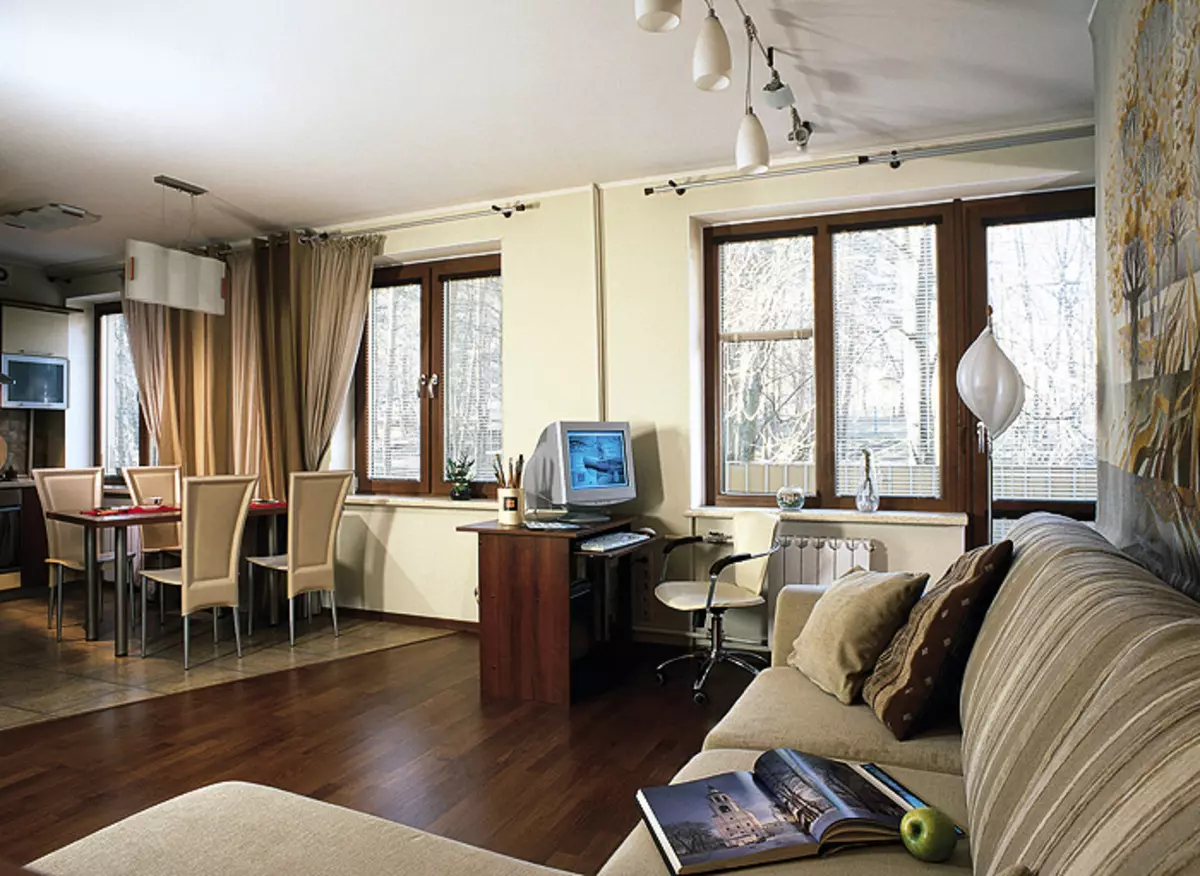
Photo by E. Kulibaba
Think: why do you need to repair? Most of the answers may otherwise reduce the fact that it is necessary to create more comfortable conditions than existing ones. The ideas about what they should be, as well as financial opportunities, everyone is different. Therefore, before you start, you need to present the result and estimate the price of the issue. At the professional level, the architect with the designer is engaged in this. Based on the wishes of the apartment owner, they develop a design project and constitute the estimate of the upcoming costs. But perhaps you trust exclusively to your own taste and the feeling of style, you yourself want to become a manager of your repair or strive to save ... then try to move the plain paper. Scale compliance will help to avoid gross mistakes. Note, not all miscalculations made in the initial stages of repair can be corrected after. For example, the layout of sockets and switches depends on the furniture layout plan. In at the beginning of the repair, you did not define where you will have a sofa, and where the TV will probably have to constantly use the extension cords.
It will not hurt to consider storage systems. Built-in wardrobes, separate wardrobe, mezzanine will facilitate the maintenance of order and will be equally delivered from problems with the placement of large-sized things: baby strollers, sports equipment, stepladers, vacuum cleaner IDR. The same costs for their manufacture are less than on the purchase of cabinet furniture.
Planning the situation in the kitchen, analyze whether you often cook and eat at home. After all, it may well be that you have not enjoyed a meat grinder or oven for several years, and the whole kitchen skarb will be fully fitted on three shelves. In this case, the rest of the kitchen space is more rational to equip as a place to relax.
Architect Andreyolkov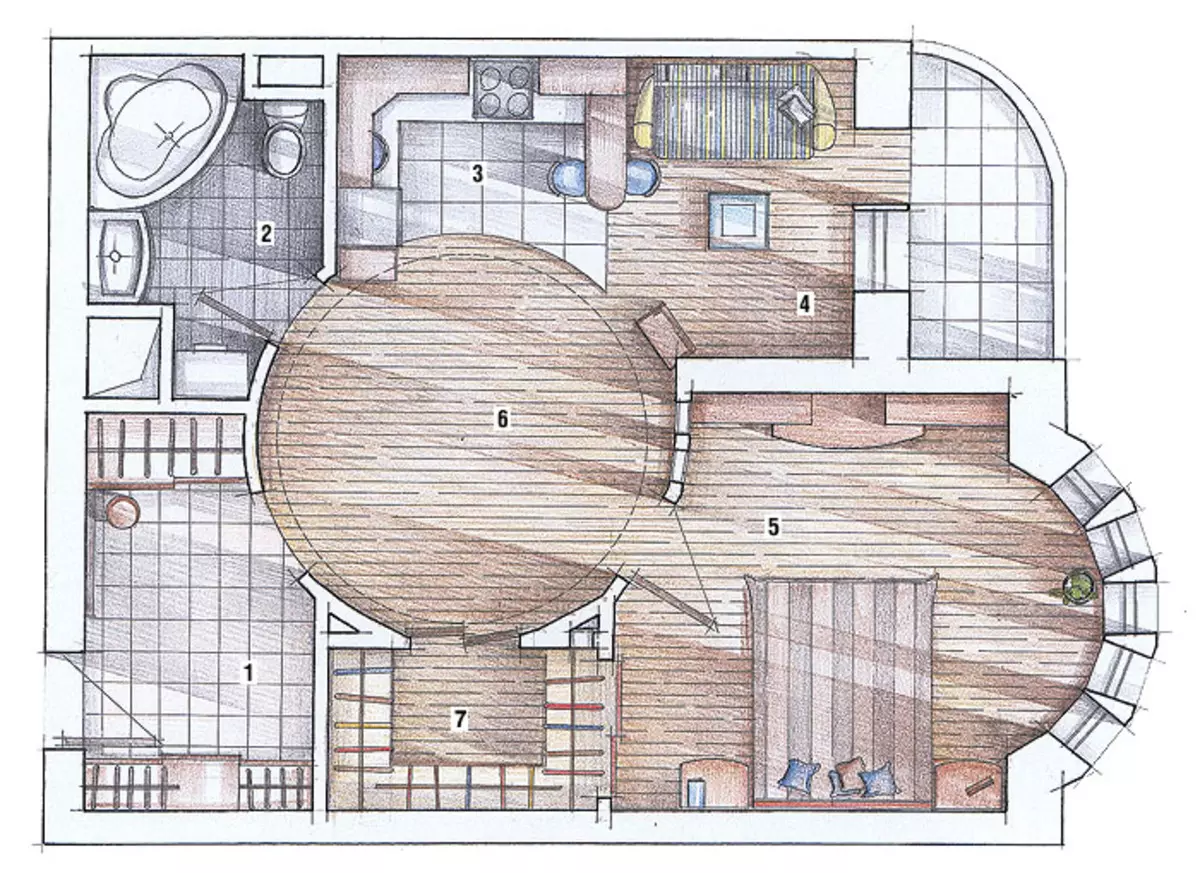
Architect Lidiaelkin
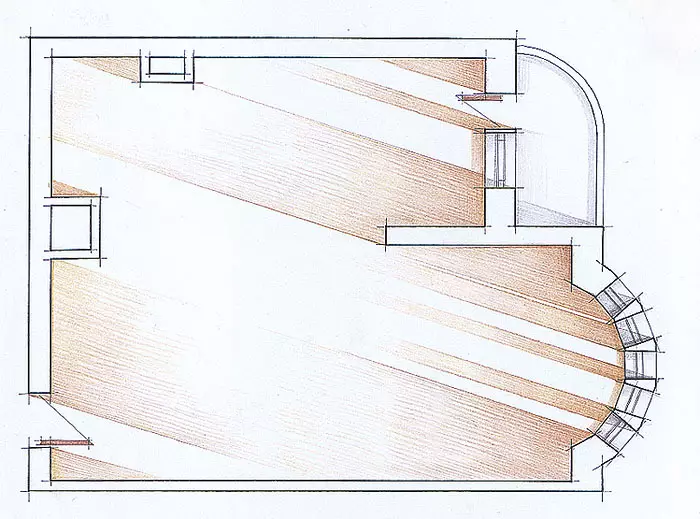
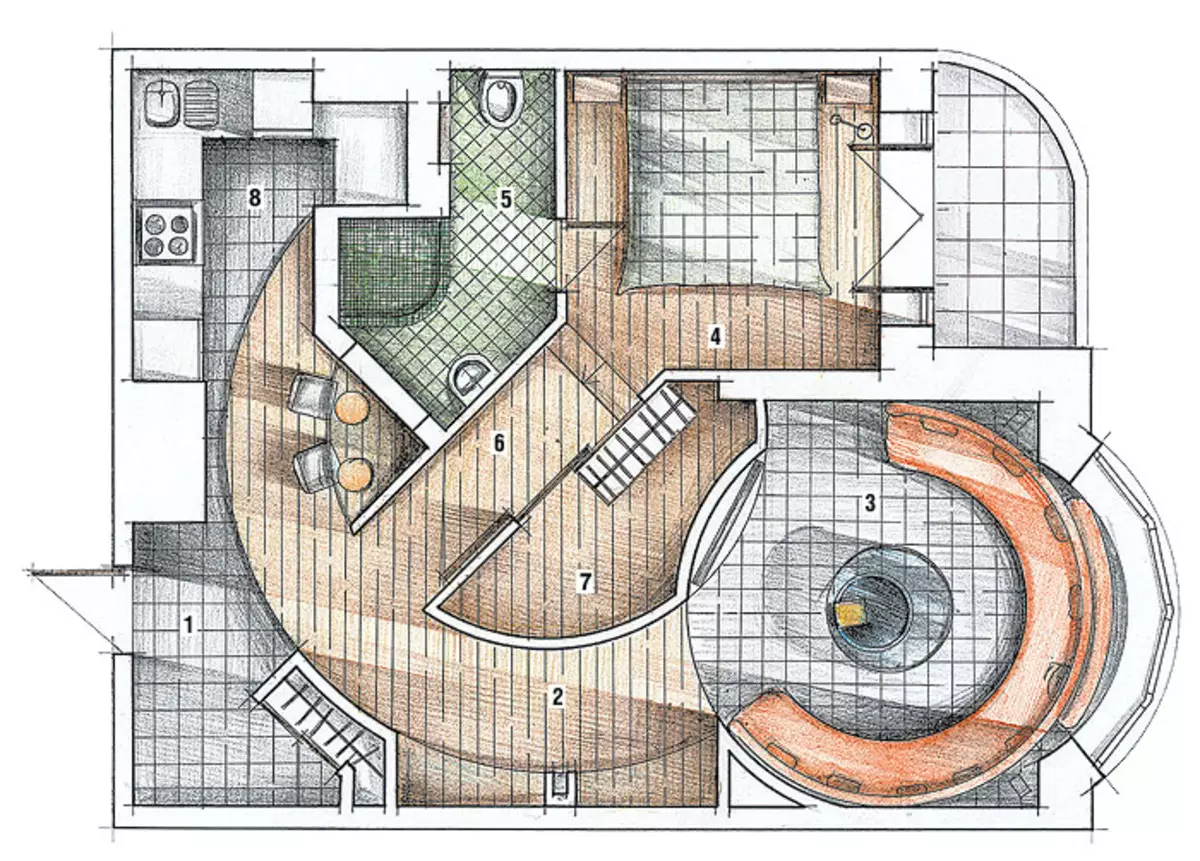
Explication 1:
1. Hall, 2. Corridor, 3. Living room, 4. Bedroom, 5. Bathroom,
6. Passion to the bedroom, 7. Wardrobe, 8. Kitchen area
Explication 2:
1. Hall, 2. Bathroom, 3. Kitchen area, 4. Recreation area, 5. Bedroom,
6. Studio, 7. Wardrobe
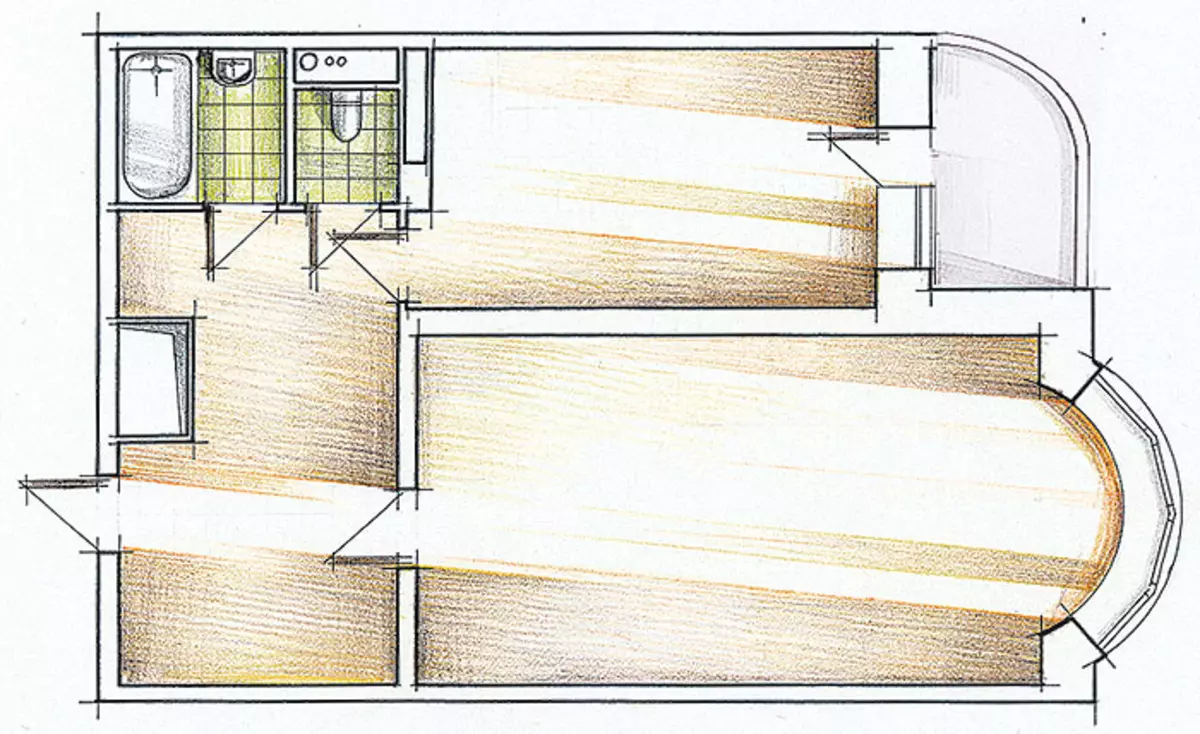
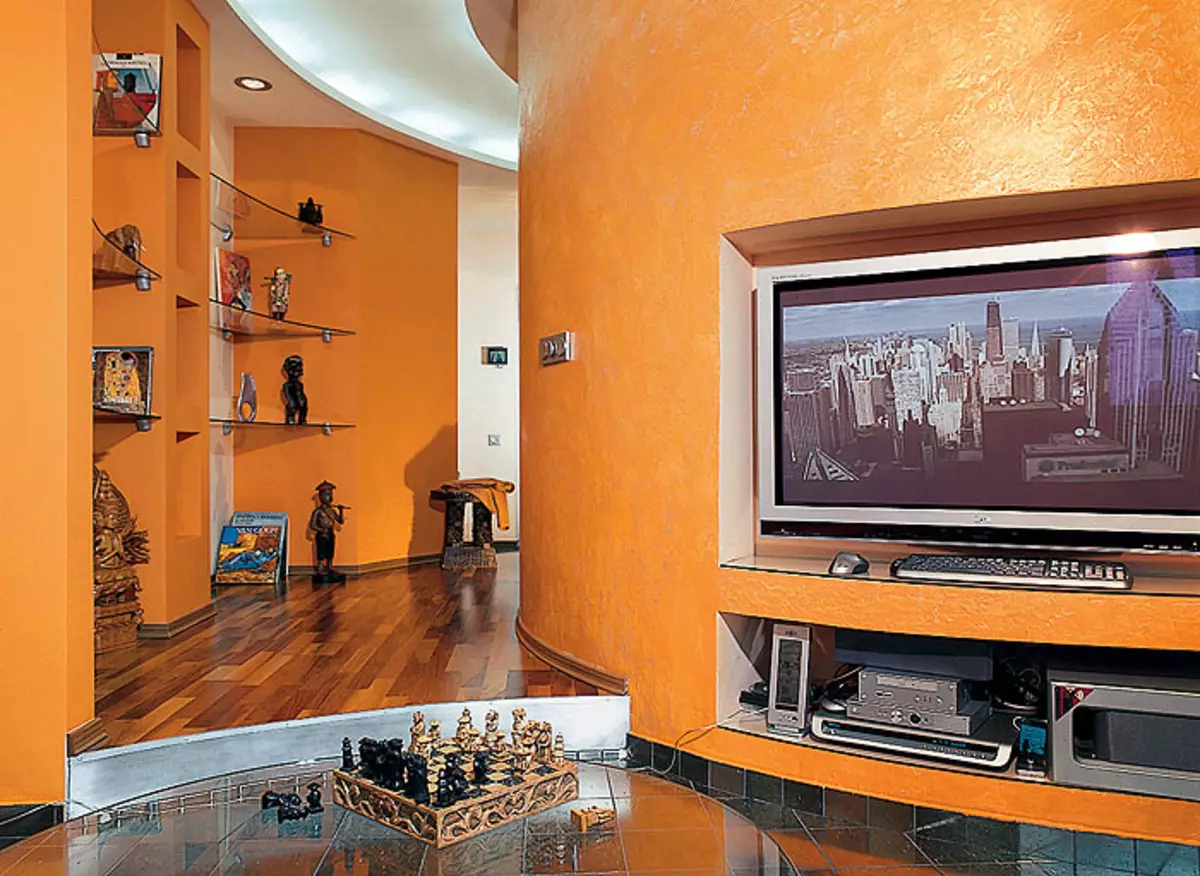
With the same source layout, the end options may be different. Even for a one-room apartment, when the flight of creative thoughts is limited by a hid, configuration and the number of window openings, can be designed rooms in different ways. In the first case, the apartment is intended for a married couple, in second - for a young woman
In conditions of shortage of living space, it is possible to combine functional zones. The most common options are a bedroom plus living room or living room plus kitchen. The answer everyone is looking for individually. As for the bathrooms, the combination of the bathroom with the toilet gives a gain in space, but generates certain inconveniences. Think about whether you need a corridor, especially if it is dark and long. Perhaps his accession to the living room area will make the public zone more spacious, and the hallway is bright.
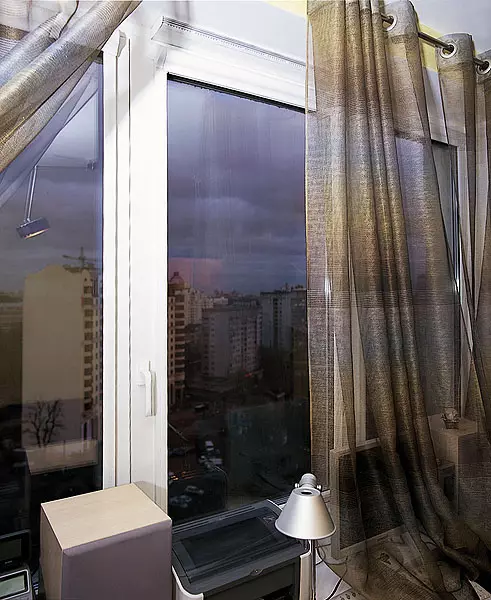
There are other technologies for sloping devices. Because of the small width of modern window boxes in the cold time, heat loss through slopes, especially when single-chamber double-glazed windows. On the edges of the frame and on the surfaces adjacent to it, condensate is formed. In order to avoid this slope insulation. The easiest way to use the space by the mounting foam, which, in fact, is insulation. From the side of the street, the foam is closed by a polyurethane self-seeping sealing ribbon or sprinkled with silicone sealant. From the side of the room it is cut and covered with decorative plastic panels.
|
|
|
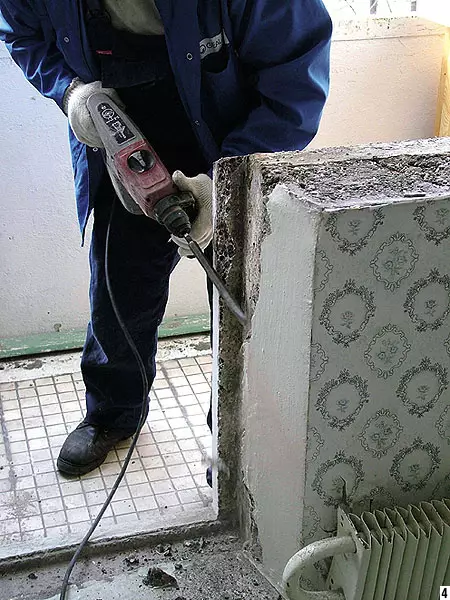
1-4. Build a window block with groove sealing. After dismantling old frames, the opening is produced | ||
|
|
|
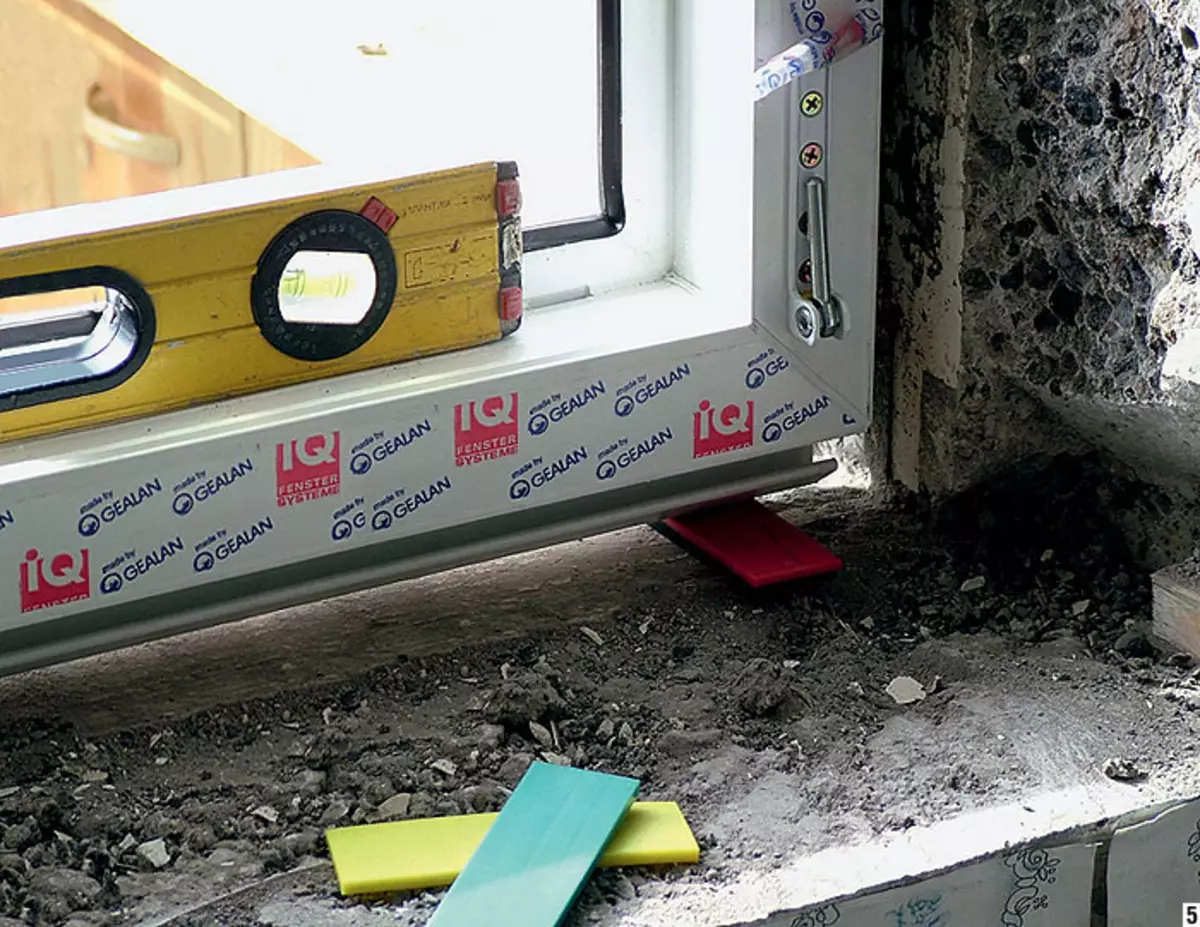
5. Window lines must be strictly vertical and strictly horizontal. This is controlled using a level. For alignment of the frame relative to the opening, adjustment plates are used | ||
|
|
|
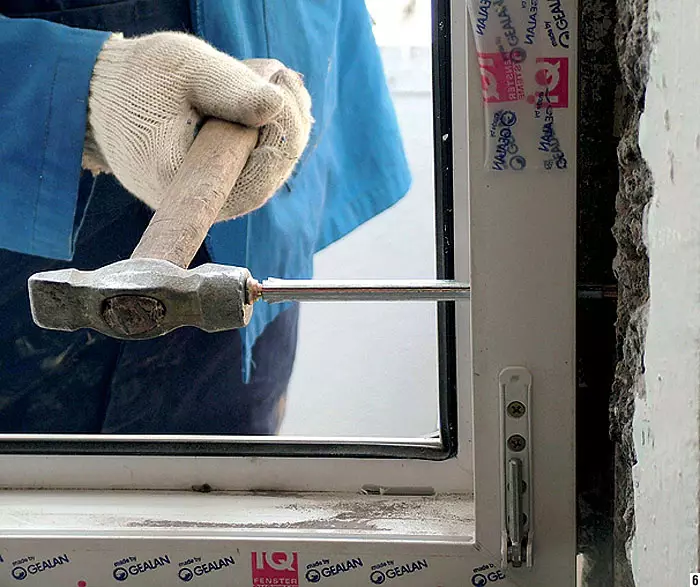
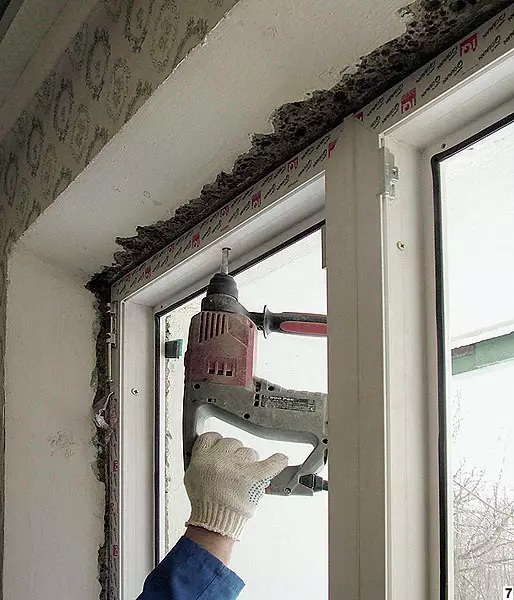
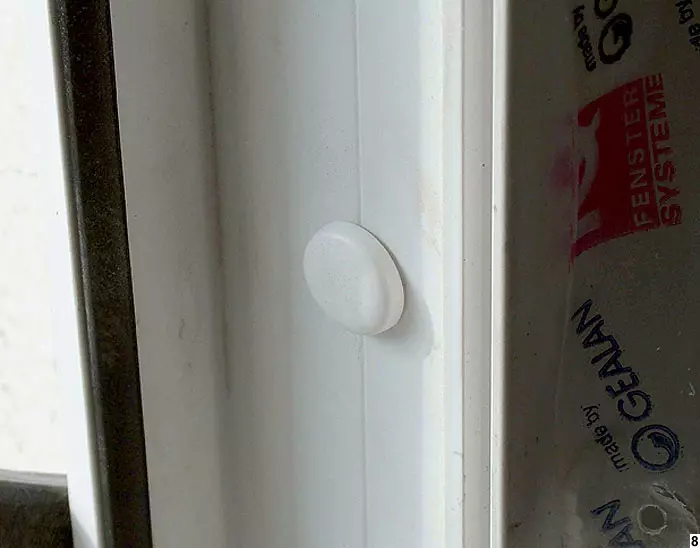
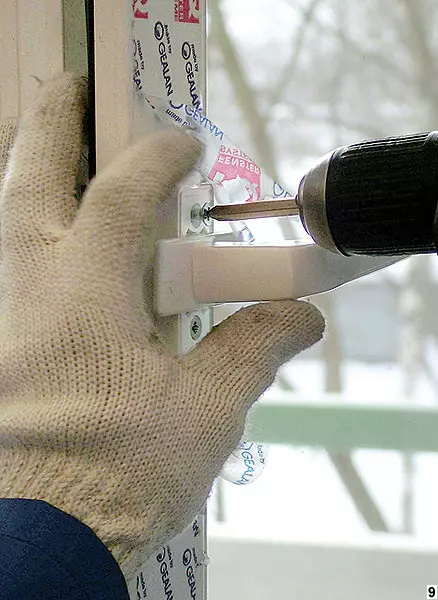
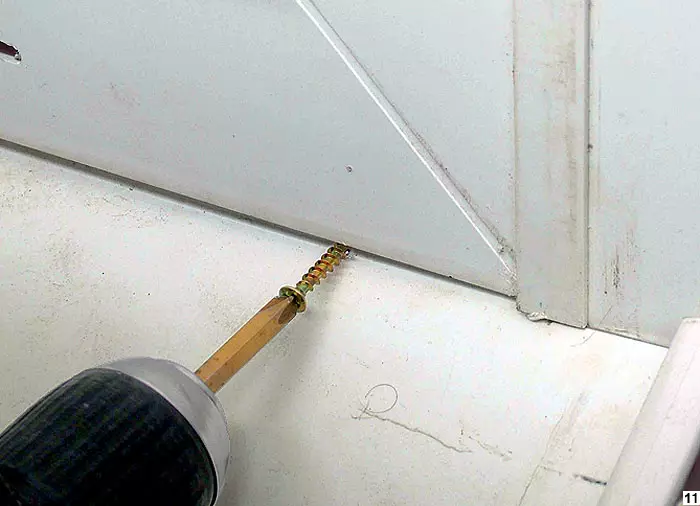
6-9, 11. The frames are fixed in the opening with the help of fasteners. Screwing heads are closed with decorative caps. Install and regulate accessories, window sills | ||
|
|
|
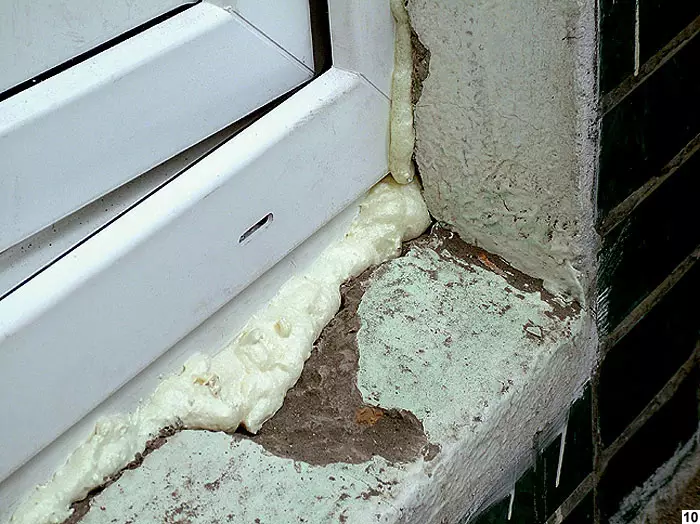
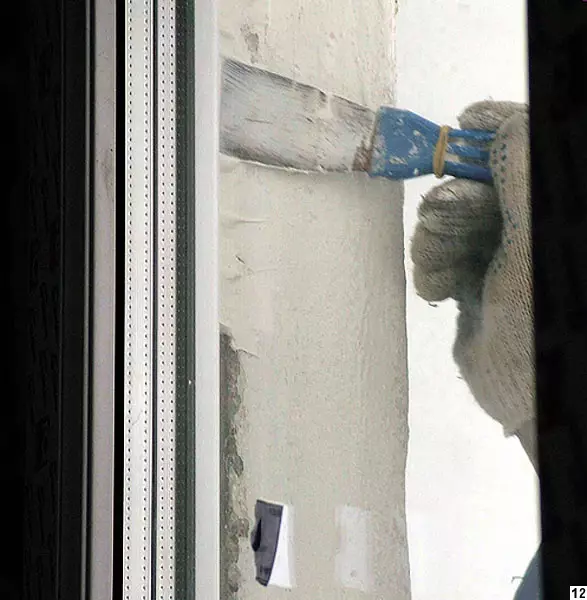
10. Ideally, the gaps between the opening and the frame should be 15-30 mm. They are usually thoroughly close by mounting foam 12. Outside the gaps need to be seen by silicone sealant as quickly as possible to prevent the destruction of the assembly foam under the influence of sunlight and moisture |
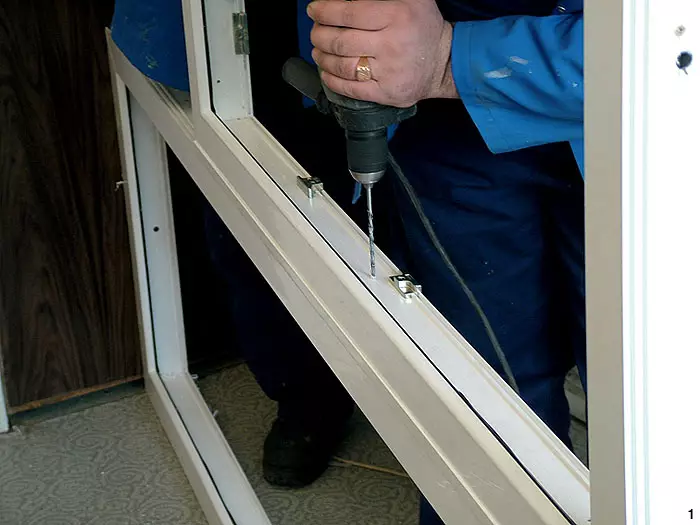
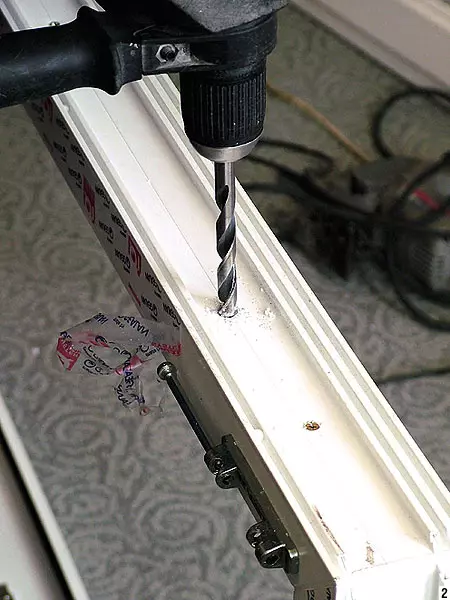
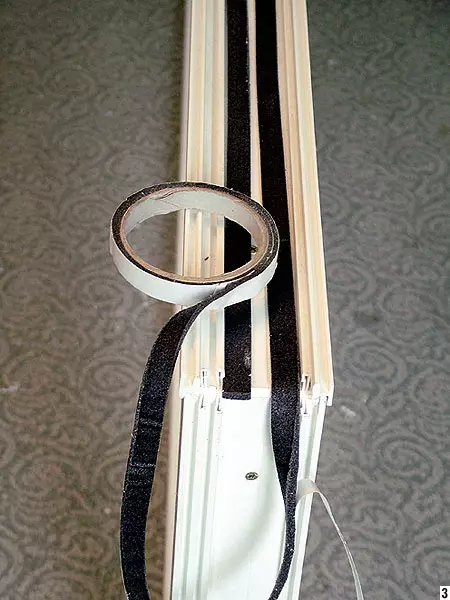
As for the installation, then, for example, a block of a plastic window, which includes a balcony door, collected from individual flaps in place. Steel inserts are fixed with self-drawers, the grooves are wicked by a sealant and insert the sealing tape. The block is attached to the wall through the box with frame dowels with an interval of no more than 800mm. The method allows to distribute the load throughout the frame of the frame. When choosing a "warm" profile, as well as if the windows are very large, the frames are fixed to the wall on the plates-anchors. The load in this case falls on the support pads.
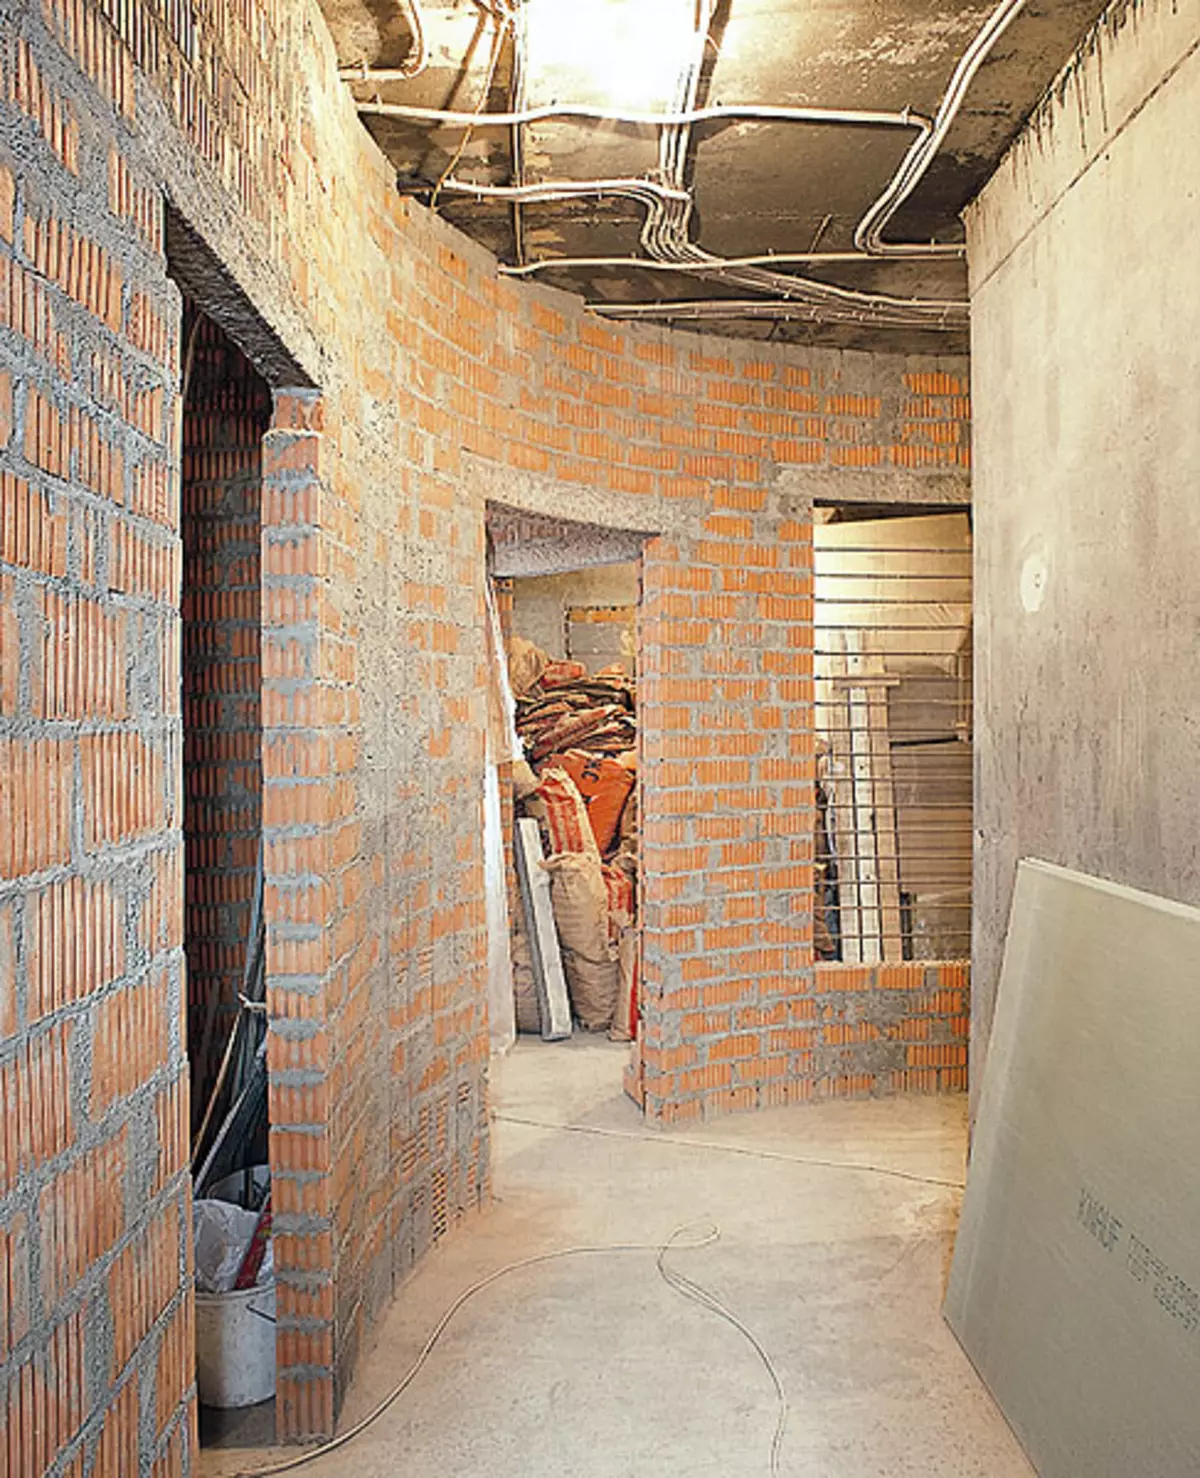
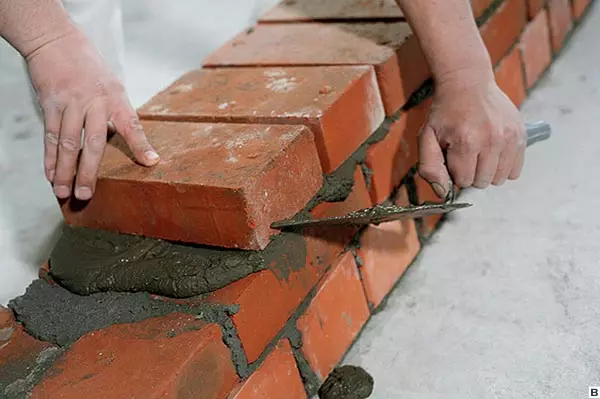
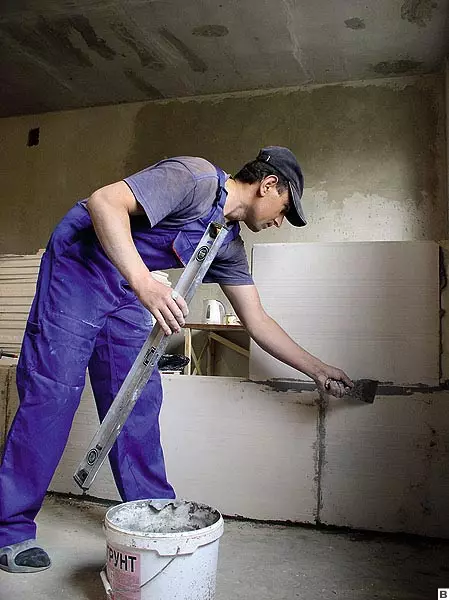
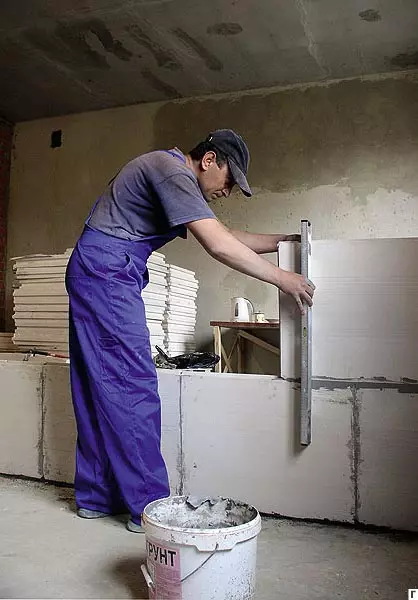
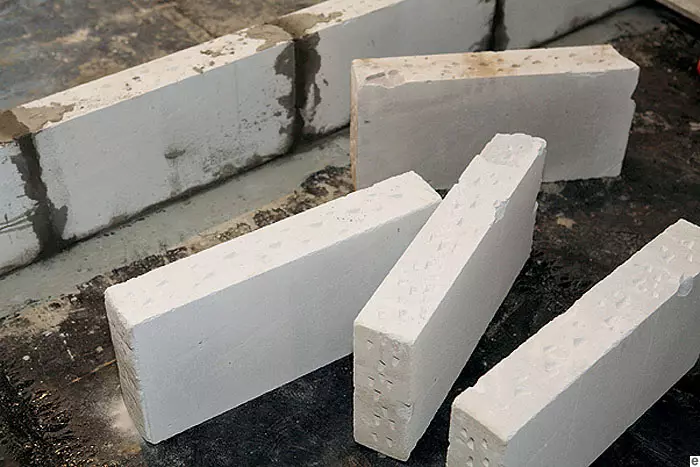
Small typical sizes of bricks and rich masonry experience make it possible to build a different partition from this material. The main thing is that the overlaps can withstand the load. For the wall in the Pollipich, it is about 250 kg / m2. Since the surface of the material is porous and uneven, the laying will be required to align the layer of plaster.
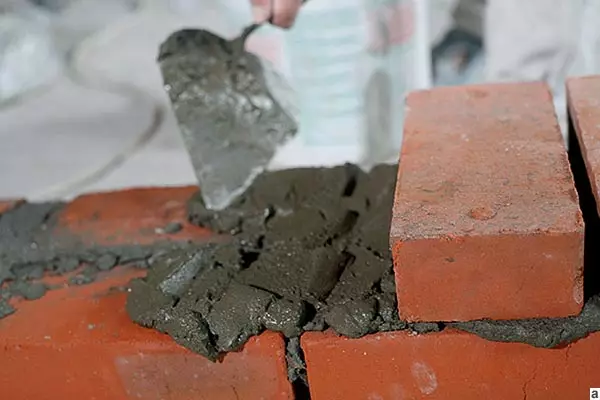
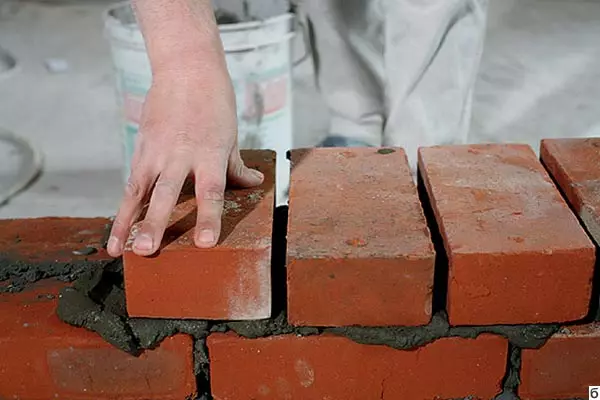
The mortar is prepared from cement and sand or use special mixtures.
The density and strength of the seams depend on the uniform distribution of the solution. After laying and binge a brick from the seams remove the residues of the solution (A, B, B)
|
|
|
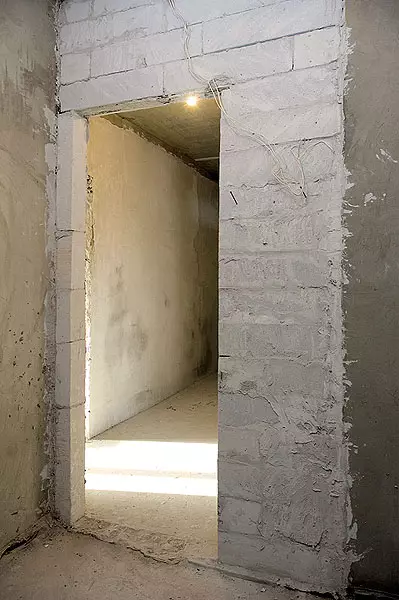
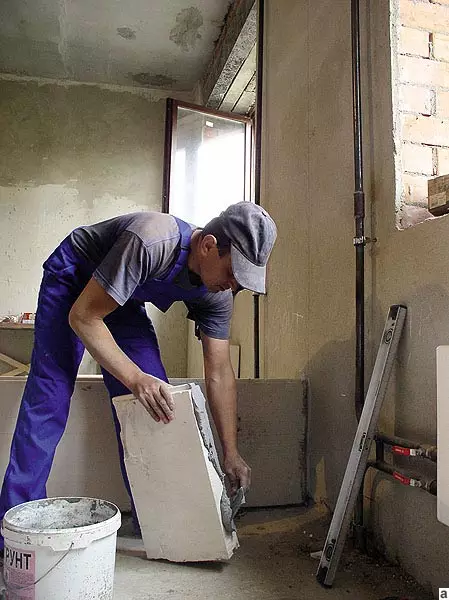
A, B, B, G. To exercise direct partitions, builders recommend using puzzle blocks. Their significant dimensions provide the speed of installation, the smooth surface does not require shuttering. Soundproofing of this material is good. Eco-friendly blocks - their main component is gypsum | ||
|
|
|
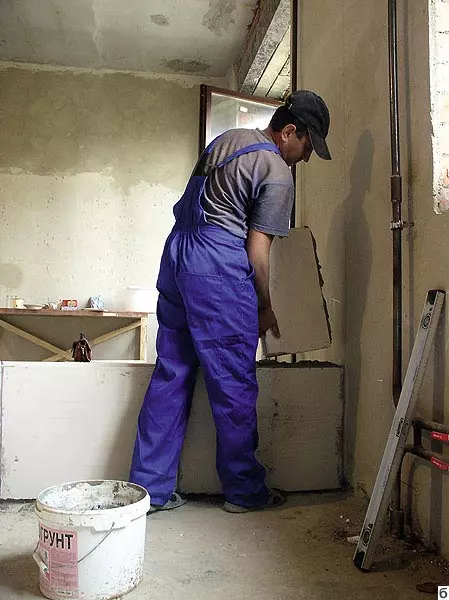
d. Compound "Groove" creates additional strength e. Penoeton blocks are characterized by good sound insulation. But such a wall is required to plaster |

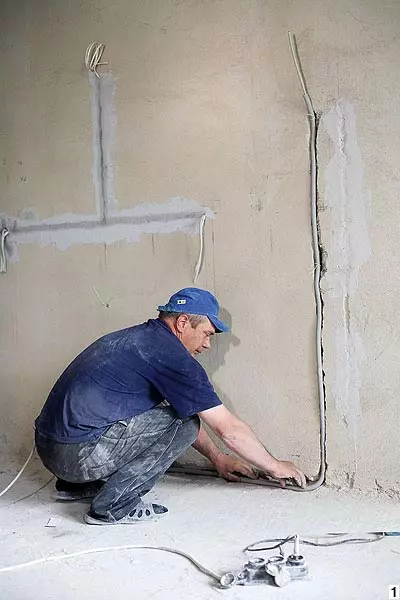
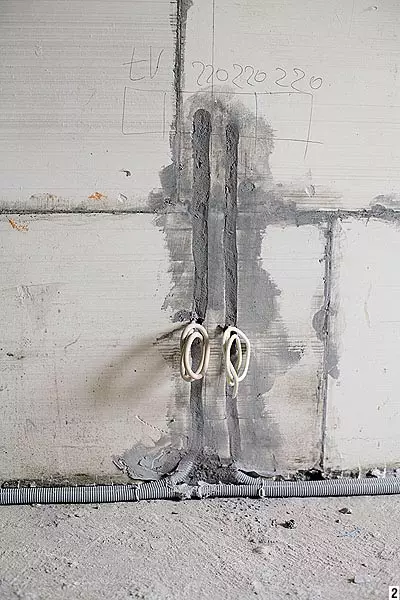
Modern housing is unthinkable without heat, light, hot water and sewage network. Mounting work - the protesters of the tracks and laying pipes in them, are carried out to the alignment of the walls and the floor base device. After all, open communications are incompatible with the generally accepted representation of the aesthetics of the dwelling (with the exception of some styles). The same safer, with hidden wiring, the likelihood of domestic electric shock is reduced.
Wires and cables are packed in accordance with the power supply project. The location of the sockets and switches is determined taking into account the characteristics of household appliances, which are supposed to be used, and highlighted on the apartment. Installation of wiring, dispensing and installation boxes is desirable to charge a qualified personnel with a necessary license.
For water supply and sewage pipes in most homes, separate technical mines are provided. Such an engineering solution provides the possibility of preventive repair and at the same time sharply reduces the likelihood of flooding apartments in the event of an accident on the main pipeline. Most of the water will go to the mine. (For this reason, you should not master the spaces of technical mines!)
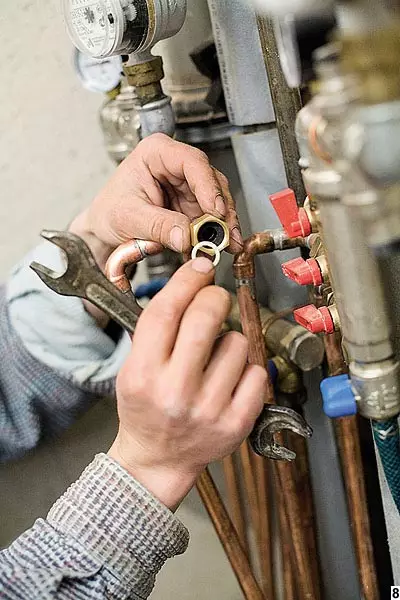
To maintain the stable operation of modern plumbers, it is recommended to use a collector wiring scheme when its pipeline is isolated for each consumption point. All hidden in stranges or cliented pipes must have only all-in-point connections. At the same stage, they put new heating devices and completed welding.
|
|
|
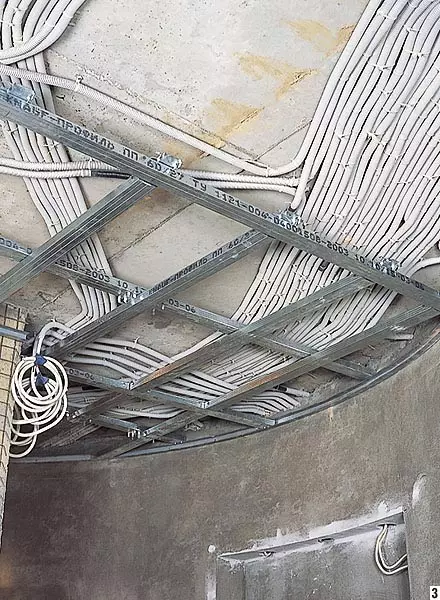
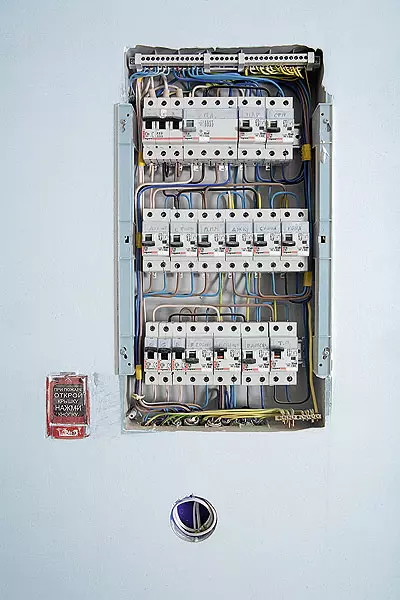
1. To accidentally not get the nail into the hidden wiring, on the floor of the wire in the isolation laid exclusively along the walls, and on the wall only vertically or horizontally, but in no case diagonally 2-3. From the shield of the wire and cables in isolation are carried out on the floor or on the ceiling. For the case, the case of communication is poured by the tie of the floor, they are second, hiding behind the suspended design of the ceiling. Before stirring the wires, they are tested | ||
|
|
|
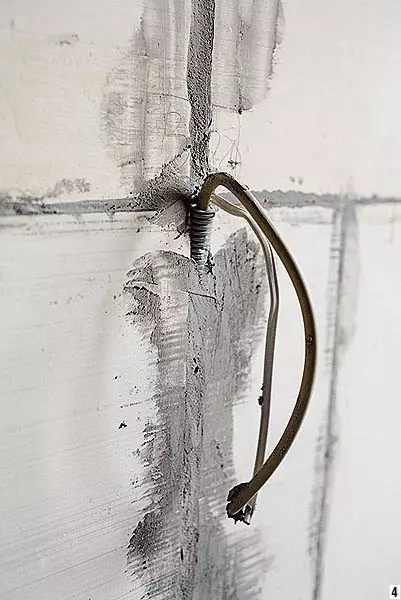
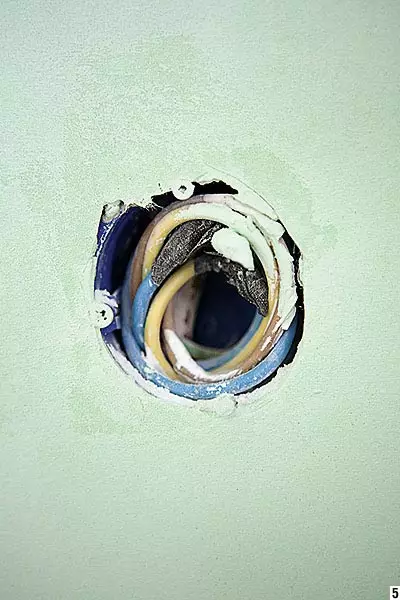
4-6. The selection of wires and cables is carried out on the basis of a technical task. It is useful to know that the copper wire withstands the load of about a third more than aluminum, and serves longer. Included safety of the operation of the electrical network depends on the literacy of the installation and quality of electrical installation products | ||
|
|
|
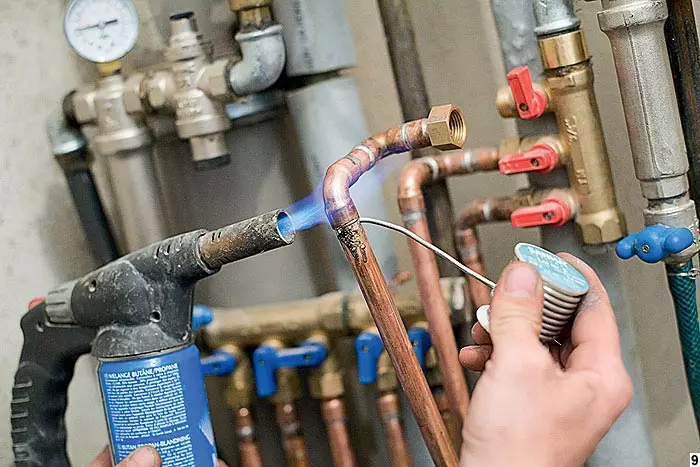
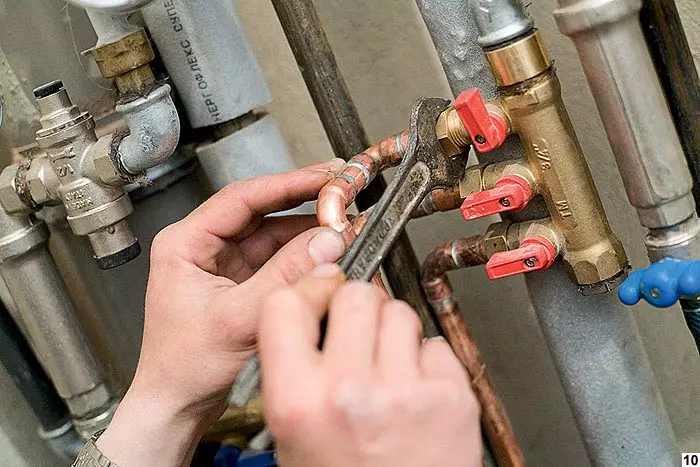
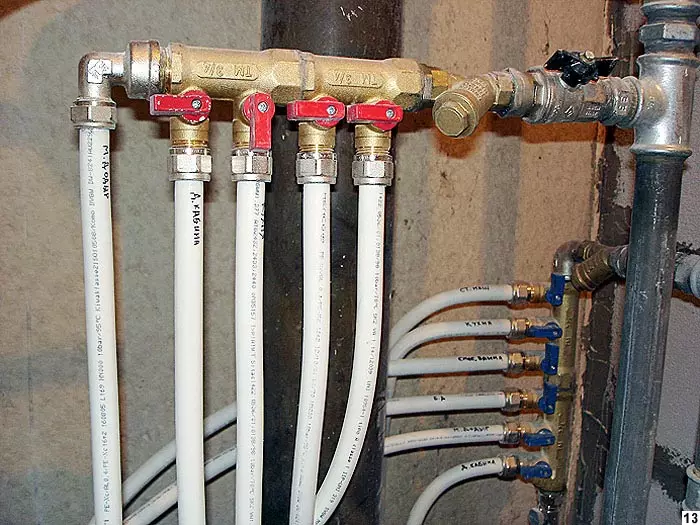
7-8. Collector with wiring of copper pipes. Connection of pipes with a collector produce using threaded or crimping fittings and sealing gaskets 9-10. Low-permanent compounds of copper pipes are carried out by the low-temperature capillary soldering method. The solder gently lead along the heated edge around the joint | ||
|
|
|
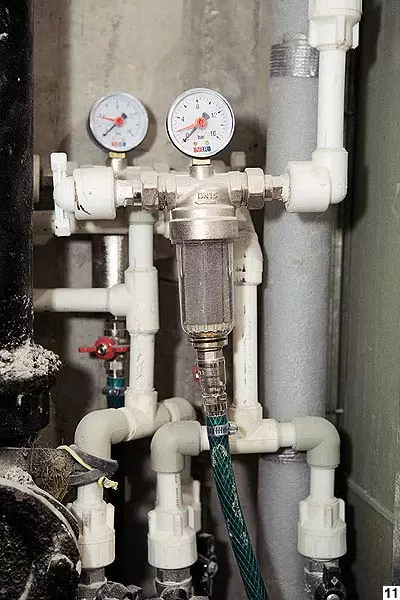
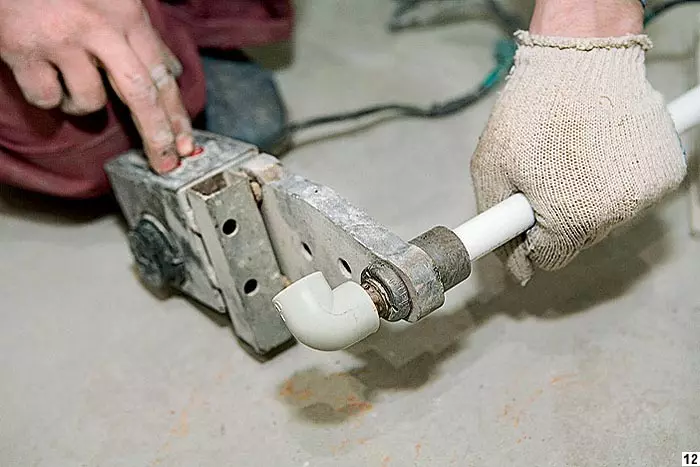
11-12. Polypropylene pipes are connected by heat welding method. Self-welding machine for manual welding The end of the pipe and the fitting is warmed up to the desired temperature, after which the parts are connected | ||
|
|
|
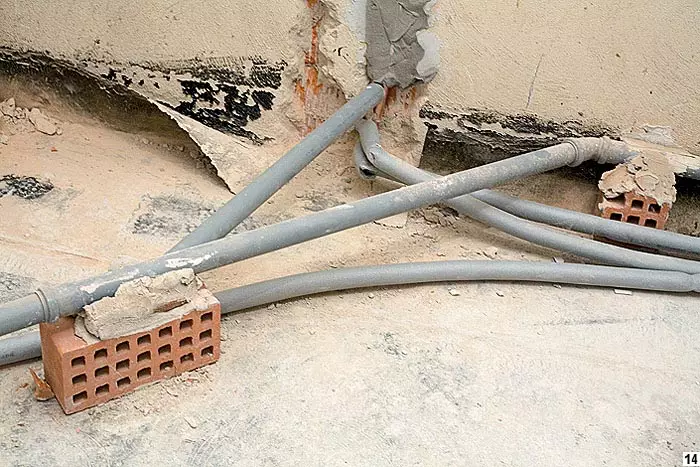
13. Collector with a layout of metal-plastic pipes. Their appearance is deceptive. They are calculated on the operating temperature of 95 С at a pressure of 10 atm 14. Installation of sewage branches start from the riser, observing the rule: the farther, the less the diameter of the pipe. The bias of pipes should be at least 3% |


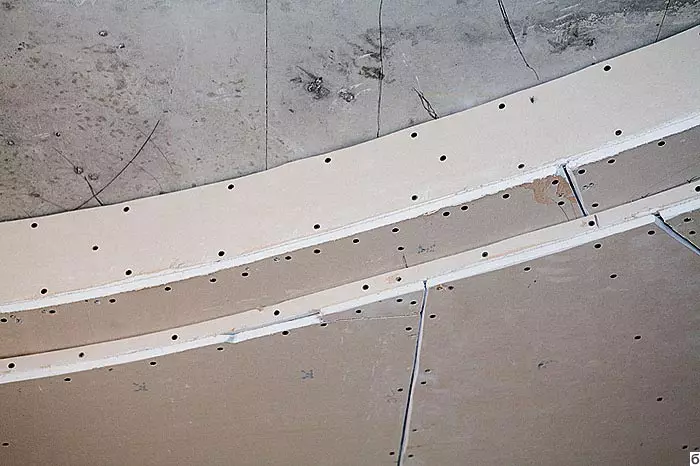
A smooth white surface was and remains a universal version of the ceiling. Depending on the state of the upper plates of the overlap, the height of the finishing room is used different methods. Small defects put sand and align the same way as on the walls. With a significant height difference (more than 2-3cm), experienced builders are no longer risking to apply putty layers, but recommend leveling structures: plasterboard, rush, stretching. Bearing plasterboard ceilings on a metal frame are most popular on the greatest popularity. Material is inexpensive, convenient to work and allows you to create multi-level compositions with built-in lamps. (By the way, the fashion for such designs is already passed.) The construction of a simple smooth frame and the fastening of sheets of HCL is torn to 5-7cm of the height of the room. Since the seams between the sheets are putty, drywall, as a rule, are assembled before the start of plastering. In this case, it is recommended to use moisture-proof material (HCCB), because the usual plasterboard can swell from moisture when the floor screed device and other "wet" processes.
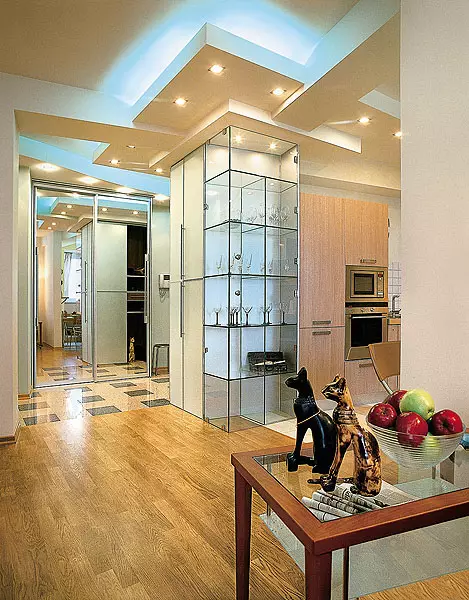
Photo from Z. Rodooddinov | 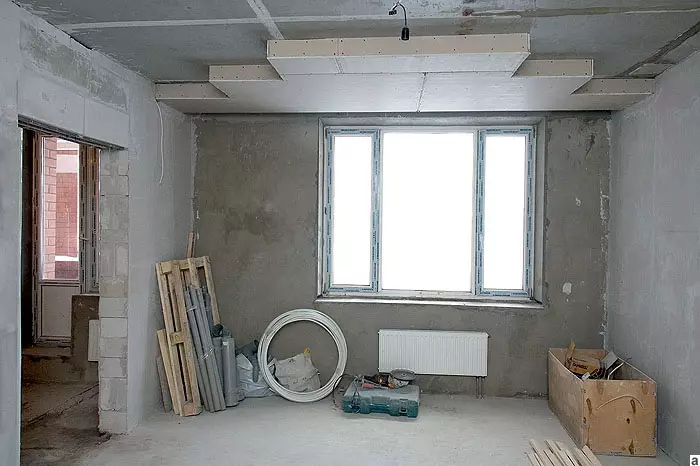
|
|
|
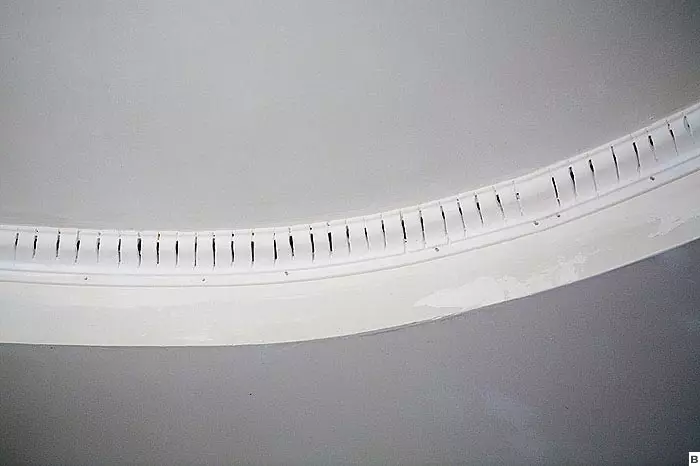
but. In this room, a dining area will be highlighted with a drywall design. Since the room is low, sewing the entire ceiling does not make sense. The jokes of the upper plates of floors are spun and sample the mounting ribbon B, c. The space between the levels of the staircase ceiling is undesirable to leave open. Inside the gaps will accumulate dust, and it is almost impossible to remove it. Vertical sites can be closed with the same plasterboard or polyurethane eaves. For bending along the radius, the material is cut off, and then putty | |||
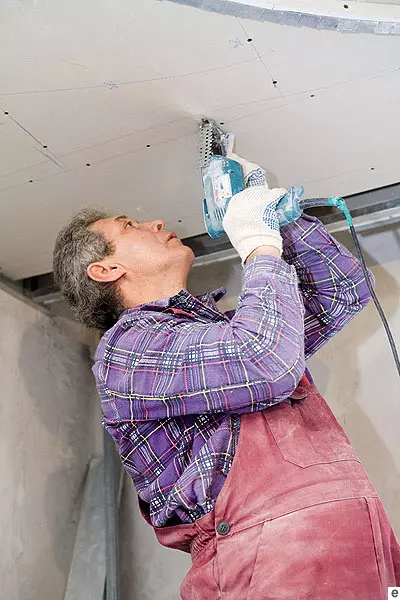
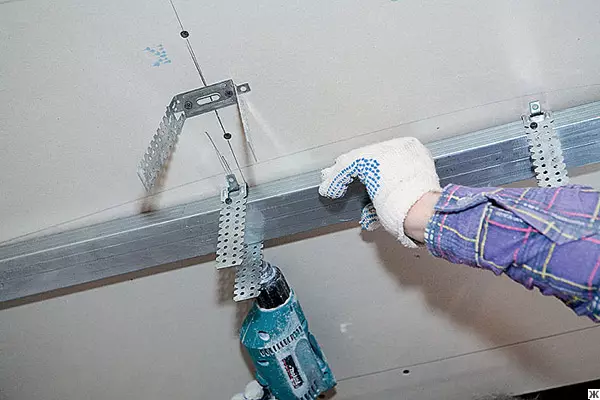
| 
|
|
|
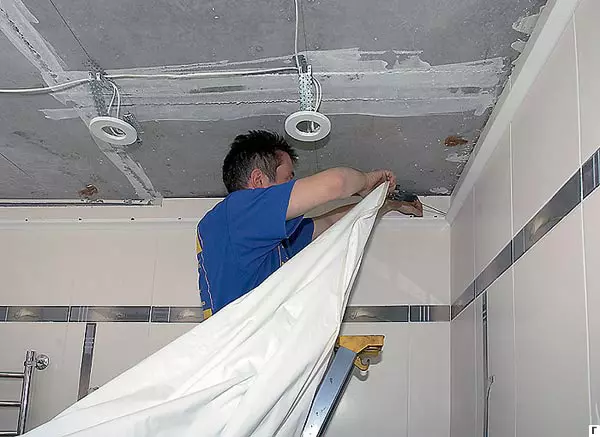
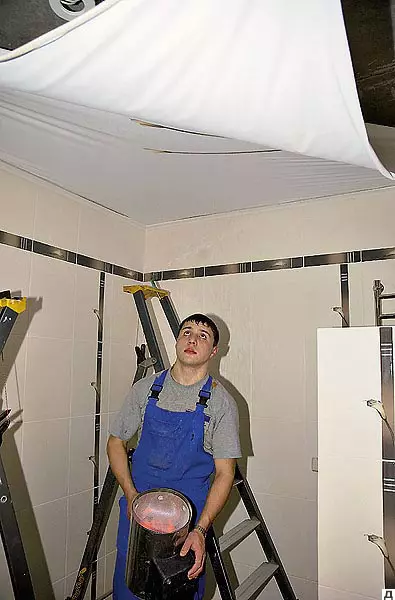
D, d. At the low height of the room, the ceiling slabs can be hidden behind the stretch ceiling, the device of which will take 3-5 cm. By the way, due to the effect of reflection on the glossy surface, the volume of the room visually increases. Mount the stretch ceiling at the finishing stage E, w. The frame of a stitched plasterboard ceiling is created from a metal ceiling profile and fastening elements: suspensions, crabs |
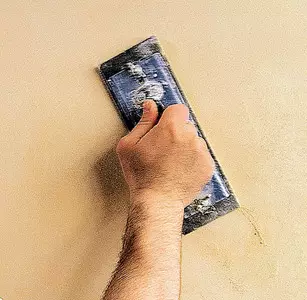
In the same way, as a schoolboy, with the help of a circulation and ruler draws the right geometric shapes, builders, using the simplest adaptation with a plumb and a water level, - exhibit horizontally and vertical. Rather, they remove the labels along which the planes are leveling. On the labels, the beacons are fixed - special metal rails, dividing surfaces on the sections of about 1m wide (they are convenient for work by the Raking Regulation). In addition to inside the layer, the stress occurred and microcracks did not form, the reinforcing mesh is used: the metal is fitted into the light tie; Thin metal or fiberglass, depending on the layer thickness, in the walls.
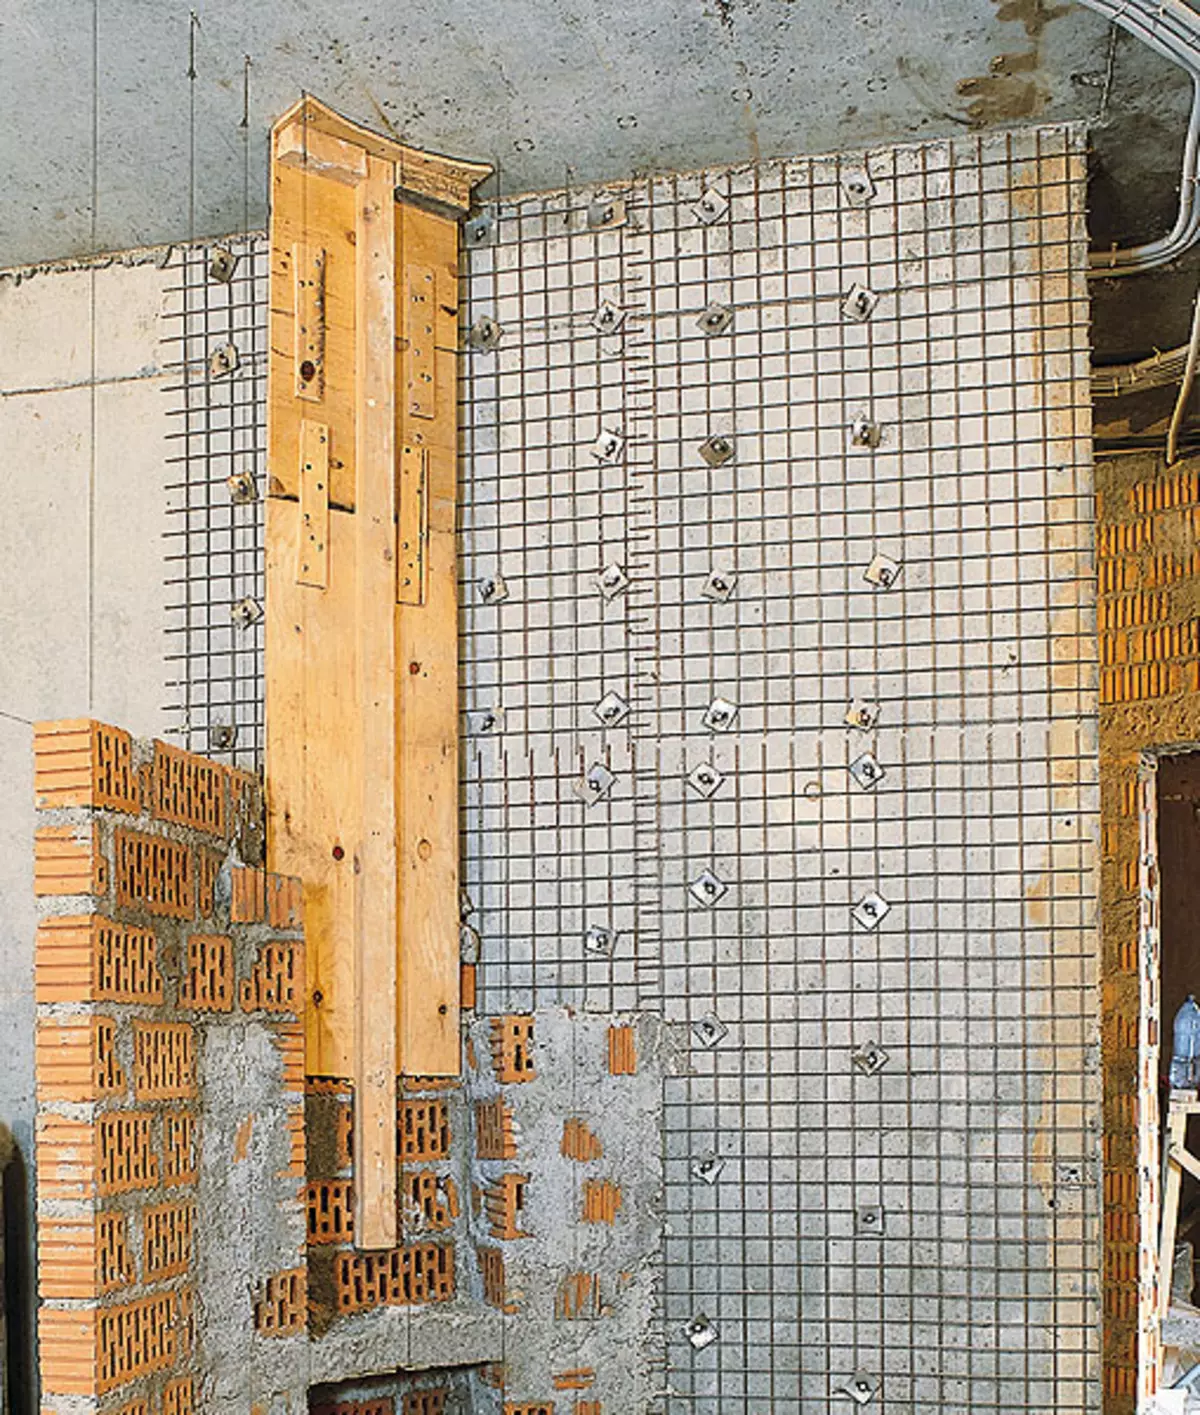
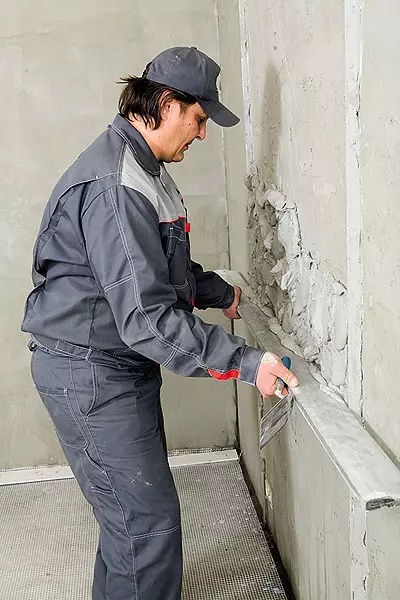
At the initial stage of coarse alignment of the walls, a metal grid for reinforcement is used.
Tools for alignment: Rake rule, half-sash. The roller is applied primer
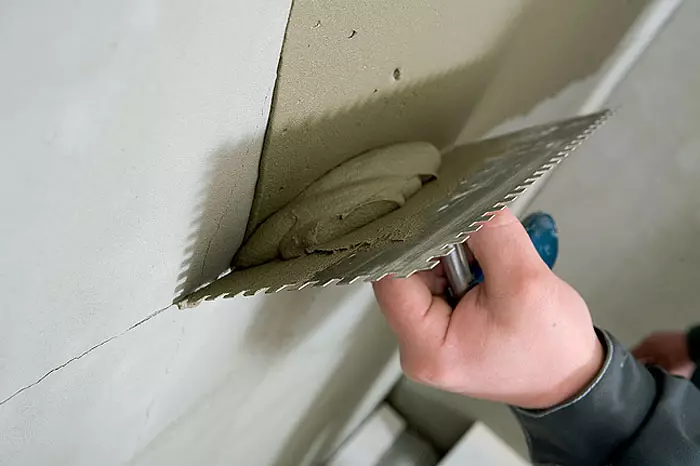
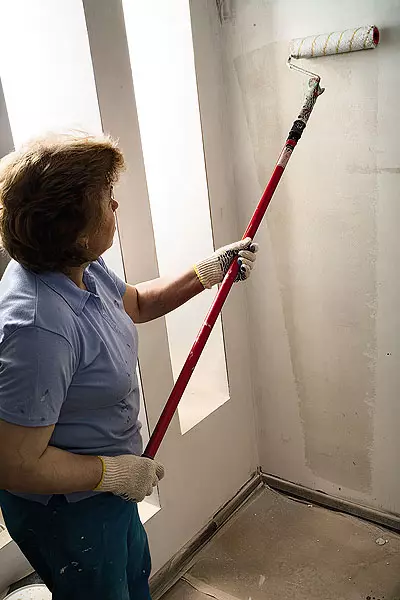
Alignment of surfaces start from the ceiling. Before plastering, the soil of deep penetration improves adhesion is applied. On top of the plaster there are several layers of putty. Before each layer, the surface is ground. The level of alignment is largely determined by the finishing material. So, for some types of decorative plasters, no careful alignment is required, but for coloring, on the contrary, perfectly flat planes are needed. Therefore, after applying the penultimate layer of putty, the walls are grin, and for the finish alignment, a special composition is used with a smaller fraction of particles.
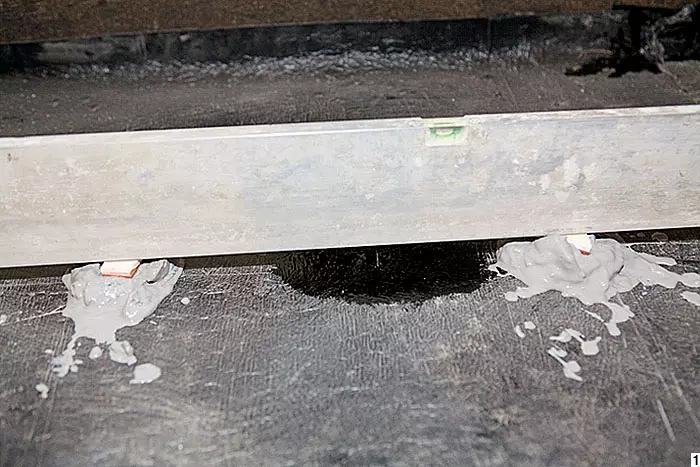
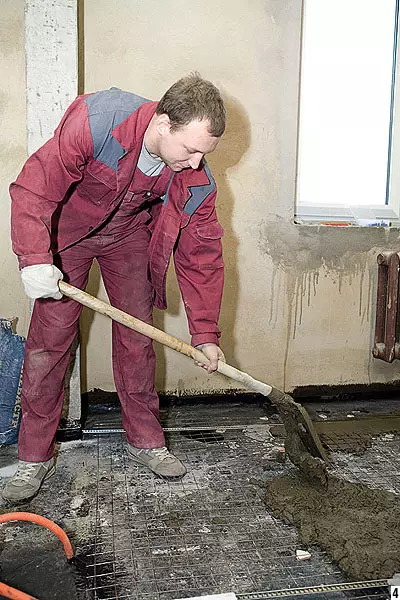
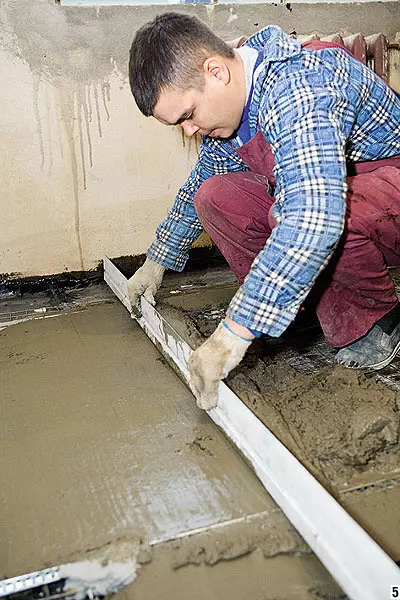
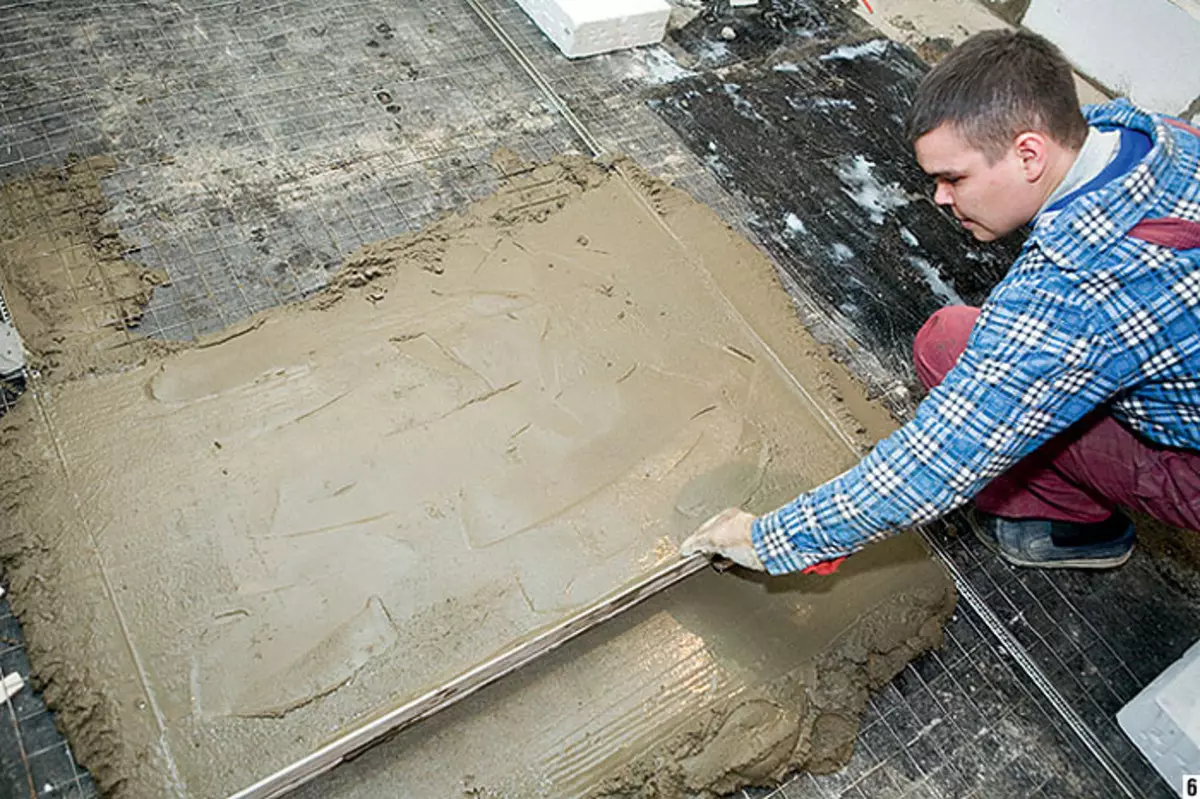
Finally poured the tie of the floor. Its device from the cement and sand mixture will require serious labor and time. Accelerate and at the same time simplify the process of performing the foundation of gender is possible through the use of modified building mixtures. Their use guarantees high quality screed, that is, the stability of strength in all areas.
|
|
|
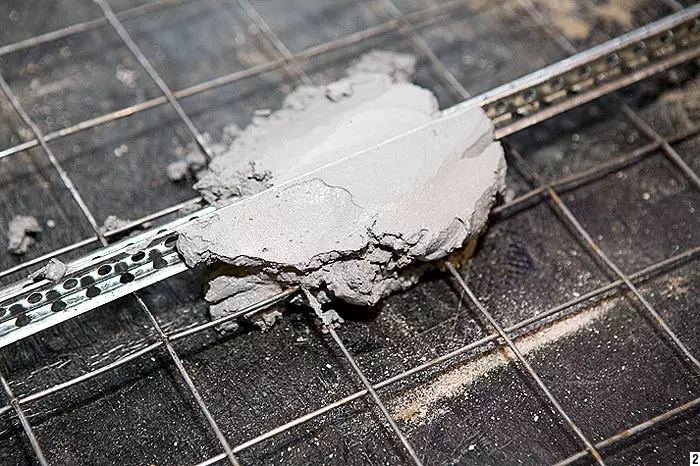
|
1-3. For the device of the cement, the screed first determine the level of the first floor. Then stacked the reinforcing mesh and expose lighthouses 4. With a manual method of kneading and sand, the particles are distributed in the volume of inhomogeneously. For this reason, it is recommended to use electric concrete mixers or special blends for the device | |||
|
|
|
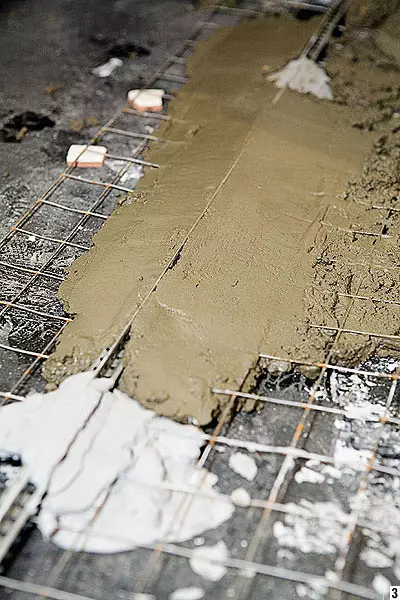
|
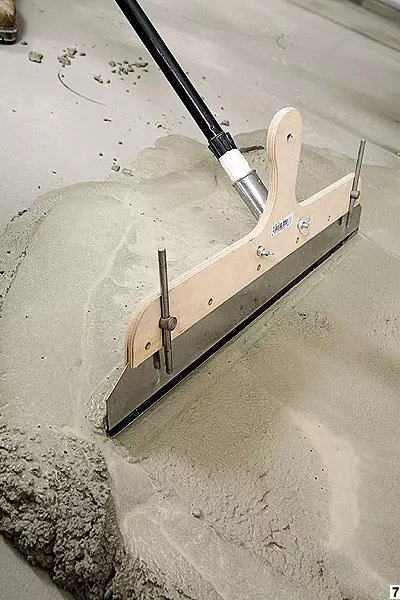
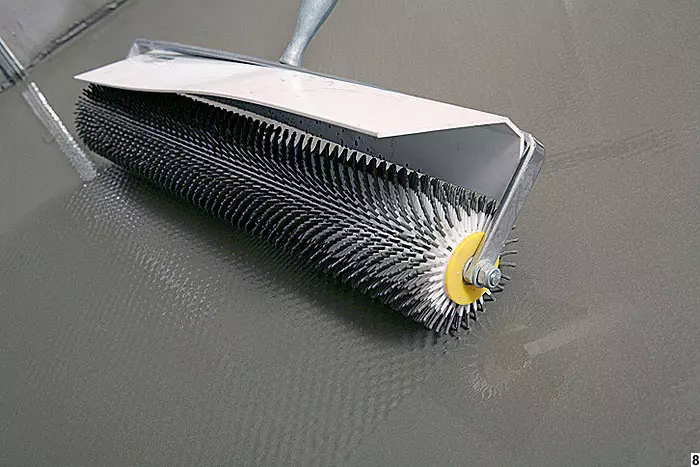
5, 6. After the distribution of the cement-sandy solution, the surface of the screed is neatly aligned with the railway along the guide lines of the beacon profiles. The latter can either pull out or leave inside the monolithic layer 7, 8. To align the screed generated from special modified building mixtures, a wide ripe (7) and needle roller are used. |
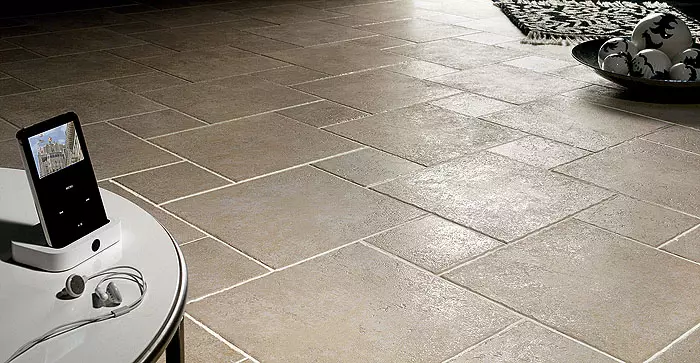
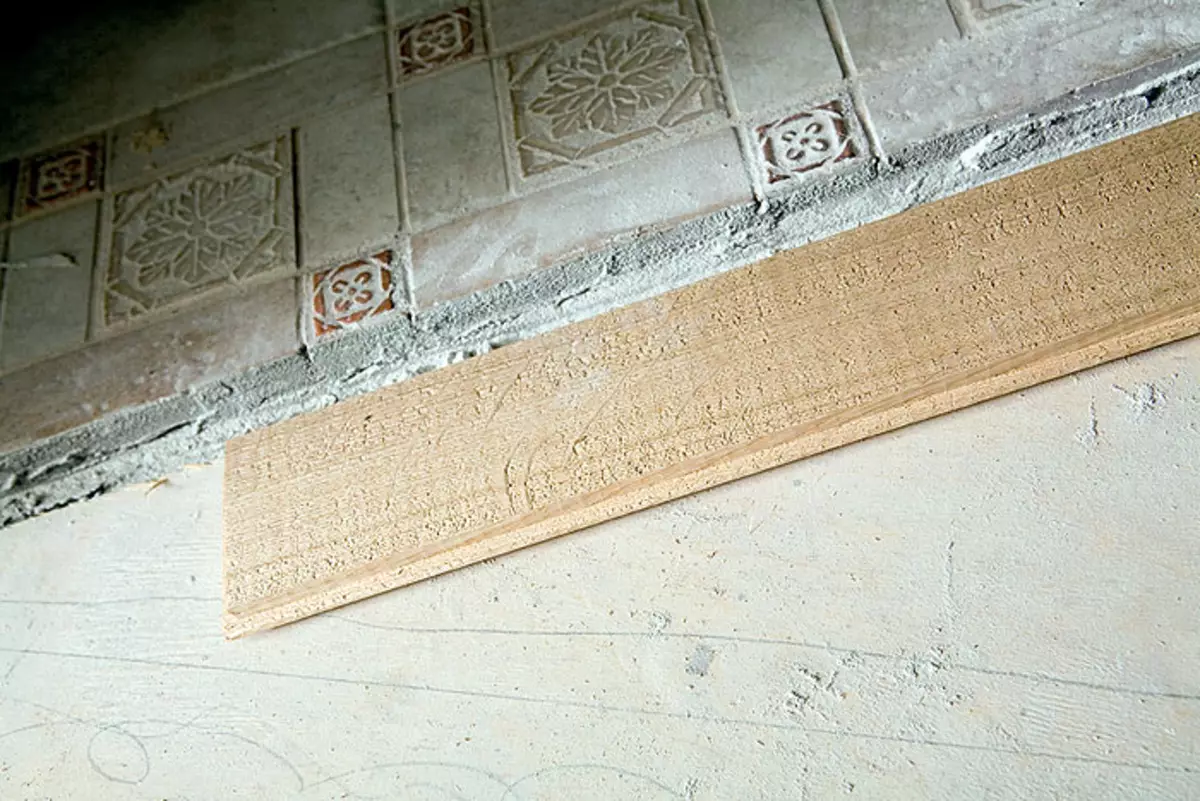
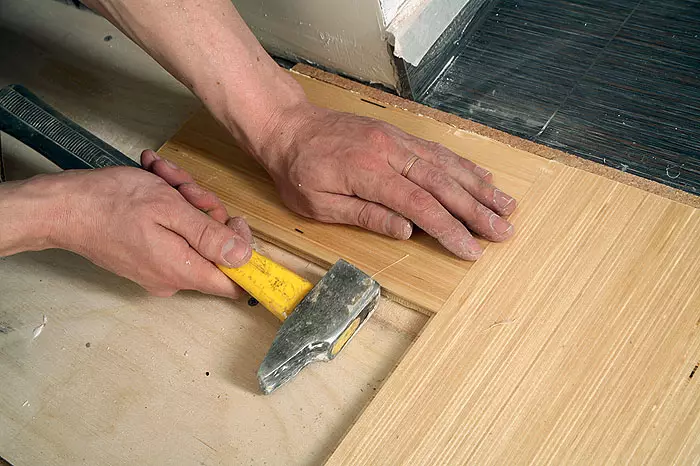
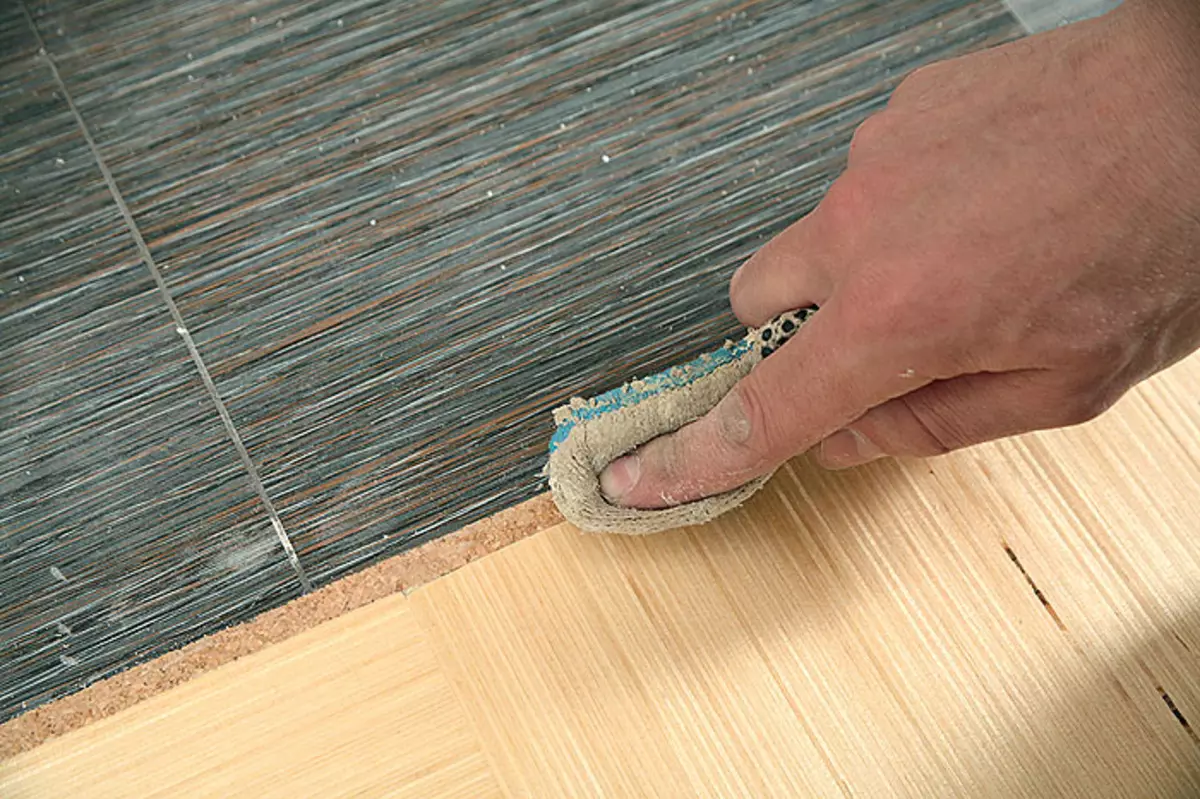
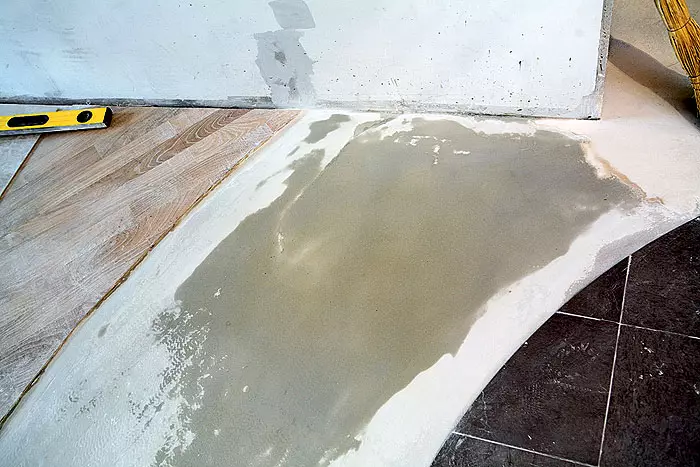
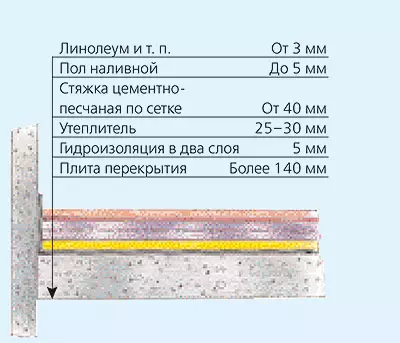
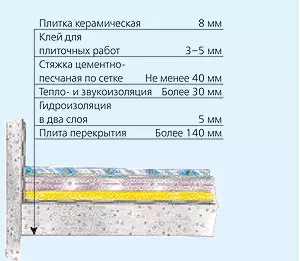
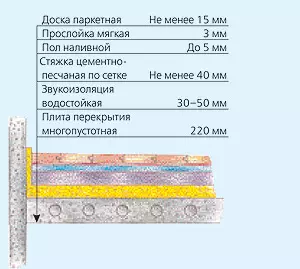
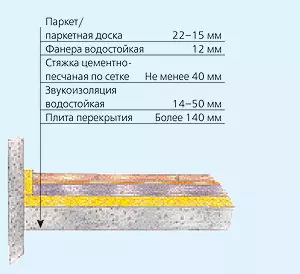
The height of the "cake" from the underlying layers for different materials may be different. Listening to the combined flooring devices (for example, one part of the area of the room occupies parquet, another tile) is the task of removing coatings for one level. After all, the tile is placed directly on the screed, and under the parquet over the screed requires a substrate from plywood. Sophisticated way to calculate all layers with an accuracy of a millimeter and pour tie plots, different in height. Easy-to-pour a single screed, to put a parquet plate on a sheet of plywood and, focusing on them, bring the ceramic coating level by varying the thickness of the laying solution. Accommodation between coatings lay the cork compensator
To have an idea of the scheme of laying coatings, it is necessary even before the base device, because in many cases the heat and sound insulation are put under the tie. If the thermal insulation is not needed, the builders often simplify their task. Expensive sound insulation plates they are replaced with clay. In order for this light sound insulation material, "pop up" through a layer of raw ties, it is placed, fall asleep with dry sandbetone, then such a "pie" is wetted with water. Over the tie.
Directly the installation of sanitary equipment is carried out by manufacturers or qualified plumbing services at the end of the finishing work in the bathrooms. This stage is inextricably linked to the communications device. Before laying pipes, it is necessary not only to decide on the placement of equipment, but also to have assembly drawings on it - all the conclusions of the plumbing and the drains of the pipes are arranged for specific models.
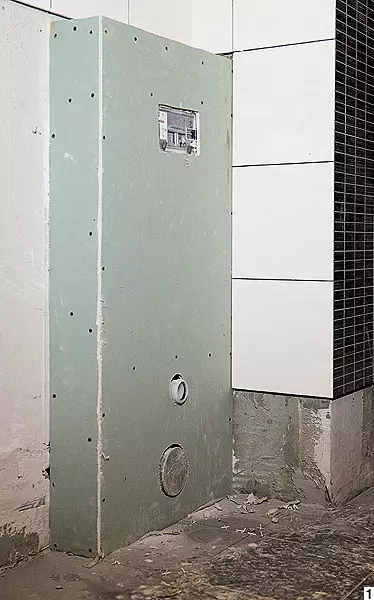
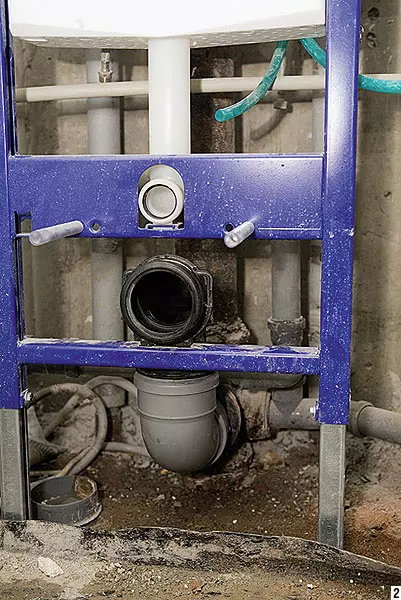
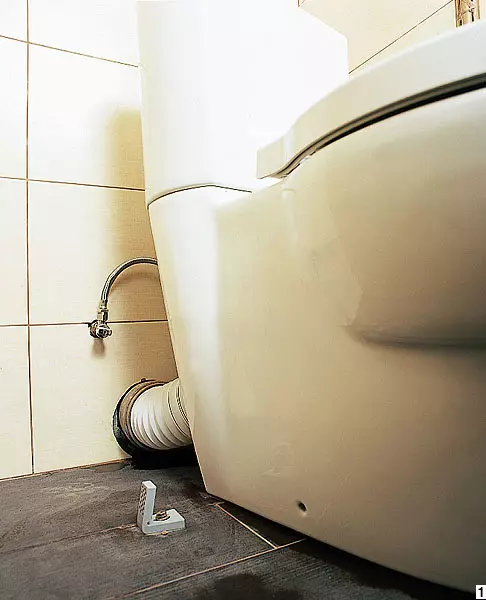
1, 2. Geberit installation system for mounted toilet with an integrated tank
3. Fravel in 90 and less on the sewer tube is undesirable. Great probability of blockage. Flaw on the riser is fraught with a breakdown of hydraulic devices of devices from the neighbors below
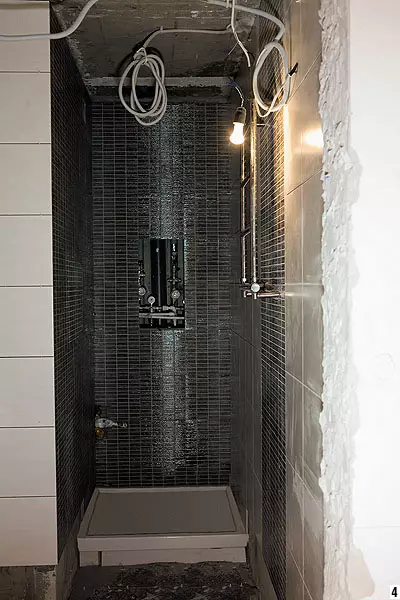
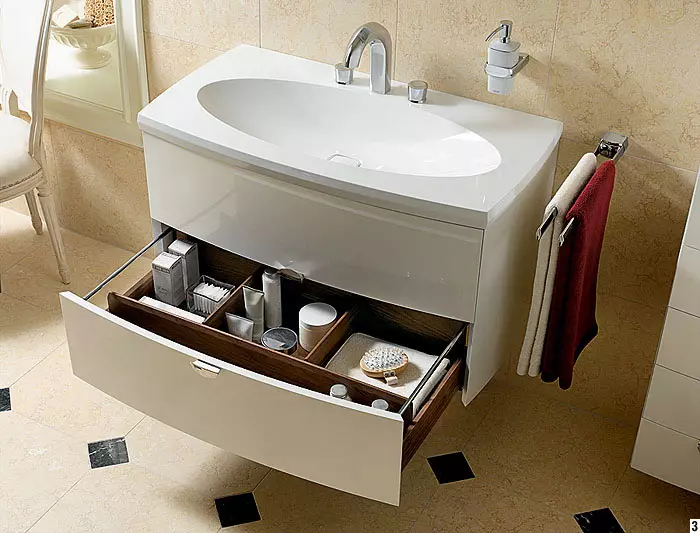
4. You can not buy a ready-made shower cabin, but to construct an individual model, pickup shower panels, pallet, curtains and ceramic finish
After laying pipes in the fines, the tightness of the compounds check. At the initial stage, frame installation systems for toilet and bidet are also mounted. Plumbing works refer to the discharge of hidden, and the mistakes allowed can do very expensive. In order not to create yourself of unnecessary problems, stick to the connection of plumbing in terms of connecting the alignment. Thus, the transfer of the toilet, even for a short distance from the sewering riser, will require a pipe eyeliner with a slope of at least 3%.

1. Connecting the toilet media by corrugated pipe
2. The conclusions of the water pipes are temporary plugs
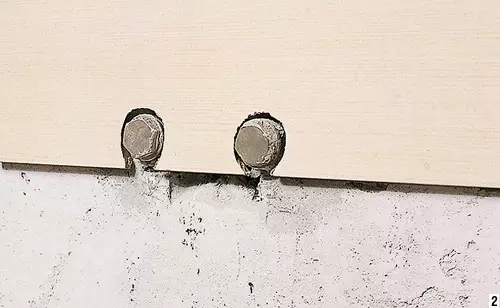
3. The latest models of ultramodern plumbing - mounted washbasins with drawers that hide siphon
4. Architect A. Caprov
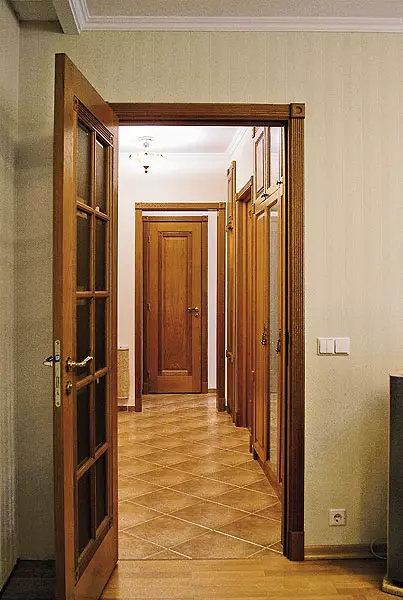
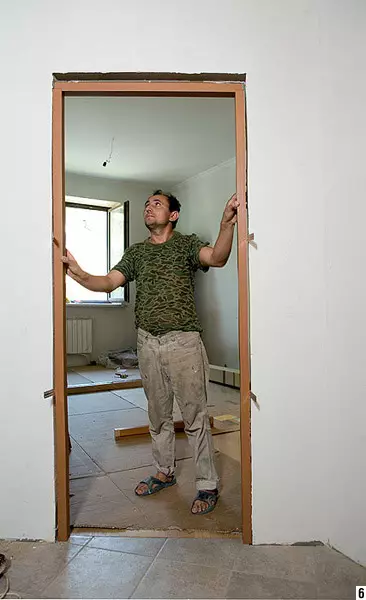
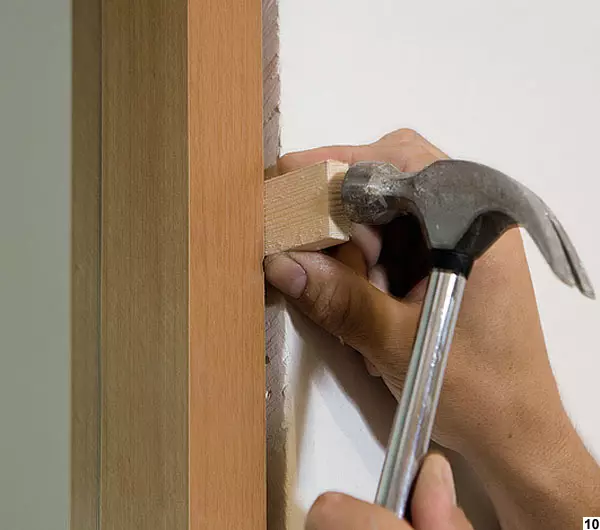
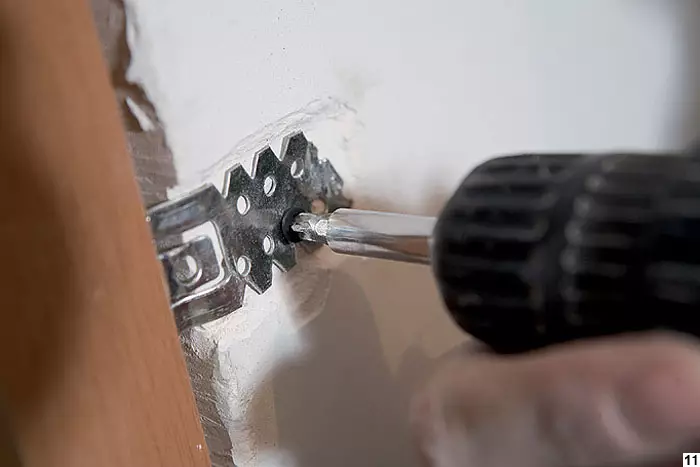
It also presents the technology of installing the doors preceding the finishing finish, as the fasteners remain invisible. To fix the door in the opening and make fasteners imperceptible, metallic suspension elements of the suspended system of plasterboard ceiling are used.
Determining dimensions when ordering doors are width, the height of the opening and the thickness of the wall. Inesley width and the height of the widths of the standard and should be adhered to them, then with the thickness of the walls it is easier. Most manufacturers go to meet the consumer and reduce the size of the door frame thickness under the desired size.
|
|
|
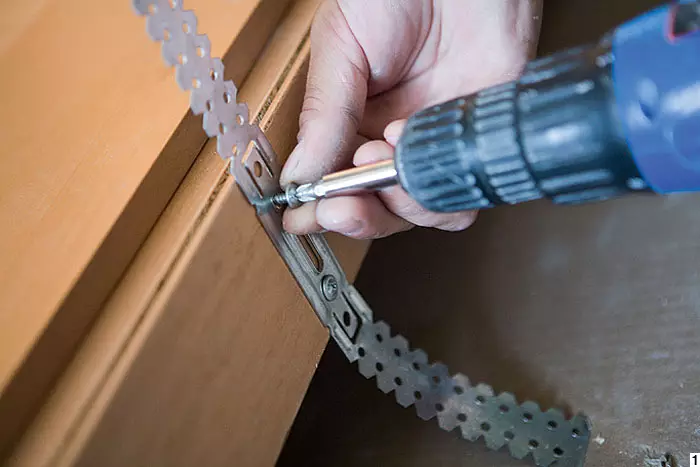
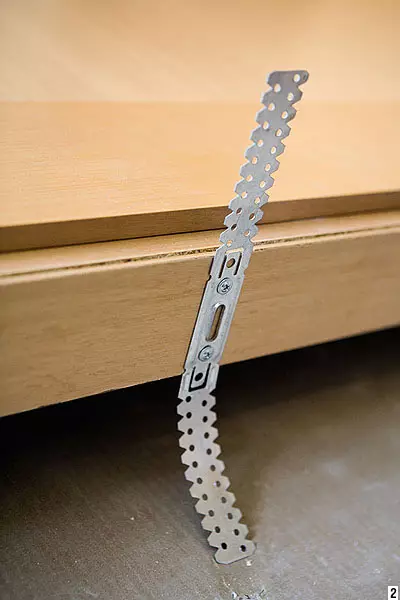
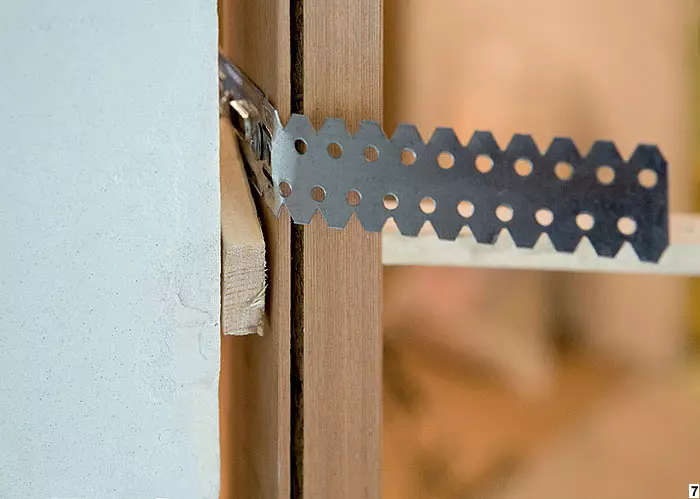
1, 2, 11. The suspensions are screwed to the outside of the box, then to the wall along the edges of the doorway, shutting down the remakes from the place. Innissets are fixed with self-draws, and outside shook down | ||
|
|
|
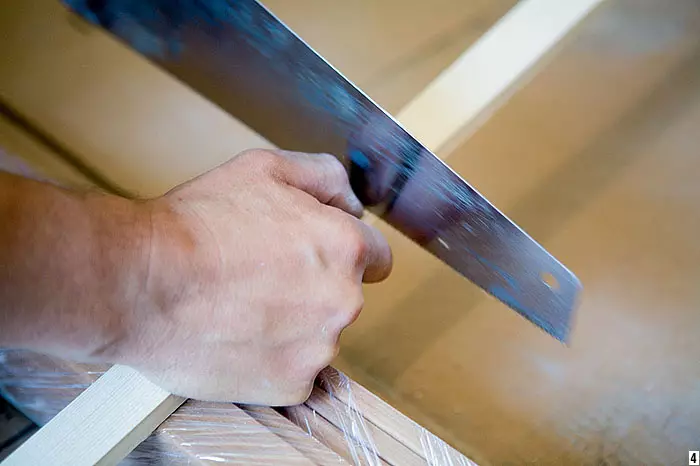
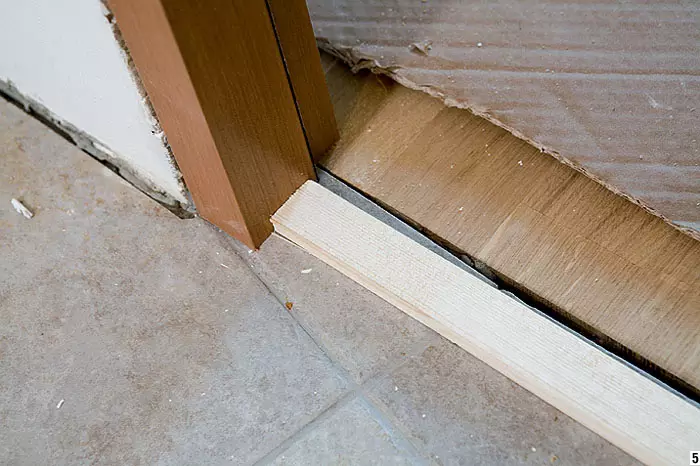
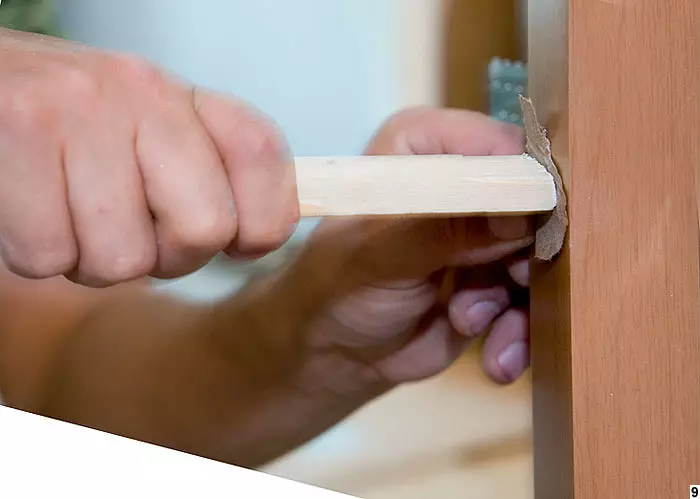
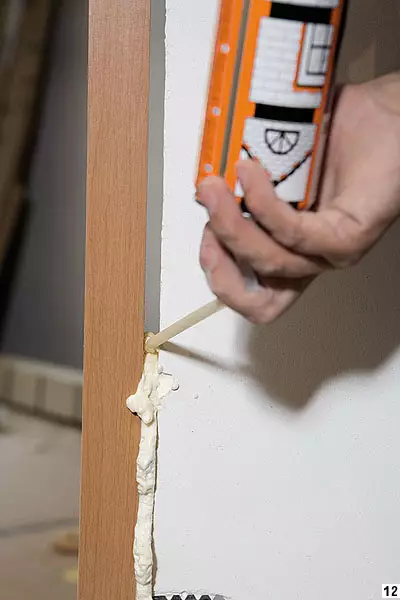
3-5, 9. For the accuracy of the installation of the door frame, the reconditions of the same length corresponding to the width of the box are used. They are manufactured in place and fix in the opening at the time of installation. 6. First install the door frame, gate gaps. After a day of surplus foam cut off and hang the door | ||
|
|
|
7, 8, 12. The box is exhibited by level. First, it is fixed with the help of bars. They are tightly driven into the gap between the wall and the box. The rest of the gaps are filled with mounting foam | ||
|
|
|
10. For a reliable installation of doors having a box of MDF, in the opening between the box and the wall it is recommended to insert as many bars as possible, otherwise deflection can be formed. |


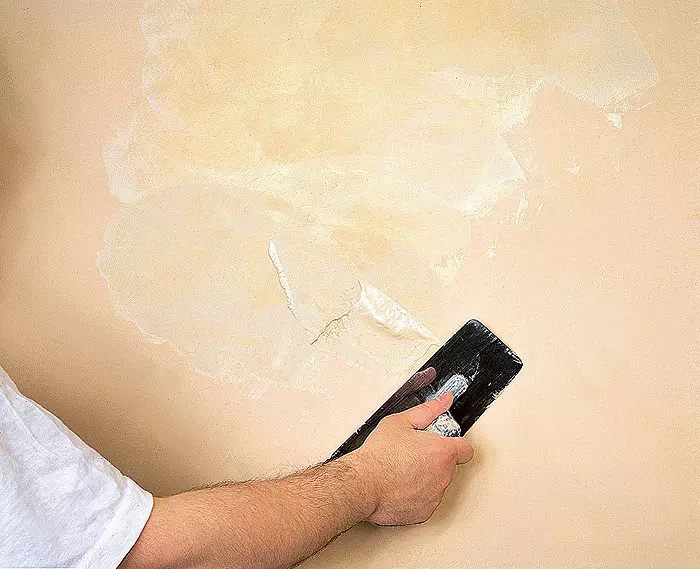
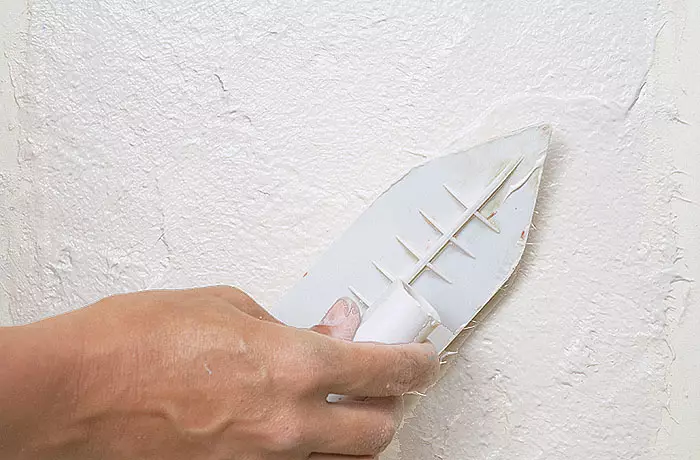
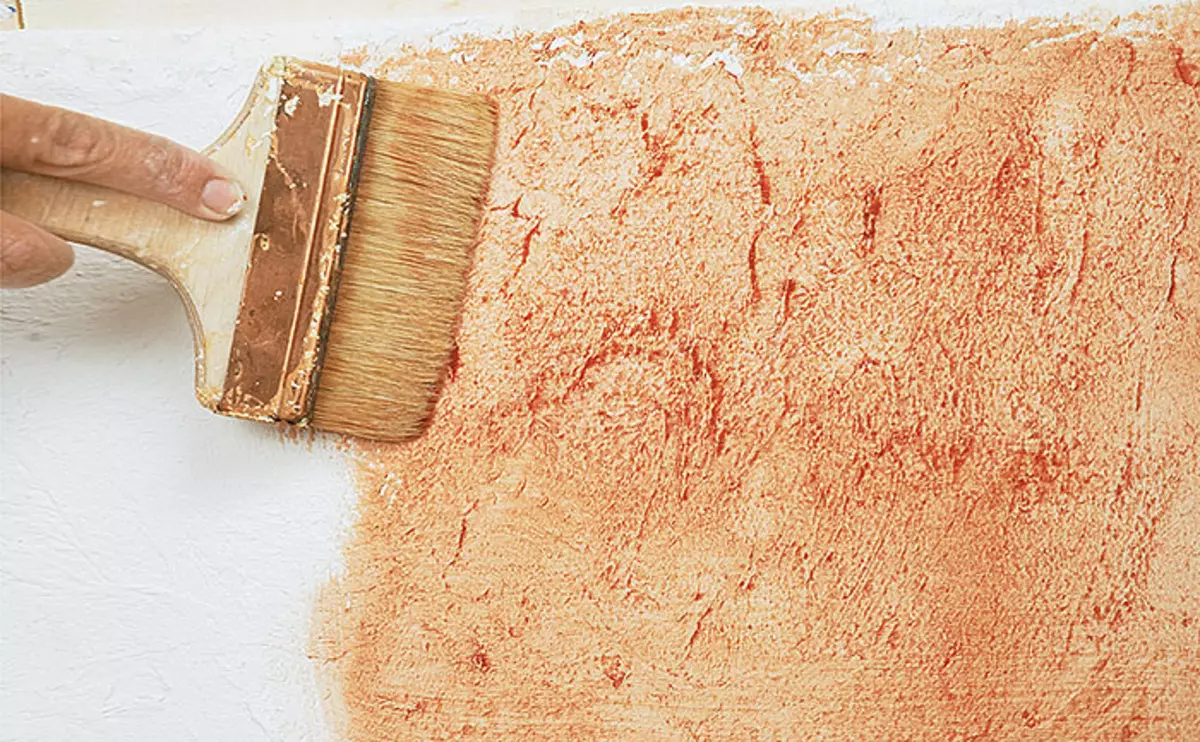
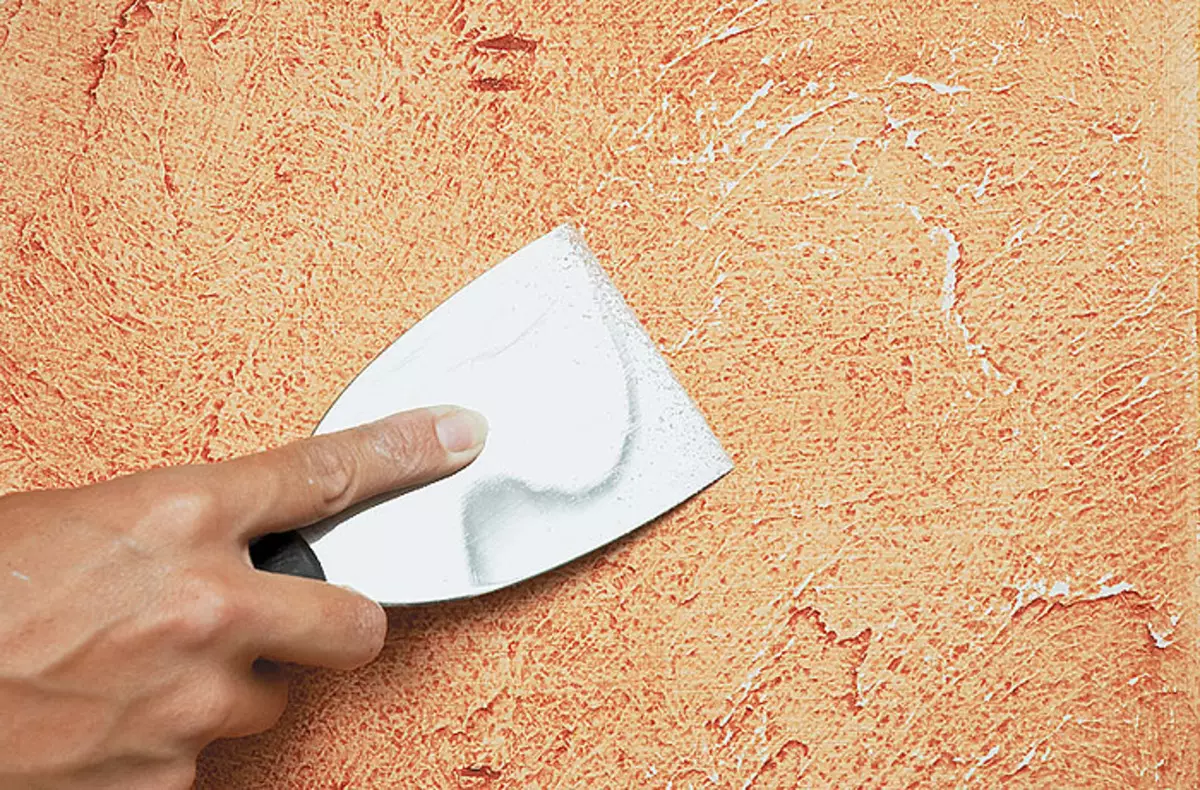
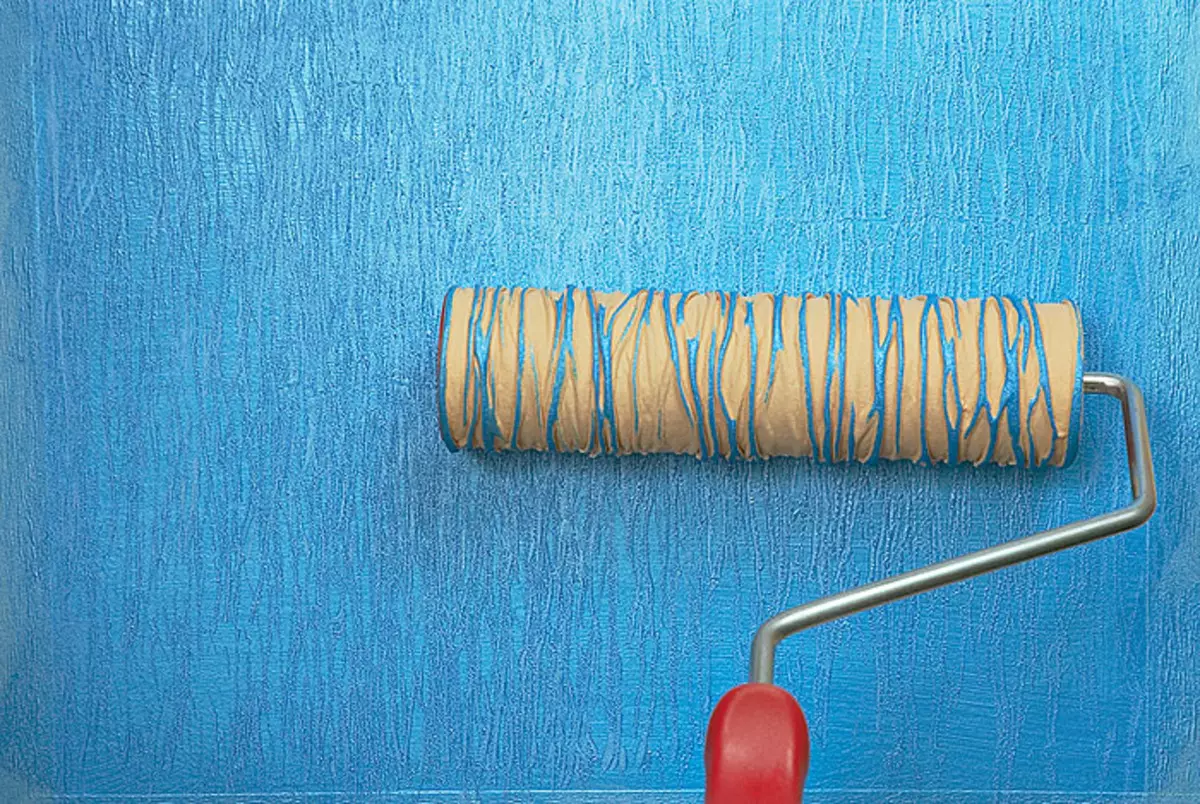
Along with traditional wallpaper for wall decoration, decorative plasters and paints are used. The roller applied, spatula, the brush coatings do not form on the surface of the seams or joints and do not require the fitting pattern.
But quite often work with liquid materials requires high qualifications. The process of applying most decorative plasters cannot be interrupted until the entire wall from the angle to the angle is covered, otherwise the visible joint is formed. Adla creation of the original relief over the entire surface requires appropriate skills. But the one-time costs for the professional trim of walls will undoubtedly take off overup.
Perhaps, it is even more important to determine the color than with the material. The main thing is not to peel. As a rule, the walls are made lighter than furniture, and a catchy drawing or a bright color is good only in order to create accents. One of the walls, for example, can be on the tone of the lighter than the others, and the mood of a sunny day will appear in the room ...
If it is difficult to choose a color, we advise you to stay on the achromatic tones, that is, on combined with all other shades of gray or white. A kind of light walls visually expanding the boundaries, create a calm cozy atmosphere in the house, because you simply do not notice them.
|
|
|
|
|
|
|
|
|
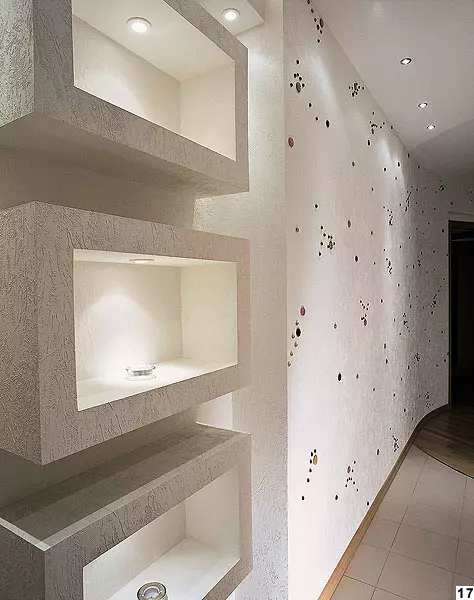
Photo by E. Kulibaba, D. Minkin, V. Chernyshova Whole arsenal of tools plus smear appliances make it possible to achieve different decorative effects: velvet fabric, crumpled paper, orange peel, antique walls, fish scales, frost pattern and much more. Figure can be clearly relief or have a thin invoice | ||
|
|
|
|
|
|
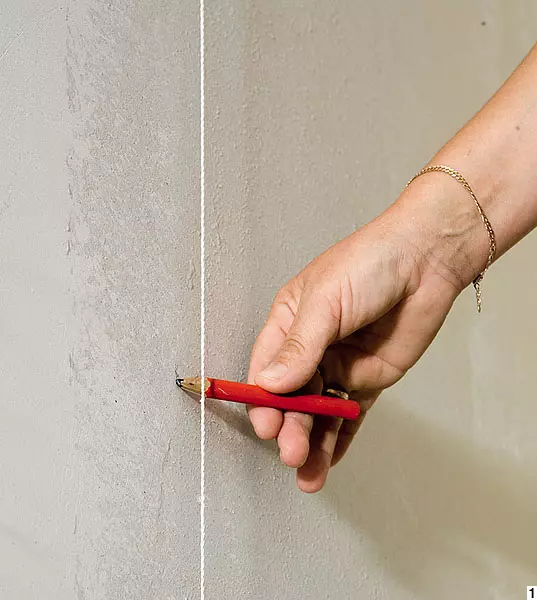
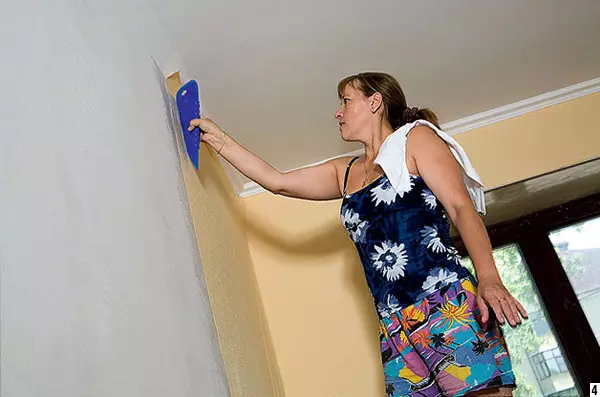
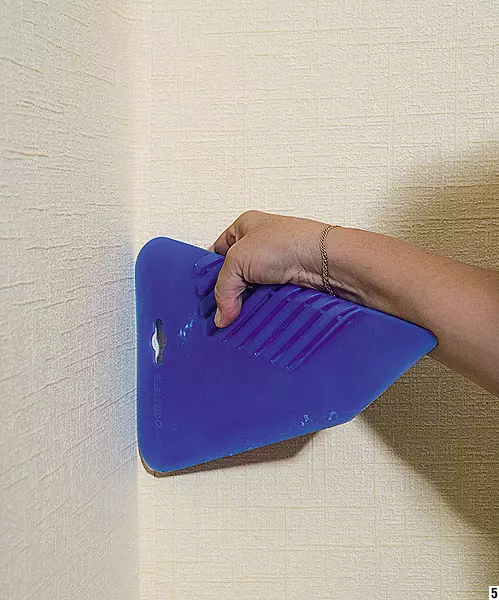
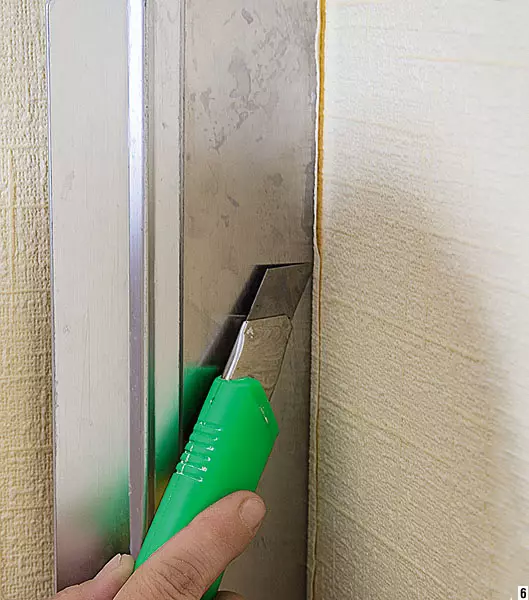
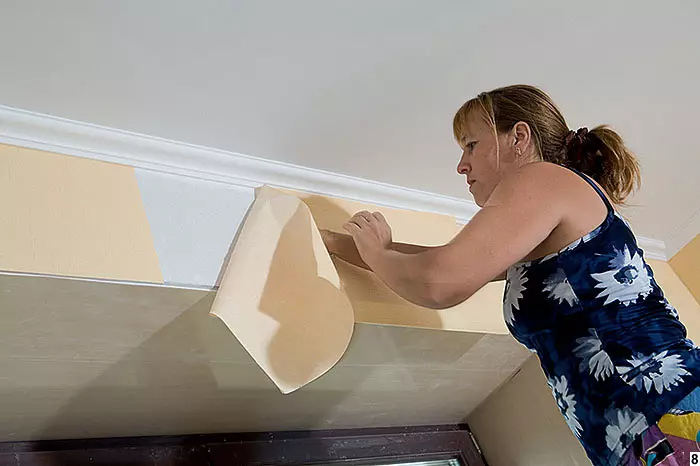
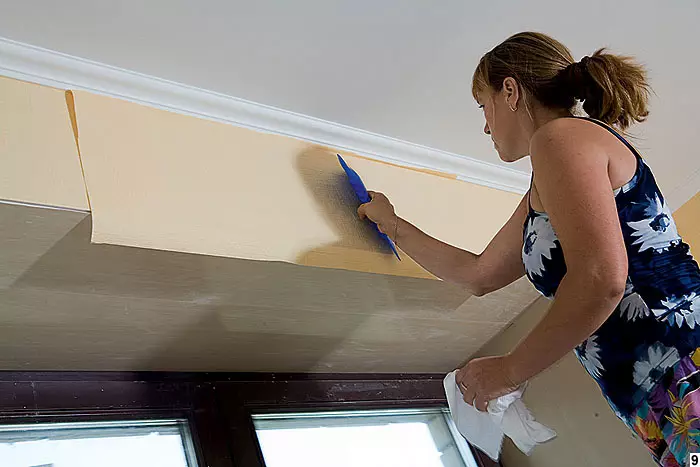
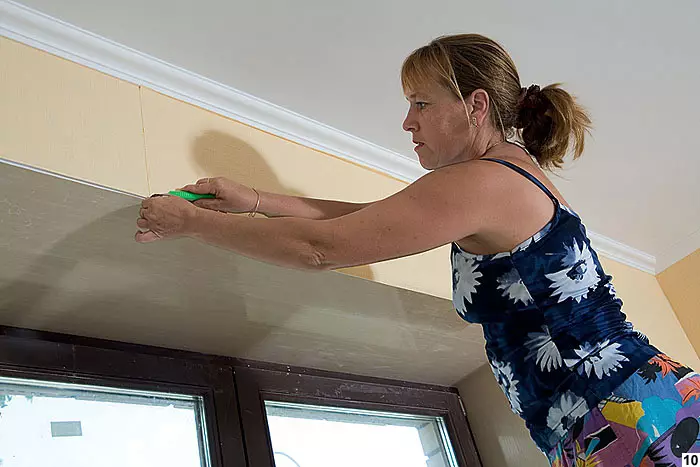
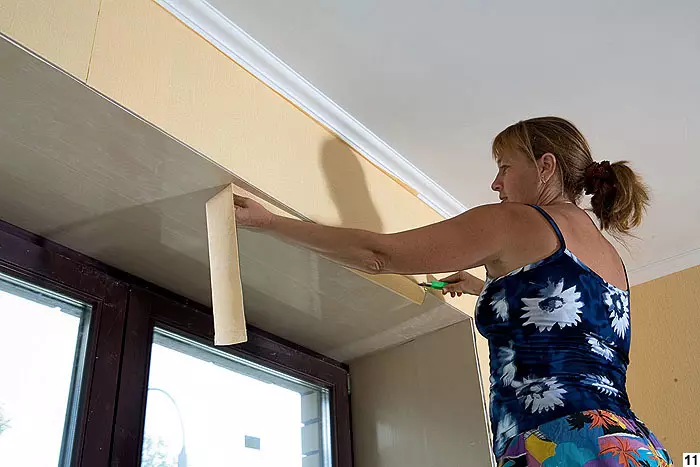
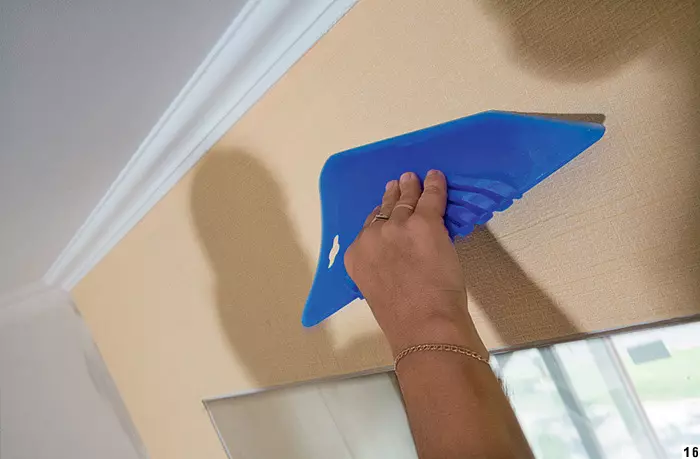
1-6. Printing wallpaper online requires great accuracy. The vertical position of the angular canvases is measured using a plumb and a pencil outlined several points on the wall. On these points orient the edge of the canvas. It is smoothed in the direction of the angle, where the surplus is cut on the metal line of the cutter | ||
|
|
|
|
|
|
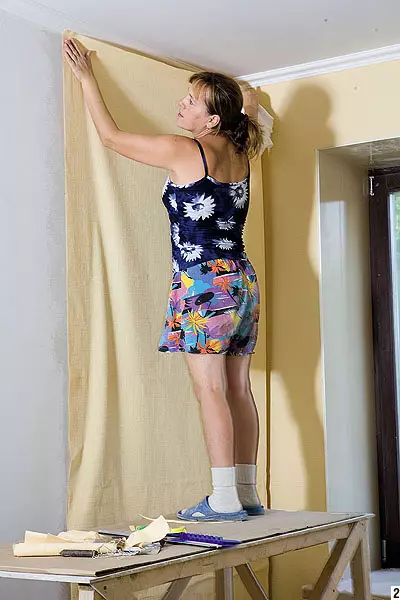
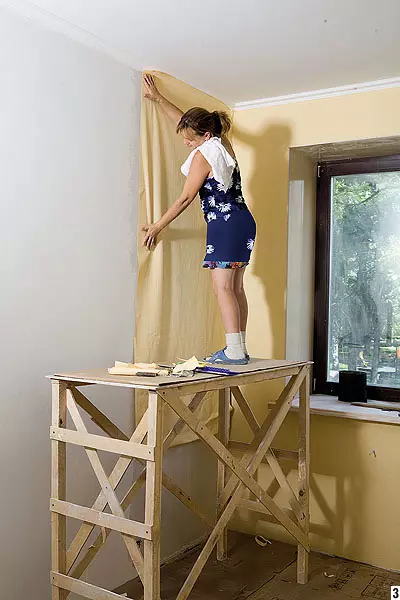
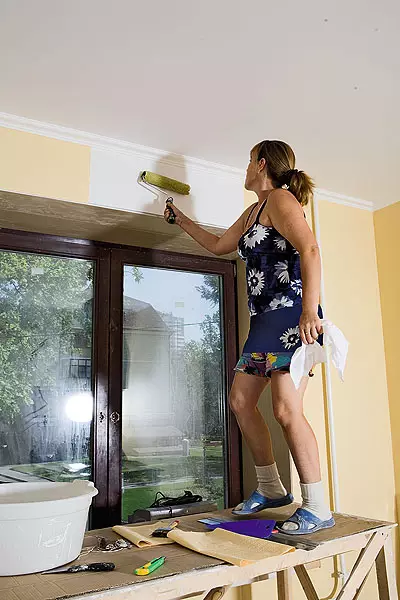
7-12. In accordance with the marking on the roll glue is applied to the wall or on the reverse side of pre-marked and chopped cloths. (The length of the canvas is equal to the height of the wall plus 5-10cm on trimming.) When the main walls are finished, proceed to the salary of the remaining areas above the doors and windows | ||
|
|
|
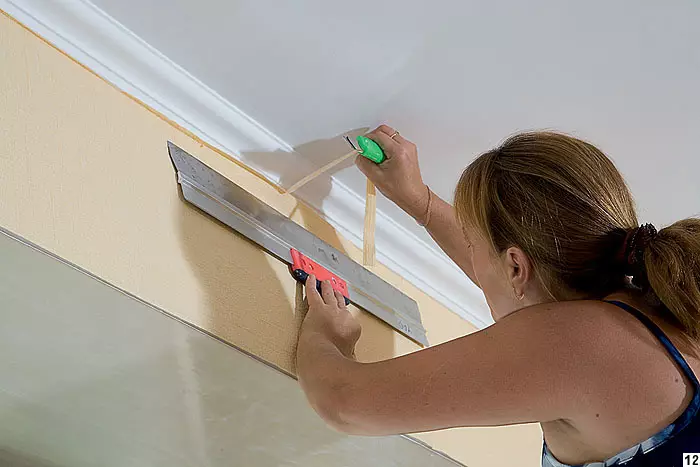
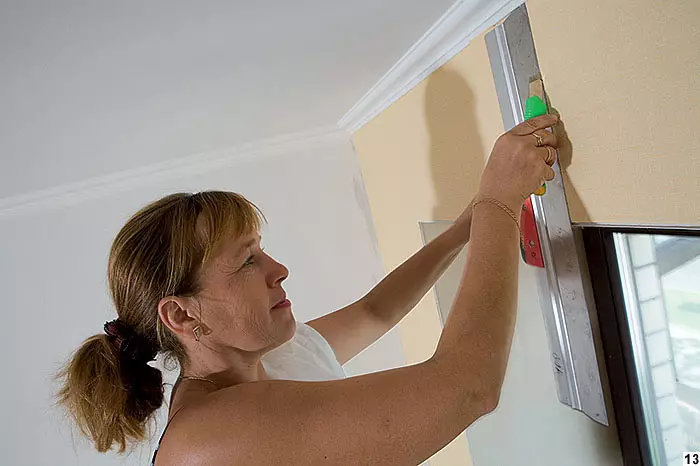
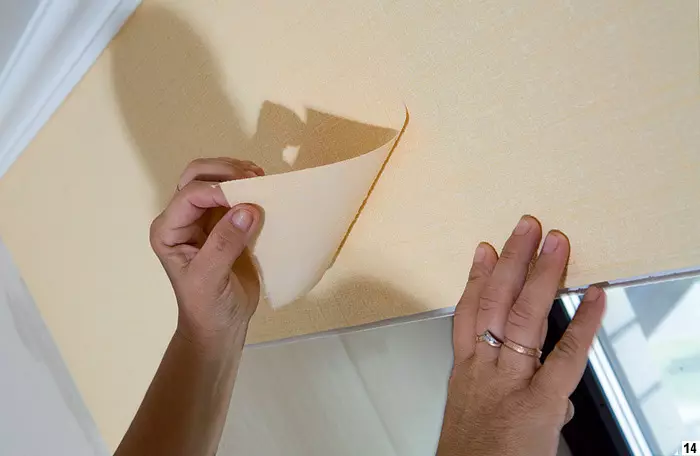
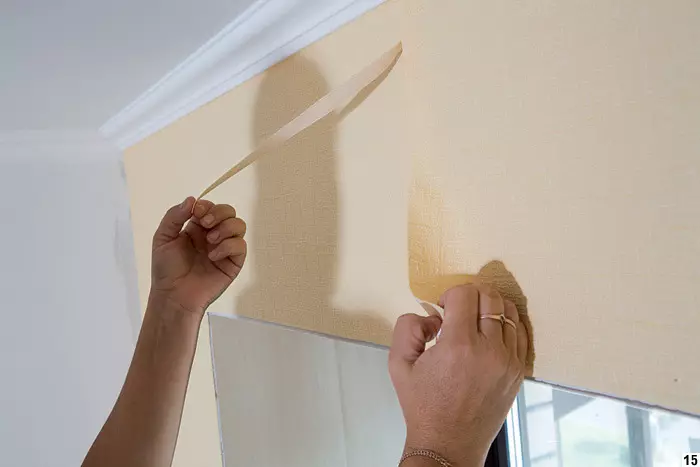
13-16. To get a smooth junction over the window, the canvas first glue a mustache. Having attached to it a ruler, the cutter make a vertical cut. Remove the upper trim of the right canvas. Then, unscrewing the edge of the right canvas, pull the left cut from it from under it. The connection is perfectly smooth | ||
|
|
|
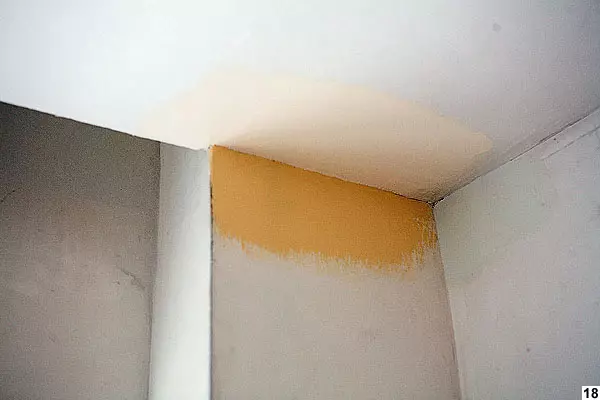
17. Architects Y. Mikhailova, A. Kutsenko; Photo by E. Lichina 18. Attractive color of the smear on the lid of cans with paint can not be at all on the wall. This is explained by the fact that the impression of the decorative effect of the finishing material can be made only on the scale of the room. To do this, it is pre-made the wall on the wall, as if the "fitting" of the selected shade. It is recommended to use special tools and observe the optimal temperature regime (18-20 seconds). The fit of the drying of the glue closes the windows so that there are no drafts |


The editors thanks the company "Boomerang" for help in preparing the material.
Repair, as in nature, there are regularities. After summer does not begin in spring, and on top of the glued wallpaper do not align the walls. "Seasons" and "offseason" repair work alternate in a certain order, and in the end the process comes to complete. Most likely, in fact, there will be more than ten stages. Or in the confusion of coordination, procurement, ideas, shortcomings and alterations you will not notice them at all ...