Install the fireplace itself - actually, subject to the use of the standard set and compliance with the safety rules. Installation of the fireplace: step by step.
About fireplaces written a lot. Their popularity is growing day by day. Stylistic solutions related to the decor of fireplaces - a huge amount. The inpecker room of Salon-Interior magazine presents different options for making fireplaces in residential interiors. We publish a report on installing a fireplace in the house.
Is it possible to install the fireplace?
- metal part;
- Decoration Materials;
- Composite parts of drawing and pipes.
Selected model
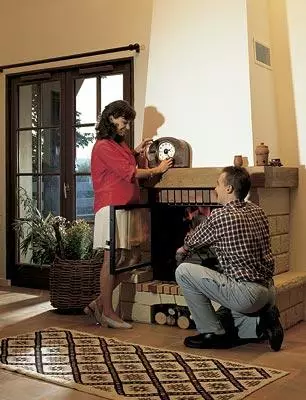
Presented here is a set fireplace with a glass door and a massive oak shelf. The hearth gives energy equal to 11kilovattam. The distribution of heat in this case is natural, but it is possible to connect a collector and metal insulated heat conductors for heating adjacent rooms. Extract from molding gypsum - both the finishing element and the heat battery.Preliminary operations
Back wall. Before installing the fireplace, it is necessary to know what the nature of the wall. If it is finished using composite polystyrene or polyuritan panels, it will be necessary to release the rear wall to brick or concrete and lay the heat-resistant material.
Floor. Due to the large weight of the fireplace and due to the large heat transfer, the floor should be thick and fixed. You can not install a fireplace on a wooden base or an old tile. In the case, we put the fireplace on the concrete tile, which is the most durable and reliable base. Alpox cases are necessary at the base to make a small concrete reinforced formwork in 10 cm thick.
Installation
Back wall. Foam concrete blocks are cut with a hand saw. The connection of blocks should be very thorough, without gaps to avoid penetration of cold air and exposure to heat directly on brickwork.
Chimney. The 2020cm brick chimney was provided in the design of the house. Always use the chimney to it need to build a new, metallic. As a rule, tubes of small diameter are used. For better fixation and smoke insulation, a coupling and cuff will be required.
During the installation of adapters in the joining cuffs, there should be a bias of 45 (so that the soot is not accumulated and the cleaning was facilitated). This can be done with a lime solution. Despite the manufacturer's recommendations, we did not set the exit from the facade side of the hood. But for convenience they made access to the system on the back side.
Finish. Listening to individual mounting of the furnace, it is necessary to leave the free section in 800cm2 below and behind the air access furnace. Niche below is designed to store wood, but you should not fill it with the lamps completely.
Bake. The focus is installed on a metal pedestal for air access. Tin canvas protect wooden panels and decoration materials from the heat.
Hood. In addition to the aesthetic functions, the extractor and finishing of the fireplace perform some thermal insulating functions. Hot air from the surface of the furnace through the metal grilles specifically provided on the surface of the draw surface goes into the room. In addition, these lattices in the absence of another access make it possible to penetrate the system. They should be located not higher than 30cm from the ceiling and have a total area of at least 800cm2.
Handling from gypsum plates. It is installed using glue, on the corners, the design is enhanced by strips of fiber and plaster. Inside the heat-insulating fiber tile aluminum layer. It protects the upper layers of material from overheating and cracks.
Outside the easiest way to finish is the applying of matte paint (Dulux Valentine Lumiere), which is most suitable for a shade to the rest of the room and the least perceive dust. Of course, it is preliminarily necessary to spacing the surface and apply a background lescing that levels the surface.
Beams. They should be made of wood and be sure to be protected from the heat. Between the metal and wood, you need to pave a fiber gasket and enhance the insulation of the tin. It is best to treat the shelf with dark wax (Varnishing from the veil and varnish, which cracks, the wax protects the wood well).
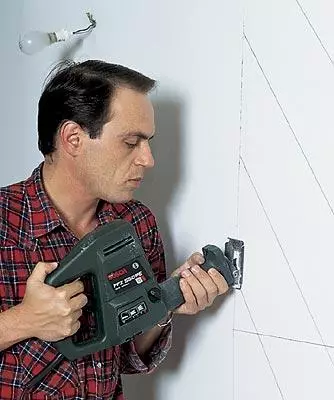
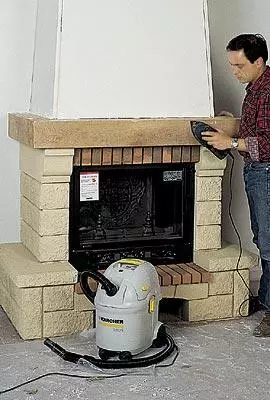
| On the wall outline the dimensions of the future fireplace and saw or mechanical hacksaw cut the composite panels located over the wall. Be careful and make sure that a large number of asbestos and brick dust falls into the motor. |
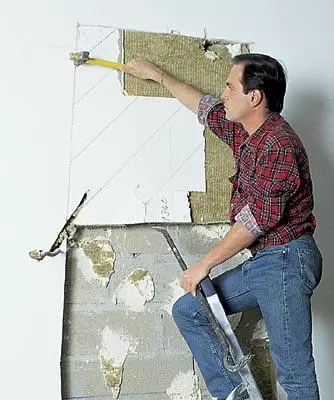
| The wall is released to the main material. The remnants of the glue-real problem, they must be removed to install the heat-resistant gasket. Wiring must be left to the side. |
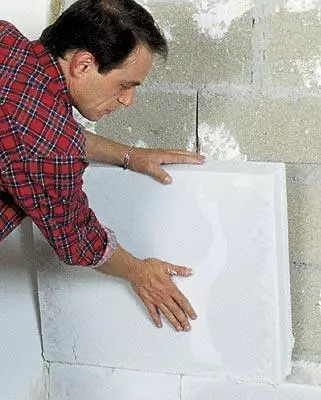
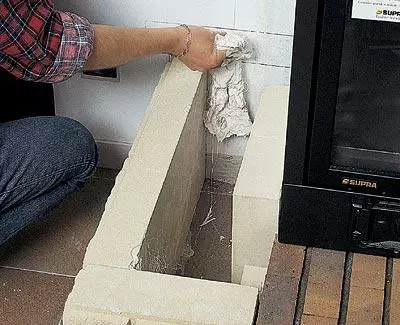
| When the brickwork and chimney are naked, blocks of foam concrete are inserted into the resulting niche. They must be tight to drive to each other. The new wall should be the same thickness as all the walls in this room. |
| Chimney, laid out of the brick, is freed from the remnants of glue or cement. The gap between the chimney hole and concrete blocks should be as small as possible. The edges of the chimney and the surrounding panels should be smeared with a lime solution. The solution is placed by a trowel, removing surplus and equalizing the edges of the chimney and concrete blocks. |
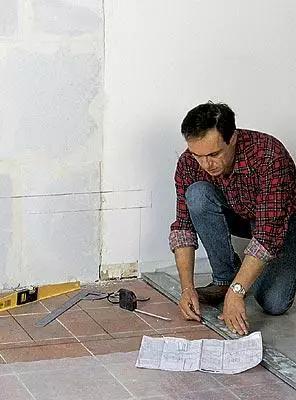
| Accepting the middle of the chimney for the coordinate axis, the projection of the installed fireplace is applied to the floor and the wall in exact accordance with the plan. |
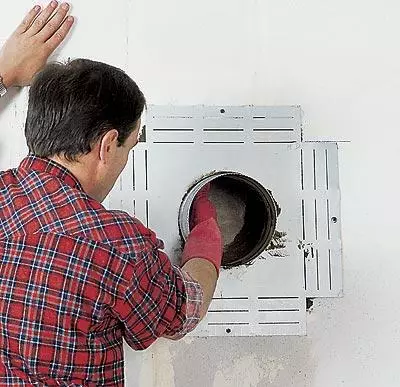
| The transition cuff is attached using metal screws. To facilitate the cleaning of the fireplace chimney, an lime solution is laid inside the cuff and is leveled so that an inclination of 45 is formed. |
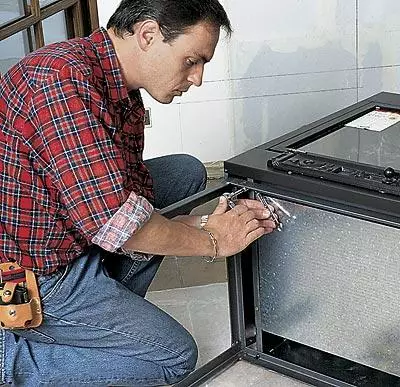
| Putting on the side of the fireplace focus, screw the base, do not confuse the legs and do not blame the metal mount. The basis will have to withstand thermal loads and the weight of the fireplace. |
| The focus must be installed as strictly as possible along the axis of the chimney exit, a few millimeters from the wall. Here you will need a dexterity to establish a hearth in strict accordance with the pre-applied markup. Already after installation, exactly in the center of the hearth, fasten with the help of heat-resistant glue and bolts the outlet cuff of the focus for the exhaust pipe. Before you finally fasten, do not forget to try on the pipe and cuffs. Further operation of the installation depends on the accuracy of the installation. |
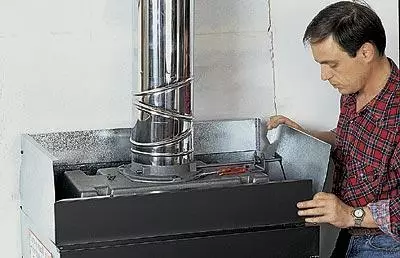
| Install the metal pipe so that it is tightly "sat" on the output cuff. Make sure this again before fixing the entire complex using a clamping ring and bolt systems. |
| Then on top of the focus install four additional protective panels made of galvanized tin. They will interfere with the contact of hot air with trim pipe and plaster plates. |
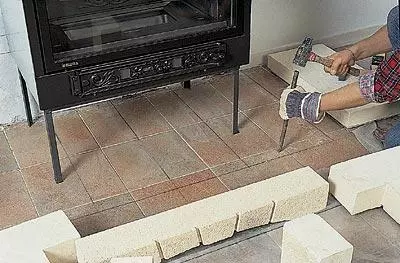
| Before installing the finishing stones, it is necessary to improve the clutch of the surface within the installation pattern on the floor. No need to split the tile or remove it completely. It is enough with the help of a chisel to gently be a top layer of tile, which will increase the area of contact of the glue with the surface. |
| The glue is applied with a thin layer with a spatula. Try not to put it too much on the surface next to the outer border of the picture. Surplus remove immediately after installing the stones. |
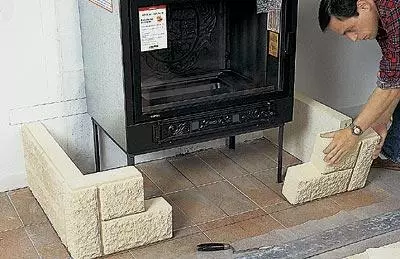
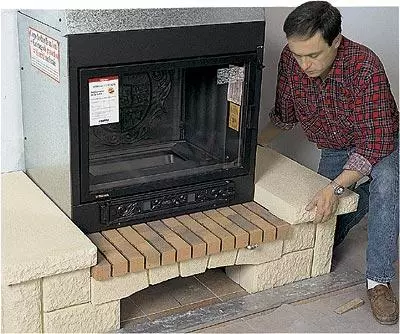
| The basements are installed directly on glue. Try not to shift them, but if necessary, it is better to tear it off from the floor, and not to move. Not a touch of previously installed stones, light shocks of rubber xy, carefully crimped the top row. |
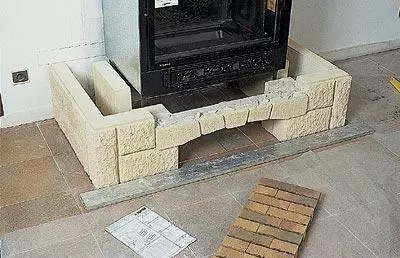
| The brick unit under the hearth will give a solid view of the entire complex. The arch is installed so that all the stones of the base are at the same level. Pre-manufactured block of glued bricks are put on a pillow of glue. It is necessary to promote the block under the hearth itself. |
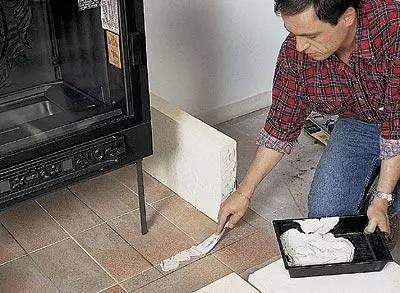
| A rag impregnated with plaster is necessary for strength and bonding design. It is applied and immediately hands up to the surface of stones, walls and gender. |
| A few minutes later, after "grab" plaster, panels are installed on the base with glue. They are aligned using a bubble level and small wedges of wood or metal. |
| Then install the sidewalls and honeycomb stones. With the help of wedges, levels and rules align both parts. |
| The front part consists of a block of pre-glued bricks attached to the metal bar. Since the block will be under the oak panel, it can be specifically fixed. |
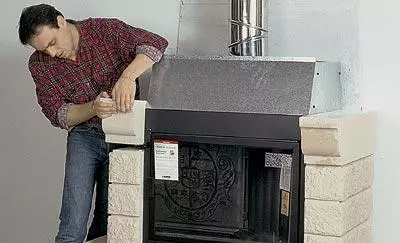
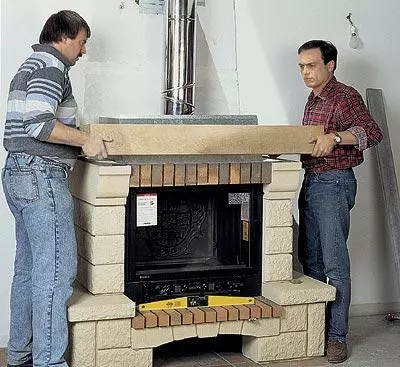
| Wooden frame is very massive. To avoid breakdown and offset, not until the end of the fastened panels, it is better to install it together. |
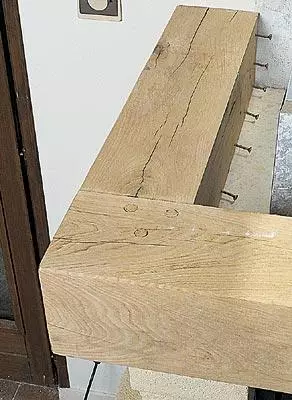
| On the inner part of the beams, nails are driven or screwed screws. They are fixed by a progressable tissue. More help is fastened the main surface and beam. Avoid gypsum gets on the top of the beams! |
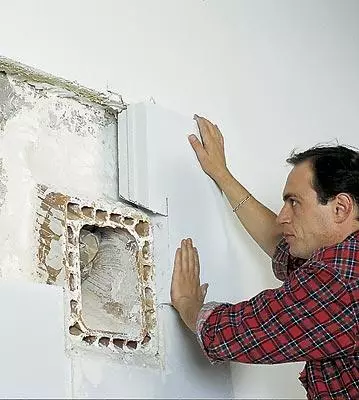
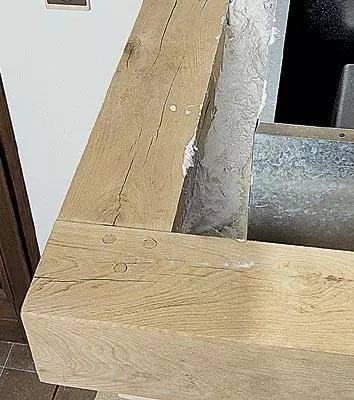
| In order to avoid fire between the top of the metal casing and the wooden beam, insulation materials are installed (remnants of foam concrete and fiber). Gypsum panels cut off by manual saw are attached using plaster. To do this, first along the entire length of the attachment in the wall are robbed nails to which the panel is pressed. At the bottom of the panel rests on the edge of the beams. There are also tissue with plaster for fastening surfaces. It is important that the fabric stripes are not very voluminous, as this may interfere with the installation of the heat insulating layer. |
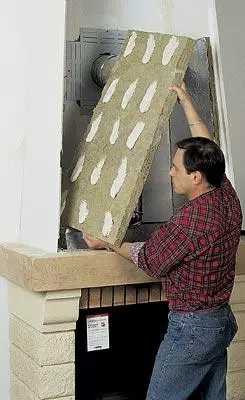
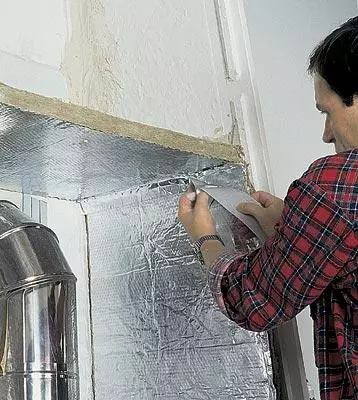
| The heat-insulating fiber with aluminum foil is cut according to the size of the exhaust. It may be necessary to fit the canvas, so before "planting" on glue all fiber plates, try on them. When gluing, it is necessary to press the wall as close as possible to the wall to avoid possible problems with thermal insulation. The seams at the rear wall can be wrapped with glue or lime solution. |
| The false ceiling of the fiber canvas is attached over two previously installed layers using glue and strips of aluminum foil or special adhesive tape. All seams must be checked and wrapped. |
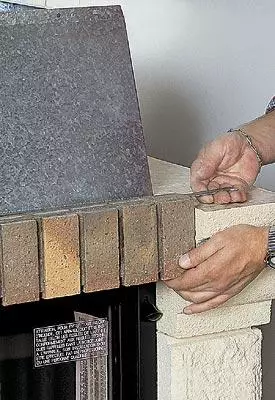
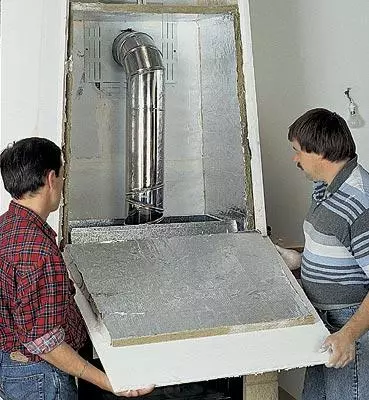
| After the glue inside is dry, the carved front panel, which is already glued with a fiber plate, "plant" on glue. The insulating layer must be logged in size. By the way, while glue and gypsum dries, you can cut holes at the level of the false ceiling. |
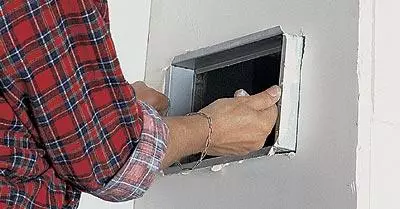
| The lattice box was missed by glue and inserted into the resulting holes. The residue of the adhesive in the upper part of the inner insulation will enhance the seam and will avoid its cracking. After the glue is dry, you can insert decorative lattices. |
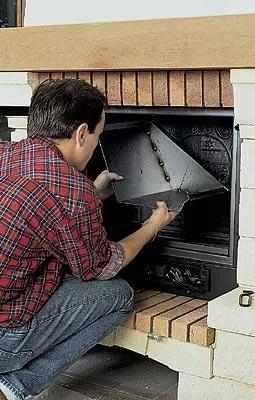
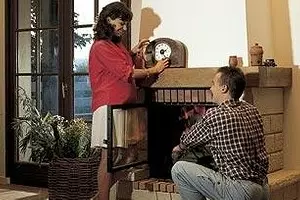
| The smoke deflector, installed inside the furnace, allows you to adjust the heat transfer and soot accumulation. When the inner grill and door handle are installed, we can assume that the work is completed. But you need to wait three weeks before using the fireplace: he must dry. |
| There is time for final finishing of the fireplace. In order for the wooden shelf, there are no traces of plaster, stains and irregularities, it should be pasted, then with the help of an iron brush and a vacuum cleaner cleaned the entire fireplace. |
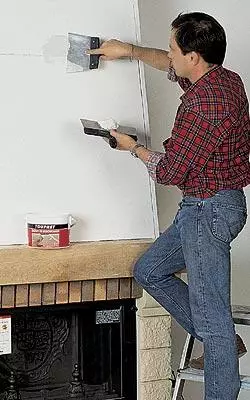
| Suts of the drawing need to wipe the limestone putty. Having strongly pressing the trowel and the spatula, try to drive as much as possible putty in the coast. After the putty dry, apply the lesing background color. By closing the shelf with a plastic film, squeeze the two layers of acrylic paint using a short pile roller. The shelf can also be tinted. It is preferable to use dark wax, as it does not prevent the evaporation of water, it does not crack. Stones are better to wipe with a mixture of flaxseed oil and White Spirit. |