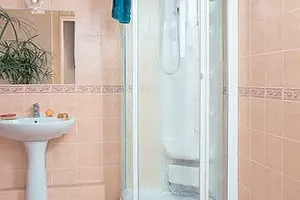
Installation of the corner shower with your own hands in one day. Detailed photo report.
If you set at home a shower cabin with a hydromassage, then never regret it. Its use delivers with nothing comparable pleasure. The novice master is quite bye forces to mount the cabin in one day

As a rule, there is a shelf for toiletries in the shower cabin, and sometimes there is a special highchair. It is usually sold together with all the necessary equipment for assembly, but you can only purchase the housing if your failed or lost view.
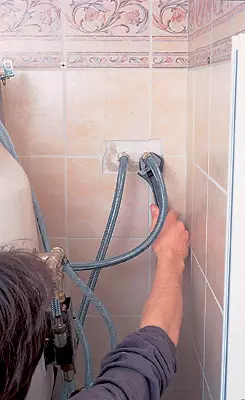
In addition to the central shower with a stationary sprinkler, Vcabin has nine spraying heads, fortified on the vertical panel, and two heads in the pallet for the foot massage. The compartment also includes a mixer (normal or thermostat), a shower hose with a sprinkler, pressure control panel (from2 to 5bar) and water temperature (up to 60C).
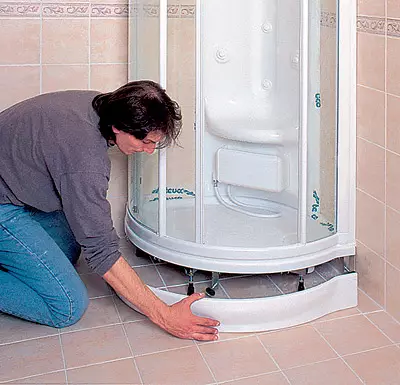
The pallet made from plastic based on acrylic resin is installed on two adjustable legs and close in front with a decorative casing. There should be a gap in 5mm between the casing and the floor. If necessary, it can be done narrower. To do this, with a cut side, a tape is imposed on it, which will not allow scratching the surface. The casing is spawned with a metal with a metal and cleaned with sandpaper.
The joints are sealed with sealed silicone (underlying aseptic properties) or for water connections.
Vertical shower racks attached by three screws to the wall, serve to install glass partitions and upper semicircular guide, which is covered with decorative casing. On the guides (the bottom is located on the pallet) with the help of supporting rollers, the sliding door moves. Iperports, and the door is made of tempered glass 5mm thick.
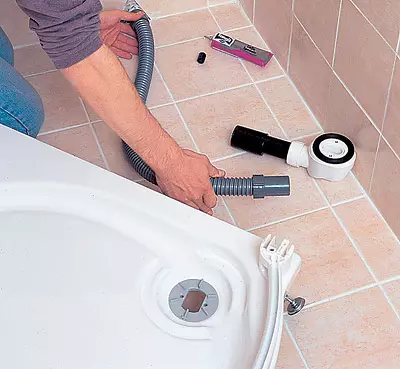
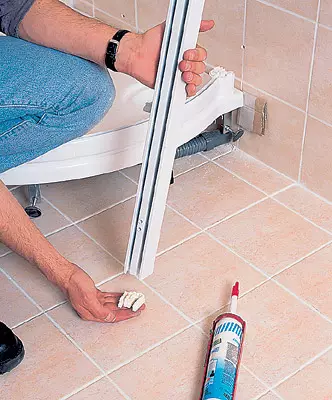
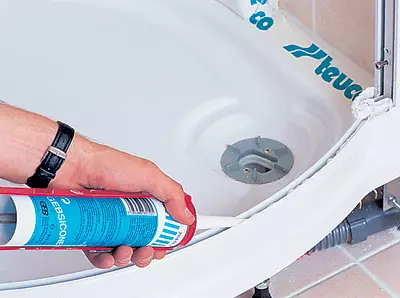
| Connect the drain hose to the drain pipe in the wall and take the connection location. Install the fixing gasket into the scene of the pallet. |
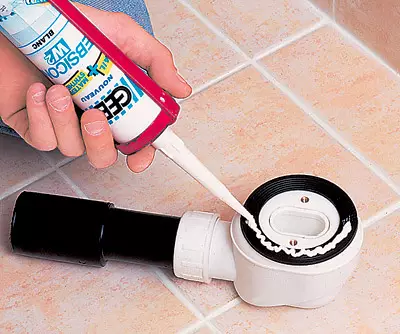
| Treat a sealing gasket of a waste node with silicone sealant. Then install it under the pallet opposite the fixing gasket and secure the screws. |
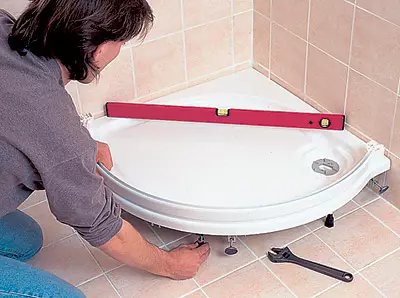
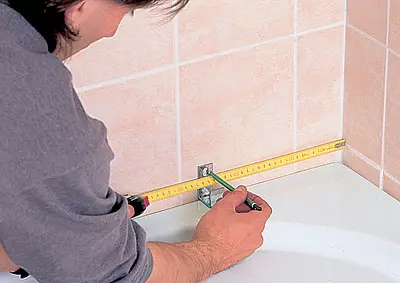
| Using the level, adjust the position of the pallet in the horizontal plane with the legs. Tighten fixing locknuts. |
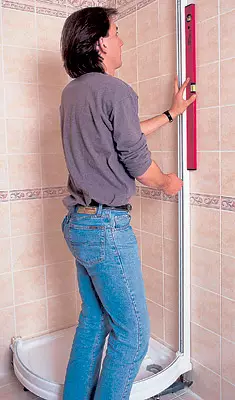
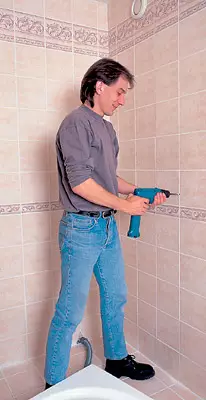
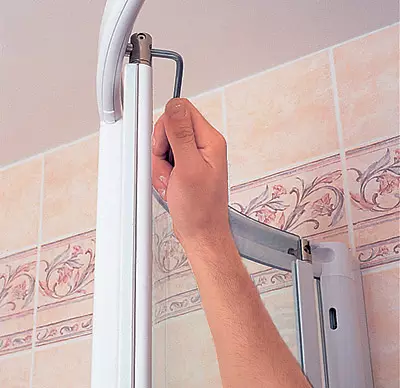
| After installing the pallet, attach one of the racks to the wall, controlling its vertical level. Take a place for holes. |
| When drilling holes in the seam between tiles do not turn on the vibration, until you deck on the tile thickness. Install the dowels in them with a diameter of 8mm. |
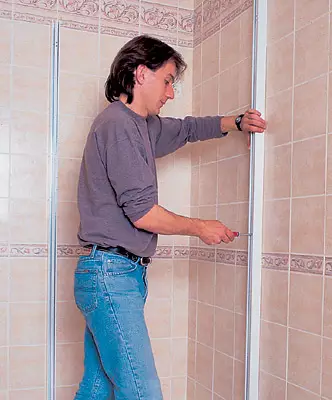
| Apply a little sealant under the bottom edge and on the back side of the racks. |
| Apply the rack to the wall and wrap screws for two or three turns. |
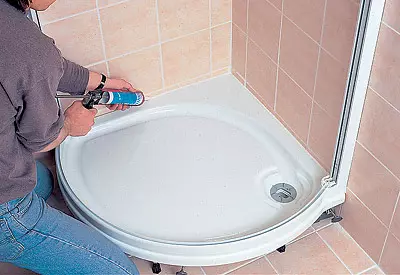
| Get sealant to the joint between the wall and the pallet and immediately arrange the seams moistened in the soapy water with your finger. |
| After waiting for the sealant drying, set aside from the angle in both directions to 25 cm and make places where the lower panel clamps should be installed. Drill holes, insert the dowels and depart the clamps. |
| The upper clamps are mounted on metal brackets welded to the frame located on the reverse side of the panel. Do not trust them completely, as it will be necessary to make fit. |
| For markup, check the panel to the lower clamps, take the place for the holes for the top clamps (while the panel should fit tightly to the wall), drill them and insert the dowels. |
| Apply a little sealant under the nuts of the hydrocoles and tighten them using the usual or adjustable key, holding the panel with your hand. |
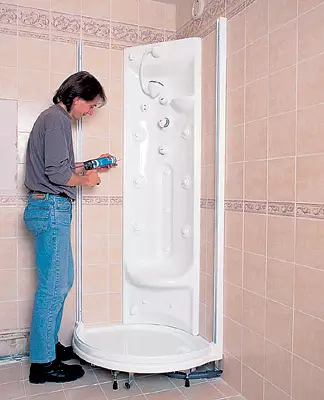
| Install the panel to the lower clamps, arrive the top clamps to the wall, then tighten them on the frame located on the reverse side of the panel. |
| Apply sealant on both sides of the panel and scream it. |
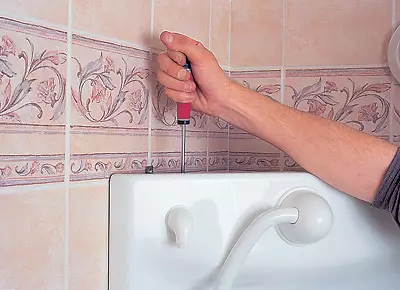
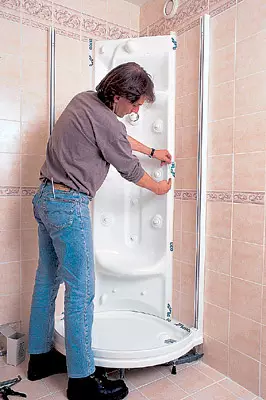
| Measuring the required length, disconnect the decorative bar of the metal with a metal. Install it in place by pressing to sealant. |
| Similarly, close the vertical joints with decorative straps and secure them with a tape before the sealant drying. Four hours later, you can remove its surplus. |
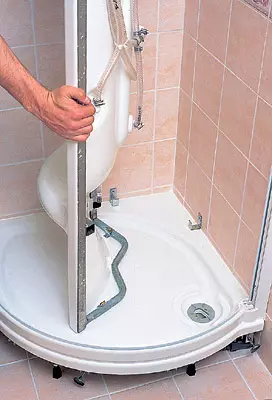
| Start up the installation screws of vertical racks. Mark the place where the partition will be attached on the lower guide and apply sealant to this section. |
| Install the septum and with the help of adjusting screws to achieve it to stand vertically. Then tighten the fixing screws. |
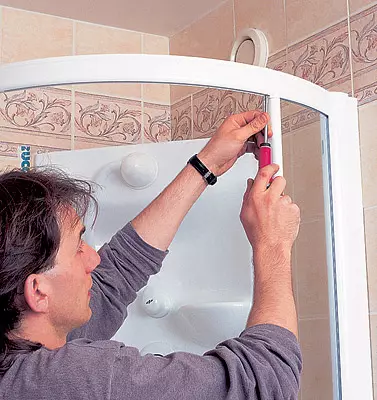
| Install the top guide, wrap screws at the ends of the racks and on each partition. Attach the decorative casing to hide the fastening screw heads. |
| Insert the door, check the direction of the upper and lower eccentrics, then set the rollers to the appropriate guides. Door fitting with lower eccentrics and tighten fixing screws. |
| Close the door and make sure it is installed correctly. If magnetic locks are poorly adjacent, adjust the position of the door using the upper eccentrics. Tighten the pallet screws and attach the decorative casing. |