Stained glass is something unique and individual. Try creating a simple stained glass window.

Ella Glyantseva
Architect:
Valery Magidov
Photo:
Mikhail Stepanov
Stained glass - one of the few products that is not replicated and is distinguished by the uniqueness and individuality. Old masters retain the secrets of their craft. Now the revival of technology and the development of stained-in compositions again acquire significance. We will not discuss the subtleties of the manufacture of "solar" paintings and show only the basics of the process of creating them
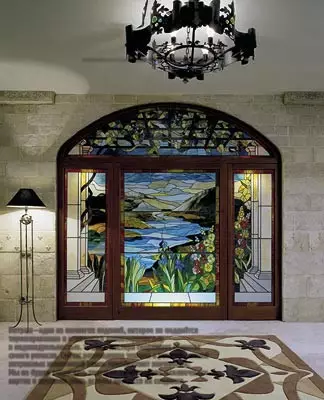
Stained glass consists of a plurality of glasses in the framing of lead or brass. Each piece of glass performs its own artistic and expressive function in the composition. The expressiveness of the stainedwood significantly affect the lighting conditions, usually depending on the location of its location, in the outer window or in the inner opening with the backlight. Sunlight allows the range of paints to manifest itself in full force, and electrical restricts its more scanty spectrum.
Pieces of glass of different colors, but preferably one thickness
High quality glass cutter (better diamond)
Clamps and narrow lead strips with n-shaped cross section (so-called broachs that can be purchased in artistic salons)
Electrical tube power 100W, rosin, solders Pos-18 or Pos-30
Aluminum hammer
Joiner knife
Make sure that the longitudinal recess (groove) pull is equal to the glass thickness that you are going to use, otherwise the groove will have to additionally process (roll, stringe or crimp).
In search of a better illumination, some stained glass makers make special niches in the walls or cut the openings in them to install luminous paintings. For beauty, there is always a place. The parts made of stained glass are often made in muffle furnaces, and much depends on the firing conditions. It is necessary to reap the glass or change the ovens, and it can change not only the shade, but also the main color. Of course, at home professionally perform stained glass windows is almost impossible, and to get a highly artistic work, it is better to contact the specialists. If you still want to experience yourself in stained glass, then you will have to stock up with some materials, tools and very great patience.
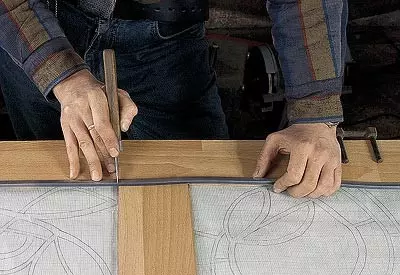
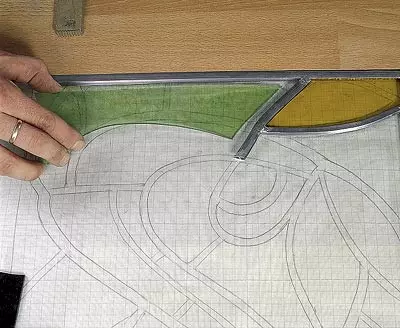
To begin with, transfer to a large paper sheet of paper that you choose a full size. It should not have details of a complex configuration, as you have to work with a very fragile, but solid material. Two clear parallel lines highlight the contours for which you, like a mosaic, will lay out colored glass: the first contour of the pattern, and the second broken.
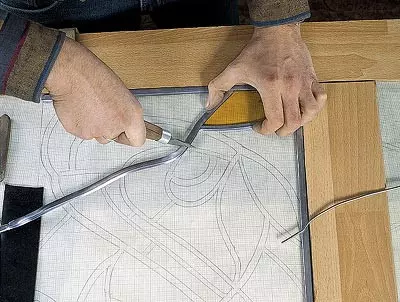
Estate the resulting drawing on the desktop, impose on top of it "conductor" from wooden plates and secure clamps. Thus, the boundaries of your stained glass will be indicated. Parallel to the inner edges of the lines of the arrangement line for the lead frame.
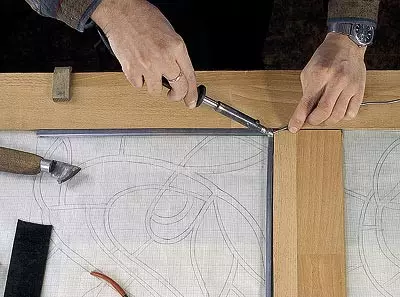
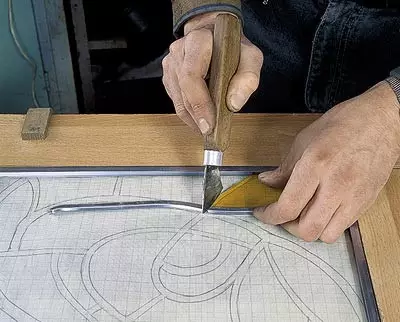
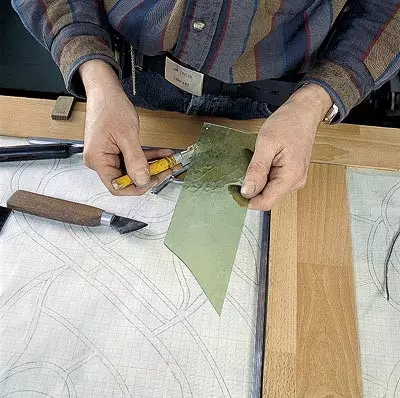
Number all fragments of the pattern. Next, each impose a piece of glass of the appropriate color and apply the contours of this fragment on it, increasing its dimensions to the distance equal to the depth of the groove. On the details, specify their numbers. The glass cutter is neatly, with a small pressure circle the contours of the fragments and, easily knocking the aluminum hammer along the contour lines, separate the unnecessary. Then cut the joinery knife to stretch into segments of such a length so that they can be lowered by the internal perimeter of the frame without gaps. Insert them into the wooden "conductor" and smear with solder and rosin, trying to make the seams as neat as possible and aesthetic. Get a lead frame.
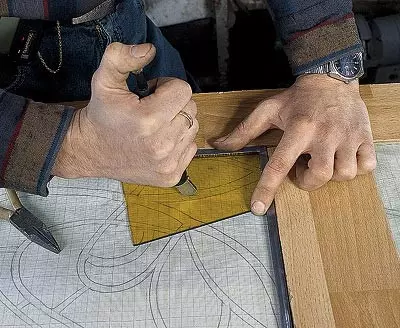
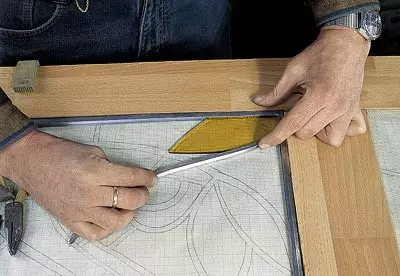
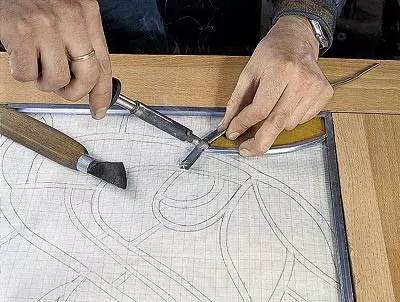
Insert the appropriate glass fragment into the angle, tightly pressing it into the grooves. So it will be securely fixed. Together, a sharp breaking of the contour of the glass fragment cut the barrel with a joiner and fix it, having soldered its end to the lead frame. Similarly, degress the glass fragment of the strip of broach from the other side, smear it with a frame and a previously installed broach, and then cut with a length of length sufficient to hold the adjacent glass fragment.
So gradually assembled drawing of stained glass. Beautiful stained glass window is obtained with painstaking work for several days, and even weeks. Hurry here is inappropriate, as in any form of creativity. If the master performs such work, then the work of art arises. But the amateur can also get a glass picture, pleasing eyes. Try!