We tell what the wardrobe rooms are, how to design themselves and assemble them.


The organization of a separate corner for storing things is convenient. And professional designers try to use the square meters so that it becomes possible. We will analyze how to make a dressing room with your own hands and all the questions related to it.
All about the arrangement of wardrobe rooms
All for and againstStorage System Options
Accommodation options
- parishion
- Bedroom
- Under the staircase
- from the closet
- from Niche
- In the storage room
Types of dressing rooms
- Corner
- one-sided
- bilateral
- P-shaped
Tools and materials
Stages of the organization
- Planning
- Lighting
- Ventilation
- Installation of partition and finishing
- Installation of filling
Ideas of dressing projects
Wardrobe room: pros and cons
It may seem that this is an unreasonable waste of precious free centimeters of space. We collected arguments for and against such a decision.
Per
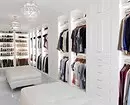
- There will be more free space in other rooms. Given that bulky cabinet cabinets are not needed, the room "is broken", visually becomes more spacious and air.
- With a skillful storage organization, all free corners are used with benefit. Even in the room of a small area, it is possible to put a lot of things.
- Simplifies the guidance of order. Storage systems are completely hidden from eyes. Shoes and clothing are collected in one place, they are easier to keep them in order.
- Saves time for fees, because the entire wardrobe is assembled in one place. This allows you to quickly equip objects, pick up a new image. You can change the same here, fully preserving privacy.
- You can use the room and as mini-hosbler. Large things that interfere with residential rooms are kept here. The corner for the vacuum cleaner, the steam generator, ironing board is retained.
- Full wardrobe equipment is cheaper than buying case or built-in furniture. Moreover, with a shortage of funds, it can be equipped with it gradually, buying or self-assembled furniture structures.
Vs
- The need to highlight the area. Sometimes redevelopment is required, which is associated with the need to obtain permission.
- Need ventilation arrangement. In a tightly closed room, all things will acquire an unpleasant sharp smell.
- In small rooms there is another problem. If the room is without door, things will be dust.
Options for filling Cardersoba
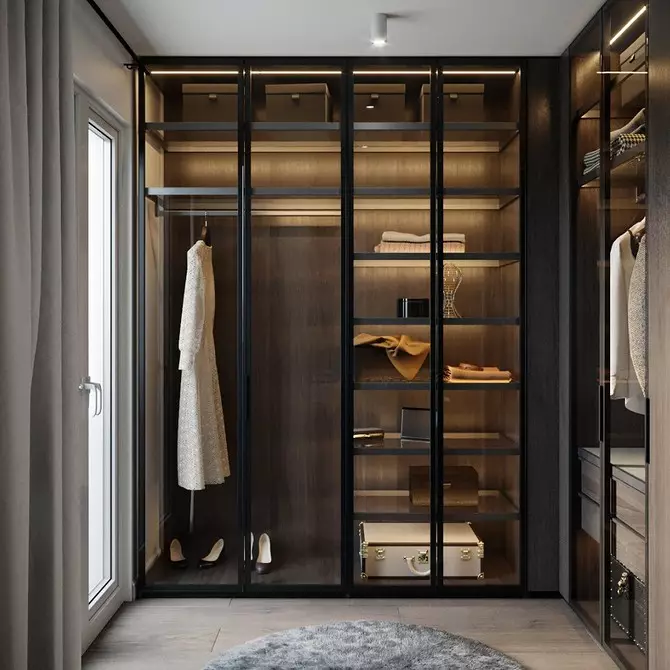
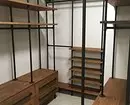
The wardrobe arrangement assumes the choice of the most convenient storage system for the owner. Three types are distinguished.Cabinet furniture
A set of cabinets, shelves and drawers made of wood or wood slabs of the most different shape, sizes and filling. It is desirable that the possibility of changing the height and configuration of the "filling" of lockers is implemented. In the case of independent manufacture, it becomes the most inexpensive solution, which is considered its advantage. There are other advantages.
pros
- Closed compartments where it penetrates much less dust.
- With a competent layout, each centimeter "works".
- Large selection of design and colors.
- The ability to choose the material and price yourself.
Minuses
- Disassembly and subsequent assembly in a new place are possible. But at the same time, the design will have to customize: to focus and trim parts.
- Save only if there is an independent planning skills of furniture and its assembly. Otherwise, the order will cost much more expensive.
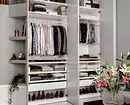
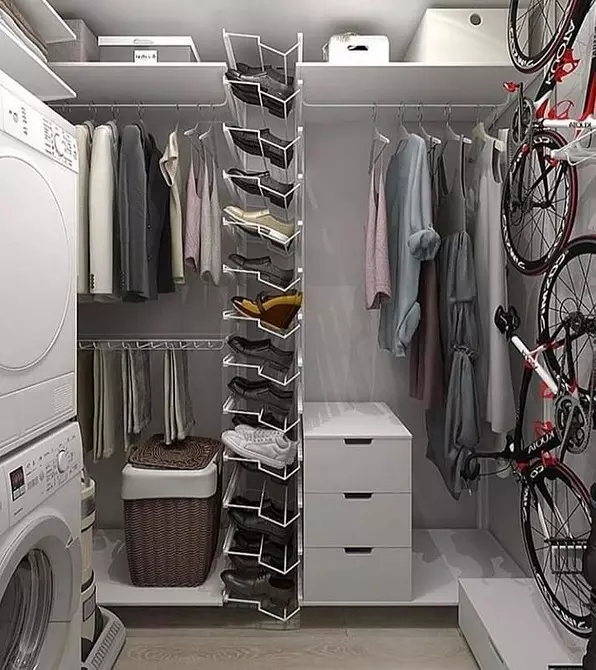
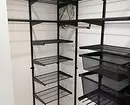
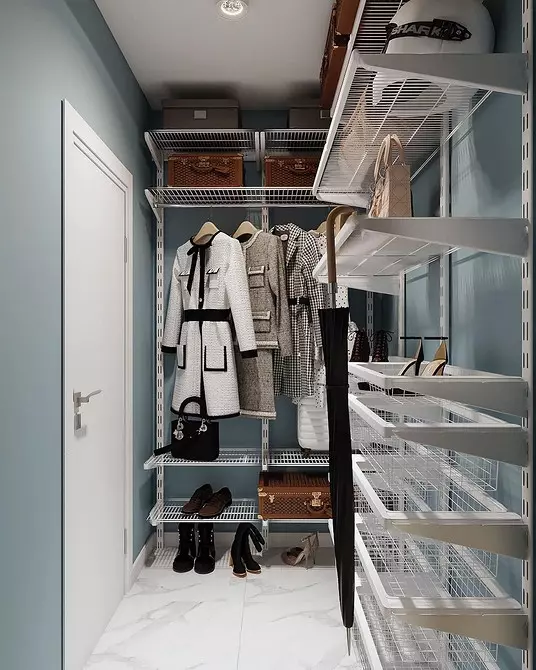
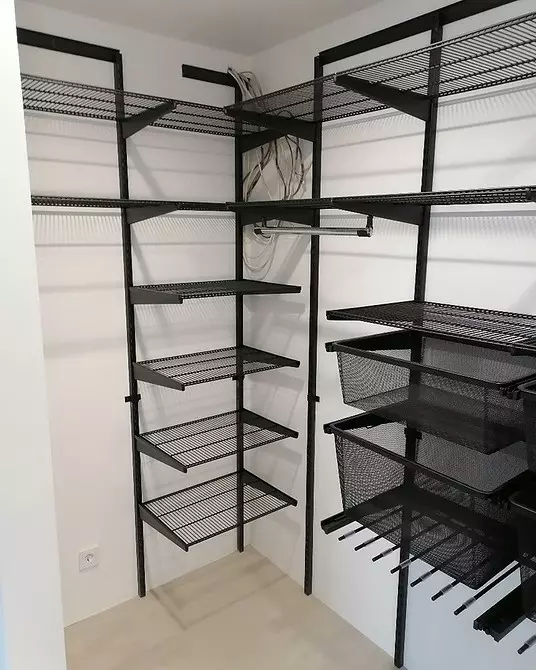
Mesh design
This is a metal frame, which is mounted modular elements: baskets, shelves, etc. All this looks like metal multifunctional rack-type cabinets. Produced in different configuration.Benefits
- Easy redevelopment. Modular elements are easy to change places or rearrange. If necessary, you can always buy new modules.
- Effective ventilation. Nothing prevents free air circulation.
- Disassembly is possible with subsequent installation in another place. It does not arise any difficulty.
- The system is quite durable and durable.
disadvantages
- Fastening the base directly on the wall, which requires drilling a large number of holes.
- Modules from different manufacturers are not combined with each other. Adaptation of elements for individual sizes is also impossible.
- High price.

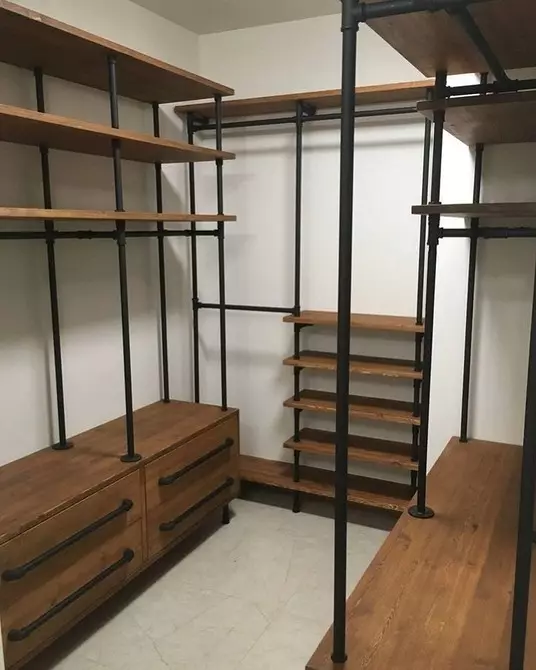
Tubular, it is a joker system
Its base is a set of furniture pipes, from which various designs are collected using additional elements. The tubes are connected at different angles, they are complemented by fasteners for shelves and mirrors.pros
- Unlimited number of assembly options. If necessary, you can buy the missing details or easy to fit them in size.
- Elements are easily rearranged from place in place, well combined with other systems.
- Well transfer disassembly and re-assembly. It is possible to build up and transform parts.
- The possibility of planning without drilling walls.
- High strength and durability.
- The possibility of installing indoors with uneven floors and walls.
Minuses
- There is no color selection. Only chrome pipes are used.
- It is quite difficult for independent design.

Different types of storage systems can be combined. The combinations of cabinet and joker or mesh and cabinet furniture are in demand.
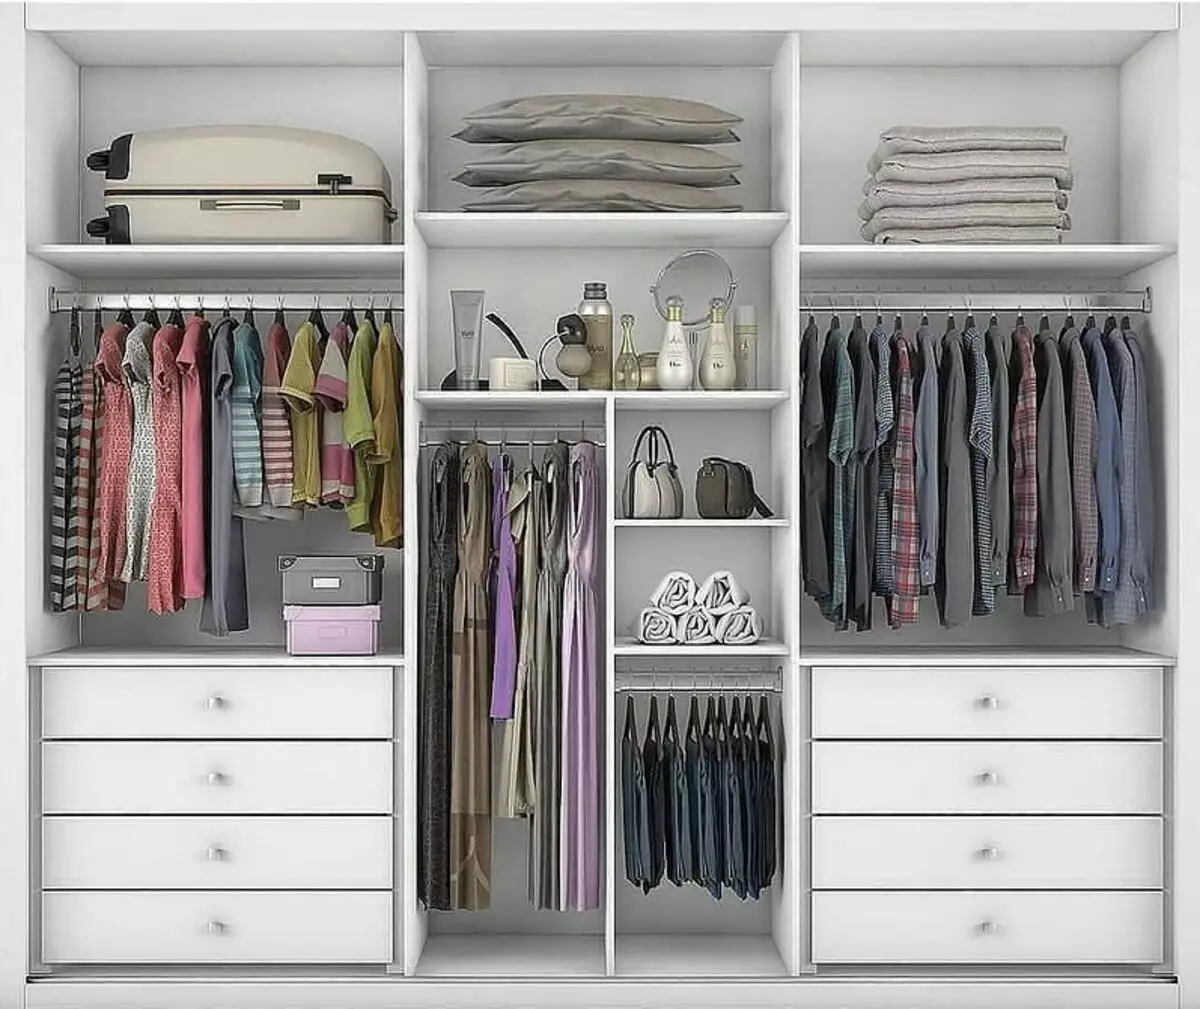
Let's turn to filling. It is selected under the needs of the owner and can consist of different elements that are easily combined with each other. We list the main.
Possible storage systems
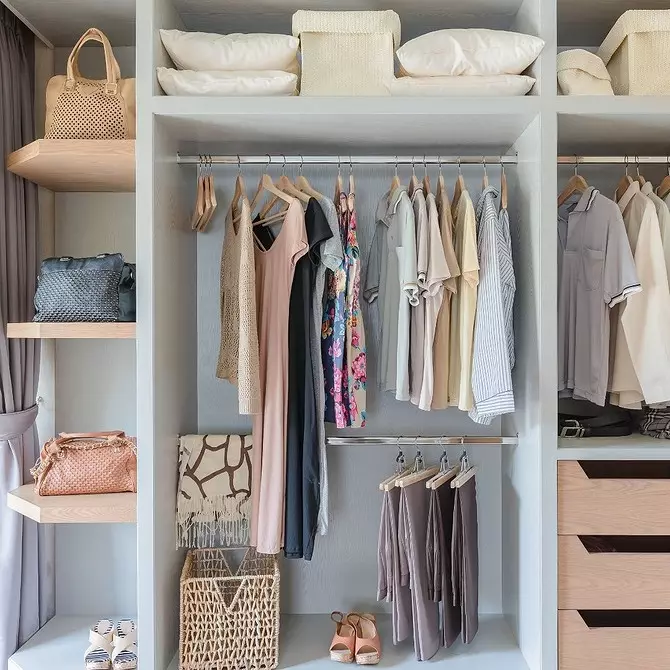
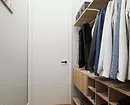
- Rods or pantographs. For short things like jackets, blouse or jackets choose a bar, fixed at an altitude of 100-130 cm. For storing long clothes, the bar is raised to a height of 160-165 cm. Comfortable pantograph. This is the "clothing elevator", which goes down and rises to the desired height. The rods can be not only straight, but also curved. For example, a spiral product is appropriate in the angular room.
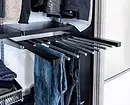
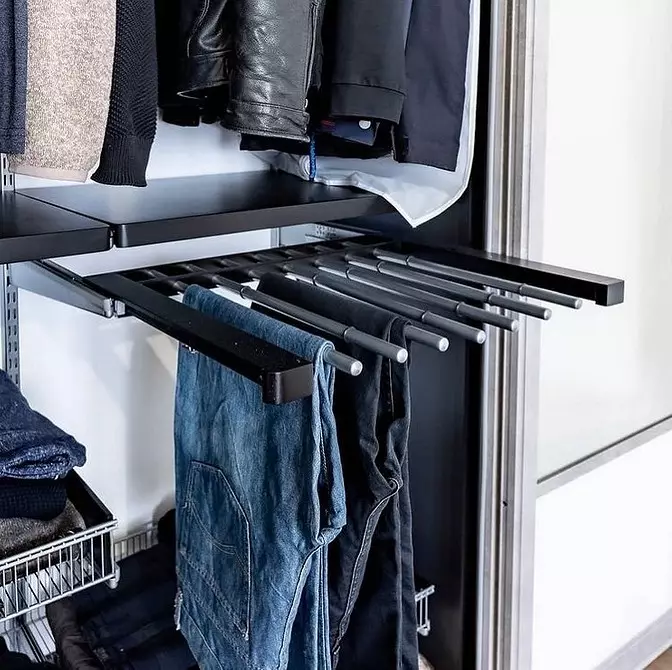
- Hangers under skirts and pants. There are dual and single models, with special clothespins or without them. It is placed on a height of not lower than 60 cm. Retractable hangers are especially convenient, they save free space.
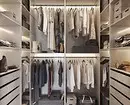
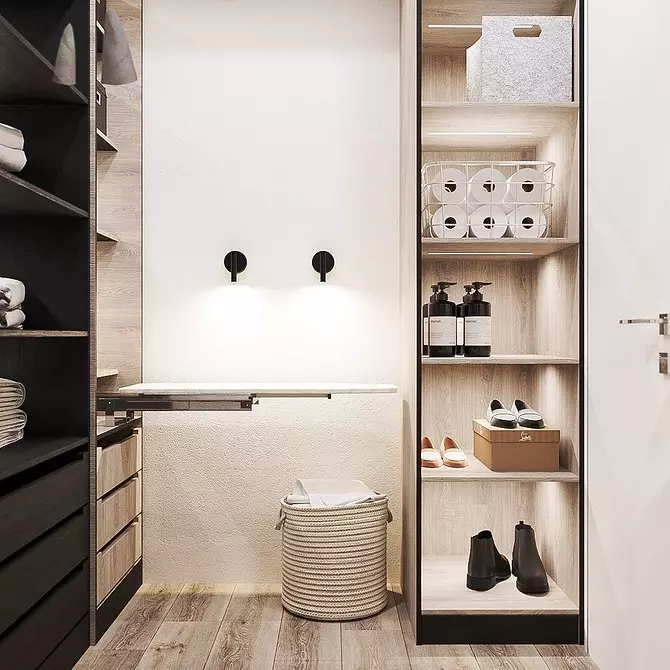
- Shelves. Options, how to make the shelves in the dressing room, a lot. Their sizes are determined depending on location and destination. So, for the upper tier, the model is 50-60 cm high. On the middle tier, it is better to install the shelves not higher than 30-40 cm. On their linen, home textiles. Uncomfortable too deep shelves. If the depth is more than 100 cm, reach the opposite edge will be problematic.
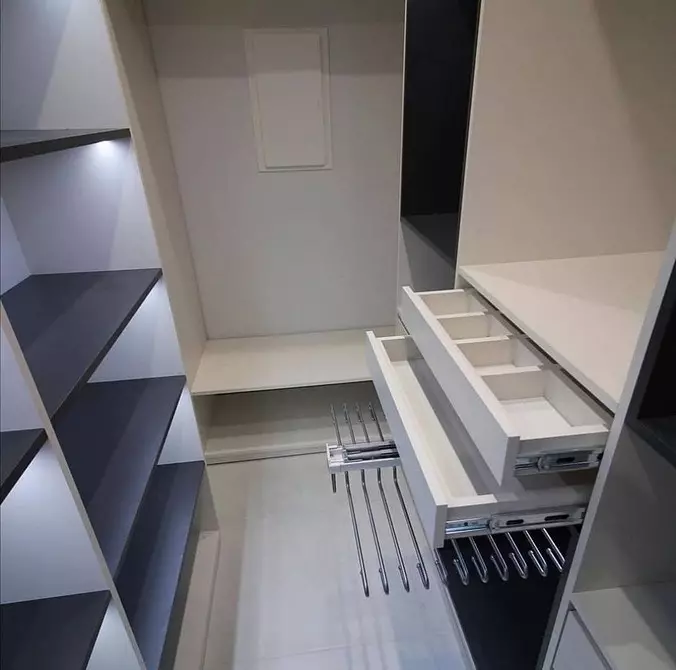
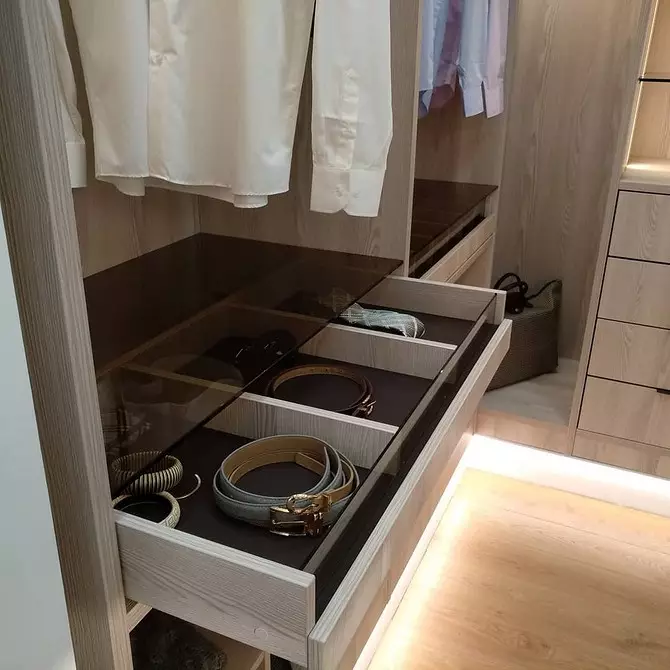
- Boxes. At least some of them should be closed so that the contents are not dreamed. Depending on the size, used to store different items. Well, if you put forward for the whole depth or at least 3/4. For ease of use, equipped with closers and transparent front wall. So see what lies inside.
- Baskets or boxes. Move from different materials. Standard models are placed on the shelves equipped with a retractable mechanism or wheels roll out or put forward. It is much more convenient. There are or without lids. Usually, the sticker is glued to the front panel, which describes the contents of the basket.
- Holders for accessories. Designed for ties, belts, scarves. It can be suspended or multi-tiered hangers, flat boxes with dividers, hook panels.
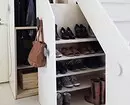
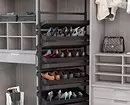
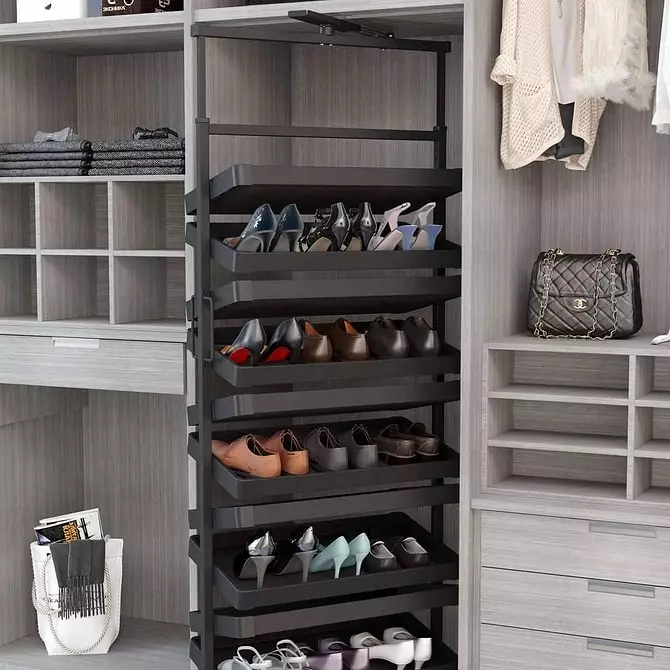
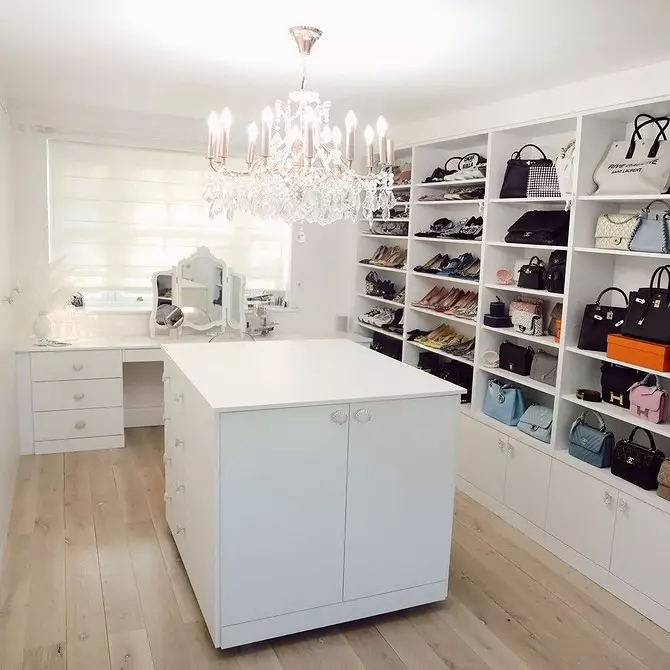
- Shoe modules. Store shoes on the shelves not practical. Therefore, other devices have been developed. It can be multiple-row oblique or straight shelves, pads or hangs, rods with clothespins for boots and so on. Well, if they are closed with transparent panels. Then shoes will not dust, but it is clearly visible.

How to make a dressing room: 6 accommodation options
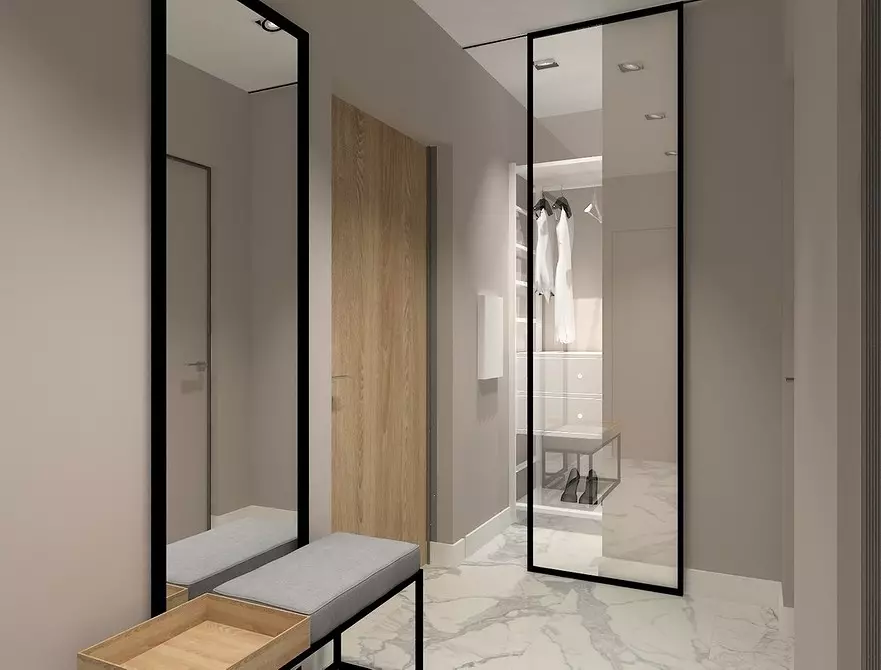
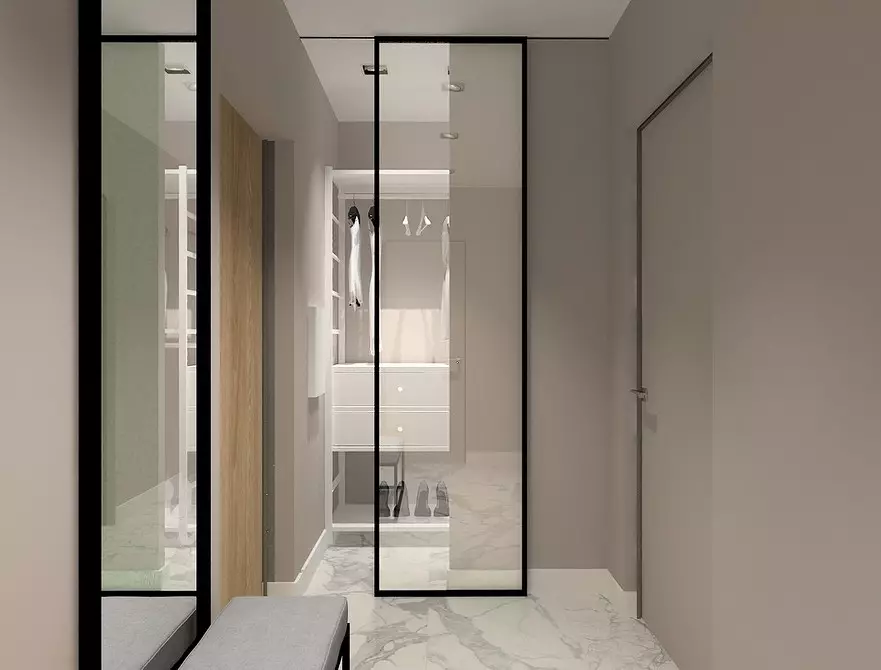
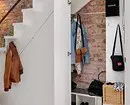
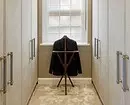
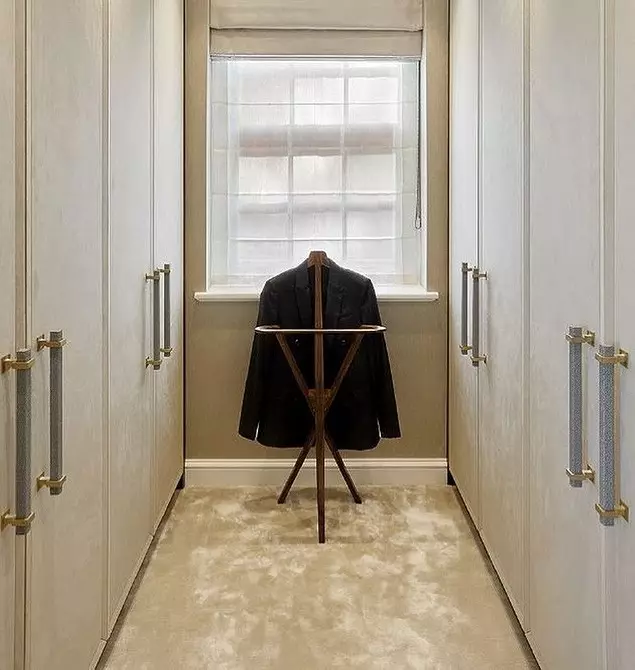
In the house, the room under storage is allocated at the layout stage or later when distributing the premises. In typical apartments, they are rarely provided. Therefore, it is necessary to find a suitable solution. We will analyze several possible options, from which and where you can make a dressing room with your own hands.In the hall
Well, if the owner is at the disposal of the spacious hall, part of which can be taken under the arrangement of the storage system. In this case, a partition is put, dividing the corridor into two rooms. The size and shape of the wardrobe are chosen, guided by their preferences.
In small apartments there are two decisions, how to make a dressing room in the corridor. The first is for long but wide enough halls. The storage system is placed on one of the walls. Optimally choosing closed cabinet furniture, possibly with mirror doors. So it will be possible to visually expand a little space. The second option is for square or approximate planning. In this case, one corner is complained by the partition, the storage system is equipped inside it.

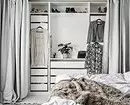
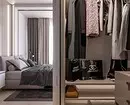
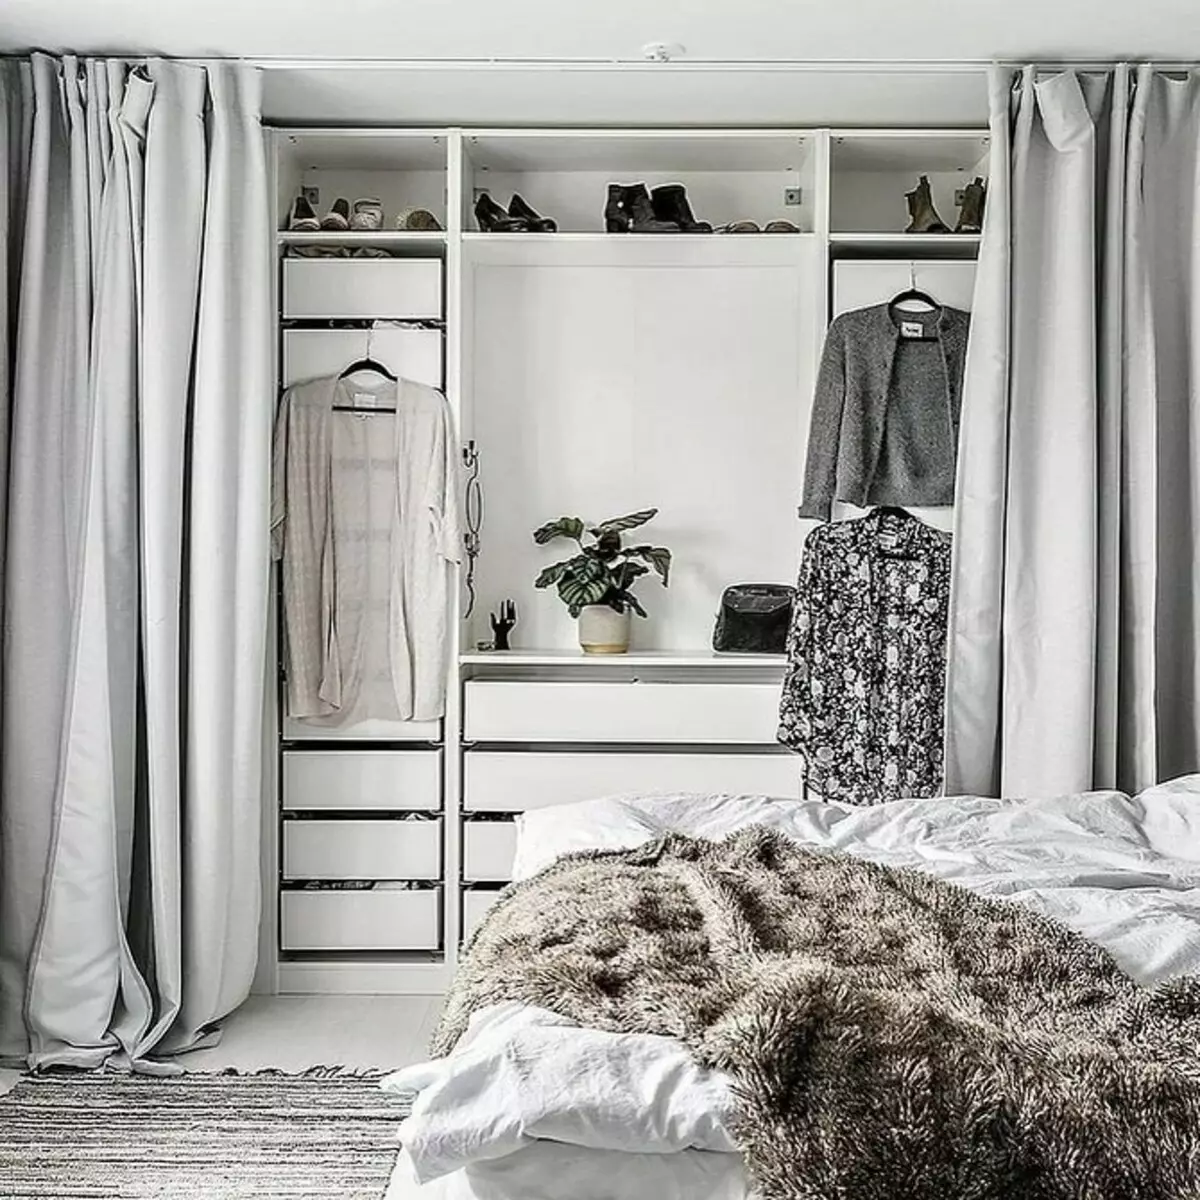
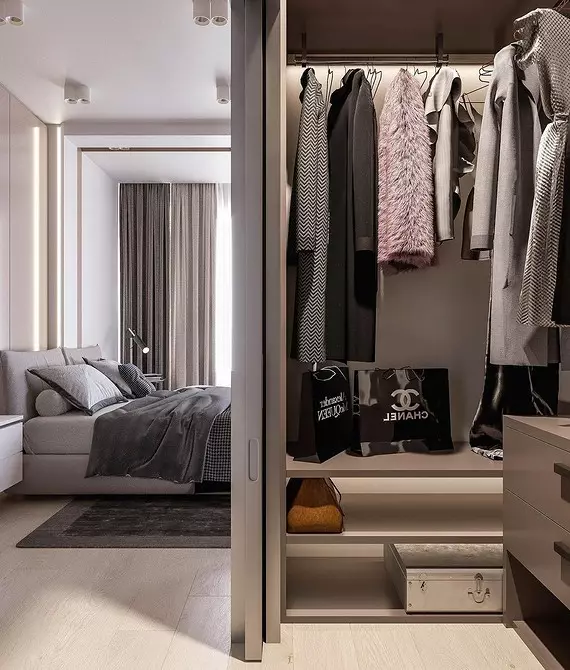
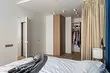
In the bedroom
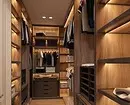
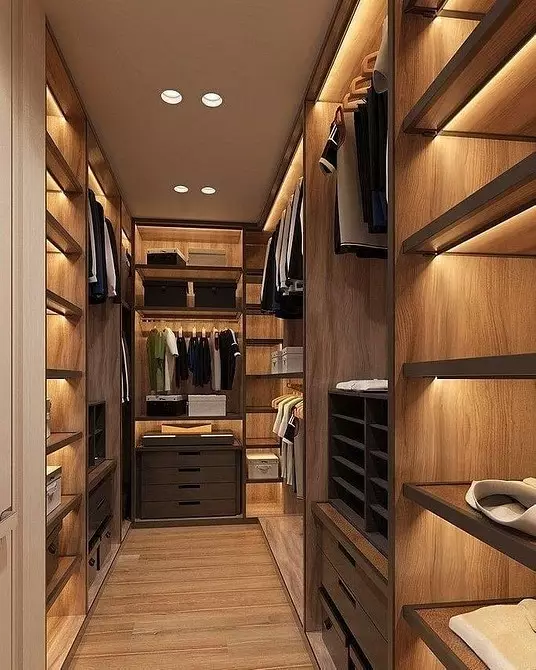
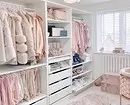
It is customary to keep clothes in the bedroom, so this decision is considered very appropriate. The location under the storage system is determined based on the bedroom form. If it is too elongated, it is best to extinguish the area across the room. The bedroom will receive the correct proportions, it will become more comfortable and more attractive. In sufficiently spacious rooms in square and close to her form preferably the angular placement of the dressing room. It is separated by a stationary partition with doors or a dense curtain.
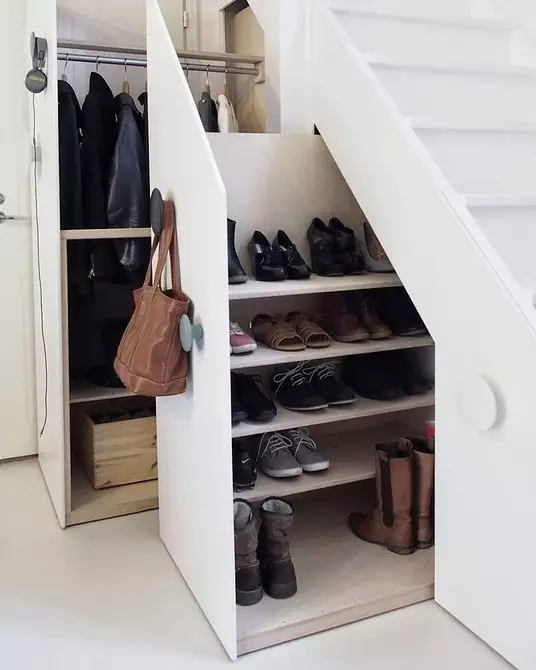
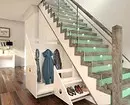
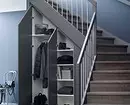
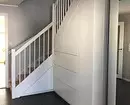
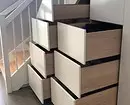
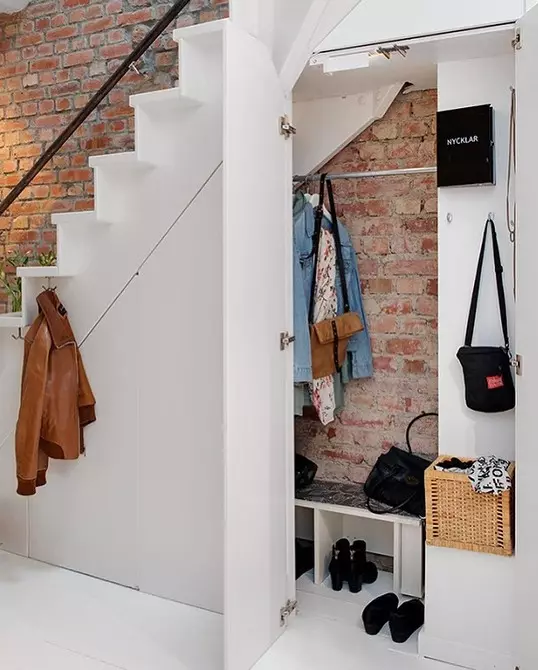
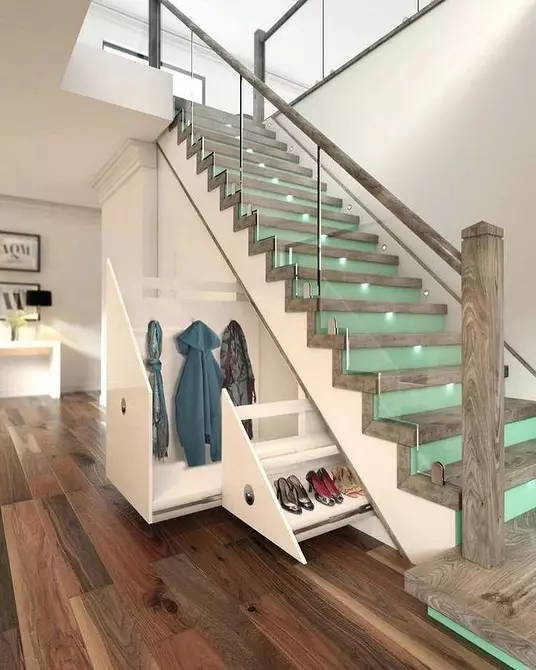
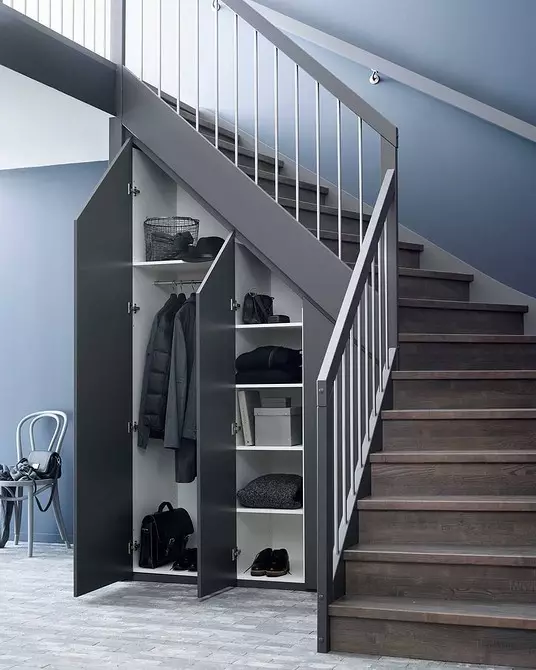
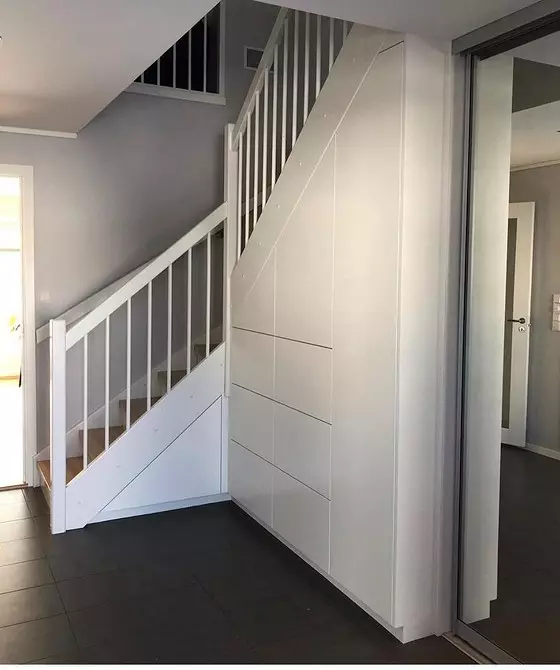
Under the staircase
Free space under the staircase is quite deep enough to locate the storage area. Lots of arrangement. You can make an open wardrobe or with doors: sliding or swinging. A modular design is suitable, which is collected from retractable or roll-out elements. Inside such blocks placed hangers-crossbars, shelves, boxes.

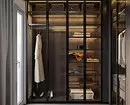
From the cabinet
The taught wardrobe, if desired, is easily construed into the wardrobe. The planning depends on the free space. From the old cabinet, remove the filling, leave only the framework, which will be the basis of the new design. It is installed in place, mounted filling. You can do otherwise. Use old furniture as a hull storage system. Something from the elements to take in a constant form, something to change and remake.
From Niche
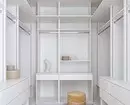
If the dimensions of the niche allow, inside the racks, shelves. It will only be left to put the doors: swing, sliding either coupe. You can leave the wardrobe open, but then it should look attractive and kept in order, or close it with a tight tissue curtain. Small niches complement the design of plasterboard, expanding to the desired size.
In the storage room
In old apartments, most often there is a small room without windows, which is called storage room. Usually its area allows you to place inside a full-fledged dressing room. Filling can be any, placed along the walls or the letter. The doorway is closed with a curtain or any suitable door is installed.
Views of the wardrobe room
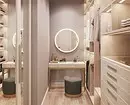
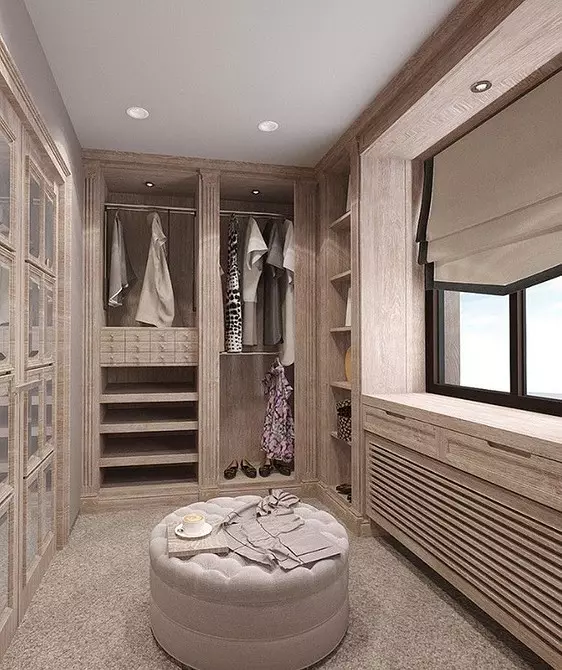
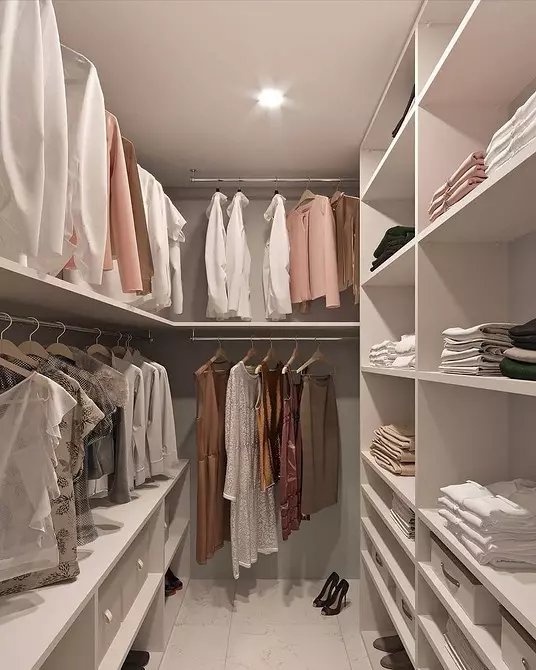
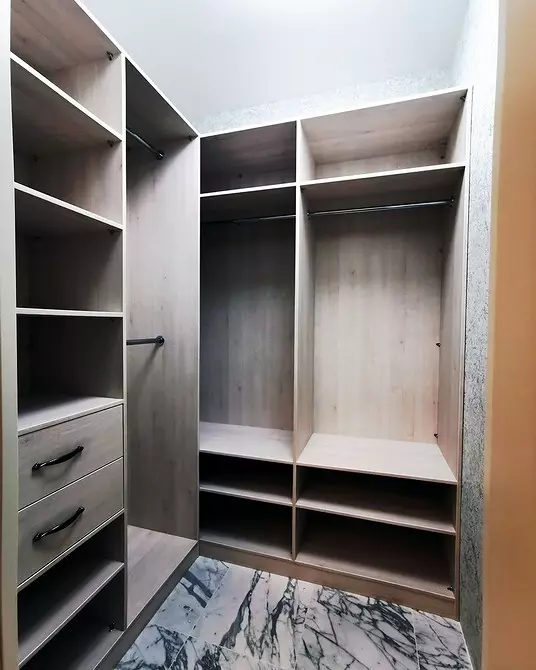
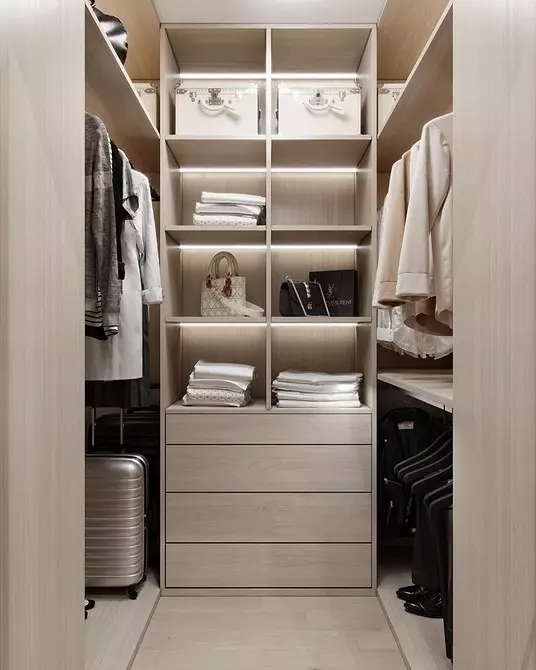
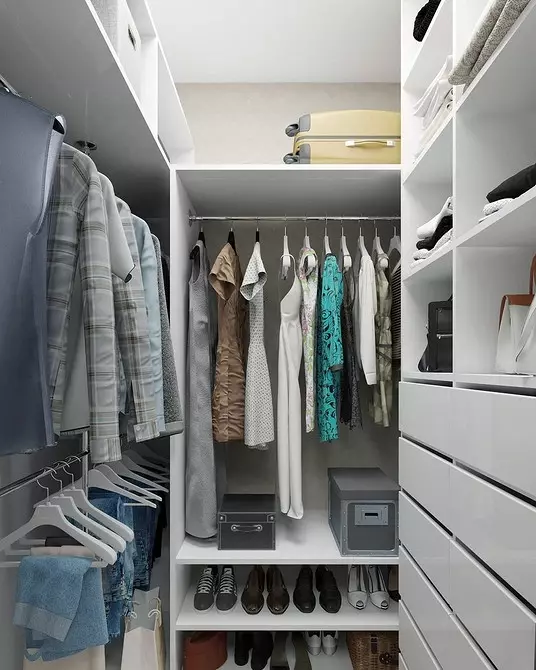
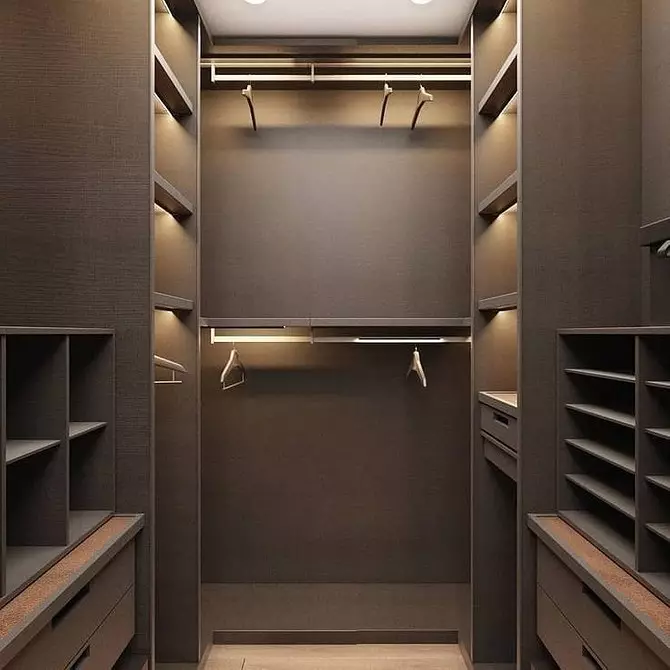
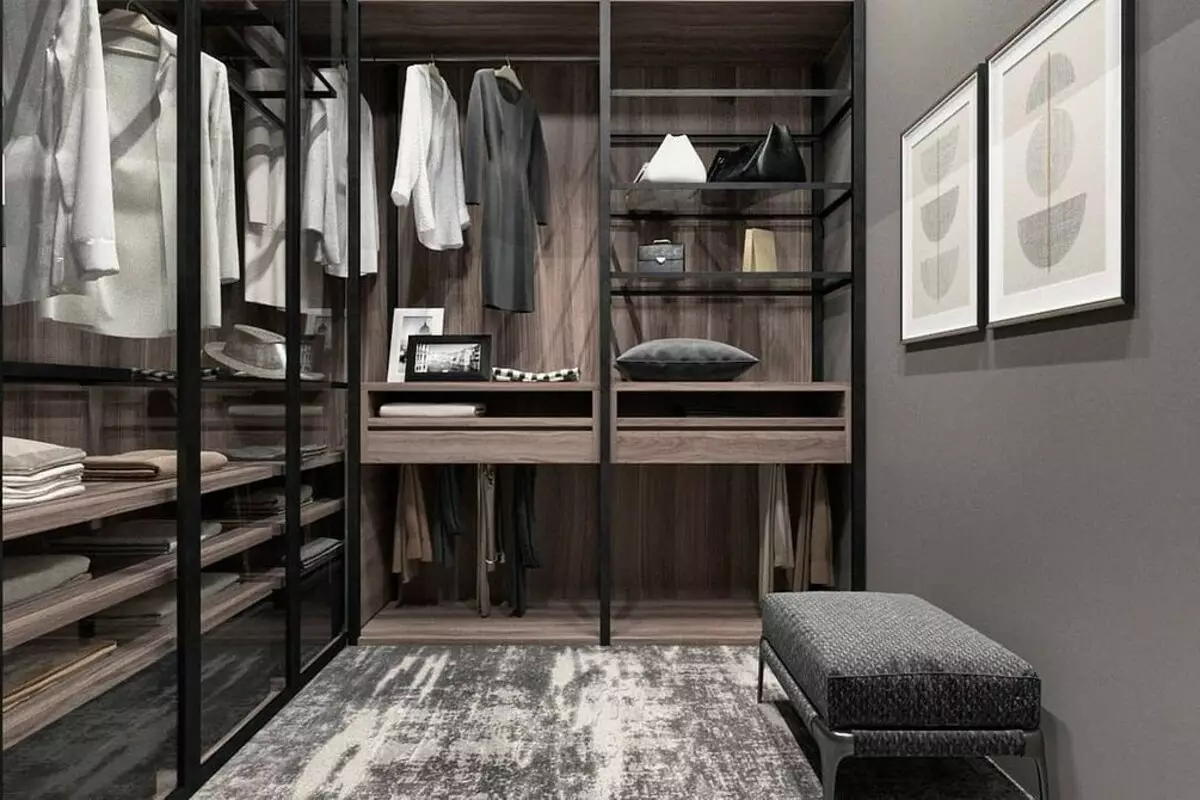
Planning the room is different. We will analyze its basic varieties.Angle
The zone of the triangular shape is soldered. Two adjacent walls serve as the basis, the facade is placed between them. You can use any type of doors or textile speed. In some cases, the open-type wardrobe is chosen. It also looks good in the corner performance. Along the walls are placed racks, shelves and other filling. The place in front of them is used for dressing up.
The dimensions of the triangle are not regulated. It can be the right form or elongated. It all depends on the availability of free space. Facade with doors do not always make straight. If its form is approximate to the semicircle, the places inside the fenced zone will be much larger. At the same time, the main premises will not lose anything. This is a good idea for a small dressing room. The partition can not always be put on the arc, so it is more common to use a broken line.
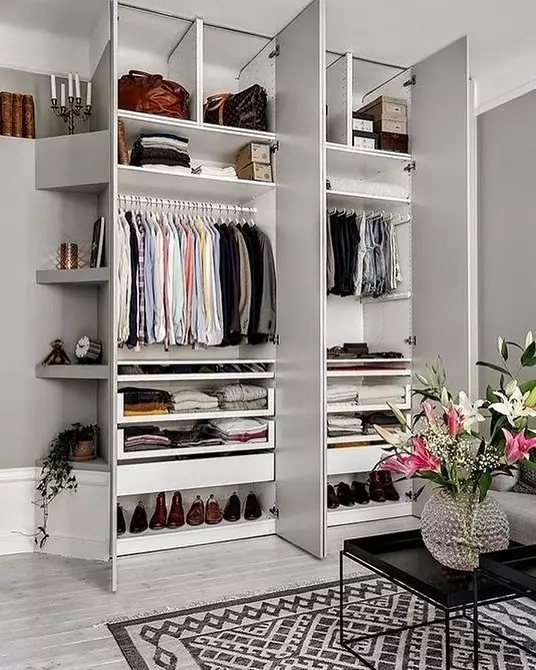
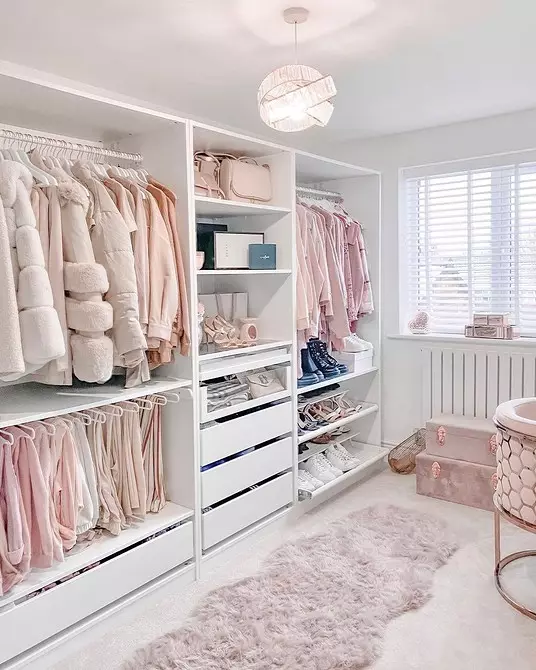
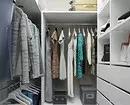
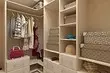
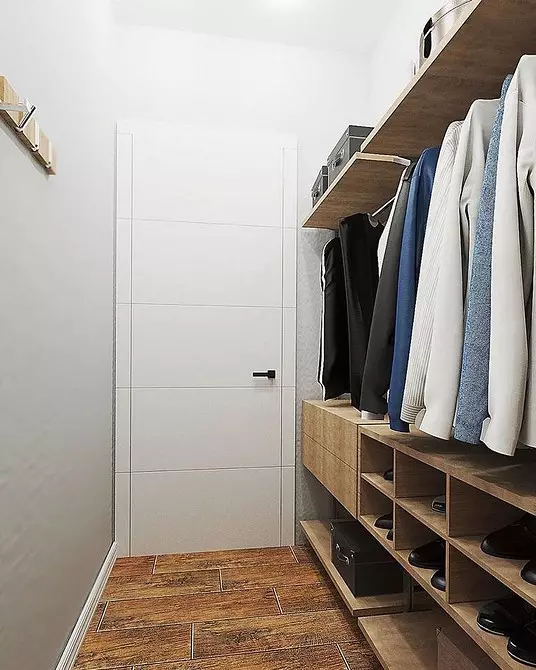
Linear or one-sided
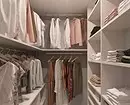
The location of racks along one of the walls. There may be two options. In the first door is located opposite the cabinet. In this case, the distance between the opening and boxes should be at least 0.8 m. Otherwise, it will be extremely uncomfortable to use furniture. The doorway in a narrow end is more convenient, it's easier to find things and change clothes. The minimum width of the room in this case should be 1.2 m, taking into account the depth of the racks of about 0.55-0.6 m.
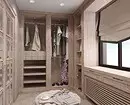
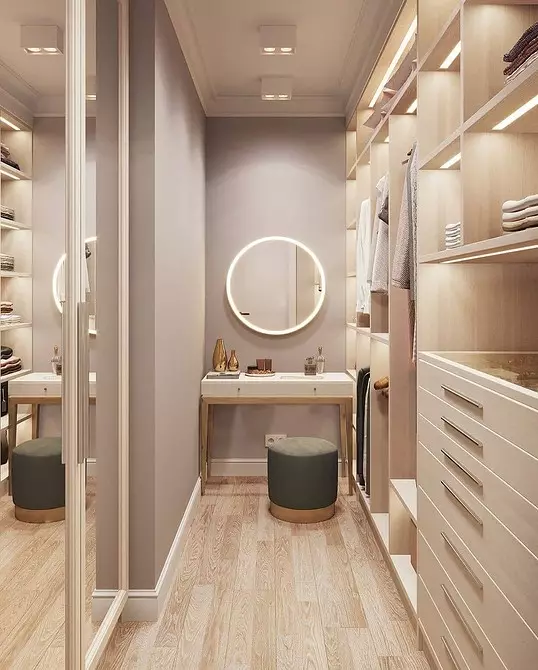
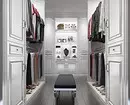
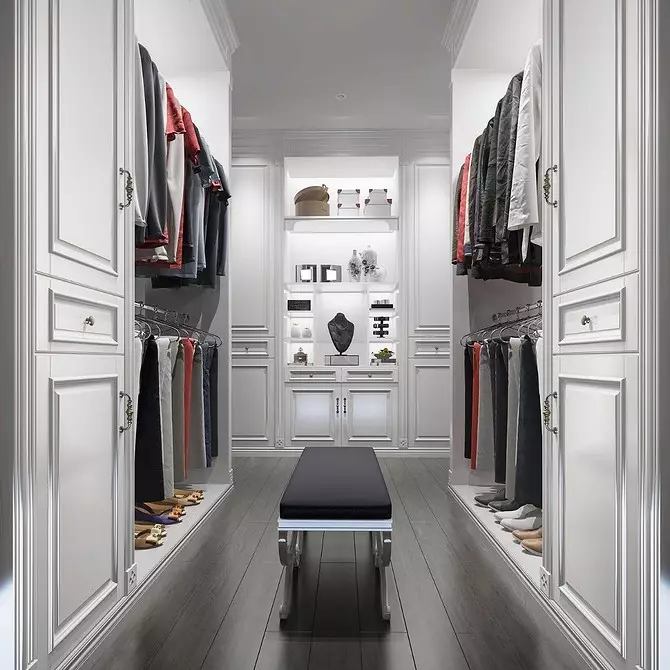
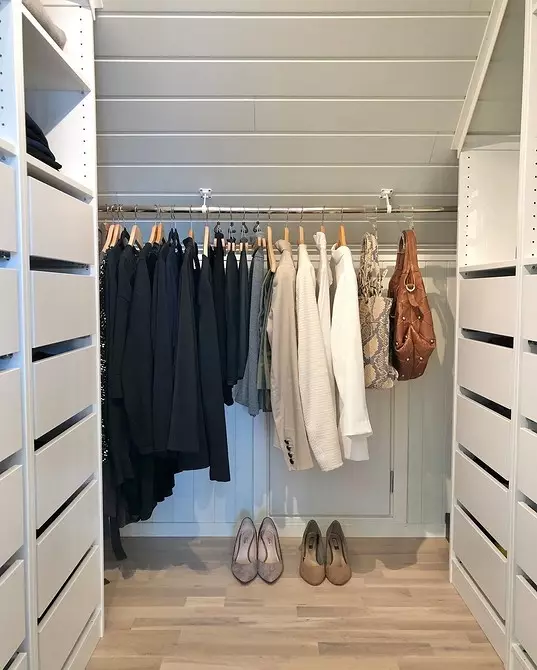
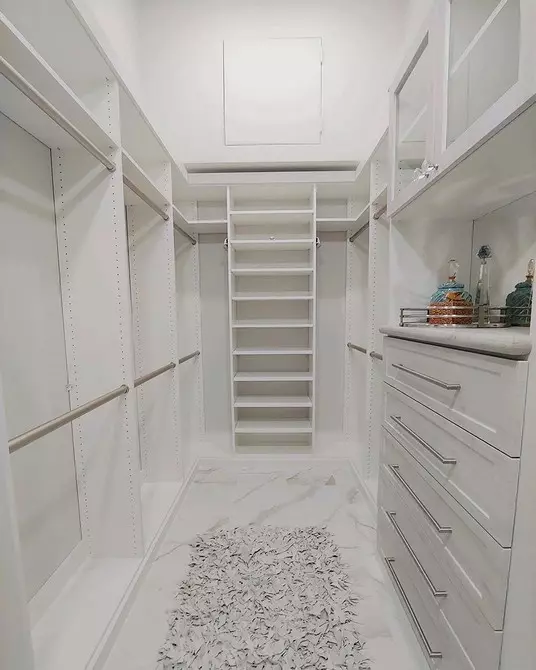
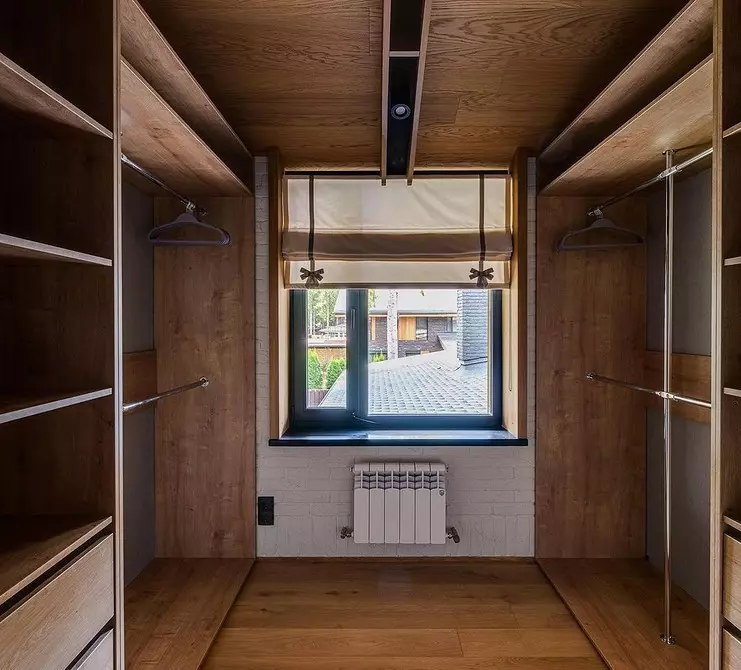
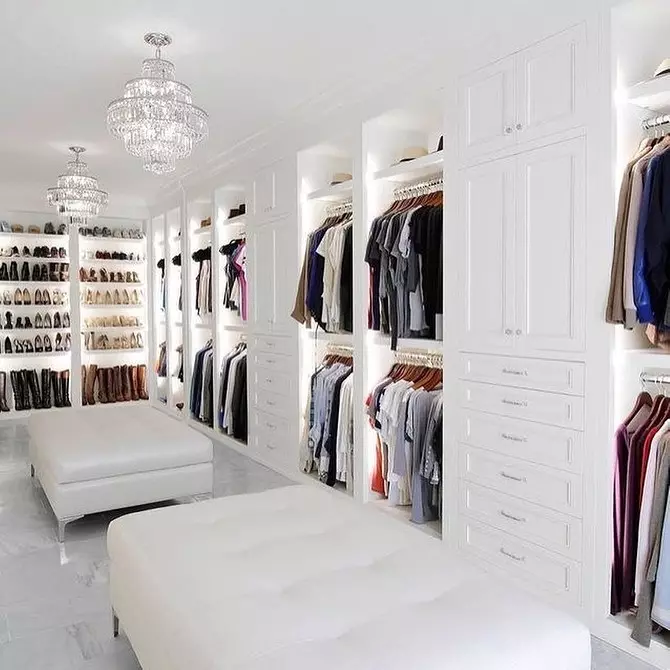
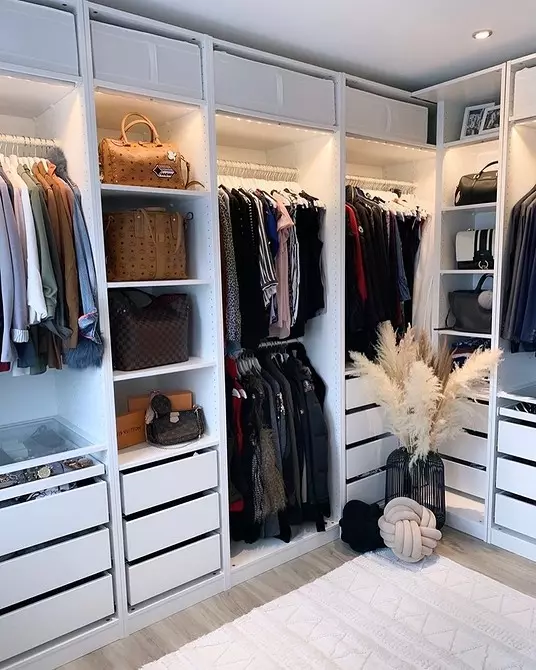
Parallel or double-sided
Racks are placed in two rows, one opposite the other. Practical and spacious option, provided that the size of the room is allowed. Its length can be any, but the minimum width is 1.5 m. In this case, it turns out to be placed on the one hand, the furniture depth of 0.55-0.6 m, on the other - the cabinets are fit. If it is assumed to install the same in depths of the racks, the width of at least 1.8 m will be needed.

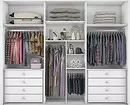
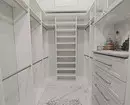
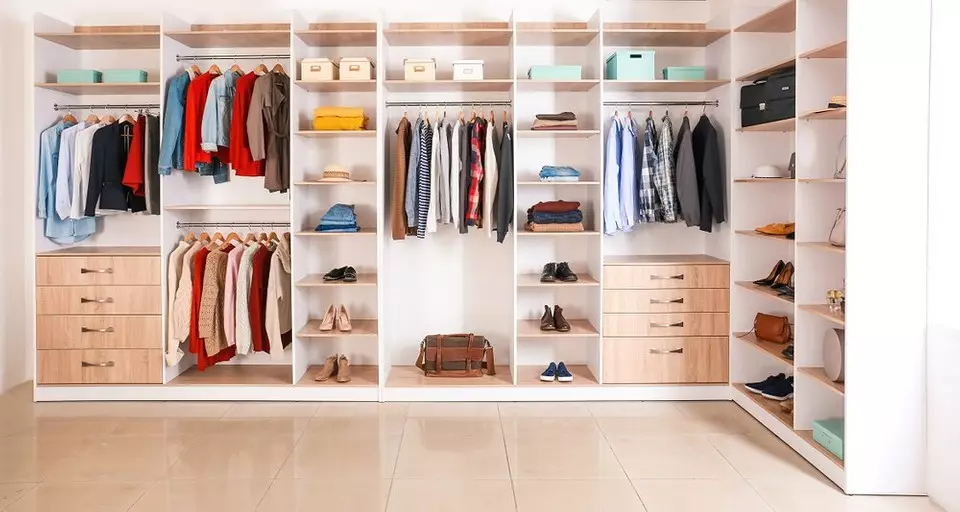
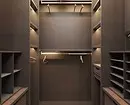
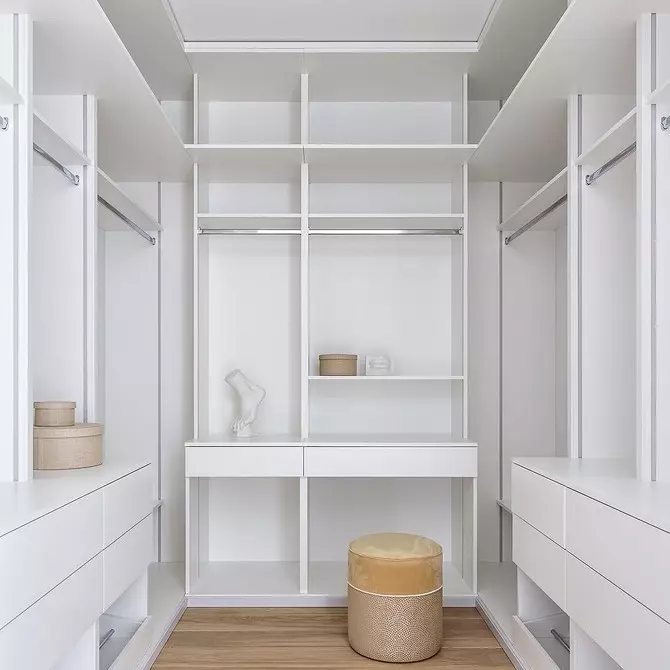
P-shaped
For storage systems, three walls are activated on which racks or shelves are installed. Narrow premises are better not to use. They are suitable for those whose form is approximate to the square. The P-shaped version is considered one of the most practical because it makes it possible to place a large number of things. At the same time use such a wardrobe conveniently.
Required tools and materials
Wardrobe partitions can be made of different materials. Most often used chipboard type chipboard, plywood, etc. If this option is implemented, it is necessary to assemble the frame of the framework or wooden bars. Self-tapping screws are taken as fasteners. The finished partition is putty, leveling tracks from fasteners, then color or stick wallpaper.
Filling you can buy. So come with mesh and tubular systems. Cabinet furniture can be collected with your own hands. To do this, they order sawing chipboard for their measurements or reprove details from disassembled old cabinets or tables. In the latter case, after the final assembly, new racks and shelves are painted so that the design looks aesthetic.
If the closed system is mounted, the doors will also be needed. They can be anywhere: swing, harmonica or coupe. The last option is chosen most often. Before making a doors-compartment in a dressing room, you need to pay special attention to the quality of fittings. Rollers and guides It is important to choose the weight of the canvas and can be installed correctly. Otherwise they will not work normally.
Stages of an independent organization of a dressing room
We will analyze in stages, how to plan yourself and make a dressing room.1. Planning
This is a very responsible stage, which builds a detailed plan for the future storage system. It is important to correctly define the type and location of the filling. In order not to be mistaken, we propose to perform a few simple steps.
- Determine how many people will enjoy the wardrobe. For each user, ideally, it is necessary to highlight your own zone.
- We define that it should be stored in the room. In addition to shoes and clothing, it can be bedding and table underwear, home textiles, travel bags, sports or economic equipment.
- We sort things. We find out what will be stored on the shelves, which is suspended. Based on this, we determine the number of rods and shelves or baskets. Be sure to make the increase "about the supply", because with time the number of things changes.
- We define the height of the placement of the rod under long clothing. For this measure the longest models.
- We make a sketch of wardrobe filling. At the same time, we take into account the longline. The average tier is given under the clothes, which often use. On the top tier we raise seasonal things, travel bags, inventory, home textiles. Footwear is more often stored on the lower tier. Knowing the number of shelves and rods, we build an exemplary plan.
- We complement the approximate size scheme. For clarity, cut out of paper exactly on the scale of the model of cabinets and shelves, we place them on the plan. Move by selecting the optimal placement. We make a list of necessary equipment, we introduce it into the plan.
The scheme thus obtained is refined. If possible, you need to make personal zones for all wardrobe users. Well, if there is a place for a large mirror, pouf or benches.

2. Lighting
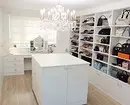
The room must have a light source, it is best not one. For top lights, point point built-in lamps or flat chandeliers are chosen. It will not interfere with changing. Optimally select lamps with a warm tint, as close as possible to the natural light. They are less distorting colors, which is very important when choosing a dress. You can highlight the zone of the mirror, shelves and the inner parts of the cabinets.
Here also put LED ribbons or flat lamps. A good solution will be the installation of the sensor, which will include the lighting when opening the door. It is necessary to think over the need to set the outlet. Perhaps it will be necessary not alone. Especially if the large size room and it provides a corner for ironing.

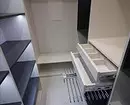
3. Ventilation
Tightly closed room must be ventilated. Otherwise, the clothing is soaked with the smell of sharpness. The best, but the most difficult option is to install forced ventilation. To do this, in the upper part of the wall, ventilation is equipped, which is connected to the overall ventilation system. A hood is mounted exhaust fan. Its operation is programmed by a timer or device starts when the lighting is turned on.For the flow of fresh air in the door canvase, you can also put a special ventilation grille. If there is no possibility of installing forced ventilation, they put leakage doors, such as folding or blinds. Venreshtka will help in the opening door canvase. So there will be a natural air exchange. If it is impossible, you will have to periodically leave the doors open to ventilation.
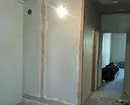
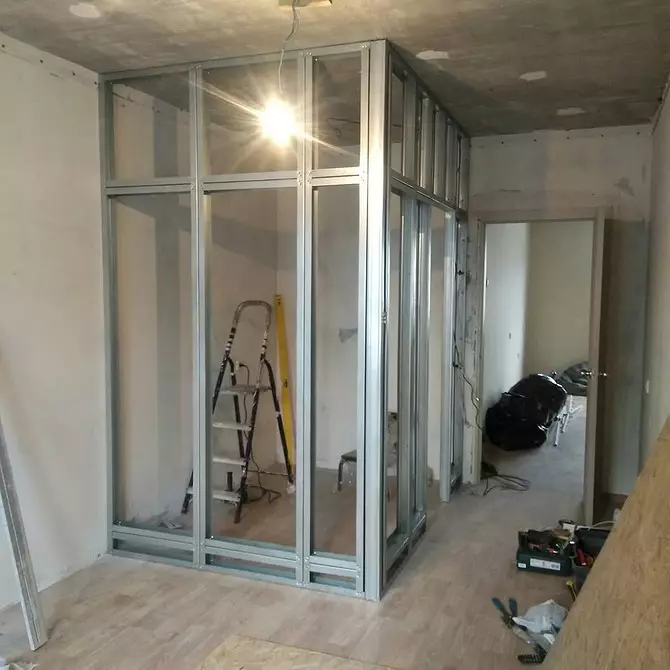
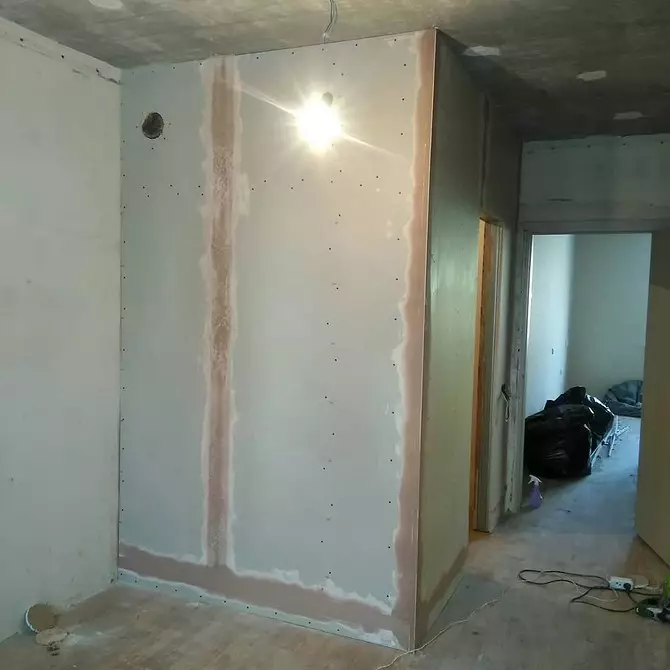
4. Installation of partition and finishing
Installation of wall walls start with frame installation. It is collected from metal profil or wooden bar. The finished design is trimmed with sheets of HCL or any other suitable material. The joints and dents from fasteners are sealed with putty, seams and angles are strengthened with sickle. The dried putty is cleaned. Now the basis is ready for finishing finish. It may be painting, in this case it is better to impose an additional layer of putty, or pasting with wallpaper.
The inner part of the wardrobe also needs to finish. Separate the ceiling, put fixtures. Then lay the coating on the floor. It may be the same as in the whole house, or any other. Walls are painted or covered with wallpaper. If the plane is uneven, it is desirable to align them before finishing. Otherwise, difficulties may arise when installing filling. Lastly, the doors are mounted if they are provided by the project.

5. Installation of the storage system
The filling assembly is carried out in a fully finished room. It is easier to collect systems purchased in the store. They always go to detailed instructions that need to be accurate. A little more difficult to mount the filling designed independently. The pre-made scheme will help. Crawled details are unfolded in the next room and gradually collect on the spot. Start with one of the walls, then go to the following. After the framework is ready, the retractable and hinged blocks put in place.

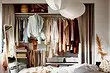
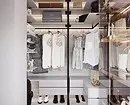
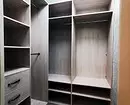
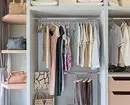
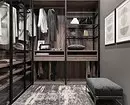
Ideas of dressing projects
Embodses of living room for storage. We have collected interesting ideas, you can see them in our selection of photos.