The countertop is a significant element of any kitchen headset. We will tell you in detail how to install it yourself.

Content
Sandy Sandy Installation StonesInstallation of table tops in the kitchen: Important moments
How to install a countertop in the kitchen with your own hands: Step-by-step instructions
Step 1. Preparatory work
Step 2. Docking Fragments
Step 3. Installation of the canvas
An independent assembly of kitchen furniture is becoming increasingly popular. It is beneficial and practical, since it appears the opportunity to make sure the parts for the size of the room as accurately as possible. You need to choose a finished project or create your own and order the required elements. The main complexity lies in a neat and correct assembly. We will analyze how the competent installation of the table top in the kitchen is your own hands.
Sandy Sandy Installation Stones
Those who want to try their hand in assembling furniture, you need to understand that only professionals can get a good result. If this is the first experience, the result may not be the best. More chances for success in those who already have skill work with MDF, chipboard or veneered wood. These are quite capricious materials.
Errors when working can spoil them. It will be impossible to return the coating for the previous way, which will lead to excess waste. If it is supposed to be installed in the installation of a canvas, for example, glass or stone, it is better to immediately contact professionals. We list the main difficulties in working with various materials:
- Natural wood. With careless circulation, dents or chipsets are possible. True, in most cases they can be seized and restore an attractive look, but this is a work for the master.
- Wood plates. Inactive cut will lead to the appearance of chips that cannot be disguised. The likelihood of mechanical damage is also great.
- Stone, artificial or natural. The high weight of the coating greatly complicates the installation, especially this is relevant for the latter. In addition, non-special skills cannot be made for washing and the cooking panel, as well as cutting the canvas.
- Metal. Install and docile it is simple enough, but dents and scratches may appear when processing. However, they can be removed.
You can only install only table tops from the materials simple in the installation of materials. The rest better entrust professionals
-->
Installation of table tops in the kitchen: Important moments
In order for the product to get up correctly and served for a long time, it is put only on the fully assembled bottom of the kitchen headset. All cabinets are mounted and installed in place. Then put them up so to align in height. Make it is very simple, if you adjust the screw legs of the furniture. The correctness of the work carried out is verified by the construction level.
The upper part of the cabinets should form a common plane located strictly horizontally.
After you managed to get such a result, all the cabinets are collected in the overall block. For this, they are tightened by special fasteners. In the walls of products, the holes are drilled through which ties pass. Each square meter should account for at least two such compounds. The base under the tabletop must be perfectly smooth. To level the smallest drops, it is worth sacking the ends of the Tumbe a sealing ribbon from vinyl.
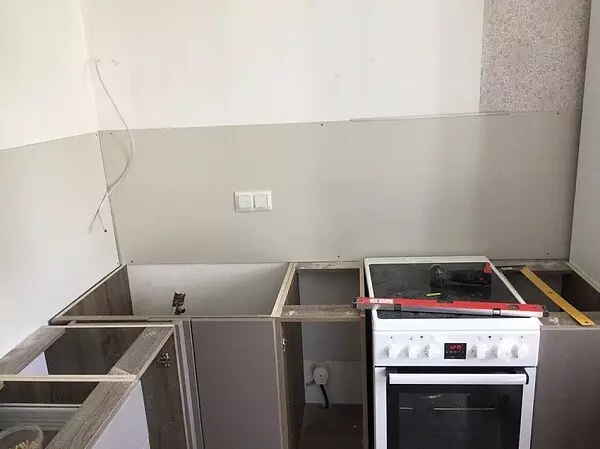
Before mounting the countertops, it is necessary to level the lower cabinets and set them by level
-->Another important point is the choice of the type of apron for the kitchen. It may be different and this will have to take into account when working. The protective coating can be solid, that is, to be located from the ceiling to the floor. Most often, in this case, the ceramic tile is selected. You need to be prepared for certain difficulties with the design of the joint. The basis should fit as close as possible to the wall, therefore, most likely, it will be necessary to cut it.
This is necessary if:
- Wall "rolled" back;
- The tile has a pronounced embossed surface;
- The facing is pasted unevenly.
In any case, you will need to process the slab end so that it repeats the wall shape. It is optimal to do this with a grinding machine of a ribbon type. So it will be possible to avoid chips.
Several otherwise will have to act if the apron is selected, closing only the space between the upper and lower tier headset. The trimming here is most likely not required. In any case, it is recommended to fix the base. Make it is the easiest way using an angular type brackets. If this is neglected, over time, the unlocked product can be asked and the crack will appear. Even if the plinth will be located on top, it will not close it. The defect will be clearly noticeable.
Before mounting, countertops need to decide on the type of kitchen apron
-->
How to install a countertop in the kitchen with your own hands: Step-by-step instructions
You can independently install a fabric of artificial stone, MDF or chipboard. Other materials are better not to use for a reason enough installation, which requires certain skills. Installation runs approximately the same and includes several steps.1 step. Preparatory work
They are starting with fitting and fitting plates or plates, if they are supposed to be allowed. Alignment is carried out by the facade of the couch. The countertop must perform in front of it by 30-50 mm. This is done in order to protect the facade from splashes and drops flying from above. With this in mind, measurements and marking under trimming are carried out. Optimally carry out the last two stages:
- We perform a slant cut. It is necessary that the edge pressed to the apron was parallel to the facade. We cut off excess with the help of a hand saw or electric jigsaw. In the second case, some experience will be required, since the board is thick and trimmed at right angles. If a hand Skolznet, the material may be hopelessly spoiled. Optimally leave a small allowance and process its belt grinding. So that the cut line is flat, we use the rail guide.
- Crop the edge under the irregularities of the wall. We perform recesses under the pipes, protrusions, etc. If there are bougra or tile on the vertical surface, it will take an additional trimming or grinding if the irregularities are small. We note a thin marker on the board a line, which will take place a cut and very carefully carry out trimming.
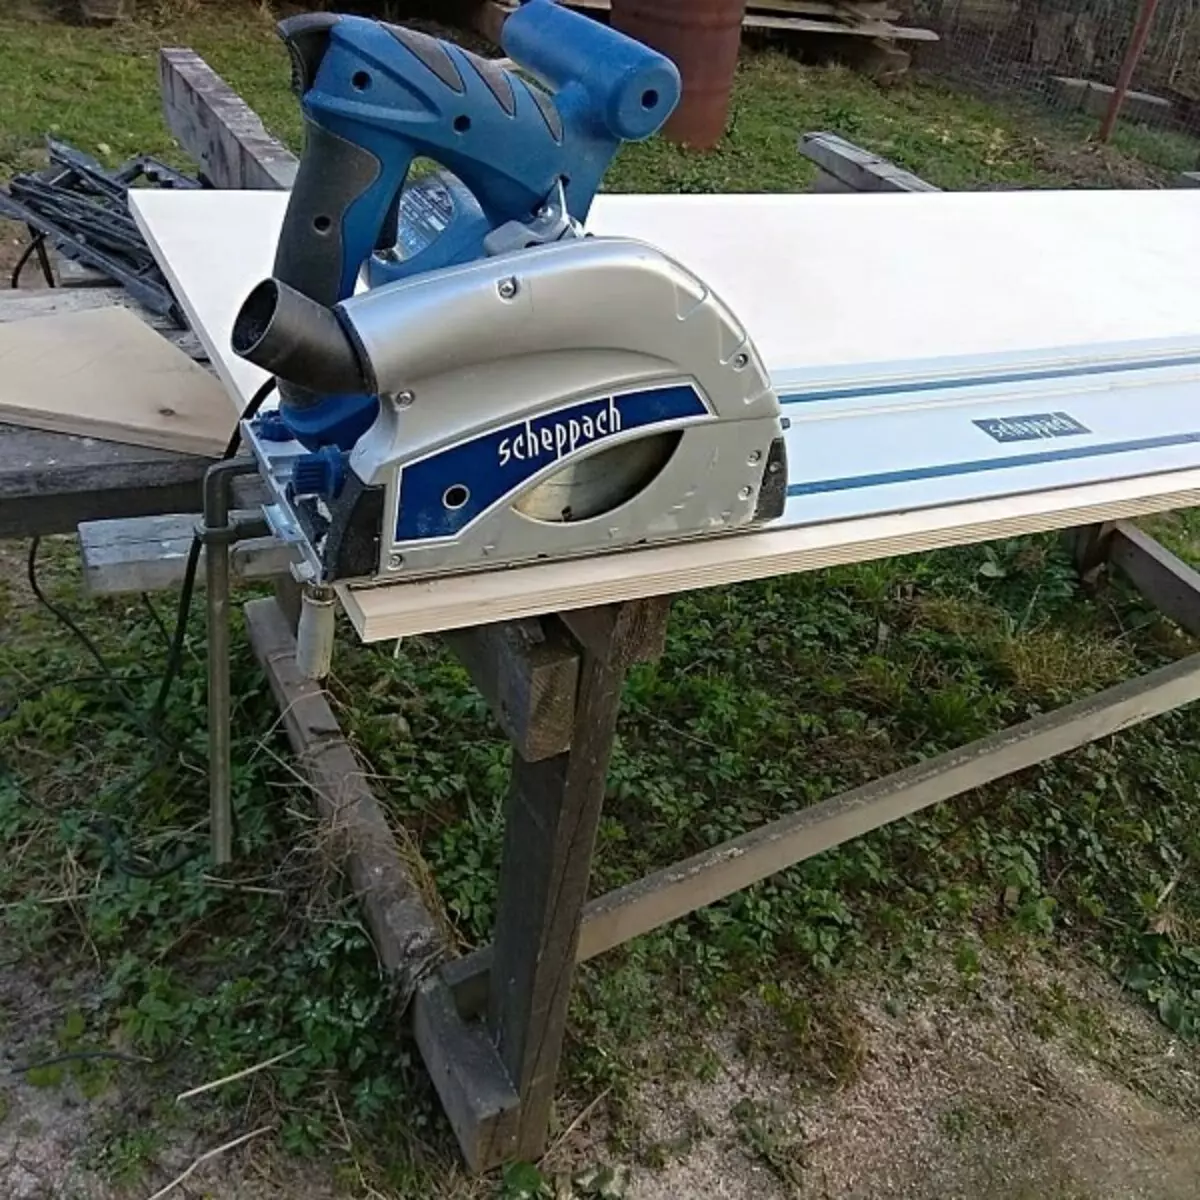
Condition should be carried out very carefully. If an electric tool is used, this is especially important
-->Cooking fasteners for the foundation. They fix it to the box, which will prevent a possible offset. These are steel corners that are attached to one side to the lower side of the plate, and the other to the side wall of the couch. Their mount depends on the material. Self-timers are used for wood plates and boards. They are fixed brackets. It is glued to composite or stone.
For this purpose, where parts will be installed, we clean, and then degrease. We carry out suitable two-component glue, we apply to the surface of the corner and press it with an effort to the surface. We are waiting for the composition to dry, on what will go on average 24 hours. After that, you can start on the installation.
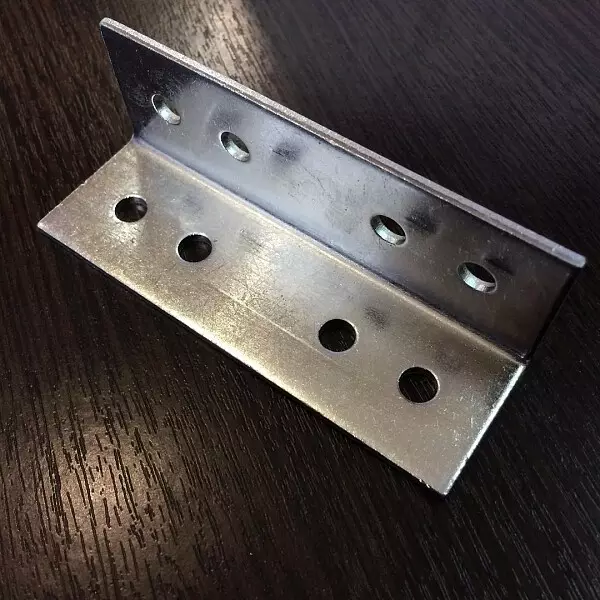
Furniture corners can be used to secure countertops
-->
Step 2. Docking Fragments
It is only necessary for prefabricated countertops, more often for corner. It is assumed that there are two or more fragments that need to be connected in a common canvas. Regardless of the material, screeds are installed on the joint section. It is advisable to prepare areas for their installation in a workshop, it will be easier to carry out drilling and milling. Fragments are cutting up so that you can dock them.
If you work with a polyester or acrylic cloth, the connection can be performed without an additional profile:
- We process the ends of the details of the glue.
- We connect the elements, put and tighten the screeds.
- Remove the excess glue.
- After drying the composition, polishing the joint. It becomes almost imperceptible.
- Strengthen the seam with a backset on the reverse side.
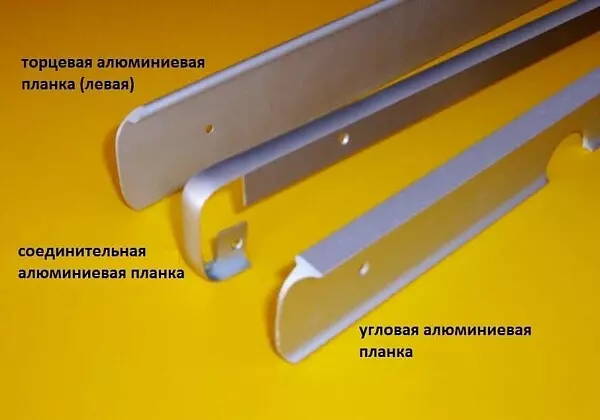
So the aluminum docking planks look like, which are used when docking countertop fragments
-->For chipboard, MDF, etc. Used aluminum docking strap. There are several types of its varieties in the shops. It is selected that designed for the compound performed.
- Facial areas process silicone.
- We put the bar and align it flush. Fix on one side with small self-draws.
- We connect fragments and put into the prepared seats of clamps-screed. Tighten them.
There is another way of docking parts. This is the so-called european. It implies the design of the junction area without any additional details. Legal cutting on the milling machine, as a result of which the lock connection is obtained. Its quality depends largely on the correct operation of the work. It is necessary to know that the use of euro-coupling involves an accurate fitting of the parts and the absence of even a small curvature of the indoor corners. Otherwise, the installation will be impossible.
This looks like a docking section of two plates according to the technology of european
-->
Step 3. Installation of the canvas
Before putting the prepared cloth into place, you need to cut holes for the sink, sockets, a cooking panel. For proper marking, it is easiest to use the template that the manufacturer puts into the packaging with the technique. Over the outlined lines are performed by holes. It should be cut carefully so as not to spoil the coating. Slices are necessarily processed with silicone to eliminate possible contact with moisture.
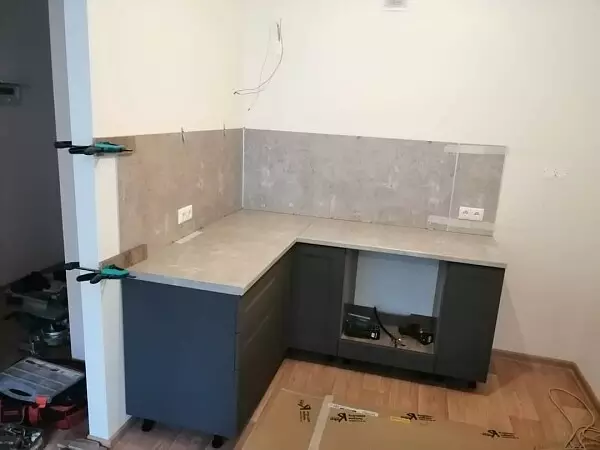
Now the plate is fully ready for installation. It is put on the stands and align relatively facades. After that, only the cloth remains. For this, the remaining unpleasted parts of the angular brackets are screwed to furniture screws to the side walls of the cabinets. It is advisable to do this with an assistant, which will with the effort to press the slab in the fastening process.
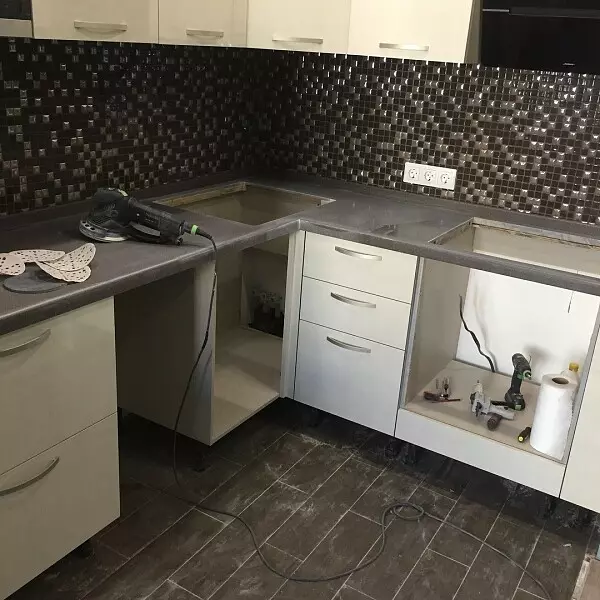
The countertop is put on the cabinet and fixes with the help of angular brackets
-->It remains to install the plinth on the tabletop in the kitchen. He will close a low-nesthetic section of the joint and protect it from moisture. You can attach the item in two ways: adhesive and self-tapping screw. The first is good for stone, ceramics, etc. surfaces. Choosing it, you need to know that when dismantling the item will be difficult to remove, without spoiling the basis. Installation on the self-tapping screw is carried out like this:
- We carry out measurements and cut off the piece of plinth of the desired length. The edge is processed by abrasive.
- The installation site is processing silicone to prevent possible moisture from entering subsequently.
- We put a profile in place, creating it with self-draws. Spin them at a distance of no more than 0.3 m one from the other.
- We establish a decorative lining. Insert it into a special groove to click.
- The joints, ends and corners close with special linings, not forgetting to additionally handle them with silicone.
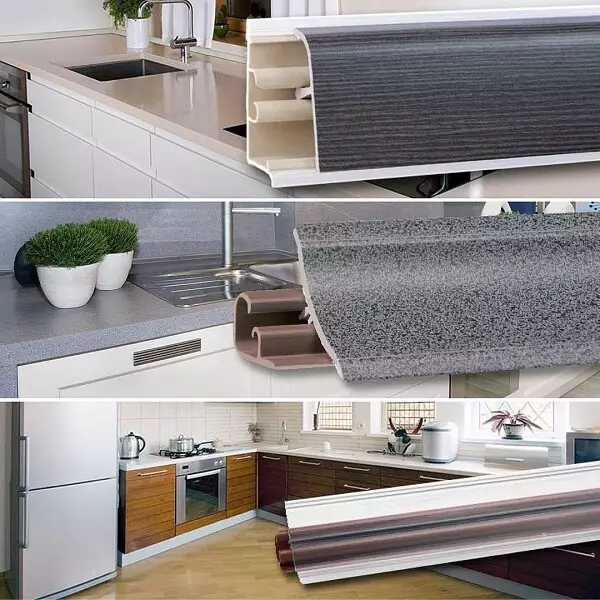
Three varieties of kitchen plinths
-->Instructions, how to attach the plinth to the tabletop in the kitchen with the help of glue, is almost similar. It will differ only in that the profile is pasted on a preventive base.
Independent installation of table top is not very complicated. If some questions remained, it is possible to consider all its stages in detail on video.