The constituent, reliable and durable roofs of flexible bituminous tiles are high-quality material and professional installation.
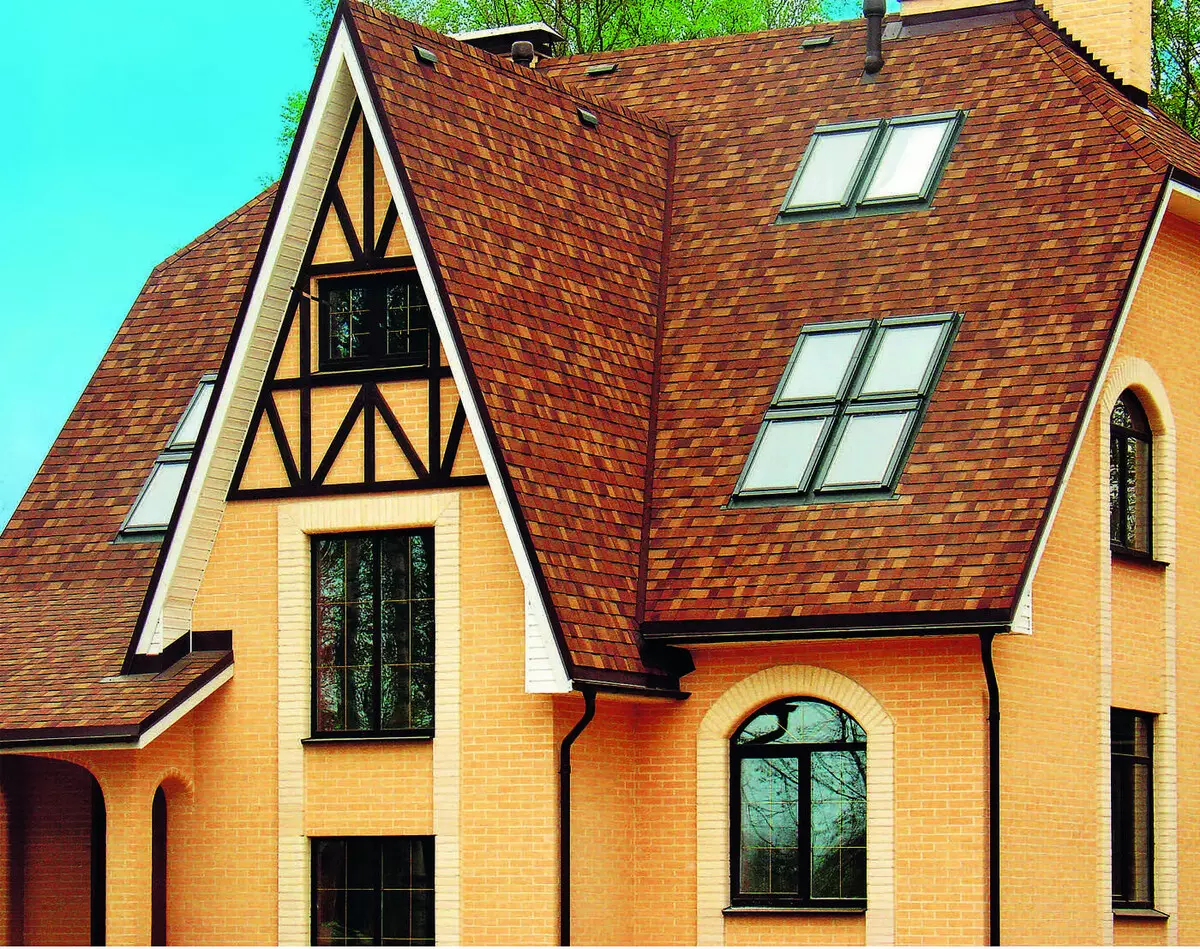
Photo: Tegola.
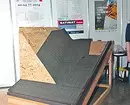
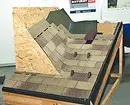
The flexible tile on the Russian market is offered by the company "Dyuk Extrubje", Tehtonikol, Certainteed, Icopal, Katepal, Kerabit, Tegola, etc. The material is suitable for pitched roofs with a slope of more than 11.3 °. As a base, it is used for it, stacked over the rafted solid flooring from oriented-chipboard (OSP-3), moisture resistant plywood (FSF) with a thickness of at least 9 mm, tight or edged boards with a thickness of 25 mm. The base elements have a rotary, with a gap of 3-4 mm. The latter serves to compensate for temperature deformations of elements. The flooring should be even, with drops in height between the triggers no more than 2 mm, as well as dry (recommended humidity from 12%).
On top of the flooring placed a lining carpet - a bitumen rolled material width, as a rule, 1 m. According to the fastener method, carpets are vocked, self-adhesive and fixed by mechanical (brackets or galvanized nails). The canvases are fill with 15-20 cm in the transverse direction and 10 cm in the longitudinal. The carpet performs several functions. Firstly, further protects the base from leakage at the time of installation of the roof and in the first 2-3 years after its structure, while the flexible tile under the influence of solar heat "does not rock" and has not formed a fully waterproof coating. Secondly, the elastic carpet allows to reduce the effect of the sediment of a wooden rafting structure to the appearance and durability of the roof (including in the endand zone and places of adjoins).
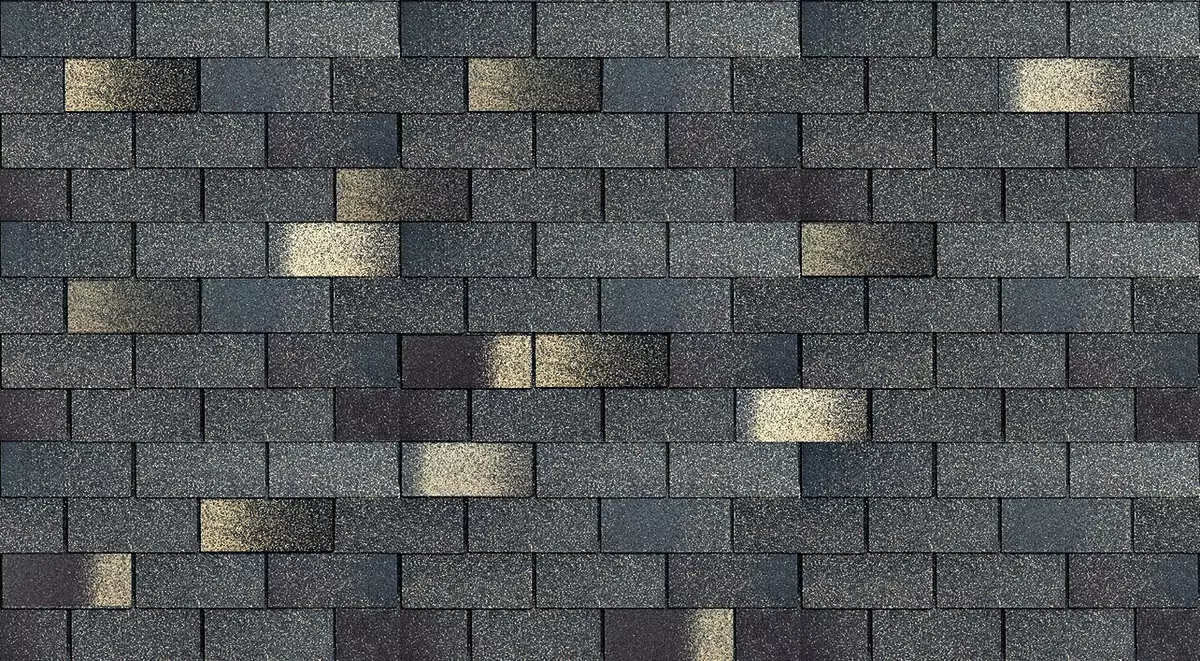
Granulate protects the bitumen layer from the destructive effects of ultraviolet, at the same time giving the color to roofing material. Photo: Tehtonol
The recommendations of the manufacturers on the installation of a lining carpet are different. Some companies advise it to lay it over the entire surface of the slope on the roofs with a slope of up to 18 °, others - on the roofs with a slope of up to 30 °. With a larger slope, the carpet is recommended to be laid only in endowes, places of adjoins to the walls, around the pipes and mansard windows, as well as along the eaves. Some companies add to this list of frontones, skates and ridges.
The next stage of the installation of the roof is the installation of metal aprons (drippers) on the frontal and eaves to protect against wind and water, as well as for the design of these parts of the roof. The aprons fasten over lining carps with nails or self-drawing. After that, getting styling of the ordinary tile.
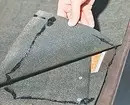
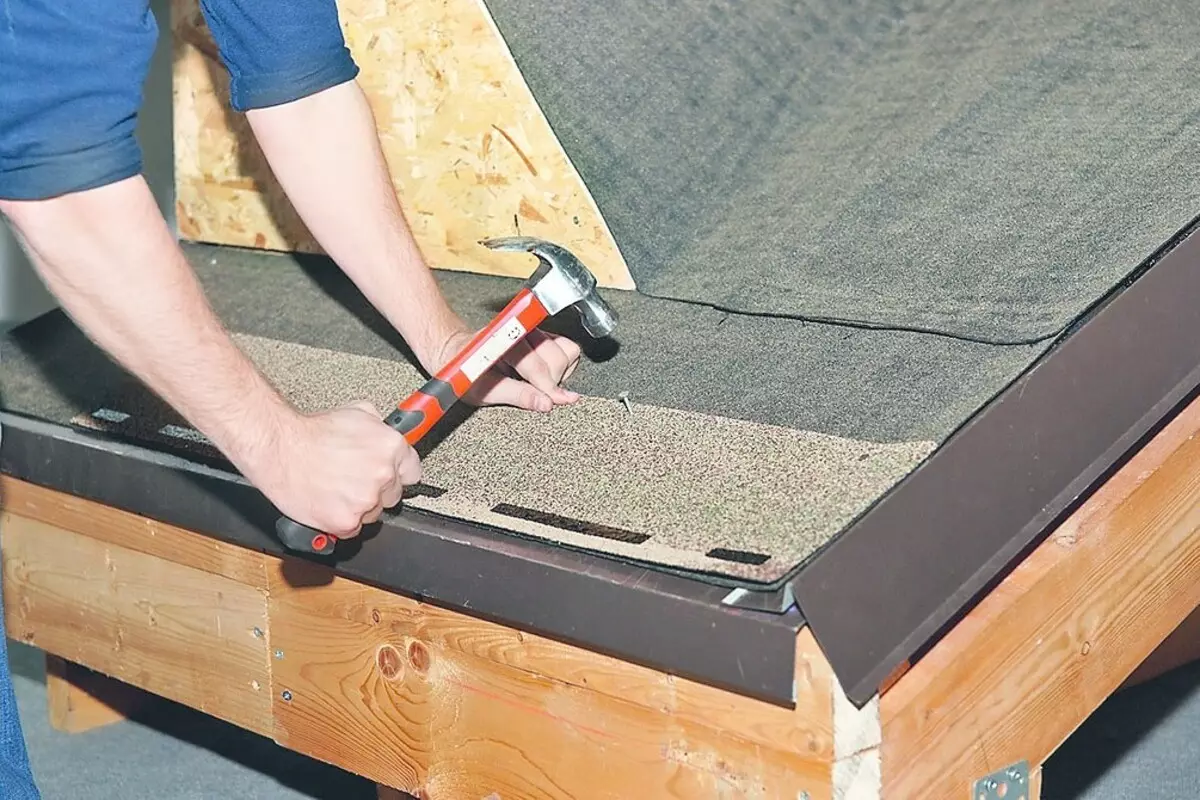
Each shingle (a small flat sheet of 1 × 0.3 m with figured clippings on one edge) is fixed on the base using four-five (depending on the tile model) galvanized nails with wide hats. They nourish them above the end of the cut-out petals (along the lines of the groove) to additionally fix the top edge of the lower row shingle. It is unacceptable to mount the shings only along the upper edge, as it can break away under the influence of a strong wind. In addition, in this case, the lower row is also poorly fixed, which can disrupt the integrity of the entire roofing coating. On the roofs with a big bias (over 45 or 60 °) for attaching the shingles you will need two additional nails: they nourish the upper angles of the tile (at a distance of 2.5 cm from the edge of the shingle).
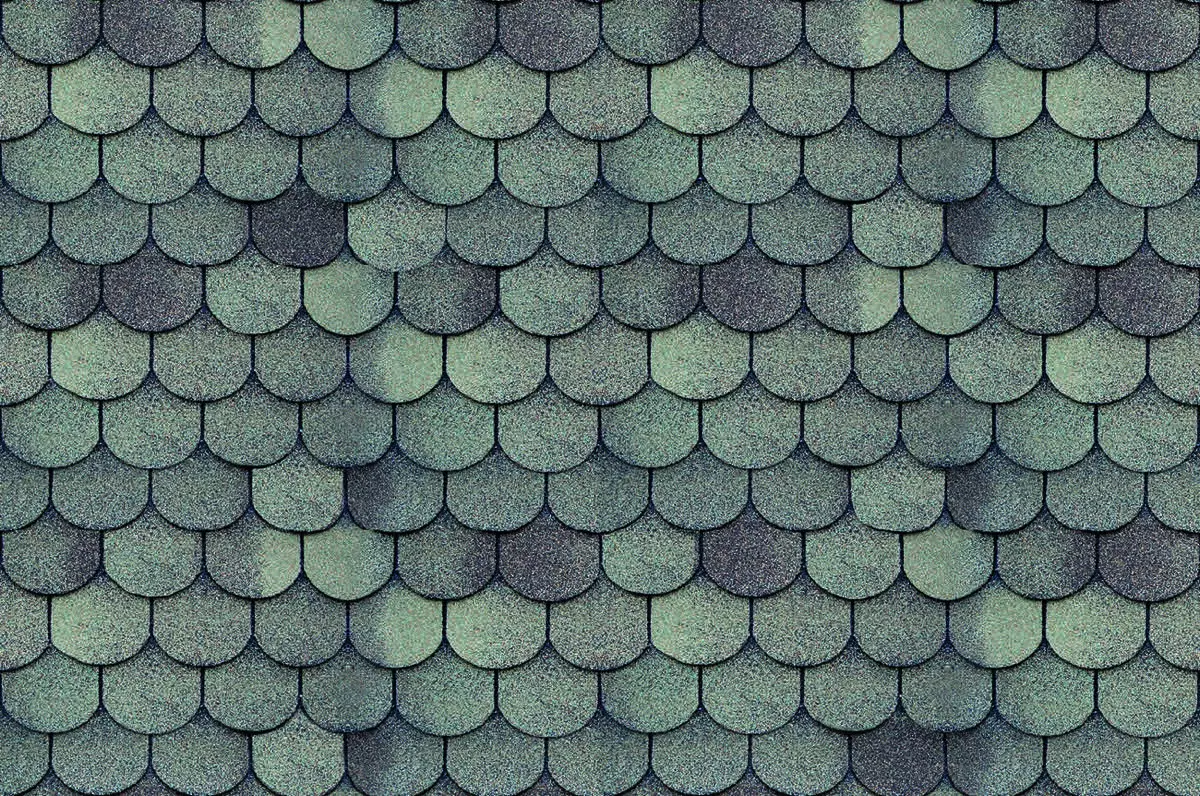
The front surface of the flexible bituminous tiles is covered with a layer of painted stone granulate, most often basalts or slate. Photo: Tehtonol
The backing side of the tile, as a rule, has a self-adhesive bituminous layer - thanks to him, the trunks under the influence of the Sun sin sin with each other, which increases the tightness of the coating. The layer is protected by a film that is necessarily removed before mounting the tiles. The first row of the shots is usually laid on the cornese swell, then gradually reach the skate. At the same time, each upper element of the roof covers the bottom with the falsestone, reliably protecting the place of its fastener.
Eaves, skates and ridges are experiencing an increased load during the operation of the roof. Manufacturers offer different solutions to protect these complex sections from leaks. Some provide special skate-filament tile (with an enlarged area of the adhesive layer). Others are recommended to additionally handle an ordinary tile with bitumen mastic. Another problem node roofing - endanda, places of convergence of the skates under the inner angle. There are several technologies for their arrangement.
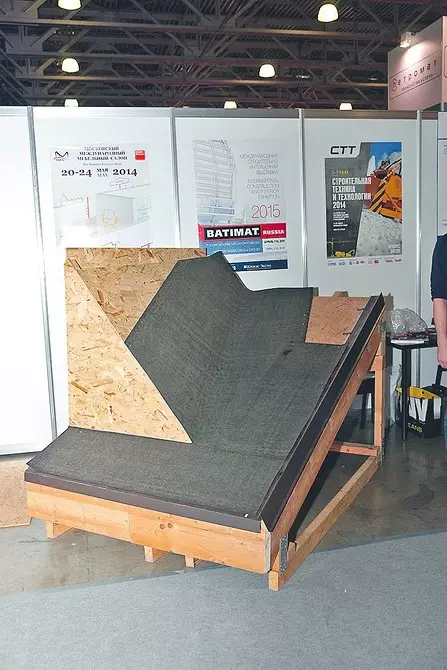
Many companies produce a special oman carpet - bituminous rolled material (usually a length of 700-1000 cm and 70-110 cm wide), which, like tile gates, has colored sprinkle from a stone granulate. Such a carpet is stronger and more elastic tile and allows you to hide it with a small amount of cloths (as a rule, several rolls). It is filling over the lining carpet, fixing the edges of the bitumen mastic and nails. Tile is raised on the carpet, cutting so that the unclosed strip of 15-25 cm wide for the unobstructed flow of water remains along the end of the end. The edges of the shingles are missing by mastic along the cut line. Fixing the carpet and gears, nails are clogged at a distance of at least 30 cm from the Endowa axis (in order to avoid leaks). However, it is believed that several long rolls, rigidly mounted in Undova, can be deformed when the wooden roof is sediment. Therefore, some companies propose to equip Undova with the help of ordinary trunks, calling them from one slope to another in various schemes ("sub-cut", "pigtail", "double weaving") and fixing glue. Supporters of this decision believe that UNDOVA consisting of a variety of individual elements is more elastic and better withstands the deformation of the roof.
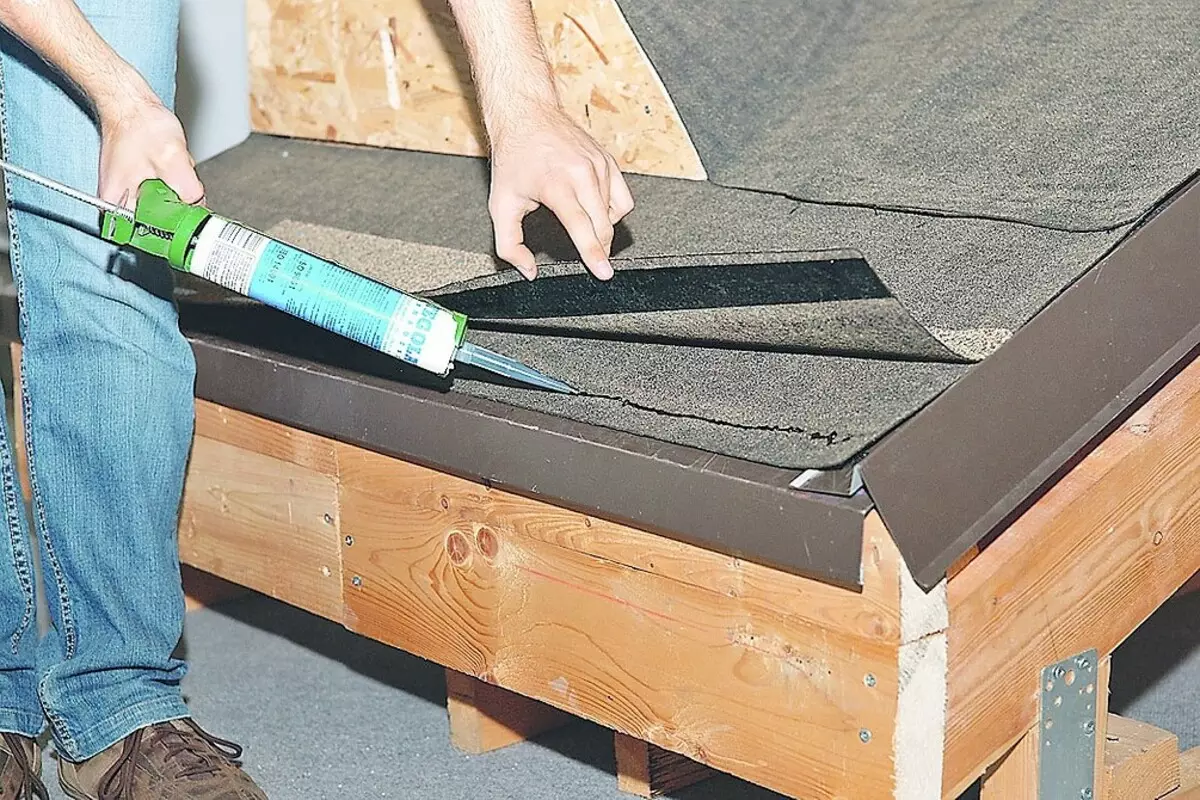
Another problematic place of the roof is the roof adjustment unit to the walls, smoke trumpets, etc. It is impossible to ensure the tightness of these sites only due to the misfortune of the bits of the junction with the adjacent surface. It is necessary to start on the wall or pipe edge edde carpet or roofing (by 30 cm) and close it with a special metal plate with a curved profile. It is fixed on the wall / tube mechanically, and the place of the joint is treated with roofing sealant.
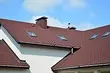
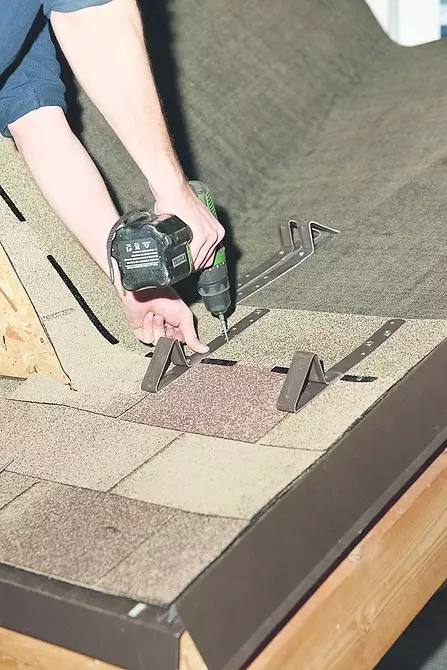
The roof necessarily provide elements that provide ventilation of the roof design. For the hood of air in the zone of the skate, the skate valves from polypropylene under the color of the coating are mounted. To enhance the ventilation in the funds zone, attic windows, wide flue pipes are installed with scanty valves. Frequency elements are often used to derive ventilation, sewer pipes, antennas.
On a note
When choosing a drainage system for a country house, it should be noted that steel drains have some advantages over waterproofs from PVC. So, plastic elements are less durable, not so resistant to UV rays: burnout and pigmentation is possible. The coefficient of temperature deformation is 4 times higher, which leads to the need to use sealants and special compensators during the installation of the hydroelectric system from PVC. Whereas for the steel it is not required. In addition, steel drainage systems can be installed in any weather, and for plastic there are temperature limitations. At the same time, PVC products are cheaper, do not corroded and practically do not need subsequent maintenance.Installation of flexible tiles Tegola in pictures


For additional waterproofing of the roof on a solid base from OSP-3, a rolled bitumen lining carpet is placed. It is rolled along the cornese swell, the axis of the endand and the end of the roof and fix the galvanized nails and bitumen mastics. Photo: Tegola.
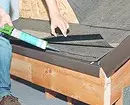
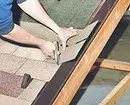
A metal apron is installed on a solid flooring on the sink and the end. Subsequently, the place of connection of the roof with apron is treated with bitumen mastic. Photo: Tegola.
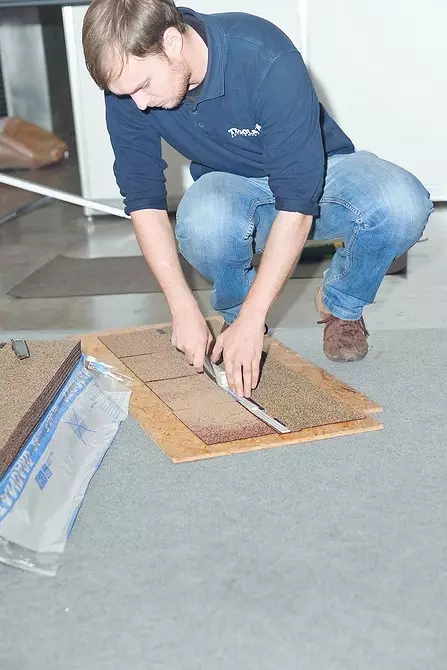
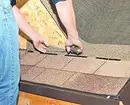
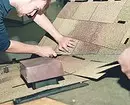
When laying TEGOLA tiles, all parts of the coating are performed from ordinary shots, without the use of challenges. And the plates of the initial row (on the cornese swell) are cut along the lines of the groove with a sharp knife with a hook-shaped blade and start assembling. Photo: Tegola.

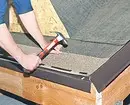
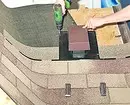
On the cornice sink, the shonts are fixed with galvanized nails. Photo: Tegola.
Also on the eaves of the rings are fixed with galvanized bitumen mastics. Tiles fasten along the lines of the groove. Photo: Tegola.
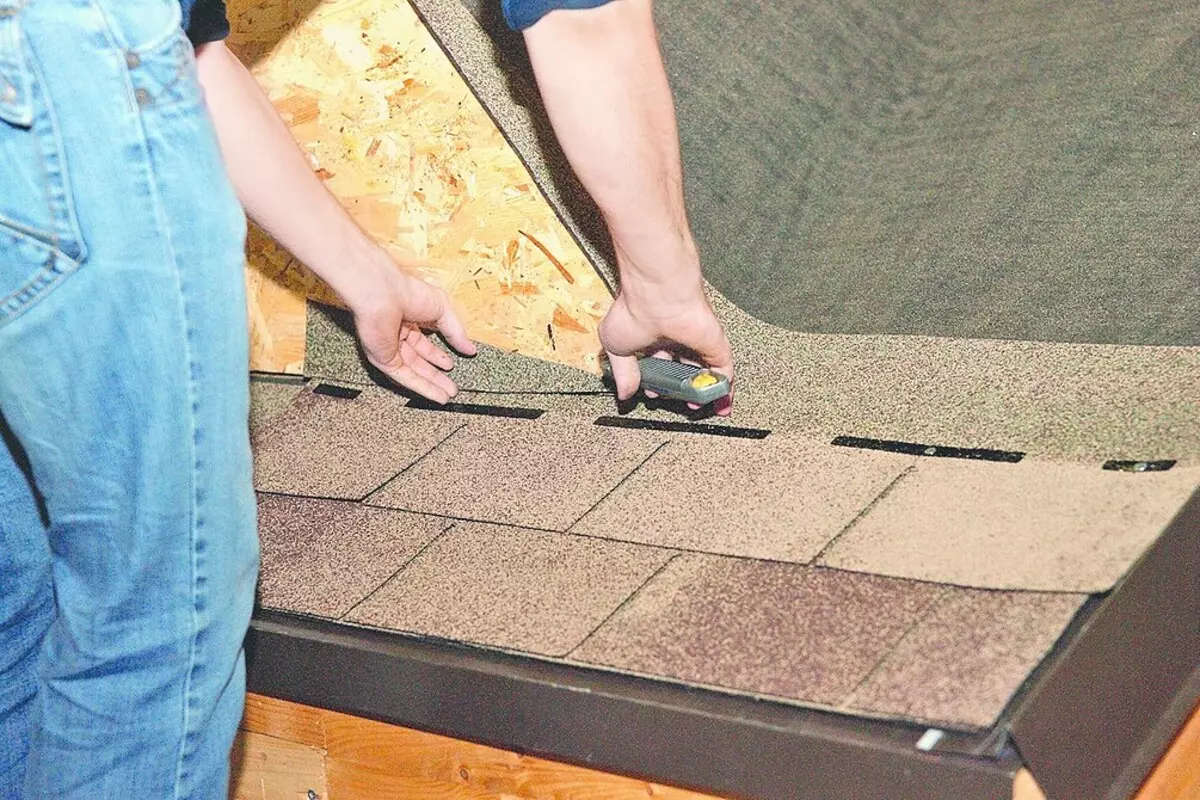
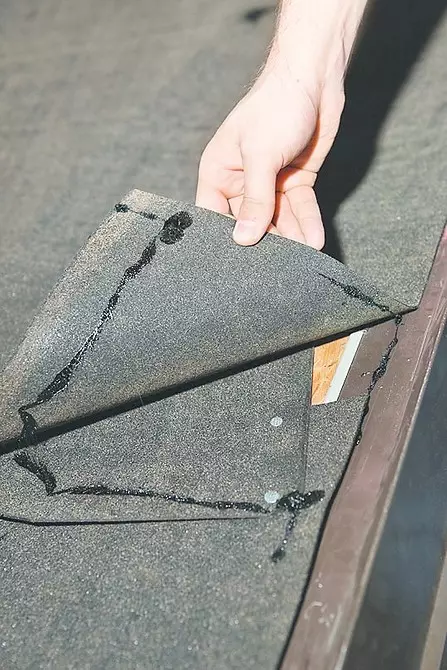
The second row shings fell into the zone of the endand, they are cut and then fastened. Photo: Tegola.
Then the truncations are fixed. Photo: Tegola.
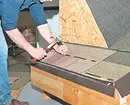
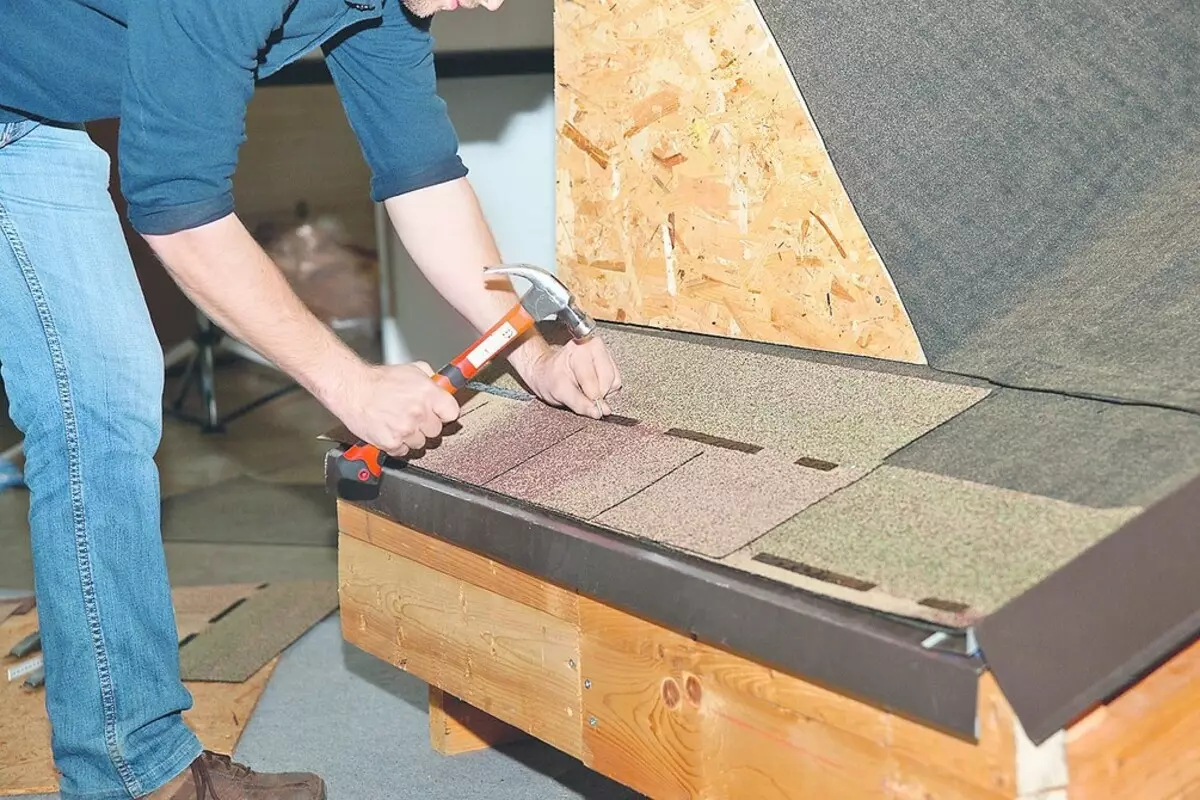
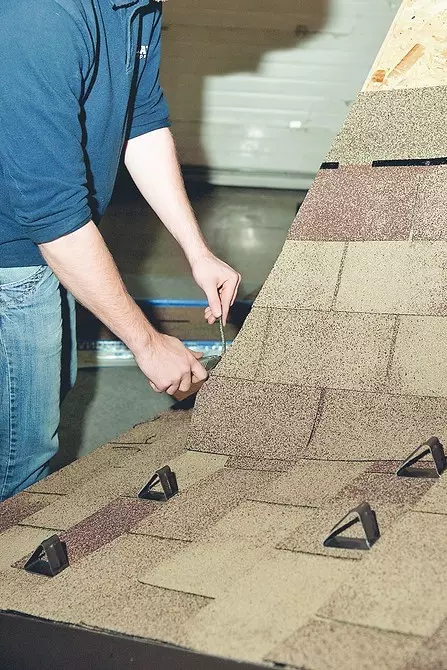
The shonts of the following rows are consistently fixed, rising from the eaves to the skate, cutting the places protruding behind the row. Photo: Tegola.
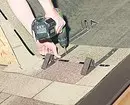
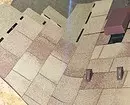
To avoid an avalanche-like snow, set corner snowstores. Their legs screwed to the base and close the tiles of the next row. Photo: Tegola.

Gonns on the roof end are cut for a demon of the impellent water drain along the apron. Photo: Tegola.
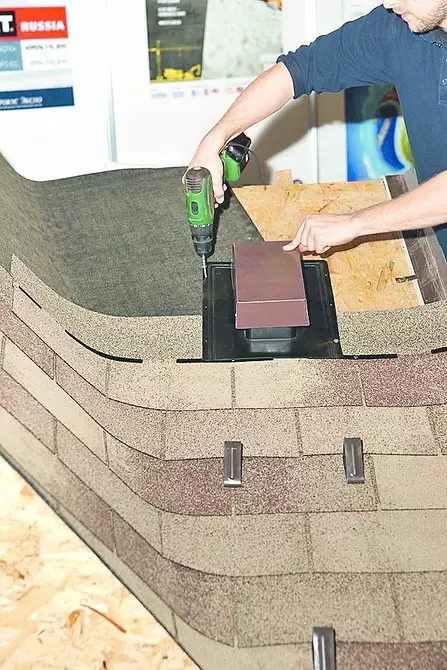
At the top of the skate, the ventilation element is installed (aerator). Photo: Tegola.
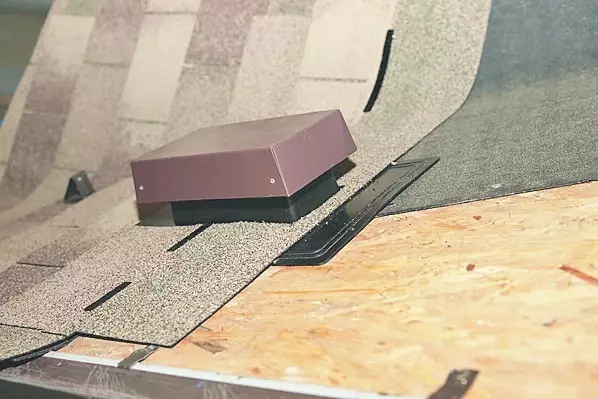
The tap element is fixed with self-pressing, then the upper part of the sole is closed with tiles, in which the grooves the desired shape is cut in advance. A protective cover is installed on the protruding part of the aerator with ventilation slots. Photo: Tegola.
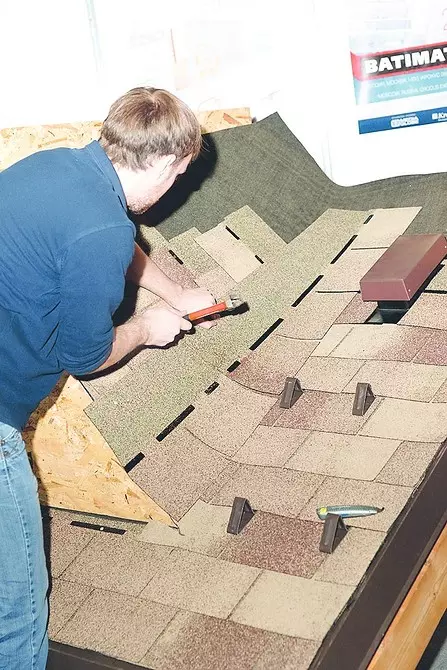
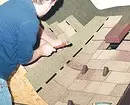
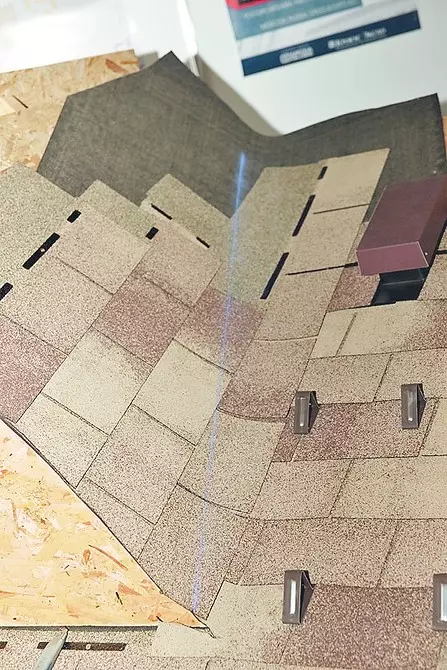
Then proceed to the installation of flexible bitumen tiles in Endah. It is placed in the "sublica" method. First, the shits on the skate having a smaller bias and the length are the elements of each row, they are settled through the Endowa axis to another slope. Next lays down the shings on the next skate. Photo: Tegola.
Please note: in the Endament zone, the material is fixed only with the help of a construction dryer or bitumen mastic. It is impossible to navigate the tile of nails, having a closer than 30 cm to the Endow's axis from each lane. Photo: Tegola.
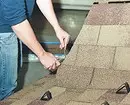
Parts of the shingles protruding beyond the scope are cut. Photo: Tegola.
Then they begin to trim the tiles, laid from the side of the skate with a big bias. Photo: Tegola.
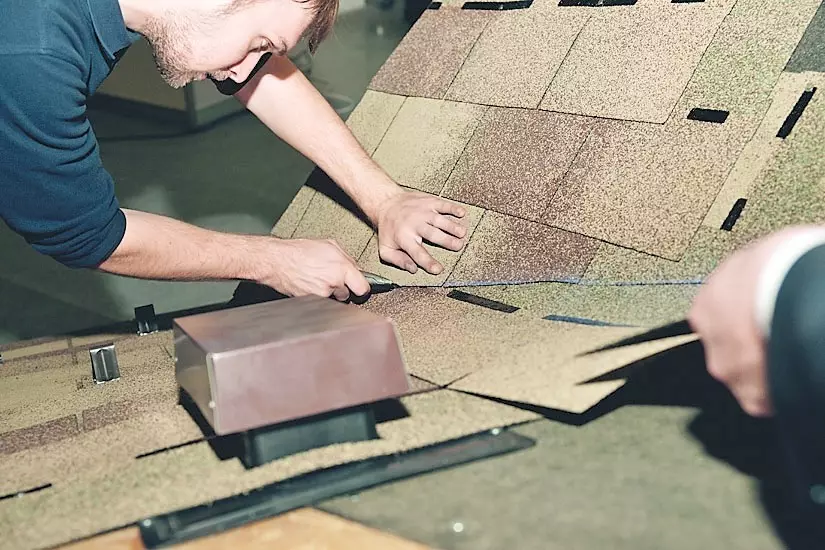
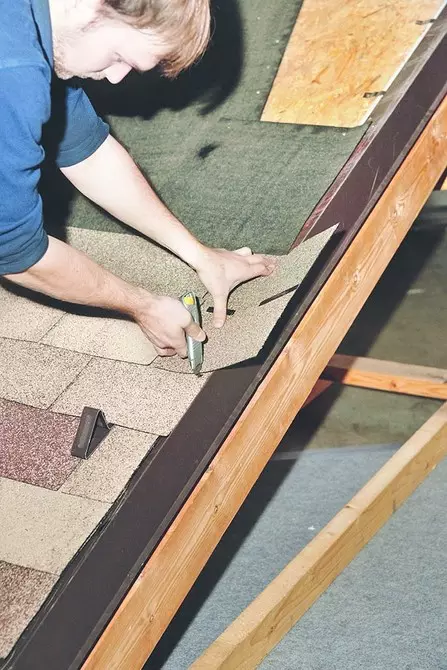
In order to increase the strength of the coating, the cutter is performed by recovering from the Endow axis by 5-10 cm. Photo: Tegola

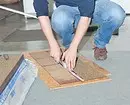
The cut line is predicted by a special pencil. Photo: Tegola.
Answers to widespread questions on the installation of flexible bitumen tiles
1. How fast can I put a flexible tile?
It all depends on the qualifications of the workers and the complexity of the roof. The area of 150 m² can be covered in about five days. It is important to understand: the main thing is not speed, but the quality of work. Thus, when the roof is erected, it is necessary to pay serious attention to the preparation of the base under the roof and the arrangement of roofing pie.2. Is it possible to install a bitumen dam in pits at minus temperatures?
Yes, it is possible, but to achieve the best result, it is desirable to maintain work at a temperature not lower than -10 ° C. At the same time, the flexible tile must be stored in the OTA slave room, feed to the roof in small batches and use the thermal construction hairdryer to heat the bitumen adhesive bands (in order to fix the tile petals), as well as to heal the bitumen mastic and location of the material.
3. What are the restrictions on the geometry of the Koli ‰ shea imposes a flexible tile?
The material is used on the roofs of any complexity and shape, as well as for finishing facades, is the indisputable advantage of flexible tiles. It is easy to install and practically utifiable. Even for the most complex architectural objects, the process margin of the material is no more than 5% of the main volume. To lay such a coating, there is one requirement - a solid foundation.

4. What nails do the shings fix?
For fasteners, special roofing nails should be used - rubbish, with a diameter of a hat from 9 mm. They provide dense adjacent and reliable tiles fixation to the base. Fasteners perform strictly according to the instructions: each nail should flash the top edge of the underlying sheet of tiles. When laying on skates with a slope over 60 °, the upper corners of the shingle must be consolidated by two more additional nails. On the rods with a small slope, up to 20 °, it is better to use the method of burning, which makes it possible to ensure the tightness of the coating on gentle roofs.5. How to put the tile in Under?
There are several ways. Often, roofers are filling along the rtanda rolled material with a protective mineral layer. This option is easy to execute, but not always aesthetic and sometimes unreliable (depends on the configuration of the roof and from the extension of the endand). Also, the tile is placed by the subside method. First, the material is mounted on a slope with a smaller bias and length. Then begin to lay the styling on the adjacent scath, while the truncations are cut, crossing the Endowa axis by 5-10 cm, which makes it possible to increase the strength and tightness of the coating. In the area of the end, the tiles shonds are fixed using a construction dryer or bitumen mastic.