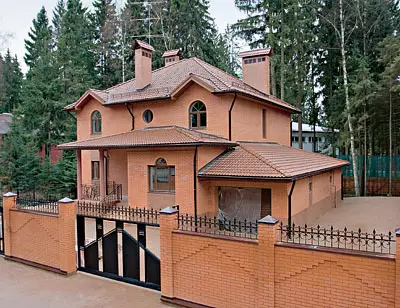
The construction technology of a warm two-storey house with a mansard floor of foam concrete: material properties and description of phased work.


Foam concrete today is becoming more and more popular. He gradually dismisses positions in such traditional building materials like brick, concrete and wood. We will tell this article how to build a warm house from it.
Recently, often in the construction of cottages prefer foam concrete blocks. Today we will introduce you to technology that allows you to build a warmer than usual, the house from this material. We will remind some of the features of foam concrete due to its structure.
When the material "breathes"
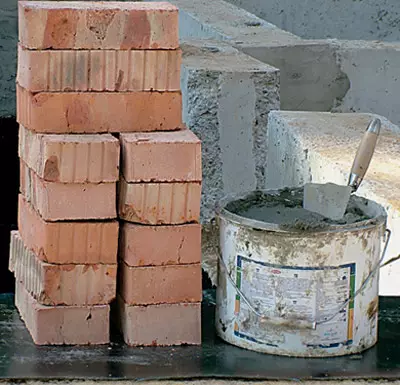
The use of large blocks (400300250mm) reduces the complexity of construction work and accelerates them approximately four. In this case, the small density of the material (on average 600kg / m3- 3 times less than that of the brick) allows you to significantly reduce the transport and installation costs. Porous blocks can be cut, strict, milling, drilling, fine, which makes it easier for the construction of walls and the gasket of communications. Another remarkable property of foam concrete - vapor permeability (the ability to skip the water vapor, always present in the air of the residential premises) it is close to the tree, and in the houses built from it it is easy to breathe.
Protection of walls from foam concrete
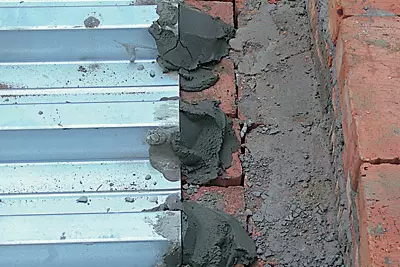
The porosity has not only its advantages, but also the minus - foam concrete is able to absorb moisture, and if it freezes, the blocks can collapse. That is why it is necessary to protect the outer surface of the walls of the walls from atmospheric precipitation. But this should be done so as not to reduce the vapor permeability of the wall structure.Inclusive of such protection apply a vapor-permeable plaster with the subsequent staining of the "breathable" paint, siding (plastic or metal) or panel. Supporters of the postulate "My home is my fortress" prefer a brick finish. But whatever material is chosen for this, you need to provide a ventilated gap between the wall and facing. If you refuse it, steam coming out of the cellular concrete, without having the opportunity to get out, It will begin to condense on the surface of the section between two materials, and even in the thickness of the wall, that at low temperatures will result in the destruction of the blocks. Do not allow excessive moistening of foam concrete walls inside the house: indoors with high humidity (bathroom or kitchen) walls better cover Playproof moisture insulating composition or separated by ceramic tiles.
Do not release heat from home
The foam concrete wall thickness in one unit has heat transfer resistance to R03M2C / W, which almost fully meets the requirements of SNIPs on heat saving for the conditions of the middle strip of Russia. If the wall of porous concrete is lined with bricks (with ventilation), then its value R0 will be about 4m2c / W. Akak make the house still warmer? It is necessary to further insulate the walls, for example, a sufficiently thick layer of polystyrene foam, having laid it between foam concrete and facing. The heat transfer resistance can be due to 4.5-5m2c / W and even more.
Well, a mandatory ventilated clearance between foam concrete and brick? In order to be able to do without it, the system should effectively function - natural or forced ventilation system. Then all the water vapors that stand out in the process of the economic activity of people, instead of getting absorbed into foam concrete walls, will be outdoor. Othom, as the specialists of the company "Style-1" built such a house, we will also tell me further. This process took about a year: a box was erected in the warm time, in its cold-made interior decoration.
Fundamental basis
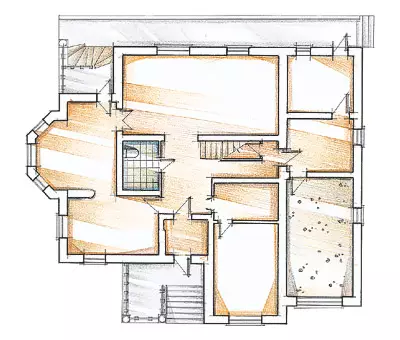
The house with a total area of 298m2 was built according to an individual project, in which all the wishes of future owners were taken into account. Since in the part of the cottage village, where the building was erected, the level of groundwater was quite high, they decided to do without the basement (it is not in homes already standing around the built-up site).
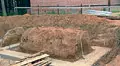
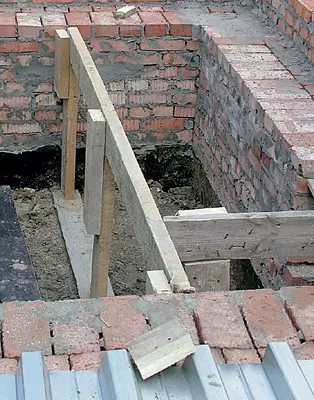
At first, they dug up with a depth of about 1.7 m (below the ground freezing point). Upon the bottom of the bottom, the foundation of the foundation was dugged in a depth of about 350mm; They were arranged sandy (200mmm), and then gravel (150mm) pillows, the top level of which was equal to the bottom of the pit. On the prepared grounds installed a wooden formwork; The reinforcing frame was put in it, after which concrete was filled, thus obtaining a foundation tape with a height of about 300mm.
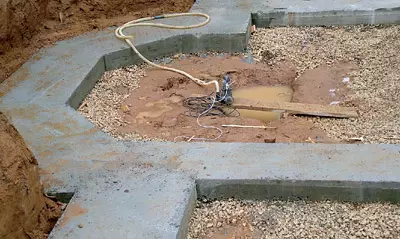
When concrete froze, the walls of the future foundation from the FBS blocks (1500600 400mm) elevated in four blocks elevated. They were deceived from both sides with bituminous mastic (in three layers), thereby defending from the soil moisture. From above on blocks, a layer of waterproofing (hydrohoteloisol) was used, and then laid nine rows of brickwork width in two bricks M150 brand. It is needed to align the surface of the foundation tape to create a monolithic overlap. Watch rows made backs, necessary for ventilation of space under the floor. Further, on the outer edge of the brick ribbon, the thin wall of bricks (frequensed thickness, about 24 cm thick, which is almost equal to the thickness of the future overlap or somewhat exceeds it). The built wall should serve as a kind of formwork, which will keep the concrete layer from the sides when pouring the monolithic basement. Its sides were insulated with a layer of polystyrene foam 100mm thick.
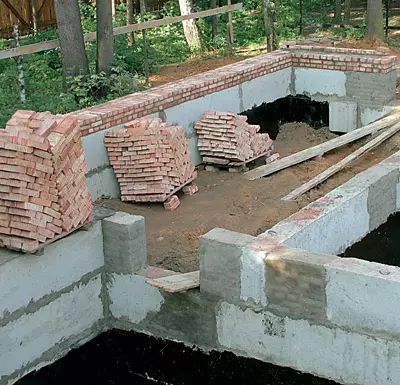
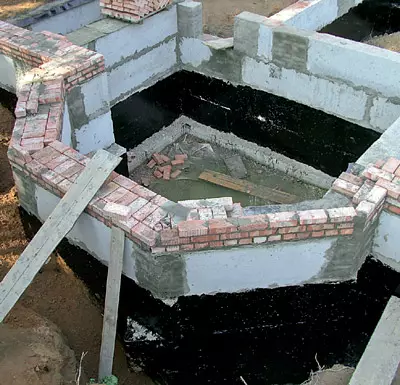
The walls of the foundation elevated from the FBS blocks, adding in the places of bends (for example, under the future erker), as well as where their length is not multiplicated by the length of the block, brick masonry. The blocks were put on a cement-sandy solution with a dressing, as when laying bricks, and isolated from the soil moisture with bitumen mastics.
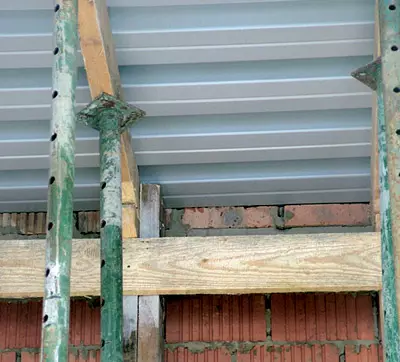
Ground overlap
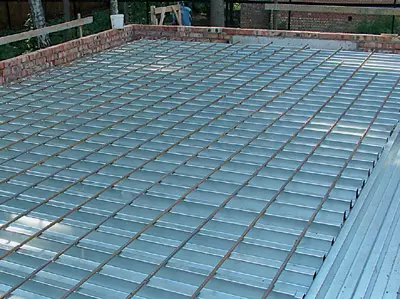
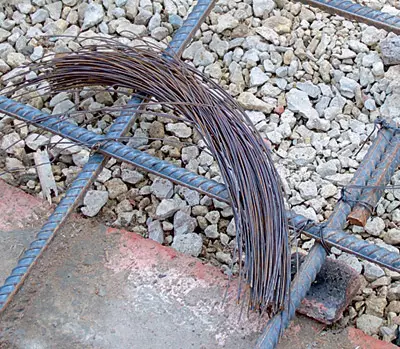
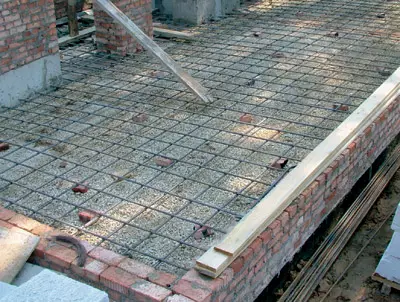
When creating a base overlap as a non-removable bottom formwork, sheets of professional flooring were used. The reinforcement frame was laid on top of them (a rod with a diameter of 20mm was used) and lifted it over a professional flooring about 70mm using steel beacons.Simultaneously with the basement, the floor of the garage was arranged, the level of which is 1.2 m below the overlap. Here, professional flooring did not apply. The sandy pillow (layer - 200mm), which was also thoroughly seal and leveled, after which the rubble layer was also put on top of the pillow and the rampant soil. Over the foundation prepared in this way, the reinforcement frame was collected (according to the same technology as for the base overlap). Then the floor of the garage and the overlap of the base was poured with the M300 brand concrete (layer - 220-240mm). Custom boiler room left holes for the introduction of water supply and sewer pipes, as well as an electrical circular.
House wall help
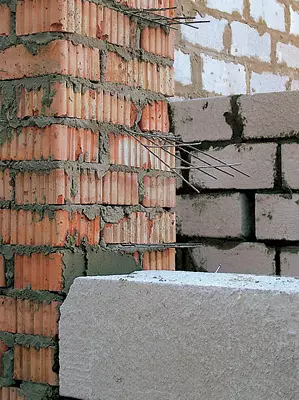
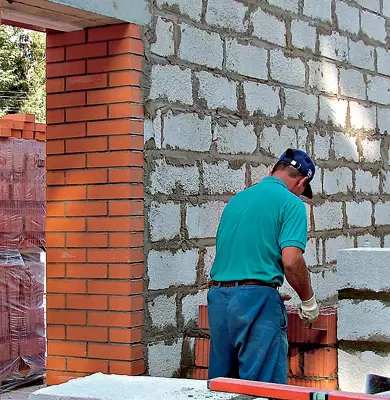
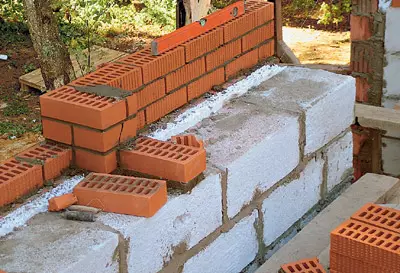
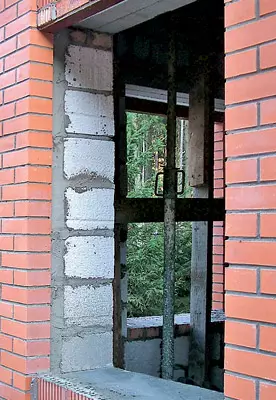
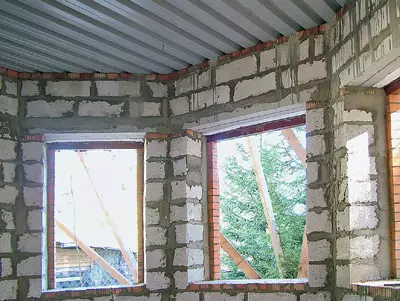
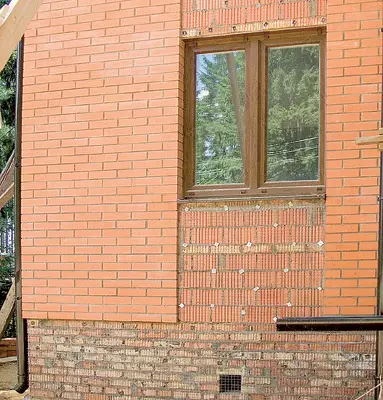
Works on the construction of walls began with styling on the cement-sandy solution of the outer facing layer of the thick of the crowd (used the hollow heat efficient face brick of the Golitsyn plant). At the same time, in places to be added to the additional outer decoration (for example, under the window openings, where the wall was collected by tiles), used the usual (non-iron) hollow brick.
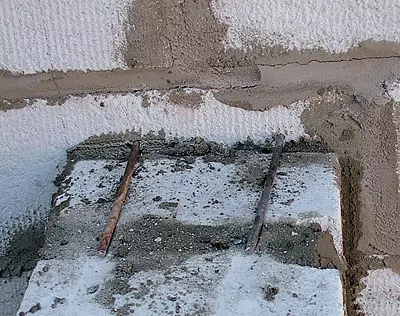
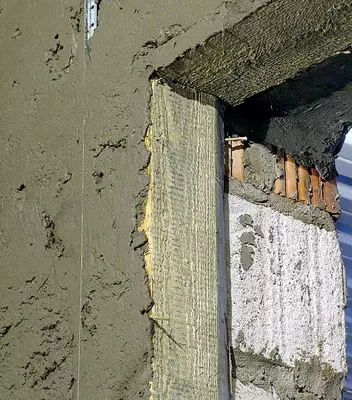
Having created a cladding of 300 mm around the perimeter at the perimeter, it was insulated from the inside with plates of polystyrene foam 100mm and started the construction of the inner and outer bearing walls, laying foam concrete blocks to the solution. Every six rows of facial bricks, which corresponds to the height of two foam blocks, the cladding was associated with the bearing foam concrete wall with a steel reinforcement grid (so that it was cut down, the insulation was cut). Inside the high load defined by the project, both masonry were connected to each other in each row of foam blocks. Cropped foam blocks were obtained by sawing the whole hand tool.
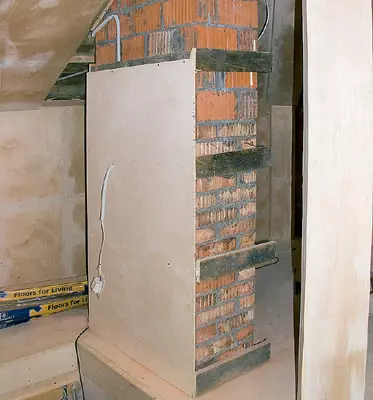
Future risers (mines) of ventilation, which are part of the inner walls, posted from bricks, while in the masonry created through vertical channels. The minted foam concrete walls of the mine was connected using the reinforcement grid layered between bricks. In total, three mines were provided in the house.
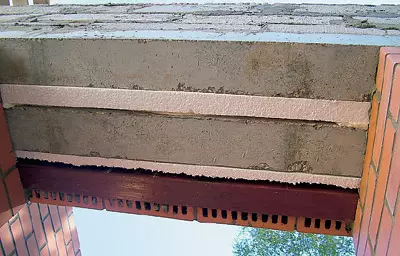
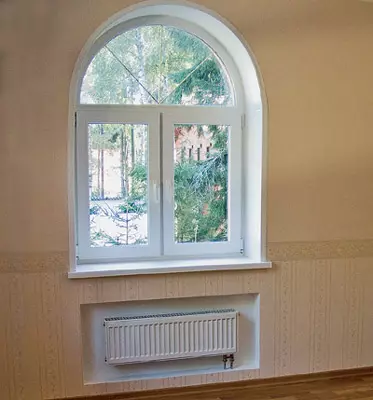
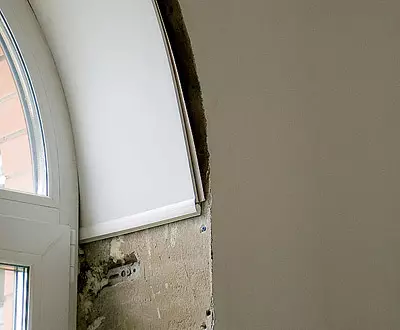
When creating window openings, facing bricks on the sides of them were put so that they are somewhat squeezed into the opening, forming protrusions that will close the gap between the window frame and the wall. Window and door jumpers used several species. Standard concrete jumpers with a cross section of 220120mm laid pairs. Between them, as well as between the outer jumper and facing brick (it is supported above the window opening, the steel corner coated, covered with anti-corrosion paint) was placed layer of polystyrene foam. When the jumpers device above the doorways in the interior walls between the beams also have polystyrene foam (in this case, it served as a soundproofer).
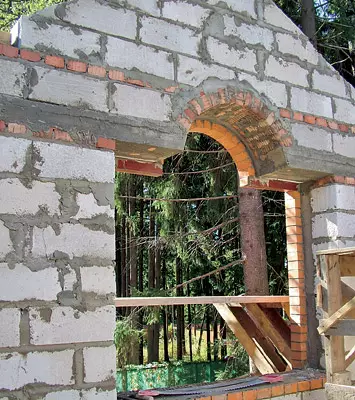
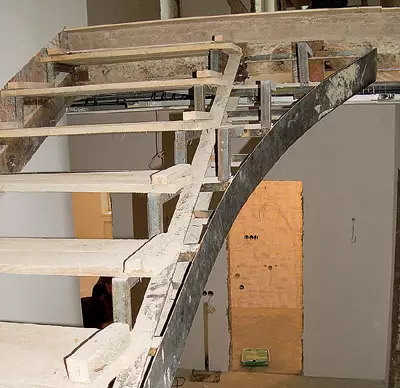
Jumpers of non-standard configuration or sized were performed on a place of reinforced concrete. When creating arched windows, concrete supplemented curly brickwork (bricks were laid out on a predetermined wooden pattern). These jumpers were also insulated with expanded polystyrene.
Usually, when walls from foam blocks are erected, in their middle and upper parts it is recommended to arrange concrete belts that increase the carrying ability of structures. In addition, the belt on the top segment of the wall is necessary because the slabs of the overlap should not be put directly on foam concrete blocks. In the case, both concrete belts decided to refuse. The fact is that they are needed mainly when the overlap is performed from ready-made hollow plates. There was also conceived monolithic overlap, therefore only the belt was created under it in the upper part of the wall, but not concrete, but a brick.
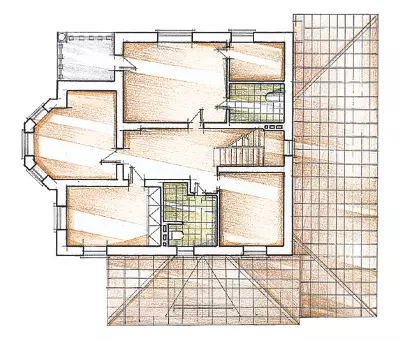
A little more about overlaps
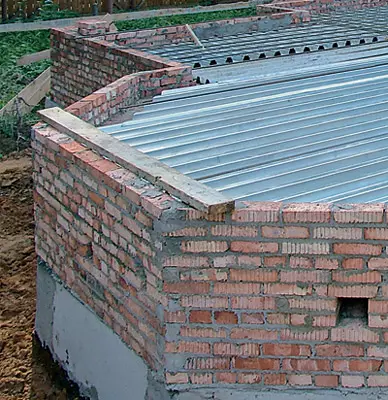
Almost the same technology as the basement, created the first floor overlap: used a non-removable bottom formwork from a professional flooring, lateral brick formwork IT.D. The only difference between the brick ventilations brought in advance above the upper level of the overlap, then to extend them further on the second floor. So that the channels do not flooded with concrete, they shut up to the trimming of polystyrene foam, and they covered the rubberoid on top.After the concrete gained strength, continued the laying of the walls of the second floor, they were erected along the same technique as the walls of the first. For the mounting of Maurolat (timing section of 150150mm) at the top of the outer wall of the garage, as well as throughout the perimeter of the walls of the house itself in the masonry laid metal rods with carvings.
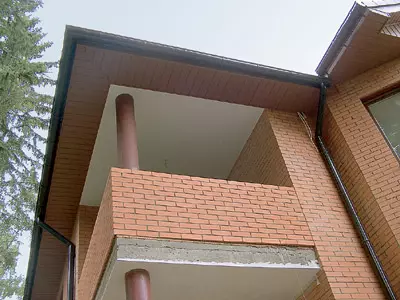
Ventilation problems
Two of the three ventilation mines initially performed from the hollow brick. In this case, the thickness of the masonry was approximately 380 mm, which slightly exceeded the corresponding parameter of the walls of foam blocks (300 mm). The fact that the mines protrude from the wall, the owners did not like at all, and they insisted that the thickness was the same. An attempt to cut down the "protrusion" was crowned with success only on one of two mines. The second had to be fully disassembled, and then lay out again, but already from full-length brick.
The third mine, technically most difficult, did not have to redo it, because it was immediately posted from a full-fledged brick. In addition to three ventricanov, air from the boiler room and the garage (these two rooms serves one common channel), the living room and the century of the second floor, there were two chimneys - for a fireplace and a gas boiler. VOBA smoking channels still at the stage of construction of the mines laid stainless steel pipes. External channels of all three mines have invested plastic pipes with a diameter of 110-160mm. Their smooth inner surface creates minimal airflow resistance and prevents dust sedimentation.
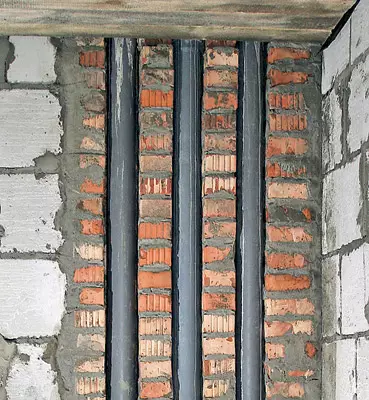

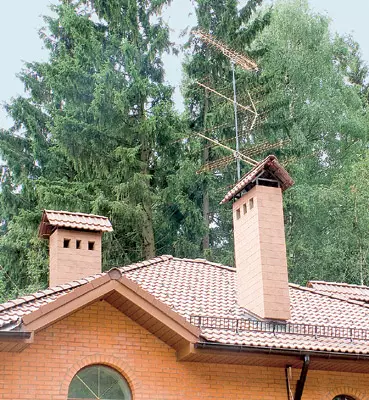
To bookmark the channels of the ventilation mines (there are three in the house, and in each canal) decided to use sewer PVC pipes. Thanks to their exhaust, a high-speed compaction is easily created with a seal. Massive pipes adversely decorate the appearance of the house, so they were decorated, lining with ceramic tiles, combined in color with tiles on the base and the facade.
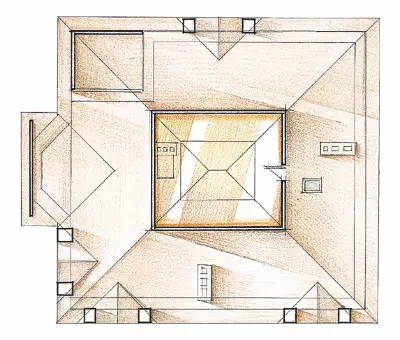
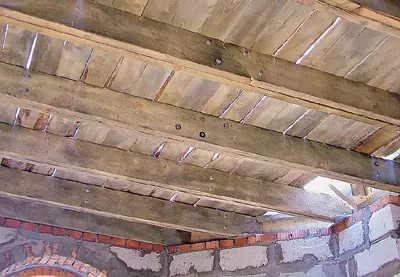
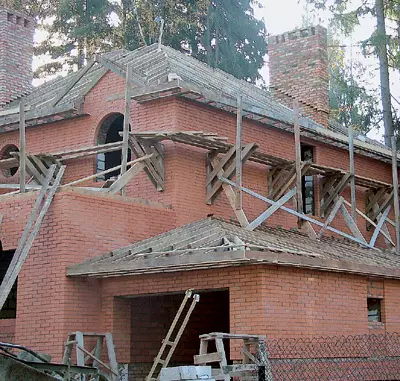
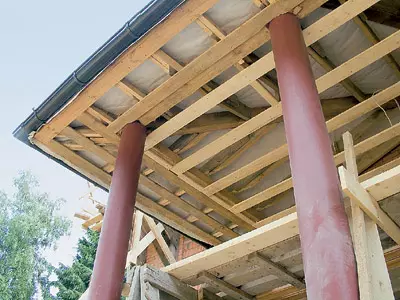
Above rafters, carpenters
Mauelalat was laid on the walls and secured it with the help of mortgage metal rods with carvings and nuts with washers. The main material for creating a rafter system served as a cutting board with a cross section of 20050mm. Initially, it was planned to use flexible bitumen tiles as roofing, but during the construction of the owners asked to replace her tiles of natural.To fulfill this wish, the designer had to recalculate the parameters of the rafter system and strengthen the design (the weight of the natural tile is much larger than bituminous). The result was used by the same boards of 20050mm, but they were paired (all the rafter elements became 2 times the thickness, the length of which exceeds 1.5m), pulled with a bolt (pitch of bolted screeds- 500-800mm). Step rafted - 600mm. The fact that the rafting legs are made of dual boards have a tangible advantage at large spans you can split in length. Wooden attic overlap made using the same paired boards. The cutting boards were laid on top and bottom to them, in the space between which mineral wool Rockwool (Russia) was laid in the space between which as sound insulation.
The lines of the garage is simpler, as its single roof. One end of the rafter is based on the bar, attached to the wall of the house with anchor bolts, the second to Mauerlat, lying on the wall of the garage. All elements of the rafter system and overlapping still on Earth are treated with flame breeding composition.
Tiled roof
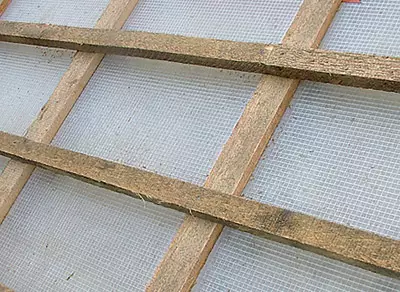
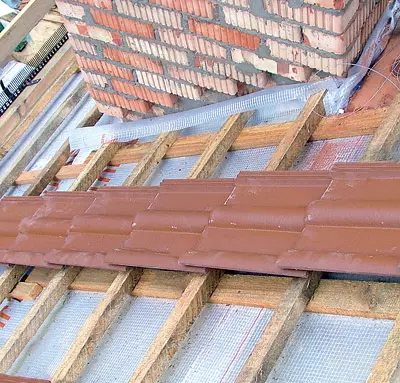
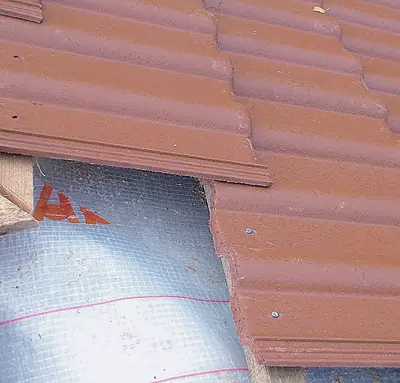
From the inside to the rafter feet attached a vapor insulation film "Yutafol N Standard" (Juta, Czech Republic), then the mineral wool slabs "Light Batts" were laid between these wooden structures (Rockwool), and the moisture insulating, but vapor-permeable material "Yutafol was installed on top of them D SELLS "(JUTA). By Klowropila, it was pressed through a counterclaim (a block section of 5030mm, which determines the magnitude of the ventilated gap), and perpendicular to the rafter feet was beaten with a crate (block cross section 5040mm) in a step corresponding to the size of the tile elements.
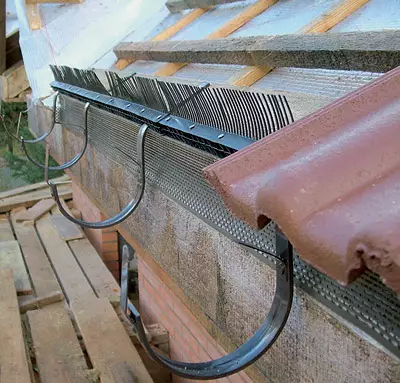
The natural tile of BRAAS (Russia) was drawn into the roof using a rope along the tray from the boat from the boards and the stacks laid evenly. Before proceeding to its installation, fasteners for waterproofing systems, as well as the mesh elements protecting the inlets of the ventilated gap, were installed along the ovel of the roof.
Installation began with the laying about the middle of the row of one row of tiles, from the skem to the skate. Carefully checked his evenness, and then, "pushing" from it from him from him, began to lay horizontal rows - from the lower to the top. Each element of the tiles fastened in the crate of self-drawers (for this, there are special holes in its upper part, which covers the following "link"). Simultaneously mounted metal snow-saw keepers and snow separators. When the roof rates were completely collected, they installed good items (skate IDR). Upon completion of the laying of roofing material, the plastic water reservoir system was strengthened with a tiled.
Installation of the tiles began with laying one of its rows, from the sink to the skate, and then began to lay out the ranks horizontally (from the lower to the top). Brackets of waterproofs and mesh elements installed along the scenes in advance.
Cozy mansard
Already during the construction, the attic decided to turn into an attic room (which is why the rafter system was insulated, and not an attic overlap). It was equipped as follows: to overlap, a thick waterproof fanwood was used to overlap. She was separated by roofing, supporting columns, ventilation risers and were finely polished, and the slits on the joints of the sheets of the sheets. Then the laminate was installed on the floor (under the substrate), the walls were sealed. It turned out a clean and cozy room in which you can arrange a gym or billiard room. The only inconvenience is not a single window, and you have to constantly use artificial lighting. However, if the owners decide that it is necessary, in a couple of days, squinting windows will appear in the skates. Installing them in the finished roof is not so difficult.Life support housing
Water supply house water pipe cottage village. Sewerage centralized and also settlement. Gas supply to the house outdoor. It was fulfilled by Mosoblgaz workers in full compliance with security requirements. When laying the wiring, the Num wire in triple insulation was applied. It was laid in the stages carved in the interior walls, pre-laying in a plastic corrugated pipe. The wiring of hot and cold water, as well as the heating systems, were made using universal RAUTIITAN Flex pipes (Rehau, Germany) from the crosslinked by the pero-xide method of polyethylene.
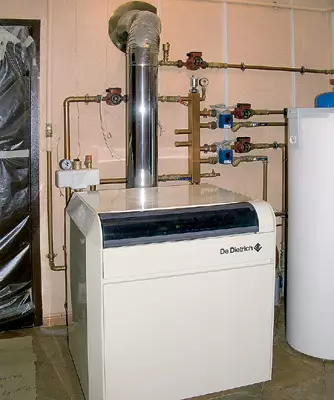
The house heats the GT 216 boiler with a capacity of 64-78 kW of De Dietrich (France), serving the heat to the Kermi panel radiators installed in the rooms). Hot water supply is the concern of the 250-liter boiler. There was a fairly powerful water purification system.
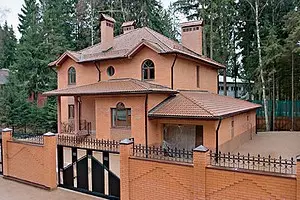
Separate the house outside
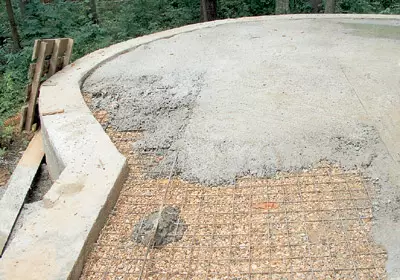
To create a retaining wall of the terrace, a silent-woodworking design from concrete was used. Around the perimeter of the future terrace broke the trench with a depth and width of about 30cm; In her day, with the help of a manual drill, made holes under the piles. Along the trenches, a wooden formwork was installed, into which the elements of the reinforcement frame wall and piles were laid and poured concrete. When concrete gained full strength, the generated recess between the wall of the house and the built-up soil was covered with a concrete wall and thoroughly tamped it. The ground was laid onto the ground, and then the gravel pillows and a layer of concrete (thickness - 8-10 cm), reinforced by the road grid, were poured on top of them. Later on the concrete poured a layer of sand with a thickness of about 1 cm for aligning the surface and dismissed the terrace with a concrete paving.
Approximately the same technology was built and the driveway to the building and the garage. Then poured with concrete and the site in front of the home houses really liked the strength (more precisely, the "inviolability") of the created coating.
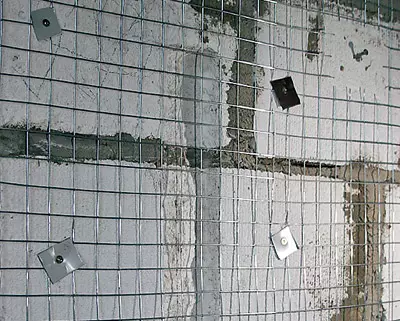
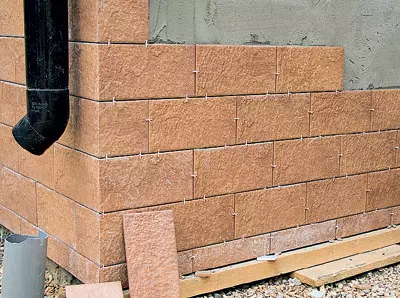
Now about the exterior of the house itself: it is very concise. Blinds under the windows, as well as on the base of the house, secured with a dowel metal mesh and shook these surfaces. Then they were covered with ceramic tiles, selected in the tone of the facing of the concrete steps of the stairs. Overactions of the roof on a wooden frame was laid with plastic siding.
Create interior
Interior decoration of premises is simple and simple. The walls were plastered, after consolidating with the help of a dowels with a metal mesh with a dowel, then passed and covered with wallpaper. The ceilings were made of drywall, keeping it to the ceiling concrete directly through the professional flooring. Window openings form plastic slopes.
The floors did this: on the monolithic overlap poured a ceramzite-concrete tie, and then the finish cement-sandy. Cement was primed (used conventional primer for internal works), after which the sheets of thick waterproof plywood were pasted on it and additionally secured them on the screed of dowels with self-draws. A substrate of foamed polyethylene was installed on Phaneur, which was put on the Tarkett parquet board (Sweden). The house really turned out very warm, and I want to hope that the owners prevailing him with such love would be comfortable and comfortable here to live. If the idea of building a super-step building inspired our readers, then we did not in vain attracted their attention to this interesting topic.
The enlarged calculation of the cost * construction of the house with a total area of 298m2 similar to the submitted
| Name of works | Number of | price, rub. | Cost, rub. |
|---|---|---|---|
| Foundation work | |||
| Layout, development and garment | 210m3. | 500. | 105,000 |
| Sand base device, rubble | 60m3 | 220. | 13 200. |
| Fundament device | 87m3 | 1620. | 140 940. |
| The device of retaining walls of bricks (base) | 25m3. | 1650. | 41 250. |
| Device plate reinforced concrete (garage) | 8m3 | 2200. | 17 600. |
| Waterproofing horizontal and lateral | 330m2. | 112. | 36 960. |
| Transportation of soil vehicles | 190m3. | 520. | 98 800. |
| Reverse Freshness, Planning Site | 20m3 | - | 6300. |
| Other works | set | - | 16 200. |
| TOTAL | 476250. | ||
| Applied materials on the section | |||
| Crushed stone granite, sand | 60m3 | 950. | 57,000 |
| Concrete heavy | 8m3 | 3100. | 24 800. |
| Concrete block, clay ordinary brick | 112m3. | - | 257 600. |
| Masonry heavy solution | 19m3. | 1490. | 28 310. |
| Hydrosteclozol, Bituminous Mastic | 330m2. | - | 36 300. |
| Armature, Formwork Shields and Other Materials | set | - | 29,700 |
| TOTAL | 433710. | ||
| Walls, partitions, overlap, roofing | |||
| Preparatory work, installation of forests | set | - | 7900. |
| Laying of outdoor walls from blocks | 78m3 | 980. | 76 440. |
| Facing walls facial bricks | 130m2 | 320. | 41 600. |
| Devices of reinforced brick partitions | 110m2. | 270. | 29,700 |
| Device of monolithic and precast jumpers | 7m3 | 2200. | 15 400. |
| Device plates of reinforced concrete | 68m3 | 2340. | 159 120. |
| Assembling roof elements with crate device | 190m2. | 740. | 140 600. |
| Insulation of walls and overlaps insulation | 610m2. | 54. | 32 940. |
| Hydro, vaporizolation device | 610m2. | 81. | 49 410. |
| Roofing and drainage system | 190m2. | - | 58 900. |
| Installing window and door blocks | 30m2 | - | 28 400. |
| Other works | set | - | 89,000 |
| TOTAL | 729410. | ||
| Applied materials on the section | |||
| Block from cellular concrete | 78m3 | 2025. | 157 950. |
| Concrete heavy | 75m3 | 3100. | 232 500. |
| Ceramic construction brick | 5.6 thousand pcs. | 5900. | 33 040. |
| Brick ceramic facing | 6.6 thousand pcs. | 9800. | 64 680. |
| Masonry heavy solution | 23,5m3 | 1800. | 42 300. |
| Rental of steel, steel hydrogen, fittings | set | - | 37 000 |
| Sawn timber | 17m3 | 4500. | 76 500. |
| Paro-, wind-, hydraulic films | 610m2. | - | 22 570. |
| Insulation Rockwool. | 610m2. | - | 85 400. |
| Ceramic tile, Dobornye elements | 190m2. | - | 179 800. |
| Drain system | set | - | 18 200. |
| Window blocks with double-glazed windows | set | - | 178 200. |
| Other materials | set | - | 103,000 |
| TOTAL | 1231140. | ||
| * -Contacts made on average rates of construction firms Moskva without taking into account coefficients |
The editorial board thanks the Style-1 company, as well as the architect Y. Skorovhodov for help in the preparation of the material.